2013 CHEVROLET CORVETTE ECU
[x] Cancel search: ECUPage 1 of 414

Black plate (1,1)Chevrolet Corvette Owner Manual - 2013 - crc2 - 11/8/12
2013 Chevrolet Corvette Owner ManualM
In Brief. . . . . . . . . . . . . . . . . . . . . . . . 1-1
Instrument Panel . . . . . . . . . . . . . . 1-2
Initial Drive Information . . . . . . . . 1-4
Vehicle Features . . . . . . . . . . . . . 1-15
Performance and Maintenance . . . . . . . . . . . . . . . . 1-20
Keys, Doors, and Windows . . . . . . . . . . . . . . . . . . . . 2-1
Keys and Locks . . . . . . . . . . . . . . . 2-1
Doors . . . . . . . . . . . . . . . . . . . . . . . . 2-10
Vehicle Security . . . . . . . . . . . . . . 2-12
Exterior Mirrors . . . . . . . . . . . . . . . 2-15
Interior Mirrors . . . . . . . . . . . . . . . . 2-16
Windows . . . . . . . . . . . . . . . . . . . . . 2-16
Roof . . . . . . . . . . . . . . . . . . . . . . . . . . 2-18
Seats and Restraints . . . . . . . . . 3-1
Head Restraints . . . . . . . . . . . . . . . 3-2
Front Seats . . . . . . . . . . . . . . . . . . . . 3-2
Safety Belts . . . . . . . . . . . . . . . . . . . . 3-8
Airbag System . . . . . . . . . . . . . . . . 3-14
Child Restraints . . . . . . . . . . . . . . 3-26 Storage
. . . . . . . . . . . . . . . . . . . . . . . 4-1
Storage Compartments . . . . . . . . 4-1
Additional Storage Features . . . 4-2
Instruments and Controls . . . . 5-1
Controls . . . . . . . . . . . . . . . . . . . . . . . 5-2
Warning Lights, Gauges, and
Indicators . . . . . . . . . . . . . . . . . . . . 5-8
Information Displays . . . . . . . . . . 5-25
Vehicle Messages . . . . . . . . . . . . 5-34
Vehicle Personalization . . . . . . . 5-51
Universal Remote System . . . . 5-60
Lighting . . . . . . . . . . . . . . . . . . . . . . . 6-1
Exterior Lighting . . . . . . . . . . . . . . . 6-1
Interior Lighting . . . . . . . . . . . . . . . . 6-6
Lighting Features . . . . . . . . . . . . . . 6-6
Infotainment System . . . . . . . . . 7-1
Introduction . . . . . . . . . . . . . . . . . . . . 7-1
Radio . . . . . . . . . . . . . . . . . . . . . . . . . . 7-6
Audio Players . . . . . . . . . . . . . . . . 7-12
Phone . . . . . . . . . . . . . . . . . . . . . . . . 7-17
Trademarks and License Agreements . . . . . . . . . . . . . . . . . 7-25 Climate Controls
. . . . . . . . . . . . . 8-1
Climate Control Systems . . . . . . 8-1
Air Vents . . . . . . . . . . . . . . . . . . . . . . . 8-6
Maintenance . . . . . . . . . . . . . . . . . . . 8-6
Driving and Operating . . . . . . . . 9-1
Driving Information . . . . . . . . . . . . . 9-2
Starting and Operating . . . . . . . 9-17
Engine Exhaust . . . . . . . . . . . . . . 9-24
Automatic Transmission . . . . . . 9-25
Manual Transmission . . . . . . . . . 9-29
Brakes . . . . . . . . . . . . . . . . . . . . . . . 9-32
Ride Control Systems . . . . . . . . 9-34
Cruise Control . . . . . . . . . . . . . . . . 9-42
Fuel . . . . . . . . . . . . . . . . . . . . . . . . . . 9-45
Towing . . . . . . . . . . . . . . . . . . . . . . . 9-50
Conversions and Add-Ons . . . 9-50
Vehicle Care . . . . . . . . . . . . . . . . . 10-1
General Information . . . . . . . . . . 10-2
Vehicle Checks . . . . . . . . . . . . . . . 10-6
Headlamp Aiming . . . . . . . . . . . 10-41
Bulb Replacement . . . . . . . . . . 10-41
Electrical System . . . . . . . . . . . . 10-44
Wheels and Tires . . . . . . . . . . . 10-52
Jump Starting . . . . . . . . . . . . . . . 10-75
Page 25 of 414

Black plate (19,1)Chevrolet Corvette Owner Manual - 2013 - crc2 - 11/8/12
In Brief 1-19
Power Outlets
The accessory power outlet can be
used to plug in electrical equipment,
such as a cell phone or MP3 player.
The accessory power outlet is
located inside the center console
storage compartment, on the
forward left side.
Remove the cover to access and
replace when not in use.
SeePower Outlets on page 5‑6.
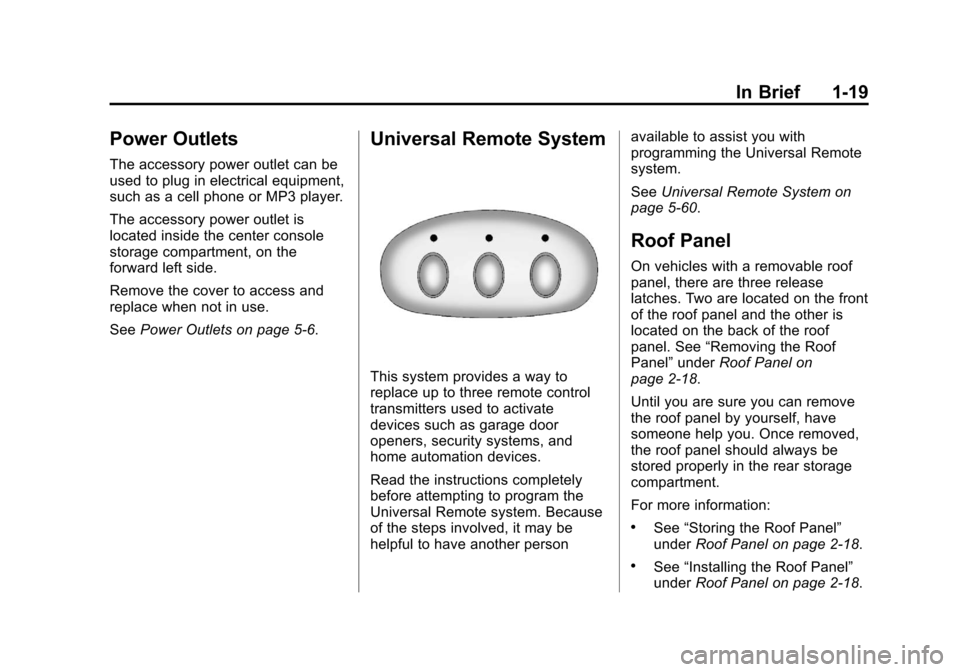
Universal Remote System
This system provides a way to
replace up to three remote control
transmitters used to activate
devices such as garage door
openers, security systems, and
home automation devices.
Read the instructions completely
before attempting to program the
Universal Remote system. Because
of the steps involved, it may be
helpful to have another person available to assist you with
programming the Universal Remote
system.
See
Universal Remote System on
page 5‑60.
Roof Panel
On vehicles with a removable roof
panel, there are three release
latches. Two are located on the front
of the roof panel and the other is
located on the back of the roof
panel. See “Removing the Roof
Panel” underRoof Panel on
page 2‑18.
Until you are sure you can remove
the roof panel by yourself, have
someone help you. Once removed,
the roof panel should always be
stored properly in the rear storage
compartment.
For more information:
.See “Storing the Roof Panel”
under Roof Panel on page 2‑18.
.See“Installing the Roof Panel”
under Roof Panel on page 2‑18.
Page 29 of 414

Black plate (23,1)Chevrolet Corvette Owner Manual - 2013 - crc2 - 11/8/12
In Brief 1-23
Battery
This vehicle has a maintenance-free
battery. SeeBattery on page 10‑37
and Jump Starting on page 10‑75.
For Z06, ZR1, manual transmission
Grand Sport Coupe, and 427
Convertible models, the battery is
located in the rear hatch/trunk area.
Access to the battery is not
necessary to jump start the vehicle.
There are positive (+) and negative
(−) terminals in the engine
compartment.
Roadside Assistance
Program
U.S.: 1-800-243-8872
TTY Users (U.S. Only):
1-888-889-2438
Canada: 1-800-268-6800
Mexico: 01-800-466-0800
New Chevrolet owners are
automatically enrolled in the
Roadside Assistance Program. See
Roadside Assistance Program
(Mexico) on page 13‑7 orRoadside
Assistance Program (U.S. and
Canada) on page 13‑10.
OnStar®
If equipped, this vehicle has a
comprehensive, in-vehicle system
that can connect to a live Advisor
for Emergency, Security, Navigation,
Connection, and Diagnostic
Services. See OnStar Overview on
page 14‑1.
Website Information
An online owner manual, owner
videos, and additional ownership
information is available at
http://www.chevrolet.com/owners/
chevy-manuals/.
Page 31 of 414

Black plate (1,1)Chevrolet Corvette Owner Manual - 2013 - crc2 - 11/8/12
Keys, Doors, and Windows 2-1
Keys, Doors, and
Windows
Keys and Locks
Keys . . . . . . . . . . . . . . . . . . . . . . . . . . 2-1
Remote Keyless Entry (RKE)System . . . . . . . . . . . . . . . . . . . . . . 2-2
Remote Keyless Entry (RKE) System Operation . . . . . . . . . . . 2-3
Door Locks . . . . . . . . . . . . . . . . . . . 2-7
Power Door Locks . . . . . . . . . . . . 2-8
Automatic Door Locks . . . . . . . . . 2-9
Lockout Protection . . . . . . . . . . . . 2-9
Doors
Hatch . . . . . . . . . . . . . . . . . . . . . . . . 2-10
Vehicle Security
Vehicle Security . . . . . . . . . . . . . . 2-12
Vehicle Alarm System . . . . . . . 2-12
Immobilizer . . . . . . . . . . . . . . . . . . 2-13
Immobilizer Operation . . . . . . . 2-14
Exterior Mirrors
Convex Mirrors . . . . . . . . . . . . . . 2-15
Power Mirrors . . . . . . . . . . . . . . . . 2-15
Folding Mirrors . . . . . . . . . . . . . . . 2-15
Heated Mirrors . . . . . . . . . . . . . . . 2-15
Automatic Dimming Mirror . . . 2-15
Interior Mirrors
Automatic Dimming Rearview Mirror . . . . . . . . . . . . . . . . . . . . . . . 2-16
Windows
Windows . . . . . . . . . . . . . . . . . . . . . 2-16
Power Windows . . . . . . . . . . . . . 2-17
Sun Visors . . . . . . . . . . . . . . . . . . . 2-17
Roof
Roof Panel . . . . . . . . . . . . . . . . . . 2-18
Convertible Top . . . . . . . . . . . . . . 2-22
Keys and Locks
Keys
{WARNING
Leaving children in a vehicle with
a Remote Keyless Entry (RKE)
transmitter is dangerous and
children or others could be
seriously injured or killed. They
could operate the power windows
or other controls or make the
vehicle move. The windows will
function with the RKE transmitter
in the vehicle, and children or
others could be caught in the path
of a closing window. Do not leave
children in a vehicle with an RKE
transmitter.
Page 42 of 414

Black plate (12,1)Chevrolet Corvette Owner Manual - 2013 - crc2 - 11/8/12
2-12 Keys, Doors, and Windows
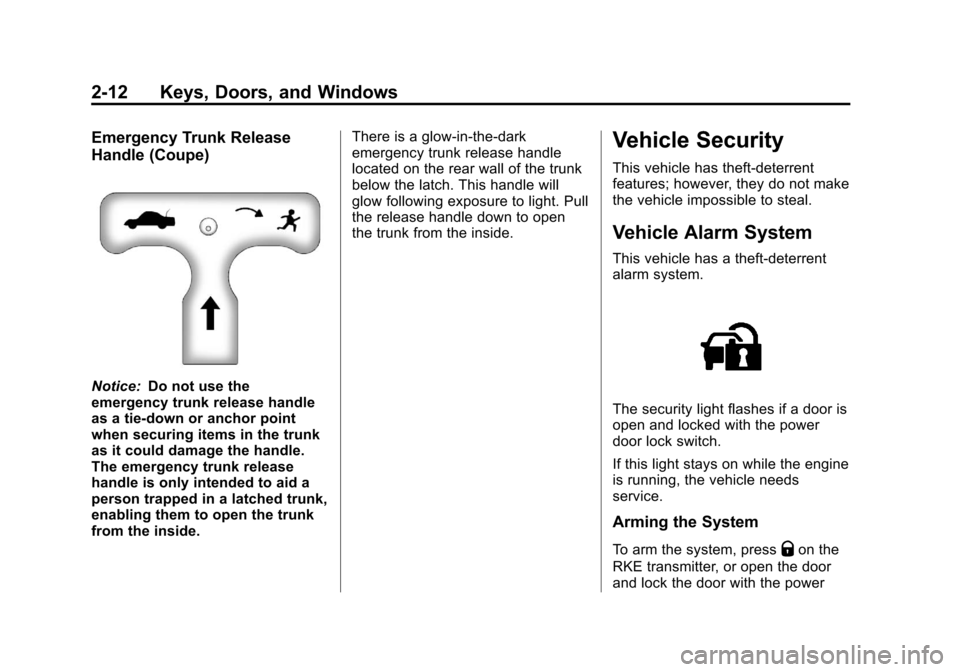
Emergency Trunk Release
Handle (Coupe)
Notice:Do not use the
emergency trunk release handle
as a tie-down or anchor point
when securing items in the trunk
as it could damage the handle.
The emergency trunk release
handle is only intended to aid a
person trapped in a latched trunk,
enabling them to open the trunk
from the inside. There is a glow-in-the-dark
emergency trunk release handle
located on the rear wall of the trunk
below the latch. This handle will
glow following exposure to light. Pull
the release handle down to open
the trunk from the inside.
Vehicle Security
This vehicle has theft-deterrent
features; however, they do not make
the vehicle impossible to steal.
Vehicle Alarm System
This vehicle has a theft-deterrent
alarm system.
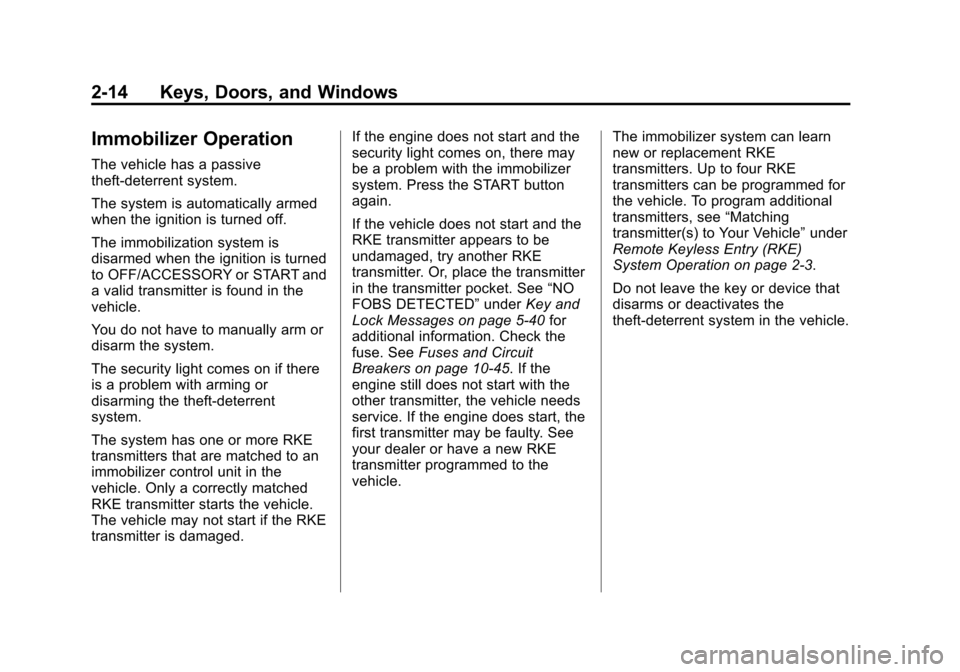
The security light flashes if a door is
open and locked with the power
door lock switch.
If this light stays on while the engine
is running, the vehicle needs
service.
Arming the System
To arm the system, pressQon the
RKE transmitter, or open the door
and lock the door with the power
Page 43 of 414

Black plate (13,1)Chevrolet Corvette Owner Manual - 2013 - crc2 - 11/8/12
Keys, Doors, and Windows 2-13
door lock switch. The security light
should flash. Remove the RKE
transmitter from inside the vehicle
and close the door. The security
light stops flashing and stays on.
After 30 seconds, the light should
turn off.
The vehicle can be programmed to
automatically lock the doors and
arm the theft-deterrent system when
you exit the vehicle. SeeVehicle
Personalization on page 5‑51.
If a door or the hatch/trunk is
opened without using the RKE
transmitter, the alarm goes off. The
horn sounds for two minutes, then
goes off to save battery power. The
vehicle will not start without a RKE
transmitter present.
The theft-deterrent system does not
arm if the driver door is locked with
the power door lock switch after the
doors are closed.
If the RKE transmitter is removed
from the vehicle while a passenger
is in it, have them lock the doors after they are closed. The alarm will
not arm, so the passenger will not
set it off.
Testing the Alarm
To test the system use the following
procedure.
1. Make sure the trunk lid/hatch is
latched.
2. Lower the window on the driver door.
3. Manually arm the system.
4. Close the doors and wait 30 seconds.
5. Reach through the open window and manually pull the release
lever on the floor.
6. Press the
Kbutton on the
transmitter to turn off the alarm.
If the alarm does not sound, check
to see if the horn works. The horn
fuse may be blown. See Fuses and
Circuit Breakers on page 10‑45.
If the horn works, but the alarm
does not go off, see your dealer.
Disarming the System
Press theKbutton on the RKE
transmitter or squeeze the door
handle sensor while the transmitter
is near the vehicle to unlock a door.
Unlocking a door any other way sets
off the alarm. If the alarm sounds,
press the
Kbutton on the RKE
transmitter to disarm it.
Do not leave the key or device that
disarms or deactivates the
theft-deterrent system in the vehicle.
Immobilizer
See Radio Frequency Statement on
page 13‑20 for information
regarding Part 15 of the Federal
Communications Commission (FCC)
rules and Industry Canada
Standards RSS-GEN/210/220/310.
Page 44 of 414

Black plate (14,1)Chevrolet Corvette Owner Manual - 2013 - crc2 - 11/8/12
2-14 Keys, Doors, and Windows
Immobilizer Operation
The vehicle has a passive
theft-deterrent system.
The system is automatically armed
when the ignition is turned off.
The immobilization system is
disarmed when the ignition is turned
to OFF/ACCESSORY or START and
a valid transmitter is found in the
vehicle.
You do not have to manually arm or
disarm the system.
The security light comes on if there
is a problem with arming or
disarming the theft-deterrent
system.
The system has one or more RKE
transmitters that are matched to an
immobilizer control unit in the
vehicle. Only a correctly matched
RKE transmitter starts the vehicle.
The vehicle may not start if the RKE
transmitter is damaged.If the engine does not start and the
security light comes on, there may
be a problem with the immobilizer
system. Press the START button
again.
If the vehicle does not start and the
RKE transmitter appears to be
undamaged, try another RKE
transmitter. Or, place the transmitter
in the transmitter pocket. See
“NO
FOBS DETECTED” underKey and
Lock Messages on page 5‑40 for
additional information. Check the
fuse. See Fuses and Circuit
Breakers on page 10‑45. If the
engine still does not start with the
other transmitter, the vehicle needs
service. If the engine does start, the
first transmitter may be faulty. See
your dealer or have a new RKE
transmitter programmed to the
vehicle. The immobilizer system can learn
new or replacement RKE
transmitters. Up to four RKE
transmitters can be programmed for
the vehicle. To program additional
transmitters, see
“Matching
transmitter(s) to Your Vehicle” under
Remote Keyless Entry (RKE)
System Operation on page 2‑3.
Do not leave the key or device that
disarms or deactivates the
theft-deterrent system in the vehicle.
Page 49 of 414

Black plate (19,1)Chevrolet Corvette Owner Manual - 2013 - crc2 - 11/8/12
Keys, Doors, and Windows 2-19
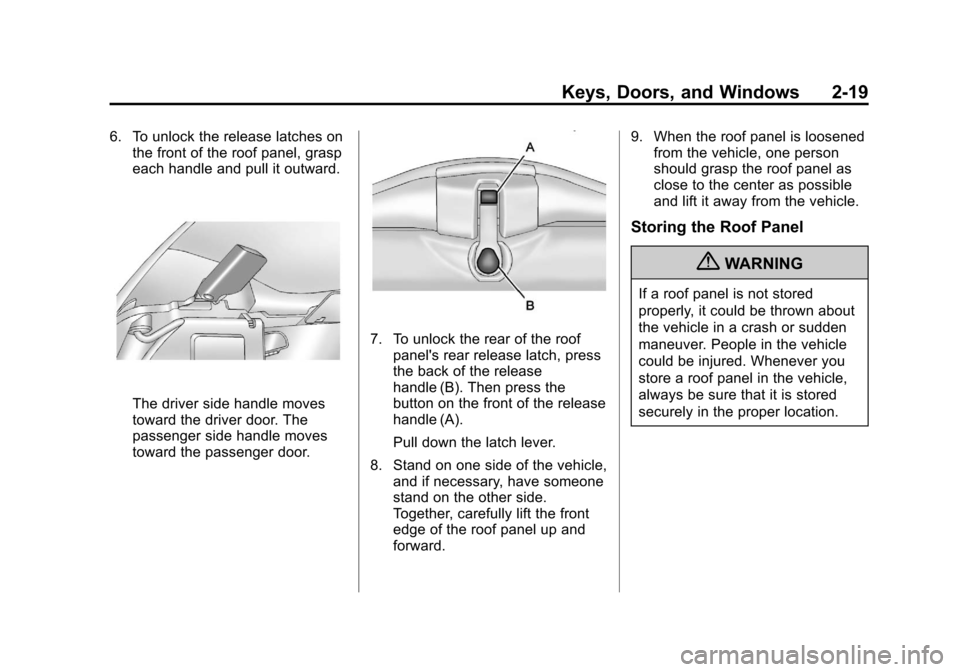
6. To unlock the release latches onthe front of the roof panel, grasp
each handle and pull it outward.
The driver side handle moves
toward the driver door. The
passenger side handle moves
toward the passenger door.
7. To unlock the rear of the roof
panel's rear release latch, press
the back of the release
handle (B). Then press the
button on the front of the release
handle (A).
Pull down the latch lever.
8. Stand on one side of the vehicle, and if necessary, have someone
stand on the other side.
Together, carefully lift the front
edge of the roof panel up and
forward. 9. When the roof panel is loosened
from the vehicle, one person
should grasp the roof panel as
close to the center as possible
and lift it away from the vehicle.
Storing the Roof Panel
{WARNING
If a roof panel is not stored
properly, it could be thrown about
the vehicle in a crash or sudden
maneuver. People in the vehicle
could be injured. Whenever you
store a roof panel in the vehicle,
always be sure that it is stored
securely in the proper location.