2013 CHEVROLET AVALANCHE mirror controls
[x] Cancel search: mirror controlsPage 67 of 494
Black plate (7,1)Chevrolet Avalanche Owner Manual - 2013 - CRC - 8/27/12
Seats and Restraints 3-7
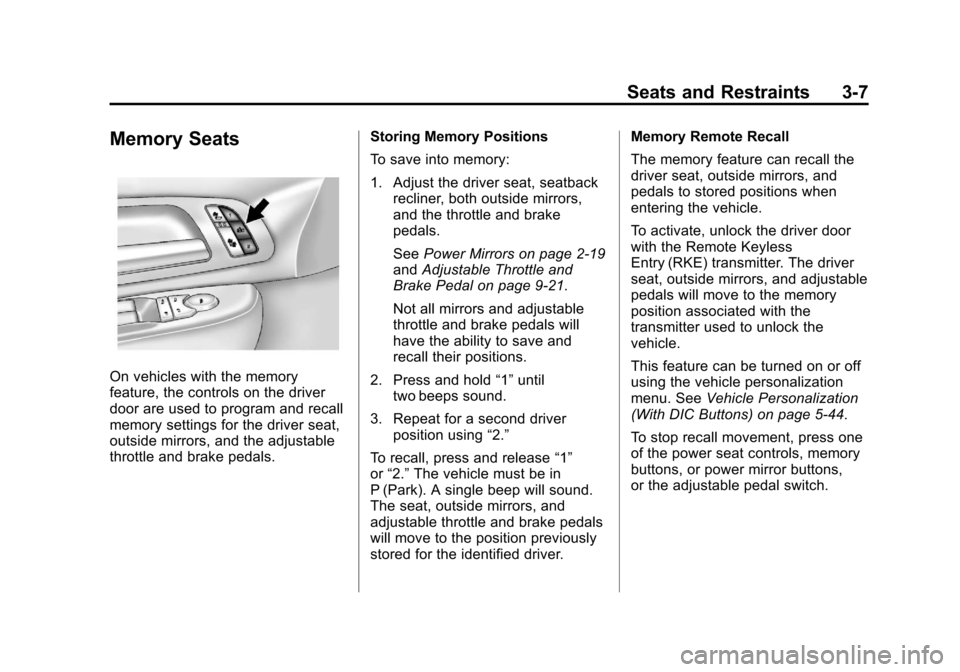
Memory Seats
On vehicles with the memory
feature, the controls on the driver
door are used to program and recall
memory settings for the driver seat,
outside mirrors, and the adjustable
throttle and brake pedals.Storing Memory Positions
To save into memory:
1. Adjust the driver seat, seatback
recliner, both outside mirrors,
and the throttle and brake
pedals.
See Power Mirrors on page 2‑19
and Adjustable Throttle and
Brake Pedal on page 9‑21.
Not all mirrors and adjustable
throttle and brake pedals will
have the ability to save and
recall their positions.
2. Press and hold “1”until
two beeps sound.
3. Repeat for a second driver position using “2.”
To recall, press and release “1”
or “2.” The vehicle must be in
P (Park). A single beep will sound.
The seat, outside mirrors, and
adjustable throttle and brake pedals
will move to the position previously
stored for the identified driver. Memory Remote Recall
The memory feature can recall the
driver seat, outside mirrors, and
pedals to stored positions when
entering the vehicle.
To activate, unlock the driver door
with the Remote Keyless
Entry (RKE) transmitter. The driver
seat, outside mirrors, and adjustable
pedals will move to the memory
position associated with the
transmitter used to unlock the
vehicle.
This feature can be turned on or off
using the vehicle personalization
menu. See
Vehicle Personalization
(With DIC Buttons) on page 5‑44.
To stop recall movement, press one
of the power seat controls, memory
buttons, or power mirror buttons,
or the adjustable pedal switch.
Page 174 of 494
Black plate (48,1)Chevrolet Avalanche Owner Manual - 2013 - CRC - 8/27/12
5-48 Instruments and Controls
NO CHANGE:No change will be
made to this feature. The current
setting will remain.
To select a setting, press the set/
reset button while the desired
setting is displayed on the DIC.
APPROACH LIGHTING
This feature allows you to select
whether or not to have the exterior
lights turn on briefly during low light
periods after unlocking the vehicle
using the Remote Keyless
Entry (RKE) transmitter.
Press the customization button until
APPROACH LIGHTING appears on
the DIC display. Press the set/reset
button once to access the settings
for this feature. Then press the
customization button to scroll
through the following settings:
OFF: The exterior lights will not
turn on when you unlock the vehicle
with the RKE transmitter. ON (default):
If it is dark enough
outside, the exterior lights will turn
on briefly when you unlock the
vehicle with the RKE transmitter.
The lights will remain on for
20 seconds or until the lock button
on the RKE transmitter is pressed,
or the vehicle is no longer off. See
Remote Keyless Entry (RKE)
System Operation on page 2‑2 for
more information.
NO CHANGE: No change will be
made to this feature. The current
setting will remain.
To select a setting, press the set/
reset button while the desired
setting is displayed on the DIC.
CHIME VOLUME
This feature allows you to select the
volume level of the chime.
Press the customization button until
CHIME VOLUME appears on the
DIC display. Press the set/reset
button once to access the settings for this feature. Then press the
customization button to scroll
through the following settings:
NORMAL:
The chime volume will
be set to a normal level.
LOUD: The chime volume will be
set to a loud level.
NO CHANGE: No change will be
made to this feature. The current
setting will remain.
There is no default for chime
volume. The volume will stay at the
last known setting.
To select a setting, press the set/
reset button while the desired
setting is displayed on the DIC.
PARK TILT MIRRORS
If your vehicle has this feature, it
allows you to select whether
or not the outside mirror(s) will
automatically tilt down when the
vehicle is shifted into R (Reverse).
See “Outside Power Foldaway
Mirrors” inFolding Mirrors on
page 2‑20 for more information.
Page 175 of 494
Black plate (49,1)Chevrolet Avalanche Owner Manual - 2013 - CRC - 8/27/12
Instruments and Controls 5-49
Press the customization button until
PARK TILT MIRRORS appears on
the DIC display. Press the set/reset
button once to access the settings
for this feature. Then press the
customization button to scroll
through the following settings:
OFF (default):Neither outside
mirror will be tilted down when the
vehicle is shifted into R (Reverse).
DRIVER MIRROR: The driver
outside mirror will be tilted down
when the vehicle is shifted into
R (Reverse).
PASSENGER MIRROR: The
passenger outside mirror will be
tilted down when the vehicle is
shifted into R (Reverse).
BOTH MIRRORS: The driver and
passenger outside mirrors will be
tilted down when the vehicle is
shifted into R (Reverse). NO CHANGE:
No change will be
made to this feature. The current
setting will remain.
To select a setting, press the set/
reset button while the desired
setting is displayed on the DIC.
EASY EXIT RECALL
If your vehicle has this feature, it
allows you to select your preference
for the automatic easy exit seat
feature. See Memory Seats on
page 3‑7 for more information.
Press the customization button until
EASY EXIT RECALL appears on
the DIC display. Press the set/reset
button once to access the settings
for this feature. Then press the
customization button to scroll
through the following settings:
DOOR BUTTON ONLY: No
automatic seat exit recall will occur.
The recall will only occur after
pressing the easy exit seat button. BUTTON & KEY OUT (default):
If
the features are enabled through the
EASY EXIT SETUP menu, the
driver seat will move back when the
key is removed from the ignition or
after pressing the easy exit seat
button.
The automatic easy exit seat
movement will only occur one time
after the key is removed from the
ignition. If the automatic movement
has already occurred, and you put
the key back in the ignition and
remove it again, the seat will stay in
the original exit position, unless a
memory recall took place prior to
removing the key again.
NO CHANGE: No change will be
made to this feature. The current
setting will remain.
To select a setting, press the set/
reset button while the desired
setting is displayed on the DIC.
Page 176 of 494
Black plate (50,1)Chevrolet Avalanche Owner Manual - 2013 - CRC - 8/27/12
5-50 Instruments and Controls
EASY EXIT SETUP
If your vehicle has this feature, it
allows you to select which areas will
recall with the automatic easy exit
seat feature. It also allows you to
turn off the automatic easy exit
feature. SeeMemory Seats on
page 3‑7 and EASY EXIT RECALL
earlier for more information.
Press the customization button until
EASY EXIT SETUP appears on the
DIC display. Press the set/reset
button once to access the settings
for this feature. Then press the
menu up/down button to scroll
through the following settings:
OFF: No automatic seat exit will
recall.
SEAT ONLY (Default): The driver
seat will recall.
NO CHANGE: No change will be
made to this feature. The current
setting will remain.
To select a setting, press the set/
reset button while the desired
setting is displayed on the DIC. MEMORY SEAT RECALL
If your vehicle has this feature, it
allows you to select your preference
for the remote memory seat recall
feature. See
Memory Seats on
page 3‑7 for more information.
Press the customization button until
MEMORY SEAT RECALL appears
on the DIC display. Press the set/
reset button once to access the
settings for this feature. Then press
the customization button to scroll
through the following settings:
OFF (default): No remote memory
seat recall will occur.
ON: The driver seat and, on some
vehicles, the outside mirrors will
automatically move to the stored
driving position when the unlock
button on the Remote Keyless Entry
(RKE) transmitter is pressed. On
some vehicles with the adjustable
throttle and brake pedal feature, the
pedals will also automatically move. NO CHANGE:
No change will be
made to this feature. The current
setting will remain.
To select a setting, press the set/
reset button while the desired
setting is displayed on the DIC.
REMOTE START
If your vehicle has this feature, it
allows you to turn the remote start
off or on. The remote start feature
allows you to start the engine from
outside of the vehicle using the
Remote Keyless Entry (RKE)
transmitter. See Remote Vehicle
Start on page 2‑4 for more
information.
Press the customization button until
REMOTE START appears on the
DIC display. Press the set/reset
button once to access the settings
for this feature. Then press the
customization button to scroll
through the following settings:
OFF: The remote start feature will
be disabled.
Page 251 of 494
Black plate (3,1)Chevrolet Avalanche Owner Manual - 2013 - CRC - 8/27/12
Climate Controls 8-3
:(Outside Air):Press to turn
the outside air mode on. An
indicator light comes on to show
that outside air is on. Air from
outside the vehicle is circulated
throughout the vehicle. The outside
air mode can be used with all
modes, but it cannot be used with
the recirculation mode. Pressing this
button again will cancel the
recirculation mode.
?(Recirculation): Press to turn
the recirculation mode on or off. An
indicator light comes on to show
that recirculation is on.
This mode recirculates and helps to
quickly cool the air inside the
vehicle. It can be used to help
prevent outside air and odors from
entering the vehicle. The recirculation mode cannot be
used with floor, defrost, or defogging
modes. If recirculation is selected
while in one of those modes, the
indicator flashes three times and
turns off. The air conditioning
compressor will also come on when
this mode is activated. While in
recirculation mode the windows may
fog when the weather is cold and
damp. To clear the fog, select either
the defog or defrost mode and
increase the fan speed. The
recirculation mode can also be
turned off by turning off the engine.
Rear Window Defogger
The rear window defogger uses a
warming grid to remove fog from the
rear window.
1(Rear Window Defogger):
Press this button on the right knob
to turn the rear window defogger on
or off. The system automatically turns off several minutes after it has
been activated. The defogger can
also be turned off by turning off the
engine. Do not drive the vehicle until
all the windows are clear.
For vehicles with heated outside
rearview mirrors, the mirrors will
heat to help clear fog or frost from
the surface of the mirror when the
rear window defog button is
pressed.
Notice:
Do not use anything
sharp on the inside of the rear
window. If you do, you could cut
or damage the warming grid, and
the repairs would not be covered
by the vehicle warranty. Do not
attach a temporary vehicle
license, tape, a decal, or anything
similar to the defogger grid.
Page 256 of 494
Black plate (8,1)Chevrolet Avalanche Owner Manual - 2013 - CRC - 8/27/12
8-8 Climate Controls
While in recirculation mode the
windows may fog when the weather
is cold and damp. To clear the fog,
select either the defog or defrost
mode and increase the fan speed.
The recirculation mode can be
turned off by pressing the outside
air button, or by turning off the
ignition.
;(Outside Air):Press to turn the
outside air mode on. An indicator
light on the button comes on to
show that outside is on. Air from
outside the vehicle is circulated
throughout the vehicle. The outside
air mode can be used with all
modes, but it cannot be used with
the recirculation mode.
Pressing this button again will
cancel the recirculation mode.
Rear Window Defogger
The rear window defogger uses a
warming grid to remove fog from the
rear window.
1(Rear Window Defogger):
Press to turn the rear window
defogger on or off. It automatically
turns off several minutes after it has
been activated. The defogger can
also be turned off by turning off the
engine. Do not drive the vehicle until
all the windows are clear.
Notice: Do not use a razor blade
or sharp object to clear the inside
rear window. Do not adhere
anything to the defogger grid
lines in the rear glass. These
actions may damage the rear
defogger. Repairs would not be
covered by your warranty.
Heated Mirrors: For vehicles with
heated outside rearview mirrors, the
mirrors heat to help clear fog or frost
from the surface of the mirror when
the rear window defog button is
pressed. See Power Mirrors on
page 2‑19.Sensors
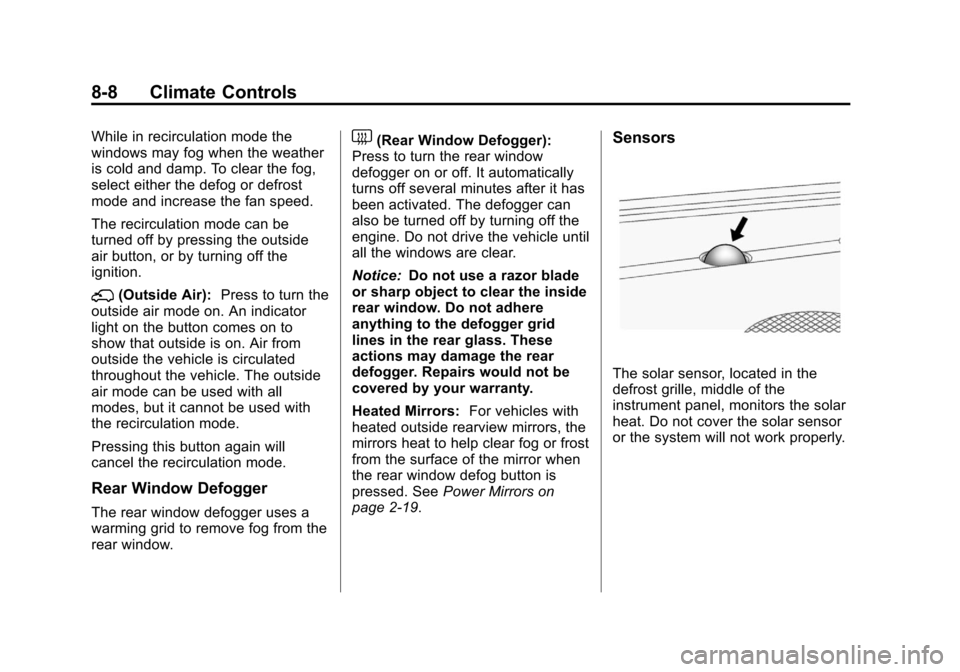
The solar sensor, located in the
defrost grille, middle of the
instrument panel, monitors the solar
heat. Do not cover the solar sensor
or the system will not work properly.
Page 371 of 494

Black plate (37,1)Chevrolet Avalanche Owner Manual - 2013 - CRC - 8/27/12
Vehicle Care 10-37
FusesUsage
31 Daytime Running Lamps (DRL) (If
Equipped)
32 Driver Side High-Beam
Headlamp
33 Daytime Running Lamps 2 (If
Equipped)
34 Sunroof
35 Key Ignition System, Theft‐
Deterrent System
36 Windshield Wiper
37 SEO B2 Upfitter Usage (Battery)
38 Electric Adjustable Pedals
39 Climate Controls (Battery) Fuses
Usage
40 Airbag System (Ignition)
41 Amplifier
42 Audio System
43 Miscellaneous (Ignition), Cruise
Control
44 Liftgate Release
45 Airbag System (Battery)
46 Instrument Panel Cluster
47 Not Used
48 Auxiliary Climate Control (Ignition)
49 Center High-Mounted
Stoplamp (CHMSL) Fuses
Usage
50 Rear Defogger
51 Heated Mirrors
52 SEO B1 Upfitter Usage (Battery)
53 Accessory Power Outlet, Cigarette
Lighter (If
Equipped)
54 Automatic Level Control
Compressor Relay
55 Climate Controls (Ignition)
56 Engine Control Module, Secondary
Fuel Pump
(Ignition)
Page 374 of 494
Black plate (40,1)Chevrolet Avalanche Owner Manual - 2013 - CRC - 8/27/12
10-40 Vehicle Care
FusesUsage
6 Driver Side Turn Signal, Stoplamp
7 Instrument Panel Back Lighting
8 Passenger Side Turn Signal, Stoplamp
9 Passenger Door Module, Driver Unlock
10 Power Door Lock 2 (Unlock Feature)
11 Power Door Lock 2 (Lock Feature)
12 Stoplamps, Center High‐Mounted
Stoplamp
13 Rear Climate Controls
14 Power Mirror
15 Body Control Module (BCM)
16 Accessory Power Outlets Fuses
Usage
17 Interior Lamps
18 Power Door Lock 1 (Unlock Feature)
19 Rear Seat Entertainment
20 Ultrasonic Rear Parking Assist, Power
Liftgate
21 Power Door Lock 1 (Lock Feature)
22 Driver Information Center (DIC)
23 Rear Wiper
24 Cooled Seats
25 Driver Seat Module, Remote Keyless Entry
System
26 Driver Power Door Lock (Unlock Feature) Circuit
Breaker Usage
LT DR Driver Side Power Window Circuit
Breaker
Harness
Connector Usage
LT DR Driver Door
Harness
Connection
BODY Harness Connector
BODY Harness Connector
Center Instrument Panel Fuse
Block
The center instrument panel fuse
block is located underneath the
instrument panel, to the left of the
steering column.