2013 BMW X6M ECO mode
[x] Cancel search: ECO modePage 7 of 327

Addendum
term “Recommended” should be
read in its place. In addition, the
text of that section should be
disregarded and the following text
should be read in lieu thereof:
The manufacturer of your vehicle
strongly suggests that you use
wheels and tires that have been
recommended by the vehicle
manufacturer for your vehicle type;
otherwise, for example, despite
having the same official size ratings,
variations can lead to body contact
and with it, the risk of severe
accidents.
The manufacturer of your vehicle
does not evaluate non-
recommended wheels and tires to
determine if they are suitable for
use on your vehicle.
14.At page 269, under the heading:
“Snow Chains,” the text should be
disregarded and the following text
should be read in lieu thereof:
Only certain types of fine-link snow
chains have been tested by the
manufacturer of your vehicle and
are determined by the manufacturer
of your vehicle to be road safe and
are recommended by the
manufacturer of your vehicle.
Information about recommended
snow chains is available from a
service center.
15.At page 270, under the heading
“Hood,” the sentence beginning, “If
you are unfamiliar” should be
disregarded.
16.At page 272, under the heading:
“Approved oil types,” the references
to “Approved” should be read as
“Suitable.” Immediately preceding
the “Gasoline engine” chart, the
following sentence should be
inserted: “Add engine oils that meet
the following oil rating
standards: . . .” The reference to
“BMW High Performance SAE 5W-
30” should be disregarded.
17.At page 273, under the heading:
“Alternative oil types,” the text
preceding the chart should be
disregarded, and in lieu thereof
should be read as follows: “If an
engine oil suitable for continuous
use is not available, up to 1 US
quart/liter of an engine oil with the
following oil rating can be
added: . . .” The reference to
“specification” should be read as
“rating.”
18.At page 273, under the heading:
“Engine oil change,” the text should
be disregarded and in lieu thereof
should be read as follows:
BMW recommends that you have
the oil changed at your BMW
dealer’s service center or at another
service center that has trained
personnel that can perform the work
in accordance with BMW
specifications
19.At page 274 and page 275, under
the heading: “Service and Warranty
Information Booklet for US models
and Warranty and Service Guide
Booklet for Canadian models,” the
second paragraph should be
Page 11 of 327
sary to adapt your vehicle to potentially differ‐
ing operating conditions and permit
requirements. If your vehicle does not comply
with the homologation requirements in a cer‐
tain country you cannot lodge warranty claims
for your vehicle there. Further information can
be obtained from your Service Centre.
Maintenance and repairs
Advanced technology, e.g., the use of modern
materials and high-performance electronics,
requires suitable maintenance and repair
methods.
Therefore, have this work performed only by a
BMW center or a workshop that works accord‐
ing to BMW repair procedures with appropri‐
ately trained personnel.
If this work is not carried out properly, there is
the danger of subsequent damage and related
safety hazards.
Parts and accessories
California Proposition 65 Warning
California laws require us to state the following
warning:
Engine exhaust and a wide variety of automo‐
bile components and parts, including compo‐
nents found in the interior furnishings in a vehi‐
cle, contain or emit chemicals known to the
State of California to cause cancer and birth
defects and reproductive harm. In addition,
certain fluids contained in vehicles and certain
products of component wear contain or emit
chemicals known to the State of California to
cause cancer and birth defects or other repro‐
ductive harm. Battery posts, terminals and re‐
lated accessories contain lead and lead com‐
pounds. Wash your hands after handling. Used
engine oil contains chemicals that have caused
cancer in laboratory animals. Always protect
your skin by washing thoroughly with soap and
water.
Service and warranty
We recommend that you read this publication
thoroughly. Your vehicle is covered by the fol‐
lowing warranties:
▷New Vehicle Limited Warranty▷Rust Perforation Limited Warranty▷Federal Emissions System Defect War‐
ranty
Seite 7Notes7
Online Edition for Part no. 01 40 2 910 876 - VII/13
BMW recommends using parts and
accessories approved by BMW for this
purpose.
Your BMW center is the right contact for
genuine BMW parts and accessories, other
products approved by BMW and related
qualified advice.
BMW has tested these products for safety and
suitability in relation to BMW vehicles.
BMW can assume responsibility for them.
However, we cannot assume any responsibility
whatsoever for parts and accessories that have
not been specifically approved by BMW.
BMW cannot evaluate whether each individual
product from another manufacturer can be
used with BMW vehicles without presenting a
safety hazard. This guarantee is also not
applicable when country-specific government
approval has been granted. Testing of this kind
may fail to embrace the entire range of
potential operating conditions to which
components might be exposed on BMW
vehicles. Such products could conceivably fail
to comply with BMW's own stringent quality
standards.
Page 12 of 327

▷Federal Emissions Performance Warranty▷California Emission Control System Lim‐
ited Warranty
Detailed information about these warranties is
listed in the Service and Warranty Information
Booklet for US models or in the Warranty and
Service Guide Booklet for Canadian models.
Your vehicle has been specifically adapted and
designed to meet the particular operating con‐
ditions and homologation requirements in your
country and continental region in order to de‐
liver the full driving pleasure while the vehicle
is operated under those conditions. If you wish
to operate your vehicle in another country or
region, you may be required to adapt your ve‐
hicle to meet different prevailing operating
conditions and homologation requirements.
You should also be aware of any applicable
warranty limitations or exclusions for such
country or region. In such case, please contact
Customer Relations for further information.
Maintenance
Maintain the vehicle regularly to sustain the
road safety, operational reliability and the New
Vehicle Limited Warranty.
Specifications for required maintenance meas‐
ures:
▷BMW Maintenance system▷Service and Warranty Information Booklet
for US models▷Warranty and Service Guide Booklet for
Canadian models
If the vehicle is not maintained according to
these specifications, this could result in seri‐
ous damage to the vehicle. Such damage is
not covered by the BMW New Vehicle Limited
Warranty.
Data memory
Numerous electronic components in your vehi‐
cle contain data memories that store technical
information on the vehicle condition, events and faults, either temporarily or permanently.
This technical information generally docu‐
ments the state of a component, a module, a
system or the environment.▷Operating conditions of system compo‐
nents, such as filling levels.▷Status messages from the vehicle and its
individual components, such as wheel rpm/
speed, motion delay, transverse accelera‐
tion.▷Malfunctions and defects in important sys‐
tem components, such as lights and
brakes.▷Vehicle responses to special driving situa‐
tions, such as airbag deployment, use of
the stability control systems.▷Ambient conditions, such as the tempera‐
ture.
These data are of a technical nature only and
are used to detect and eliminate faults and to
optimize vehicle functions. Travel profiles of
routes driven with the vehicle cannot be cre‐
ated from these data. If services are used, for
instance in the event of repairs, service proc‐
esses, warranty cases, quality assurance, etc.,
this technical information can be read out from
the event and fault data memories by service
personnel, including the manufacturer, using
special diagnosis tools. This service personnel
can provide you with more information if
needed. After troubleshooting, the information
in the fault memory is cleared or overwritten
continuously.
Situations are conceivable during the use of
the vehicle in which these technical data could
become associated with a specific person in
combination with other information, such as an
accident report, damage to the vehicle, wit‐
ness accounts, etc., possibly with the involve‐
ment of an authorized expert.
Additional functions that are contractually
agreed with the customer, such as vehicle lo‐
calization in the event of an emergency, permit
Seite 8Notes8
Online Edition for Part no. 01 40 2 910 876 - VII/13
Page 16 of 327
CockpitVehicle equipment
This chapter describes all series equipment as
well as country-specific and special equipment
offered for this model series.Therefore, it alsodescribes equipment that may not be found in
your vehicle, for instance due to the selected
special equipment or the country version. This
also applies to safety-related functions and
systems.
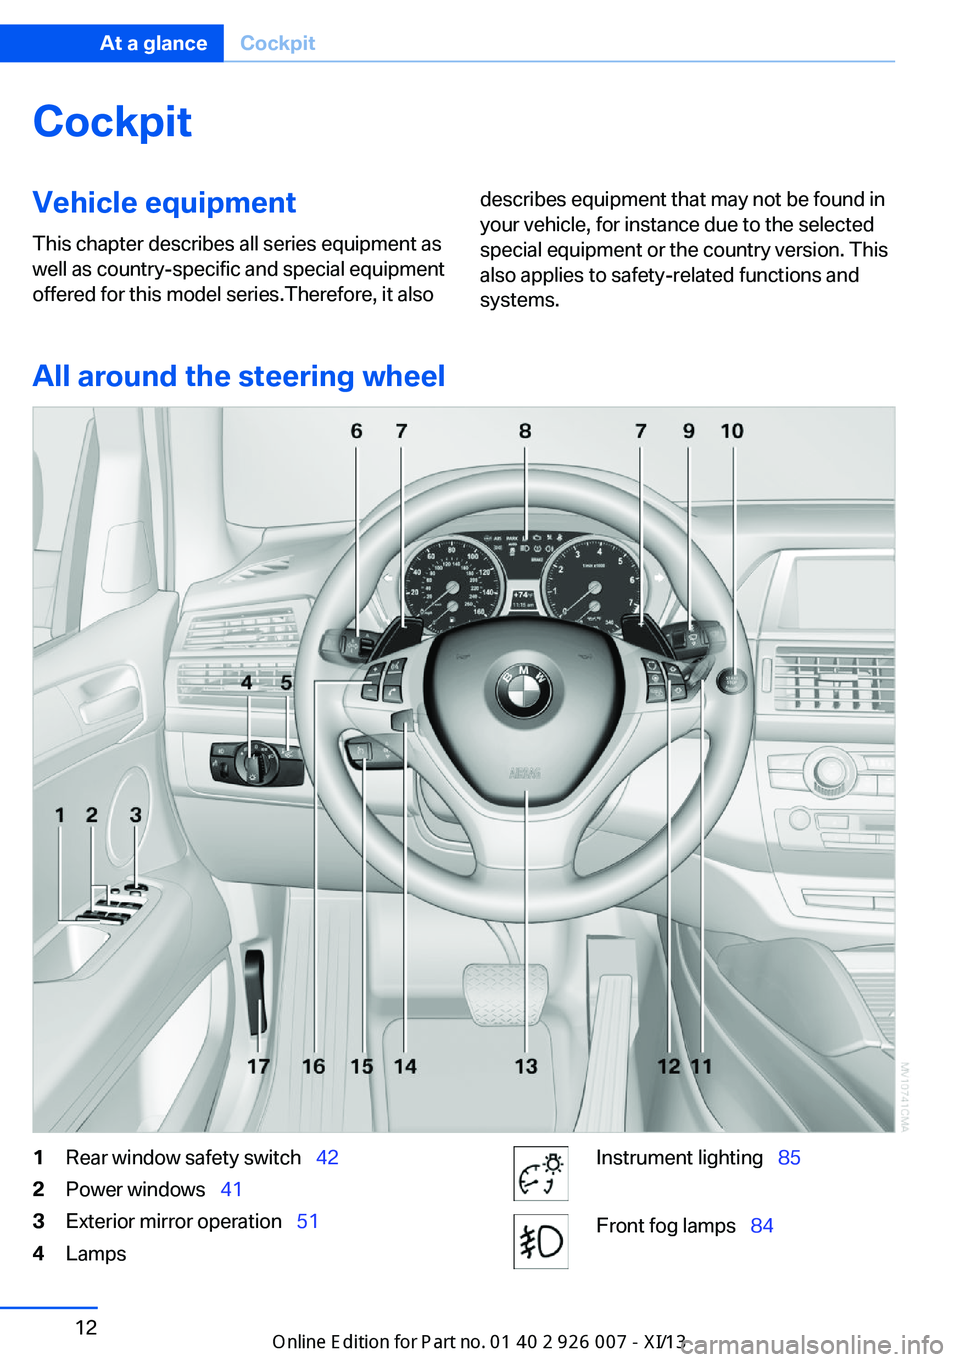
All around the steering wheel
1Rear window safety switch 422Power windows 413Exterior mirror operation 514LampsInstrument lighting 85Front fog lamps 84Seite 12At a glanceCockpit12
Online Edition for Part no. 01 40 2 910 876 - VII/13
Page 22 of 327
iDriveVehicle equipment
This chapter describes all series equipment as
well as country-specific and special equipment
offered for this model series.Therefore, it also
describes equipment that may not be found in
your vehicle, for instance due to the selected
special equipment or the country version. This
also applies to safety-related functions and
systems.
The concept
The iDrive combines the functions of a multi‐
tude of switches. Thus, these functions can be
operated from a central location.Using the iDrive during a trip
To avoid becoming distracted and pos‐
ing an unnecessary hazard to your vehicle's
occupants and to other road users, never at‐
tempt to use the controls or enter information
unless traffic and road conditions allow this.◀
Controls at a glance
Controls
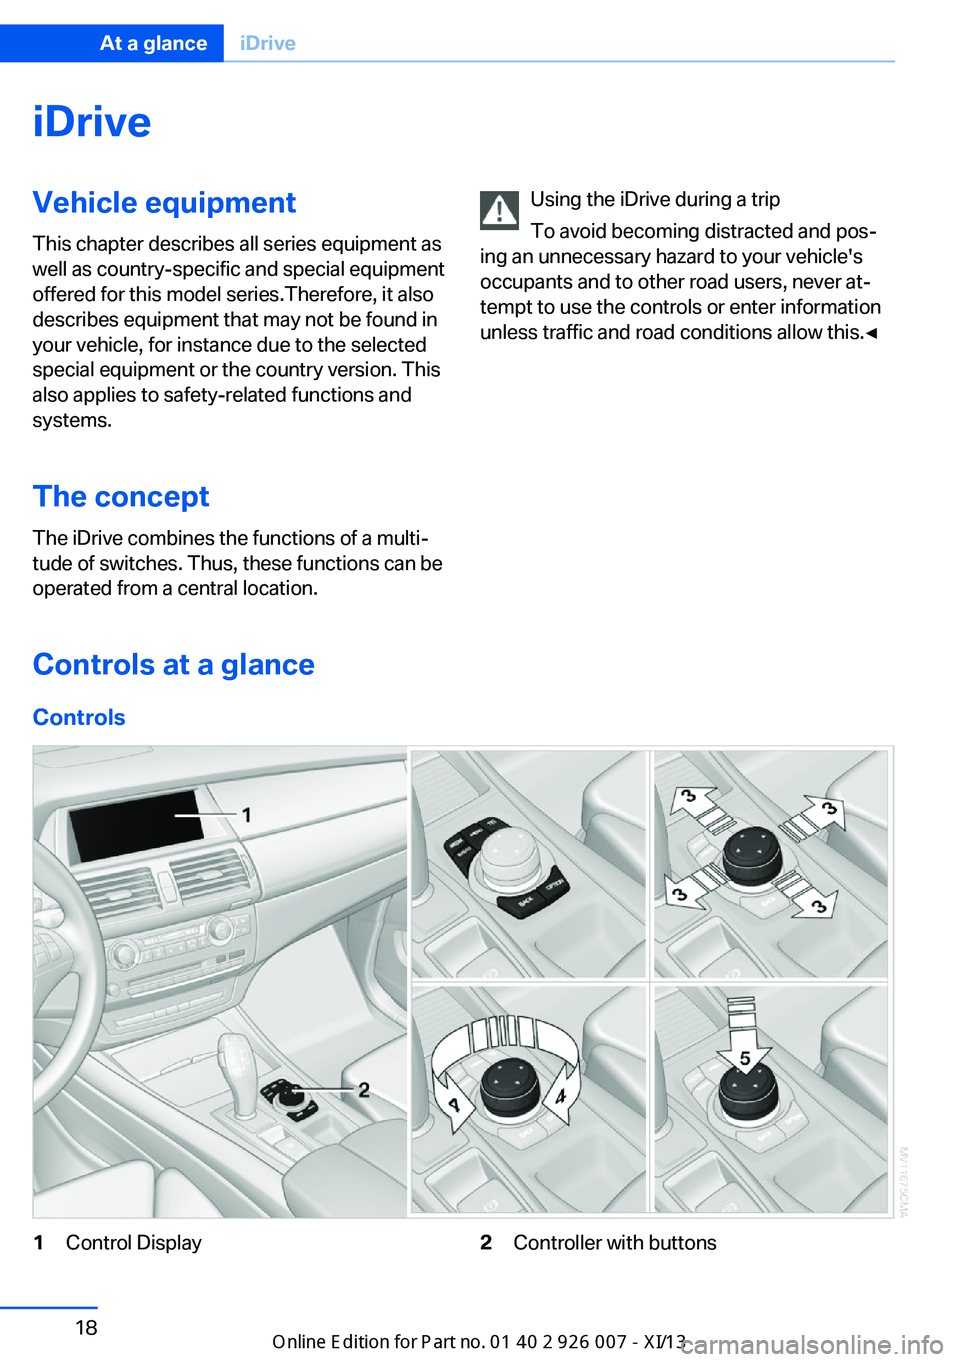
1Control Display2Controller with buttonsSeite 18At a glanceiDrive18
Online Edition for Part no. 01 40 2 910 876 - VII/13
Page 37 of 327
Convenient opening
Press and hold the button on the remote
control.
The windows and the glass sunroof open.
Locking
Press the button on the remote con‐
trol.
Locking from the outside
Do not lock the vehicle from the outside
if there are people in it, as the vehicle cannot
be unlocked from inside without special knowl‐
edge.◀
Switching on the interior lamps and
courtesy lamps
Press the button on the remote con‐
trol with the vehicle locked.
Panic mode
You can trigger the alarm system if you find
yourself in a dangerous situation.
Press the button on the remote control for
at least 3 seconds.
To switch off the alarm: press any button.
Unlocking tailgate
Press the button on the remote control for
approx. 1 second and release.
The tailgate will open slightly, regardless of
whether it was previously locked or unlocked.
With automatic tailgate operation: the tailgate
opens automatically.
The tailgate pivots back and up when it opens.
Ensure that adequate clearance is available
before opening.
To avoid locking yourself out of the vehicle, do
not place the remote control into the cargo
area. The tailgate is locked again as soon as it
is pushed closed.
Before and after each trip, check that the tail‐
gate has not been inadvertently unlocked.
Provide edge protection
Sharp or angular objects can hit the rear
window while driving and damage the heating
wires of the rear window. Provide edge protec‐
tion.◀
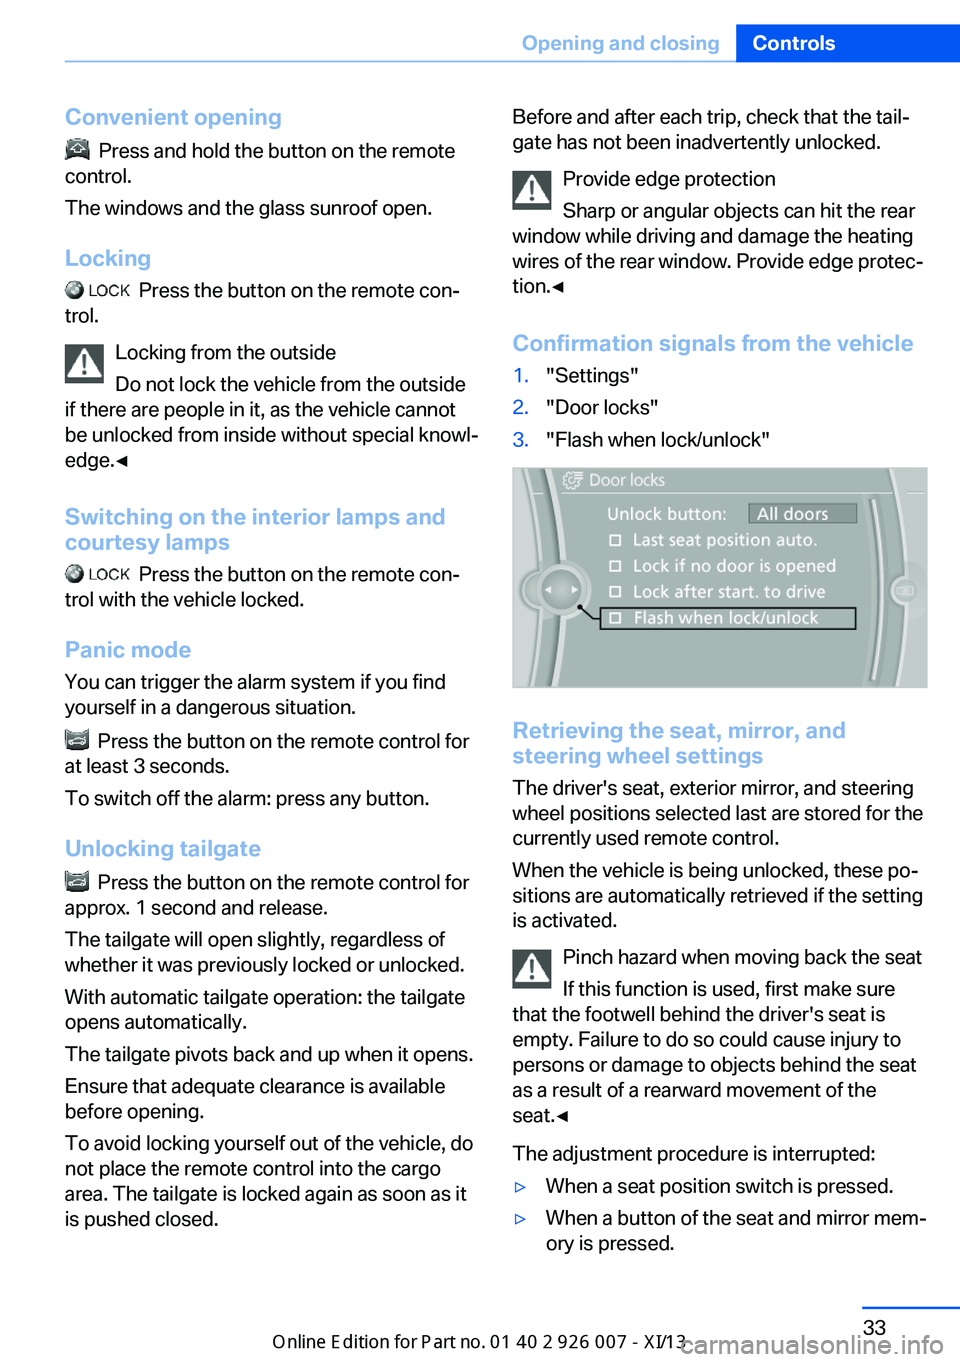
Confirmation signals from the vehicle1."Settings"2."Door locks"3."Flash when lock/unlock"
Retrieving the seat, mirror, and
steering wheel settings
The driver's seat, exterior mirror, and steering
wheel positions selected last are stored for the
currently used remote control.
When the vehicle is being unlocked, these po‐
sitions are automatically retrieved if the setting
is activated.
Pinch hazard when moving back the seat
If this function is used, first make sure
that the footwell behind the driver's seat is
empty. Failure to do so could cause injury to
persons or damage to objects behind the seat
as a result of a rearward movement of the
seat.◀
The adjustment procedure is interrupted:
▷When a seat position switch is pressed.▷When a button of the seat and mirror mem‐
ory is pressed.Seite 33Opening and closingControls33
Online Edition for Part no. 01 40 2 910 876 - VII/13
Page 44 of 327
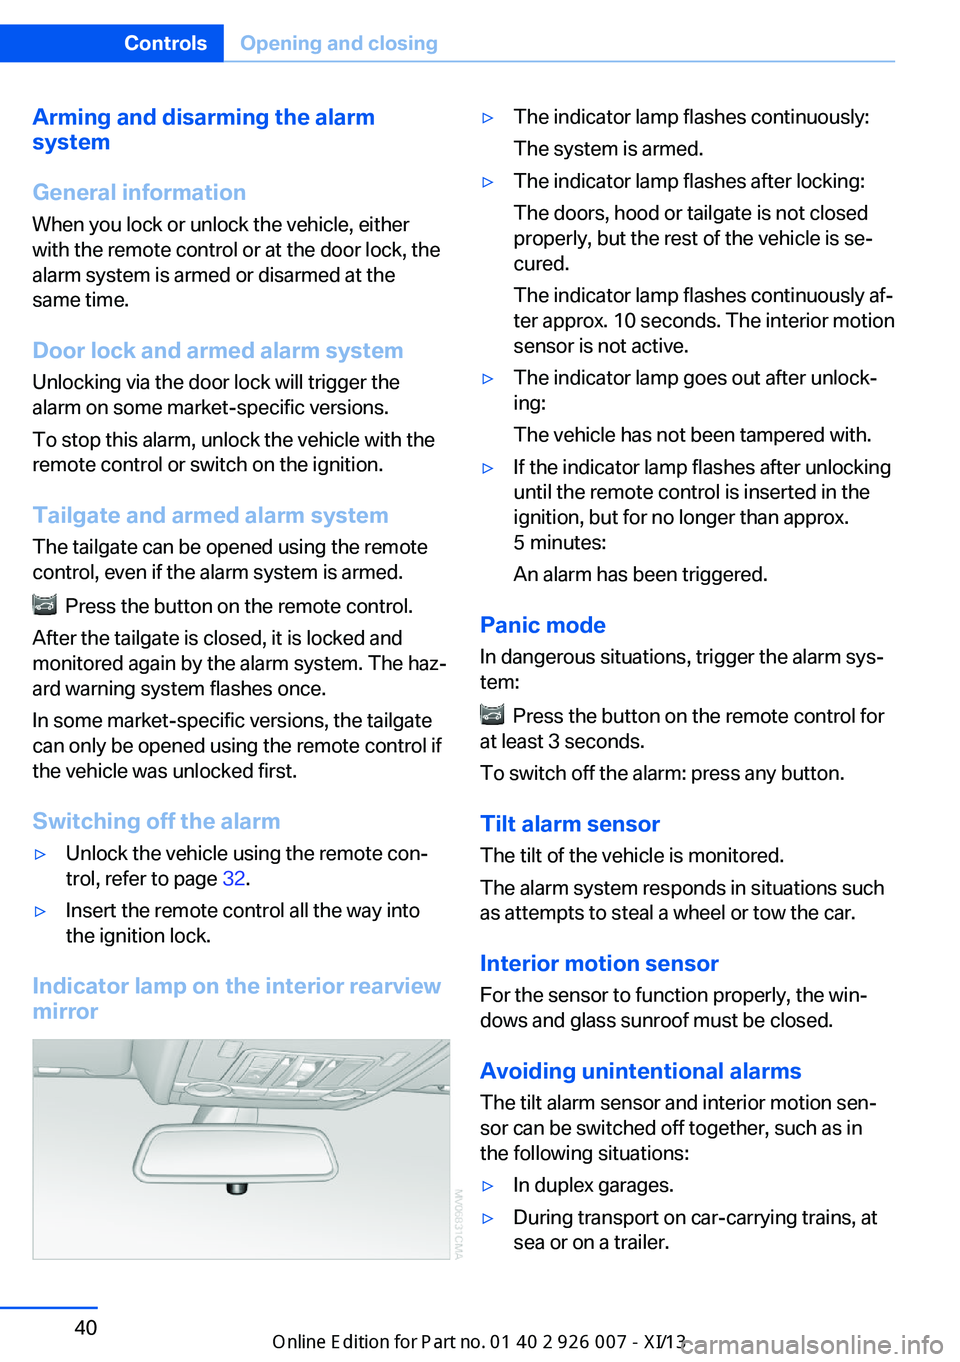
Arming and disarming the alarm
system
General information
When you lock or unlock the vehicle, either
with the remote control or at the door lock, the
alarm system is armed or disarmed at the
same time.
Door lock and armed alarm systemUnlocking via the door lock will trigger the
alarm on some market-specific versions.
To stop this alarm, unlock the vehicle with the
remote control or switch on the ignition.
Tailgate and armed alarm system
The tailgate can be opened using the remote
control, even if the alarm system is armed.
Press the button on the remote control.
After the tailgate is closed, it is locked and
monitored again by the alarm system. The haz‐
ard warning system flashes once.
In some market-specific versions, the tailgate
can only be opened using the remote control if
the vehicle was unlocked first.
Switching off the alarm
▷Unlock the vehicle using the remote con‐
trol, refer to page 32.▷Insert the remote control all the way into
the ignition lock.
Indicator lamp on the interior rearview
mirror
▷The indicator lamp flashes continuously:
The system is armed.▷The indicator lamp flashes after locking:
The doors, hood or tailgate is not closed
properly, but the rest of the vehicle is se‐
cured.
The indicator lamp flashes continuously af‐
ter approx. 10 seconds. The interior motion
sensor is not active.▷The indicator lamp goes out after unlock‐
ing:
The vehicle has not been tampered with.▷If the indicator lamp flashes after unlocking
until the remote control is inserted in the
ignition, but for no longer than approx.
5 minutes:
An alarm has been triggered.
Panic mode
In dangerous situations, trigger the alarm sys‐
tem:
Press the button on the remote control for
at least 3 seconds.
To switch off the alarm: press any button.
Tilt alarm sensor The tilt of the vehicle is monitored.
The alarm system responds in situations such
as attempts to steal a wheel or tow the car.
Interior motion sensor
For the sensor to function properly, the win‐
dows and glass sunroof must be closed.
Avoiding unintentional alarms The tilt alarm sensor and interior motion sen‐
sor can be switched off together, such as in
the following situations:
▷In duplex garages.▷During transport on car-carrying trains, at
sea or on a trailer.Seite 40ControlsOpening and closing40
Online Edition for Part no. 01 40 2 910 876 - VII/13
Page 68 of 327

cargo floor panel, refer to page 276, into
the loop of the release point, see arrow.4.Forcefully pull the screwdriver up against
the mechanical resistance until there is a
marked increase in resistance and the
parking brake can be heard to unlock.5.Stow the screwdriver, warning triangle, and
first aid kit and close the left side panel in
the cargo area.
Have the malfunction corrected
Have the malfunction corrected at the
nearest service center or at a workshop that
works according to BMW repair procedures
with correspondingly trained personnel. If the
parking brake has been released manually in
response to a malfunction, only technicians
can return it to operation.◀
Following manual release, the actual status of
the parking brake may deviate from that dis‐
played by the indicator lamp.
Putting into operation after a power failure
Putting the parking brake into operation
The parking brake should only be put
into operation again if it was manually released
due to an interruption in the supply of electrical
power. Otherwise the operation of the parking
brake is not ensured and there is a danger of
the vehicle rolling despite the parking brake
being set.◀
Procedure1.Switch on the ignition.2.Press the button with the brake depressed.
The indicator lamp in the instrument
cluster goes out as soon as the parking
brake is ready for operation.
Indicator lamp in Canadian models.
Any noises which occur are normal. Startup
may take several seconds.
Turn signal, high beams,
headlamp flasher
At a glance
1High beams2Headlamp flasher3Turn signal
Turn signal
Press the lever beyond the resistance point.
To switch off manually, press the lever to the
resistance point.
Unusually rapid flashing of the indicator lamp
indicates that a turn signal bulb has failed.
Signaling a turn briefly
Press the lever to the resistance point and hold
it there for as long as you want the turn signal
to flash.
Seite 64ControlsDriving64
Online Edition for Part no. 01 40 2 910 876 - VII/13