2013 BMW X6M heating
[x] Cancel search: heatingPage 17 of 327
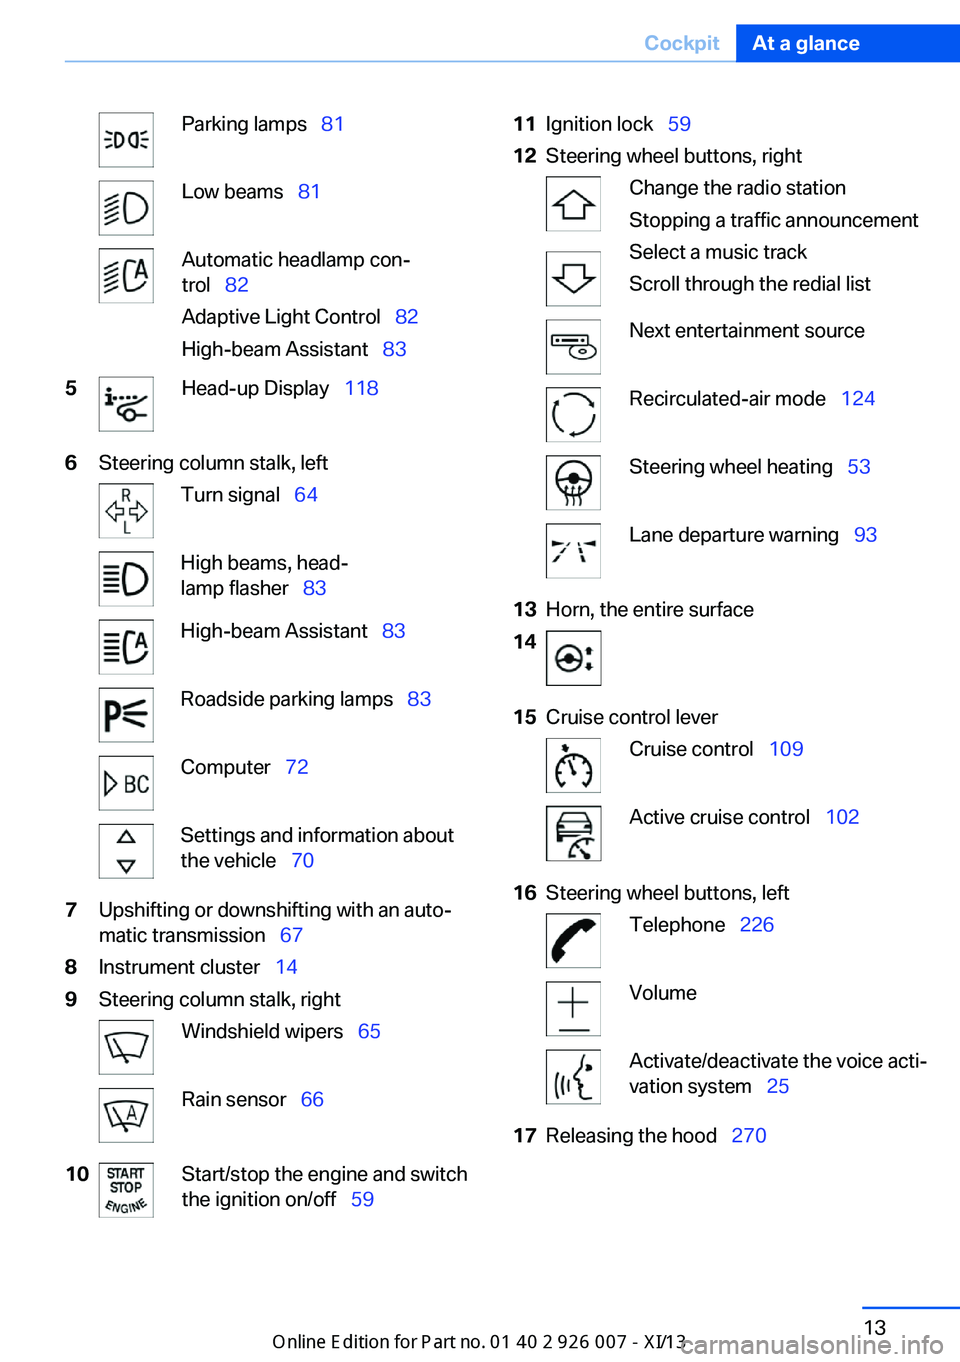
Parking lamps 81Low beams 81Automatic headlamp con‐
trol 82
Adaptive Light Control 82
High-beam Assistant 835Head-up Display 1186Steering column stalk, leftTurn signal 64High beams, head‐
lamp flasher 83High-beam Assistant 83Roadside parking lamps 83Computer 72Settings and information about
the vehicle 707Upshifting or downshifting with an auto‐
matic transmission 678Instrument cluster 149Steering column stalk, rightWindshield wipers 65Rain sensor 6610Start/stop the engine and switch
the ignition on/off 5911Ignition lock 5912Steering wheel buttons, rightChange the radio station
Stopping a traffic announcement
Select a music track
Scroll through the redial listNext entertainment sourceRecirculated-air mode 124Steering wheel heating 53Lane departure warning 9313Horn, the entire surface1415Cruise control leverCruise control 109Active cruise control 10216Steering wheel buttons, leftTelephone 226VolumeActivate/deactivate the voice acti‐
vation system 2517Releasing the hood 270Seite 13CockpitAt a glance13
Online Edition for Part no. 01 40 2 910 876 - VII/13
Page 37 of 327
Convenient opening
Press and hold the button on the remote
control.
The windows and the glass sunroof open.
Locking
Press the button on the remote con‐
trol.
Locking from the outside
Do not lock the vehicle from the outside
if there are people in it, as the vehicle cannot
be unlocked from inside without special knowl‐
edge.◀
Switching on the interior lamps and
courtesy lamps
Press the button on the remote con‐
trol with the vehicle locked.
Panic mode
You can trigger the alarm system if you find
yourself in a dangerous situation.
Press the button on the remote control for
at least 3 seconds.
To switch off the alarm: press any button.
Unlocking tailgate
Press the button on the remote control for
approx. 1 second and release.
The tailgate will open slightly, regardless of
whether it was previously locked or unlocked.
With automatic tailgate operation: the tailgate
opens automatically.
The tailgate pivots back and up when it opens.
Ensure that adequate clearance is available
before opening.
To avoid locking yourself out of the vehicle, do
not place the remote control into the cargo
area. The tailgate is locked again as soon as it
is pushed closed.
Before and after each trip, check that the tail‐
gate has not been inadvertently unlocked.
Provide edge protection
Sharp or angular objects can hit the rear
window while driving and damage the heating
wires of the rear window. Provide edge protec‐
tion.◀
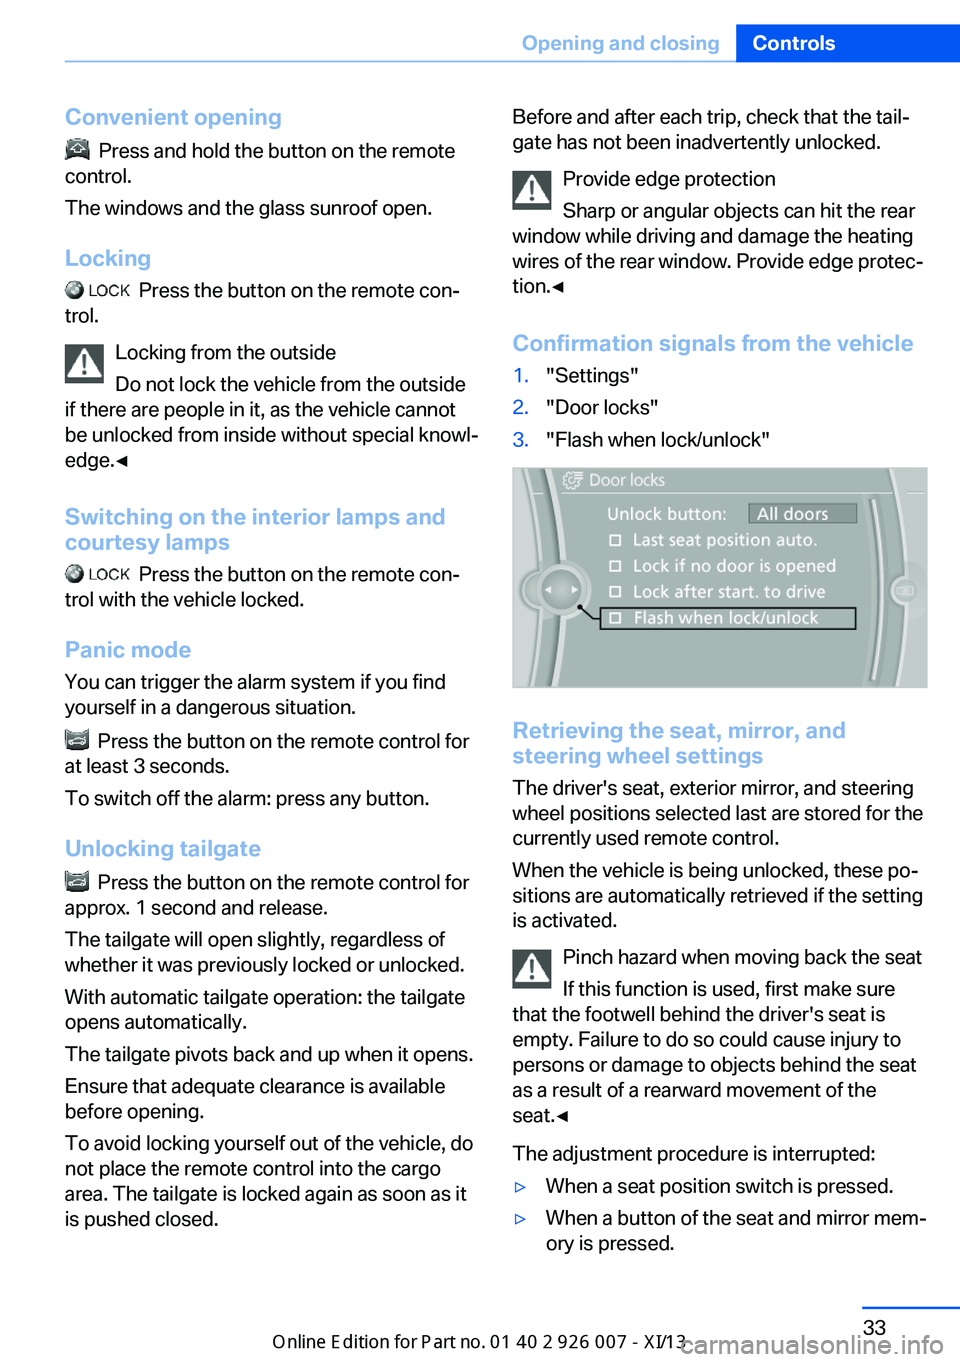
Confirmation signals from the vehicle1."Settings"2."Door locks"3."Flash when lock/unlock"
Retrieving the seat, mirror, and
steering wheel settings
The driver's seat, exterior mirror, and steering
wheel positions selected last are stored for the
currently used remote control.
When the vehicle is being unlocked, these po‐
sitions are automatically retrieved if the setting
is activated.
Pinch hazard when moving back the seat
If this function is used, first make sure
that the footwell behind the driver's seat is
empty. Failure to do so could cause injury to
persons or damage to objects behind the seat
as a result of a rearward movement of the
seat.◀
The adjustment procedure is interrupted:
▷When a seat position switch is pressed.▷When a button of the seat and mirror mem‐
ory is pressed.Seite 33Opening and closingControls33
Online Edition for Part no. 01 40 2 910 876 - VII/13
Page 50 of 327
▷Increase or decrease curvature:
Press front or rear section of switch.▷Shift curvature up or down:
Press upper or lower section of switch.
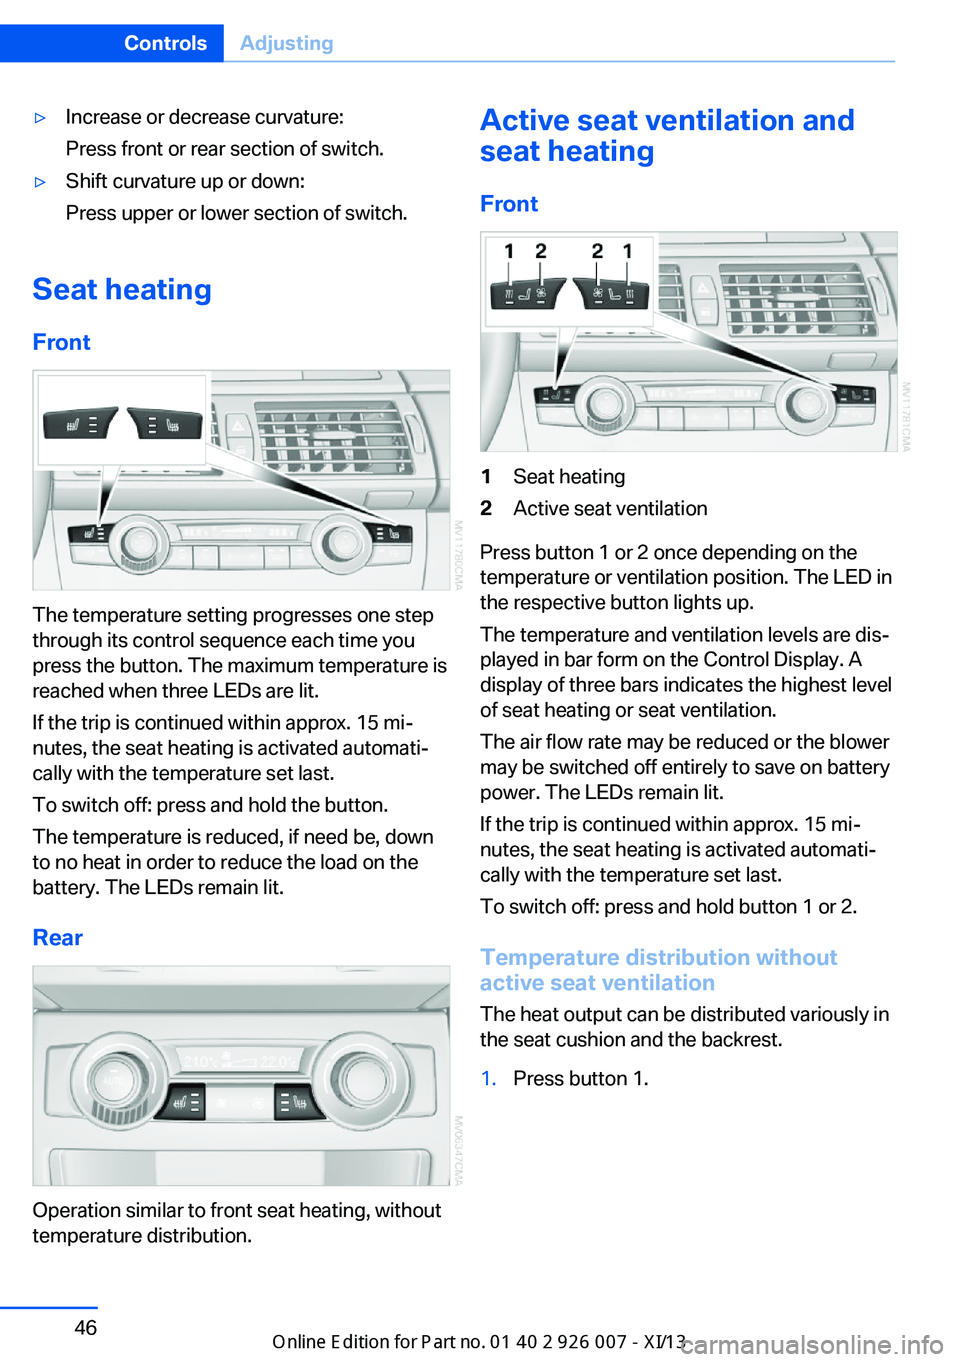
Seat heating
Front
The temperature setting progresses one step
through its control sequence each time you
press the button. The maximum temperature is
reached when three LEDs are lit.
If the trip is continued within approx. 15 mi‐
nutes, the seat heating is activated automati‐
cally with the temperature set last.
To switch off: press and hold the button.
The temperature is reduced, if need be, down
to no heat in order to reduce the load on the
battery. The LEDs remain lit.
Rear
Operation similar to front seat heating, without
temperature distribution.
Active seat ventilation and
seat heating
Front1Seat heating2Active seat ventilation
Press button 1 or 2 once depending on the
temperature or ventilation position. The LED in
the respective button lights up.
The temperature and ventilation levels are dis‐
played in bar form on the Control Display. A
display of three bars indicates the highest level
of seat heating or seat ventilation.
The air flow rate may be reduced or the blower
may be switched off entirely to save on battery
power. The LEDs remain lit.
If the trip is continued within approx. 15 mi‐
nutes, the seat heating is activated automati‐
cally with the temperature set last.
To switch off: press and hold button 1 or 2.
Temperature distribution without
active seat ventilation
The heat output can be distributed variously in
the seat cushion and the backrest.
1.Press button 1.Seite 46ControlsAdjusting46
Online Edition for Part no. 01 40 2 910 876 - VII/13
Page 51 of 327
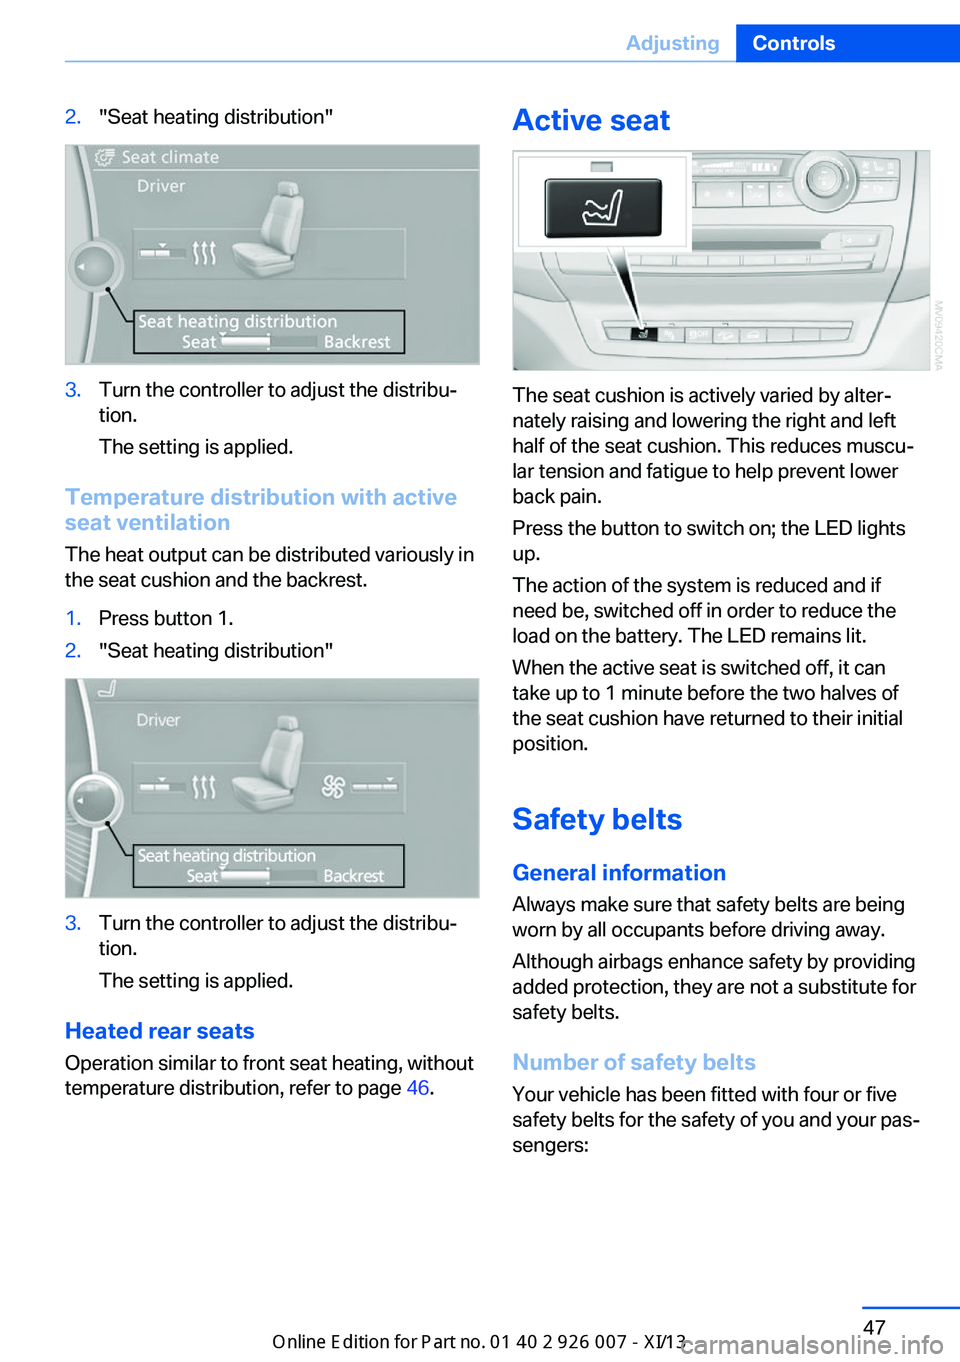
2."Seat heating distribution"3.Turn the controller to adjust the distribu‐
tion.
The setting is applied.
Temperature distribution with active
seat ventilation
The heat output can be distributed variously in
the seat cushion and the backrest.
1.Press button 1.2."Seat heating distribution"3.Turn the controller to adjust the distribu‐
tion.
The setting is applied.
Heated rear seats Operation similar to front seat heating, without
temperature distribution, refer to page 46.
Active seat
The seat cushion is actively varied by alter‐
nately raising and lowering the right and left
half of the seat cushion. This reduces muscu‐
lar tension and fatigue to help prevent lower
back pain.
Press the button to switch on; the LED lights
up.
The action of the system is reduced and if
need be, switched off in order to reduce the
load on the battery. The LED remains lit.
When the active seat is switched off, it can
take up to 1 minute before the two halves of
the seat cushion have returned to their initial
position.
Safety belts
General information
Always make sure that safety belts are being
worn by all occupants before driving away.
Although airbags enhance safety by providing
added protection, they are not a substitute for
safety belts.
Number of safety belts
Your vehicle has been fitted with four or five
safety belts for the safety of you and your pas‐
sengers:
Seite 47AdjustingControls47
Online Edition for Part no. 01 40 2 910 876 - VII/13
Page 56 of 327
Adjusting electricallyThe setting corresponds to the direc‐
tion in which the button is pressed.
Saving positions
Seat and mirror memory, refer to page 50.
Adjusting manually If an electrical malfunction occurs, for example,
press the edges of the mirror glass.
Automatic Curb Monitor When the reverse gear is engaged, the mirror
glass tilts downward slightly on the front pas‐
senger side. This improves your view of the
curb and other low-lying obstacles when park‐
ing, for example.
Activating1. Slide the mirror changeover switch
to the driver's side mirror position.2.Shift into reverse or engage transmission
position R.
Deactivating
Slide the mirror changeover switch to the pas‐
senger's side mirror position.
Fold in and out Press button 3.
Possible up to approx. 15 mph/20 km/h.
For example, this is advantageous
▷In car washes.▷In narrow streets.▷For folding back mirrors that were folded
away manually.
Mirrors that were folded in are folded out auto‐
matically at a speed of approx.
25 mph/40 km/h.
Fold in the mirror in a car wash
Before entering an automatic car wash,
fold in the exterior mirrors by hand or with the
button; otherwise, they could be damaged, de‐
pending on the width of the vehicle.◀
Automatic heating
Depending on the external temperature, both
exterior mirrors are automatically heated when
the engine is running or the ignition is
switched on.
Interior rearview mirror
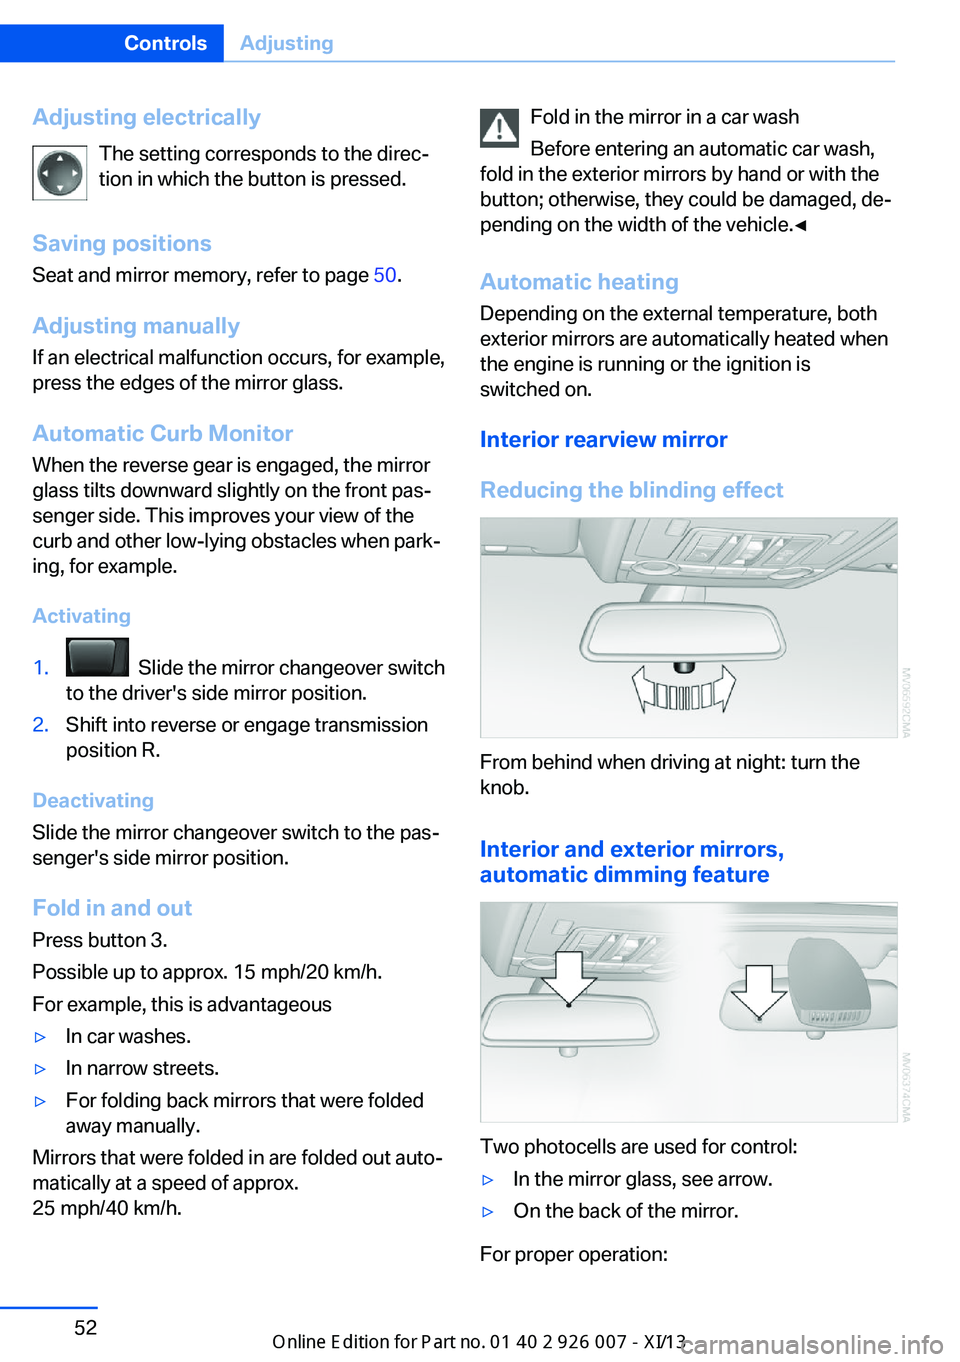
Reducing the blinding effect
From behind when driving at night: turn the
knob.
Interior and exterior mirrors,
automatic dimming feature
Two photocells are used for control:
▷In the mirror glass, see arrow.▷On the back of the mirror.
For proper operation:
Seite 52ControlsAdjusting52
Online Edition for Part no. 01 40 2 910 876 - VII/13
Page 57 of 327
▷Keep the photocells clean.▷Do not cover the area between the inside
rearview mirror and the windshield.
Steering wheel
General information Do not adjust while driving
Do not adjust the steering wheel while
driving; otherwise, an unexpected movement
could result in an accident.◀
Adjusting
Mechanical
1.Fold the lever down.2.Move the steering wheel to the preferred
height and angle to suit your seating posi‐
tion.3.Fold the lever back.
Do not use force to swing the lever back.
Do not use force to swing the lever back
up; otherwise, the mechanism will be dam‐
aged.◀
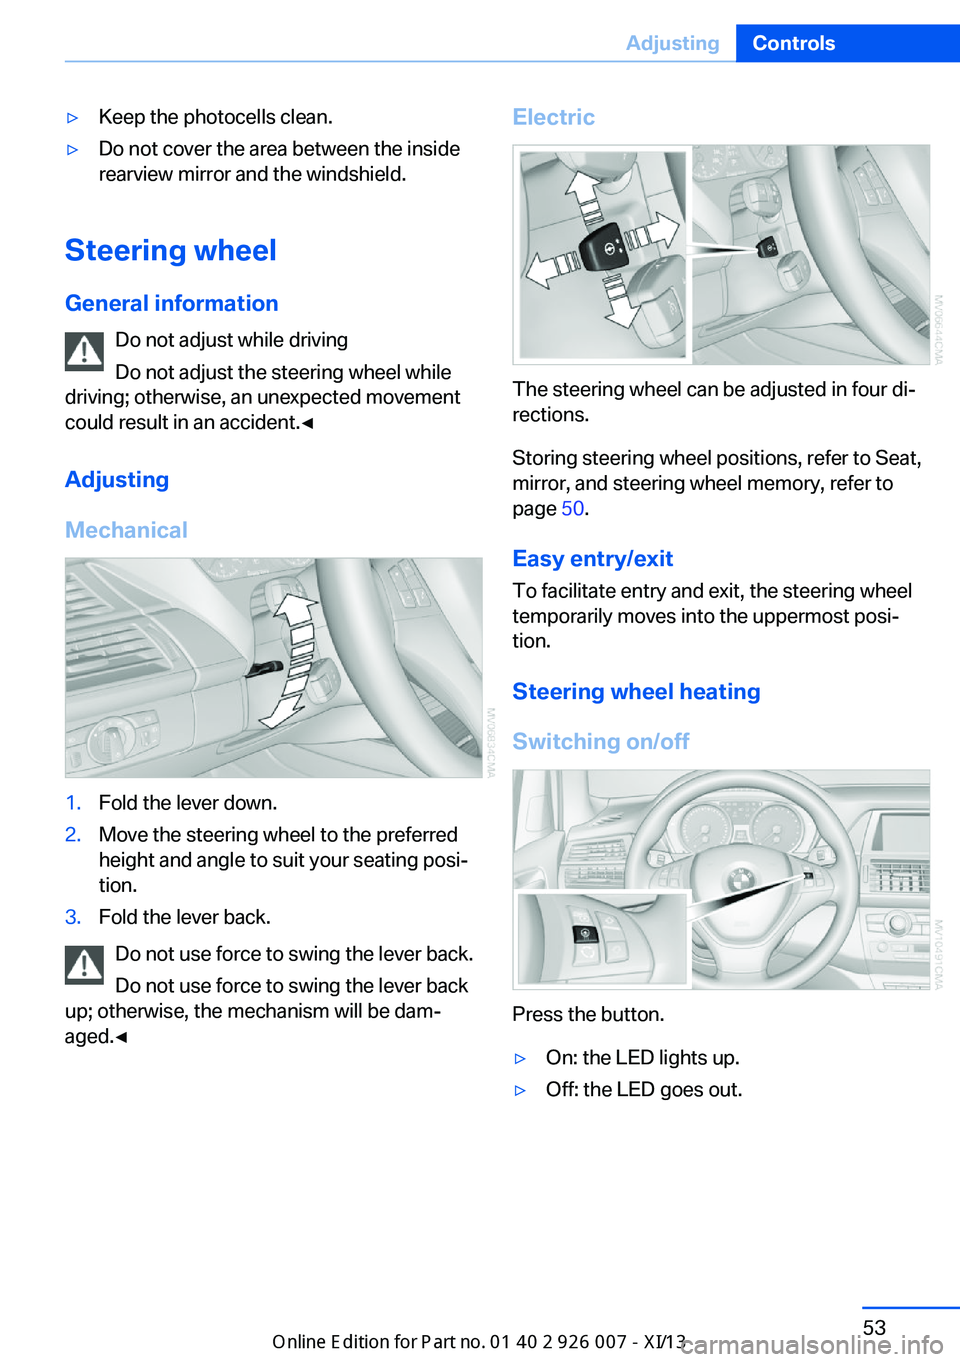
Electric
The steering wheel can be adjusted in four di‐
rections.
Storing steering wheel positions, refer to Seat,
mirror, and steering wheel memory, refer to
page 50.
Easy entry/exit To facilitate entry and exit, the steering wheel
temporarily moves into the uppermost posi‐
tion.
Steering wheel heating
Switching on/off
Press the button.
▷On: the LED lights up.▷Off: the LED goes out.Seite 53AdjustingControls53
Online Edition for Part no. 01 40 2 910 876 - VII/13
Page 64 of 327

Ignition onAll electrical consumers can operate. The od‐
ometer and trip odometer are displayed in the
instrument cluster.
To save battery power when the engine is off,
switch off the ignition and any unnecessary
electronic systems/power consumers.
Radio ready state and ignition off
All indicator and warning lamps as well as dis‐
plays in the instrument cluster go out.
Transmission position P with the ignition
off
When the ignition is switched off, position P is
engaged automatically. When in an automatic
car wash, for example, ensure that the ignition
is not switched off accidentally.◀
For example, the ignition is not switched off in
the following situations:▷The brake is applied.▷The low beams are switched on
Starting the engine
General information Enclosed areas
Do not let the engine run in enclosed
areas; otherwise, breathing of exhaust fumes
may lead to loss of consciousness and death.
The exhaust gases contain carbon monoxide,
an odorless and colorless but highly toxic
gas.◀
Unattended vehicle
Do not leave the car unattended with the
engine running; otherwise, it presents a poten‐
tial source of danger.
Before leaving the vehicle with the engine run‐
ning, set the parking brake and engage trans‐
mission position P; otherwise, the vehicle may
begin to roll.◀
Frequent starting in quick succession
Avoid repeated futile attempts at starting
the car and avoid starting the car frequently in
quick succession. Otherwise, the fuel is not
burned or is inadequately burned, and there is
the danger of overheating and damaging the
catalytic converter.◀
Do not wait for the engine to warm-up while
the vehicle remains stationary. Start driving
right away, but at moderate engine speeds.
Starting the engine
Remote control in the ignition lock or, with
Comfort Access, inside the vehicle, refer to
page 37.
1.Depress the brake pedal.2.Press the Start/Stop button.
The starter operates automatically for a certain
time, and stops automatically as soon as the
engine has started.
Engine stop General information Take the remote control with youTake the remote control with you when
leaving the vehicle so that children, for exam‐
ple, cannot operate the windows and injure
themselves.◀
Seite 60ControlsDriving60
Online Edition for Part no. 01 40 2 910 876 - VII/13
Page 126 of 327

Automatic climate control with 4-zone con‐
trol 126
Automatic climate control with 2-zone control
1Seat heating and ventilation, driver's
side 462Temperature, left side of passenger com‐
partment3AUTO program4Temperature, right side of passenger com‐
partment5Maximum cooling6Seat heating and ventilation, front passen‐
ger side 467Passenger side▷Manual air distribution▷Accessing setting for ventilation tem‐
perature on the Control Display8Switching cooling function on/off manually9Automatic recirculated air control/recircu‐
lated air mode10Manual air volume, switching off automatic
climate control, residual heat11Rear window defroster12Defrosting windows and removing conden‐
sation13Air grill for interior temperature sensor,
please keep clear and unobstructed14Driver's side▷Manual air distribution▷Accessing setting for ventilation tem‐
perature on the Control DisplayThe current setting for manual air distribution
is displayed on the Control Display.
Comfortable interior climate The AUTO program offers the optimum air dis‐
tribution and air volume for virtually all condi‐
tions, refer to AUTO program below. Select a
comfortable interior temperature only.
The following sections contain more detailed
information on the available setting options.Most of these settings are stored for the re‐
mote control currently in use, Personal Profile
settings, refer to page 31.
AUTO program Press the button.
Air volume, air distribution, and
temperature are controlled auto‐
matically.Seite 122ControlsClimate122
Online Edition for Part no. 01 40 2 910 876 - VII/13