2013 BMW X6M wheel
[x] Cancel search: wheelPage 131 of 327
AUTO programThe AUTO program automatically
sets the air distribution toward the
upper body and in the footwell, as
well as the air flow rate. It also
adapts your instructions for the
temperature to outside influences throughout
the year.
Temperature Set the desired temperature indi‐
vidually on the left and right side.
The automatic climate control achieves this
temperature as quickly as possible regardless
of the season, using maximum cooling or heat‐
ing power if necessary, and then maintains it.
When switching between different tempera‐
ture settings in rapid succession, the auto‐
matic climate control does not have sufficient
time to adjust the set temperature.
Air volume, manual The air flow rate can be varied by
pressing on the corresponding side.
The automatic mode for the air flow rate can
be switched on again using the AUTO button.
Switching off rear automatic climate
control
With the blower at its lowest setting,
press the left side of the button to
switch off the automatic climate control.
The automatic climate control can also be
switched off with iDrive. To switch on the auto‐
matic climate control again, the system must
first be reactivated, refer to Activating/deacti‐
vating.
The system is switched on again by pressing
any button of the rear automatic climate con‐
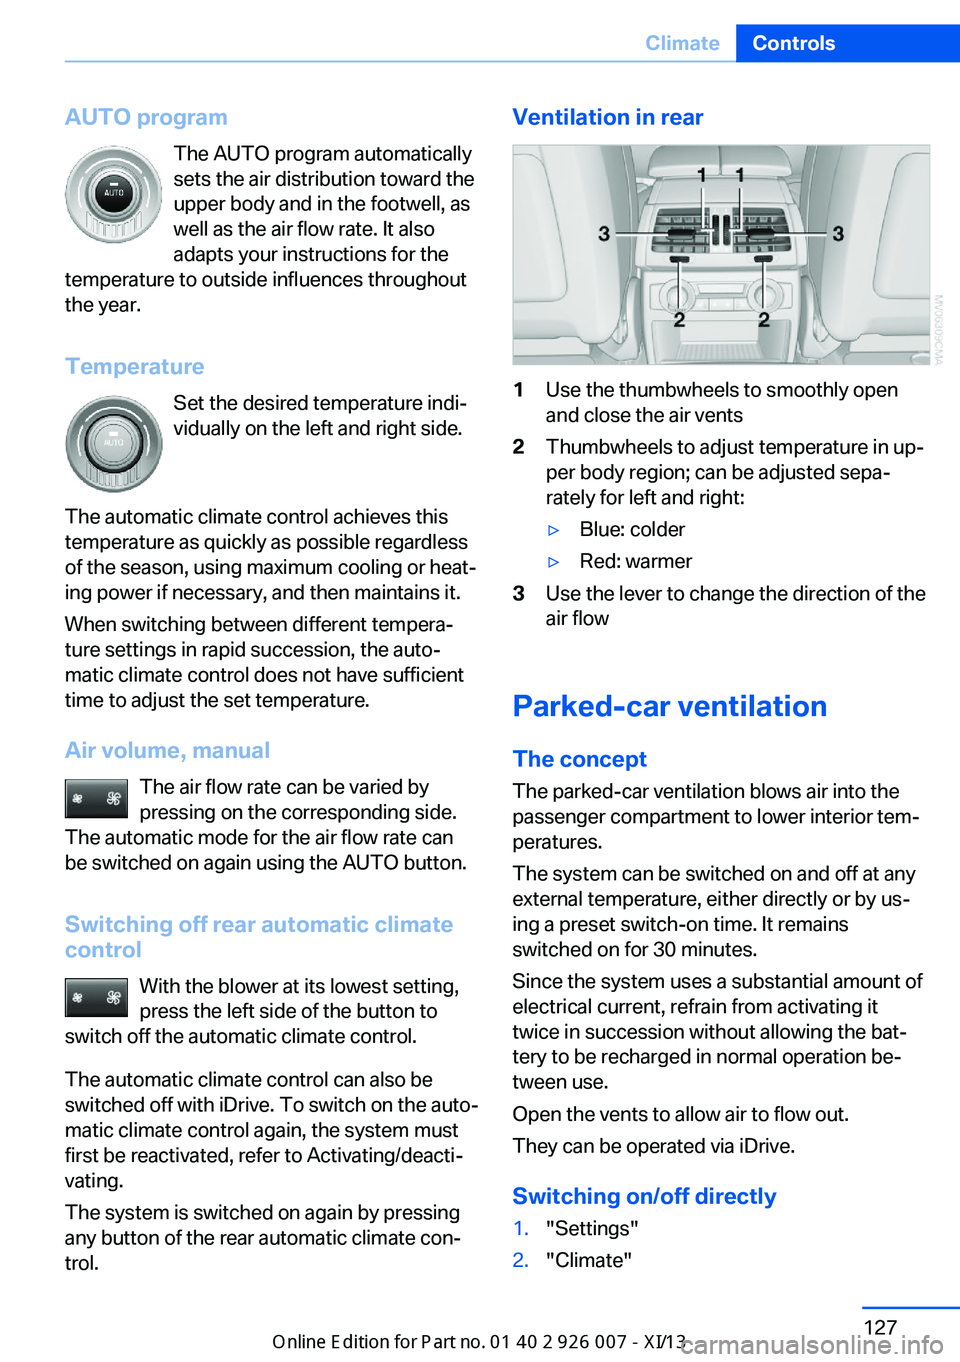
trol.Ventilation in rear1Use the thumbwheels to smoothly open
and close the air vents2Thumbwheels to adjust temperature in up‐
per body region; can be adjusted sepa‐
rately for left and right:▷Blue: colder▷Red: warmer3Use the lever to change the direction of the
air flow
Parked-car ventilation
The concept The parked-car ventilation blows air into the
passenger compartment to lower interior tem‐
peratures.
The system can be switched on and off at any
external temperature, either directly or by us‐
ing a preset switch-on time. It remains
switched on for 30 minutes.
Since the system uses a substantial amount of
electrical current, refrain from activating it
twice in succession without allowing the bat‐
tery to be recharged in normal operation be‐
tween use.
Open the vents to allow air to flow out.
They can be operated via iDrive.
Switching on/off directly
1."Settings"2."Climate"Seite 127ClimateControls127
Online Edition for Part no. 01 40 2 910 876 - VII/13
Page 152 of 327
Driving in wet conditionsWhen roads are wet or there is heavy rain,
briefly exert gentle pressure on the brake pedal
every few miles.
Ensure that this action does not endanger
other road users.
The heat generated in this process helps dry
the brake discs and pads.
In this way braking efficiency will be available
when you need it.
Hills
Drive long or steep downhill gradients in the
gear in which the least braking is required.
Otherwise, the brake system may overheat, re‐
sulting in a reduction in the brake system effi‐
ciency.
You can increase the engine's braking effect
by shifting down in the manual mode of the au‐
tomatic transmission, refer to page 67.
Avoid load on the brakes
Avoid placing excessive load on the
brake system. Light but consistent brake pres‐
sure can lead to high temperatures, brake wear
and possibly even brake failure.◀
Do not drive in neutral
Do not drive in neutral or with the engine
stopped, as doing so disables engine braking.
In addition, steering and brake assist is un‐
available with the engine stopped.◀
Brake disc corrosion
Corrosion on the brake discs and contamina‐
tion on the brake pads are furthered by:▷Low mileage.▷Extended periods when the vehicle is not
used at all.▷Infrequent use of the brakes.
Corrosion occurs when the minimum pressure
that must be exerted by the pads during brake
applications to clean the discs is not reached.
Should corrosion form on the brake discs, the
brakes will tend to respond with a pulsating ef‐
fect that generally cannot be corrected.
Condensation under the parkedvehicle
When using the automatic climate control,
condensation water develops that exits under‐
neath the vehicle.
Therefore, traces of condensed water under
the vehicle are normal.
Driving on poor roads Your vehicle combines an all-wheel drive sys‐
tem with the advantages of a normal passen‐
ger car.
Do not drive on unpaved terrain
Do not drive on unpaved terrain, as oth‐
erwise the vehicle may be damaged.◀
For your own safety and the safety of passen‐
gers and the vehicle, adhere to the following
points:▷Familiarize yourself with the vehicle before
driving; never take risks.▷Adjust speeds according to road condi‐
tions. The steeper and rougher the road
surface is, the lower the speed should be.▷When driving on steep uphill and downhill
grades: the engine oil and coolant should
be filled nearly to the MAX mark.▷Use Hill Descent Control HDC, refer to
page 99, on steep downhill grades.▷Watch for stones, holes, and other obsta‐
cles and drive around these where possi‐
ble.▷On bumps and rough roads, avoid contact
between the vehicle body and the ground.
The maximum ground clearance is 8 in‐
ches/20 cm and may vary with the loaded
cargo.Seite 148Driving tipsThings to remember when driving148
Online Edition for Part no. 01 40 2 910 876 - VII/13
Page 153 of 327
▷When driving through water, do not exceed
the maximum water height of 17 in‐
ches/45 cm.
Drive at walking speed only and do not
stop the vehicle.▷After driving through water, press on the
brake pedal several times at low speeds to
dry the brakes.▷Depending on the prevailing terrain, acti‐
vate Dynamic Traction Control DTC, refer
to page 97, briefly.▷When the wheels spin, accelerate to ena‐
ble the driving stability control systems to
distribute the drive force to the individual
wheels.▷The stone chip guard reduces the risk of
damage to painted vehicle components,
such as in the area of the side skirts and
wheel arches. Your service center will be
glad to advise you.
After driving on poor roads
Adhere to the following points to ensure vehi‐
cle safety:
▷Remove excessive accumulations of dirt
and mud from the vehicle body.▷Clear mud, snow, ice, etc., from the wheels
and tires and check for damage.Seite 149Things to remember when drivingDriving tips149
Online Edition for Part no. 01 40 2 910 876 - VII/13
Page 170 of 327
Add a destination as a further destination,
refer to page 167.▷"Exit interactive map": return to the map
view.▷"View in northern direction" or "View in driving direction"▷"Display destination": the map section
around the destination is displayed.▷"Display current location": the map section
around your current location is displayed.▷"Find points of interest": the search for
special destinations is started.
Destination entry by voice
General information
▷Instructions for voice activation system, re‐
fer to page 25.▷When making a destination entry by voice,
you can change between voice operation
and iDrive.▷To have the available spoken instructions
read out loud: ›Voice commands‹.
Saying the entries
▷The town/city, street, and house number
can be entered using a single command.▷Spell the entry if the spoken language and
the language of the system differ.▷Say the letters smoothly, and avoid exag‐
gerating the pronunciation and inserting
lengthy pauses between the letters.▷The methods of entry depend on the navi‐
gation data in use and the country and lan‐
guage settings.
Entering the address in a command
1. Press the button on the steering
wheel.2.›Enter address‹3.Wait for a request from the system.4.Say the address in the suggested order.5.Continue making the entry as prompted by
the system.
If necessary, individually name the sepa‐
rate components of the address, e.g., the
town/city.
Entering a town/city separately
The town/city can be said as a complete word.
With the destination entry menu displayed:
1. Press the button on the steering
wheel.2.›City‹ or ›Spell city‹3.Wait for the system to prompt you for the
town/city.4.Say the name of the town/city, or name at
least the first three letters.
Depending on the entry, up to 20 towns/
cities may be suggested.5.Select a location:▷Select a recommended town/
city: ›Yes‹.▷Select a different town/city: ›New
entry‹.▷Select an entry: ›Entry ...‹, for instance,
entry 2.▷Spell an entry: ›Spell city‹.6.Continue making the entry as prompted by
the system.
If there are several towns/cities with the same
name:
Towns/cities of the same name are grouped in
a list and displayed as one location followed by
an ellipsis.
1.Select an entry: ›Yes‹ or ›Entry ...‹, e. g., En‐
try 2.2.Select the desired town/city.Seite 166NavigationDestination entry166
Online Edition for Part no. 01 40 2 910 876 - VII/13
Page 186 of 327
RadioVehicle equipment
This chapter describes all series equipment as
well as country-specific and special equipment
offered for this model series.Therefore, it also
describes equipment that may not be found in
your vehicle, for instance due to the selected
special equipment or the country version. This
also applies to safety-related functions and
systems.
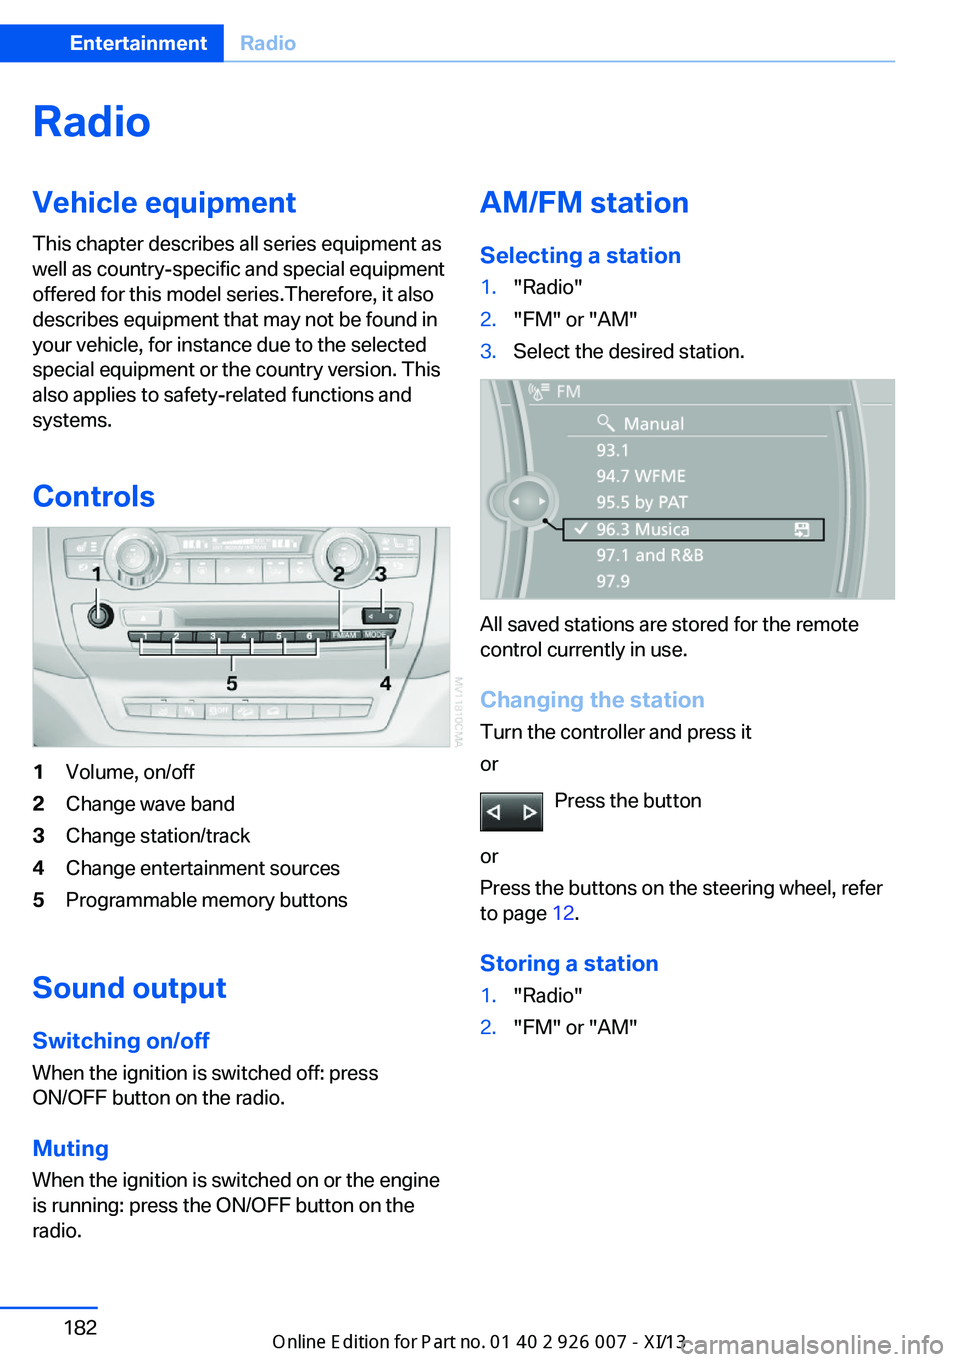
Controls1Volume, on/off2Change wave band3Change station/track4Change entertainment sources5Programmable memory buttons
Sound outputSwitching on/offWhen the ignition is switched off: press
ON/OFF button on the radio.
Muting
When the ignition is switched on or the engine
is running: press the ON/OFF button on the
radio.
AM/FM station
Selecting a station1."Radio"2."FM" or "AM"3.Select the desired station.
All saved stations are stored for the remote
control currently in use.
Changing the station
Turn the controller and press it
or
Press the button
or
Press the buttons on the steering wheel, refer
to page 12.
Storing a station
1."Radio"2."FM" or "AM"Seite 182EntertainmentRadio182
Online Edition for Part no. 01 40 2 910 876 - VII/13
Page 203 of 327
can be called up via the corresponding album,
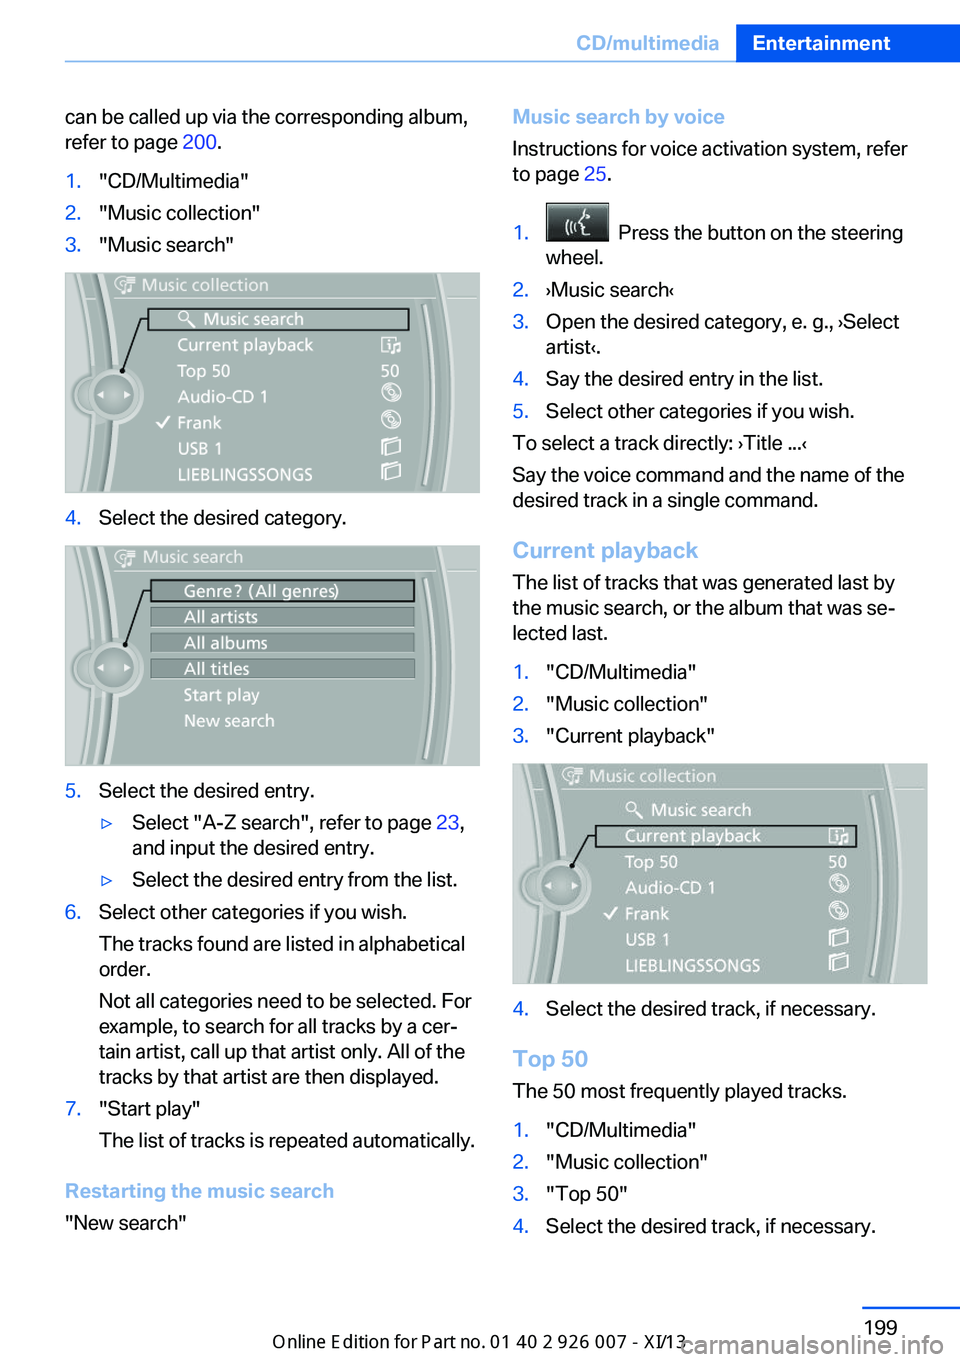
refer to page 200.1."CD/Multimedia"2."Music collection"3."Music search"4.Select the desired category.5.Select the desired entry.▷Select "A-Z search", refer to page 23,
and input the desired entry.▷Select the desired entry from the list.6.Select other categories if you wish.
The tracks found are listed in alphabetical
order.
Not all categories need to be selected. For
example, to search for all tracks by a cer‐
tain artist, call up that artist only. All of the
tracks by that artist are then displayed.7."Start play"
The list of tracks is repeated automatically.
Restarting the music search
"New search"
Music search by voice
Instructions for voice activation system, refer
to page 25.1. Press the button on the steering
wheel.2.›Music search‹3.Open the desired category, e. g., ›Select
artist‹.4.Say the desired entry in the list.5.Select other categories if you wish.
To select a track directly: ›Title ...‹
Say the voice command and the name of the
desired track in a single command.
Current playback The list of tracks that was generated last by
the music search, or the album that was se‐
lected last.
1."CD/Multimedia"2."Music collection"3."Current playback"4.Select the desired track, if necessary.
Top 50
The 50 most frequently played tracks.
1."CD/Multimedia"2."Music collection"3."Top 50"4.Select the desired track, if necessary.Seite 199CD/multimediaEntertainment199
Online Edition for Part no. 01 40 2 910 876 - VII/13
Page 216 of 327
Menu navigation
You can use the thumbwheel and buttons 1 to
navigate through the menus.▷Turn the thumbwheel: select a menu item.▷Press the arrow buttons: change between
fields.▷ Press the button: activate the menu
item.
Changing batteries
1.Press the detent and remove the cover.2.Change the batteries. The type and instal‐
lation position are marked on the bottom of
the battery compartment.3.Close the cover.
Take the used battery to a recycling
center or to your service center.
Setting the language of the
DVD system
1.Select a CD/DVD track.2. Press the button.3.Select "Tone".4. Press the button.5.Switch to the top window.6.Select "Language".7. Press the button.8.Select the desired language.9. Press the button.Sound output via speakers
In addition to the headphones, you can also
play the sound via the vehicle speakers.1."CD/Multimedia"2."External devices"3."AUX rear"4."Volume"5.Turn the controller until the desired volume
is set and press the controller.
Switching DVD system on/off
Press the button on the CD-/DVD player or un‐
der the desired screen.
The DVD system switches on automatically
when a CD or DVD is inserted.
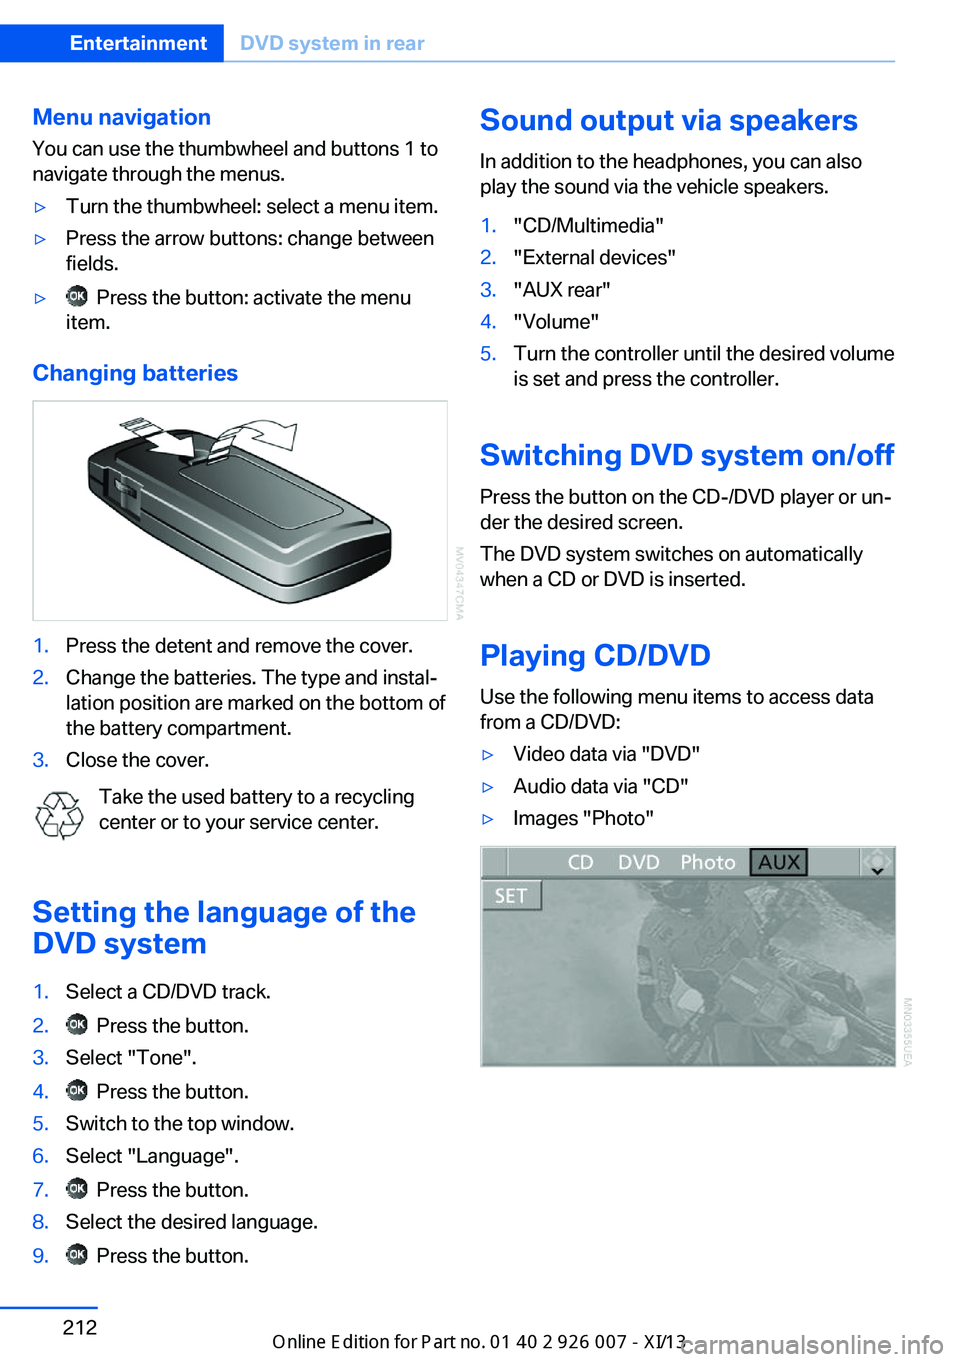
Playing CD/DVD
Use the following menu items to access data
from a CD/DVD:
▷Video data via "DVD"▷Audio data via "CD"▷Images "Photo"Seite 212EntertainmentDVD system in rear212
Online Edition for Part no. 01 40 2 910 876 - VII/13
Page 217 of 327
Playing videos from CDs/
DVDs
Country codes of DVDs
Your DVD player only plays DVDs with the
coding of your home region, e.g., Europe=2.
The country codes supported by your DVD are
contained in the information on your DVD.
An overview of the coding zones:CodeRegion1USA, Canada2Japan, Europe, Middle East, South Af‐
rica3Southeast Asia4Australia, Central and South America,
New Zealand5Northwest Asia, North Africa6China
DVDs with the code 0 can be played on all de‐
vices.
Starting playback
1.Push the CD/DVD into the drive with the la‐
beled side facing upward. The CD/DVD is
automatically pulled in.▷Playback begins automatically after a
few seconds.▷Otherwise: select "DVD".2.If the DVD control or the DVD-specific
menu is displayed when a DVD is inserted,
use the remote control buttons for menu
navigation to select the desired option.
Or:
Press the button on the CD/DVD
player.
You can control the playback with the buttons
on the CD/DVD player or the DVD control.
Video CDs (VCDs) and Super Video CDs
(SVCDs) can only be played if they do not have
a DVD-specific menu.
Eject CD/DVD
Press the button on the CD/DVD player.
The DVD emerges slightly from the drive.
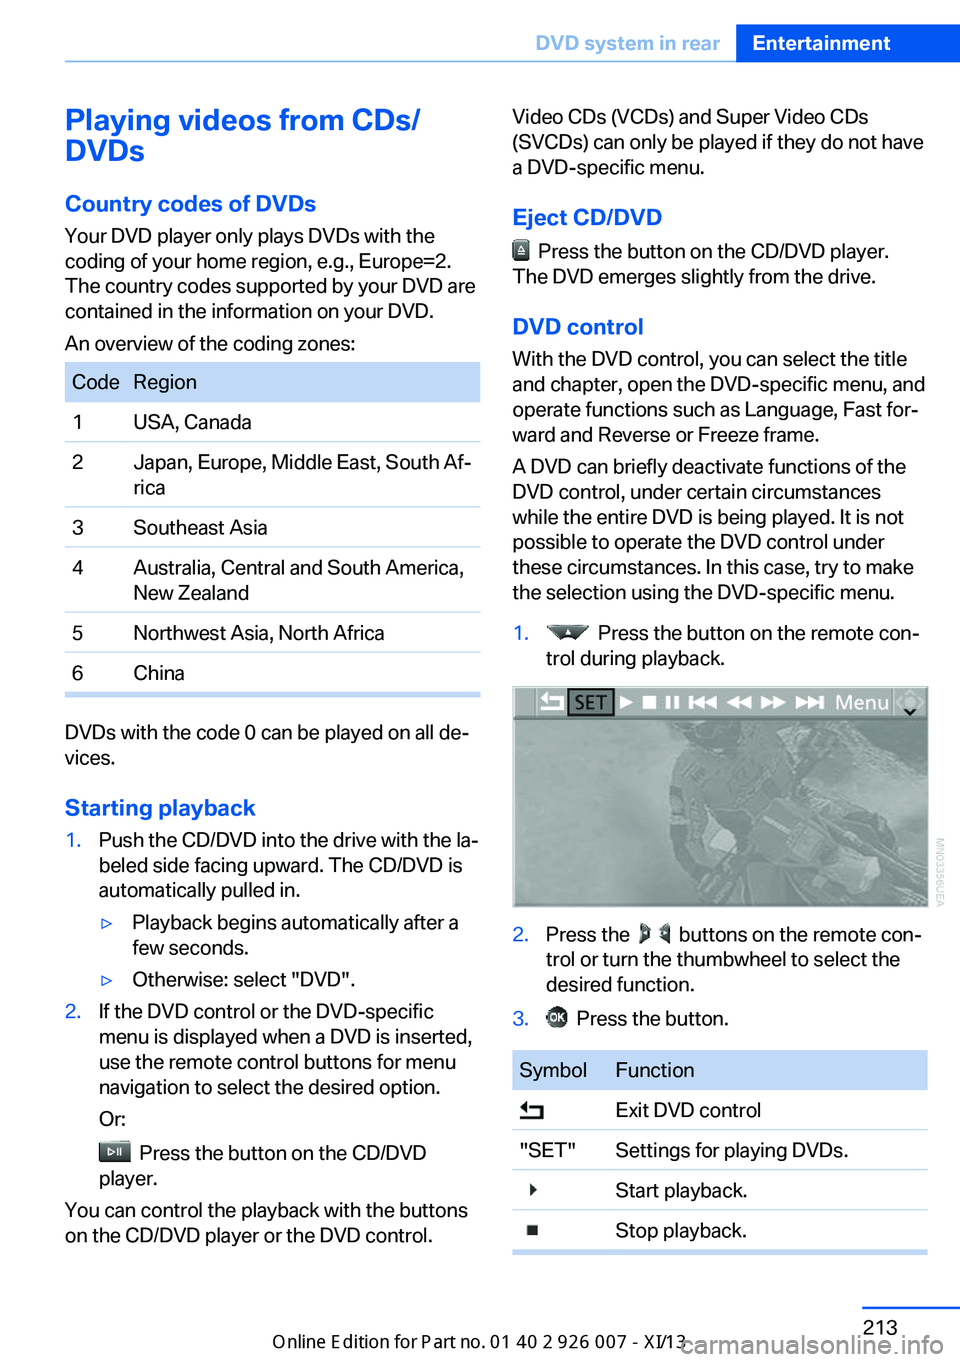
DVD control With the DVD control, you can select the title
and chapter, open the DVD-specific menu, and
operate functions such as Language, Fast for‐
ward and Reverse or Freeze frame.
A DVD can briefly deactivate functions of the
DVD control, under certain circumstances
while the entire DVD is being played. It is not
possible to operate the DVD control under
these circumstances. In this case, try to make
the selection using the DVD-specific menu.
1. Press the button on the remote con‐
trol during playback.2.Press the buttons on the remote con‐
trol or turn the thumbwheel to select the
desired function.3. Press the button.SymbolFunction Exit DVD control"SET"Settings for playing DVDs. Start playback. Stop playback.Seite 213DVD system in rearEntertainment213
Online Edition for Part no. 01 40 2 910 876 - VII/13