2013 BMW X5 XDRIVE 35I SPORT ACTIVITY sport mode
[x] Cancel search: sport modePage 43 of 345

Switching off the alarm▷Unlock the vehicle using the remote con‐
trol, refer to page 32.▷Insert the remote control all the way into
the ignition lock.
Indicator lamp on the interior rearview
mirror
▷The indicator lamp flashes continuously:
The system is armed.▷The indicator lamp flashes after locking:
The doors, hood or tailgate is not closed
properly, but the rest of the vehicle is se‐
cured.
The indicator lamp flashes continuously af‐
ter approx. 10 seconds. The interior motion
sensor is not active.▷The indicator lamp goes out after unlock‐
ing:
The vehicle has not been tampered with.▷If the indicator lamp flashes after unlocking
until the remote control is inserted in the
ignition, but for no longer than approx.
5 minutes:
An alarm has been triggered.
Panic mode
In dangerous situations, trigger the alarm sys‐
tem:
Press the button on the remote control for
at least 3 seconds.
To switch off the alarm: press any button.
Tilt alarm sensor The tilt of the vehicle is monitored.
The alarm system responds in situations such
as attempts to steal a wheel or tow the car.
Interior motion sensor For the sensor to function properly, the win‐
dows and glass sunroof/panoramic glass sun‐
roof must be closed.
Avoiding unintentional alarms The tilt alarm sensor and interior motion sen‐
sor can be switched off together, such as in
the following situations:▷In duplex garages.▷During transport on car-carrying trains, at
sea or on a trailer.▷When animals are to remain in the vehicle.
Switching off the tilt alarm sensor and
interior motion sensor
Press the remote control button again
within 10 seconds after the vehicle is locked.
The indicator lamp lights up for approx. 2 sec‐
onds and then flashes continuously.
The tilt alarm sensor and interior motion sen‐
sor remain switched off until the vehicle is
locked again.
Power windows General information Take the remote control with youTake the remote control with you when
leaving the vehicle so that children, for exam‐
ple, cannot operate the power windows and in‐
jure themselves.◀
Seite 43Opening and closingControls43
Online Edition for Part no. 01 40 2 918 395 - III/13
Page 77 of 345
Sport program and manual mode M/S
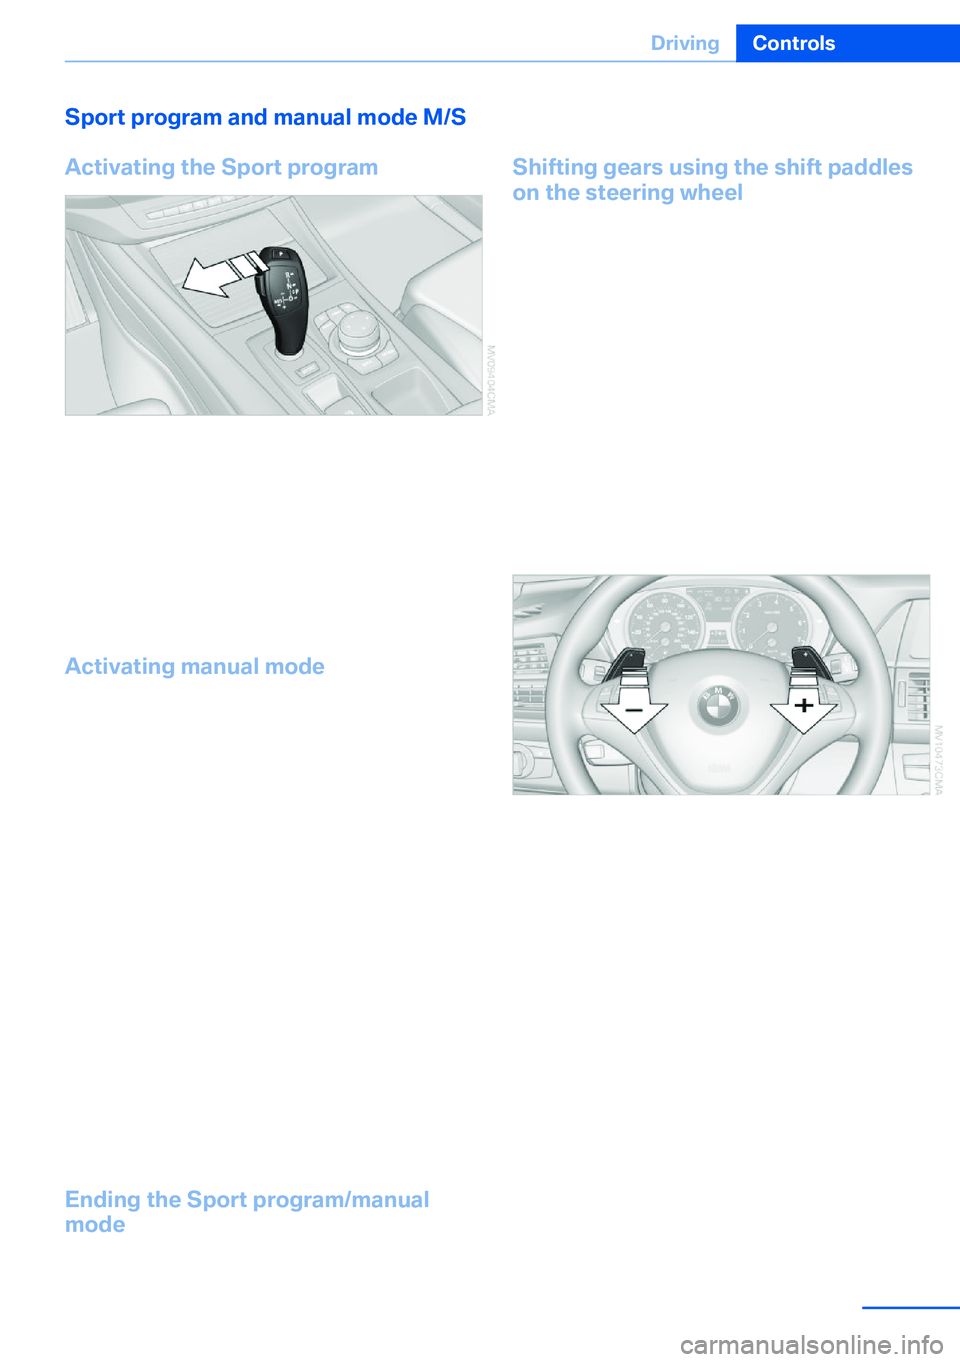
Activating the Sport program
Push the selector lever to the left out of trans‐
mission position D.
The Sport program is activated and DS or the
engaged gear is displayed in the instrument
cluster, for example S4.
This position is recommended for a perform‐
ance-oriented driving style.
Activating manual mode
Push the selector lever to the left out of trans‐
mission position D.
Push the selector lever forward or backward.
Manual mode becomes active and the gear is
changed.
The engaged gear is displayed in the instru‐
ment cluster, e.g., M1.
▷To shift down: press the selector lever for‐
ward.▷To shift up: press the selector lever back‐
ward.
The transmission only shifts up or down if the
rpm and vehicle speed are appropriate. If the
engine speed is too high, the transmission
does not shift down.
The selected gear is briefly displayed in the in‐
strument panel, followed by the current gear.
Ending the Sport program/manual
mode
Push the selector lever to the right.
D is displayed in the instrument cluster.
Shifting gears using the shift paddles
on the steering wheel
The shifting paddles make it possible to
quickly change gears since both hands can re‐
main on the steering wheel.▷If the shift paddles on the steering wheel
are used to shift gears while in automatic
mode D, the transmission temporarily
switches to manual mode.▷If the shift paddles are not used to acceler‐
ate or shift gears for a certain amount of
time, the transmission switches back to
automatic mode D.
With the transmission position M/S selected,
the manual mode remains active.
▷Shift up: pull right shift paddle.▷Shift down: pull left shift paddle.
The vehicle only shifts up or down at appropri‐
ate engine and road speeds, e.g., it does not
shift down if the engine speed is too high.
The selected gear is briefly displayed in the in‐
strument cluster, followed by the current gear.
Seite 77DrivingControls77
Online Edition for Part no. 01 40 2 918 395 - III/13
Page 160 of 345
LoadingVehicle equipment
This chapter describes all series equipment as
well as country-specific and special equipment
offered for this model series.Therefore, it also
describes equipment that may not be found in
your vehicle, for instance due to the selected
special equipment or the country version. This
also applies to safety-related functions and
systems.
General information Overloading the vehicle
To avoid exceeding the approved carry‐
ing capacity of the tires, never overload the ve‐
hicle. Overloading can lead to overheating and
increases the rate at which damage develops
inside the tires. This could result in a sudden
loss of tire inflation pressure.◀
No fluids in the cargo area
Make sure that fluids do not leak into the
cargo area; otherwise, the vehicle may be dam‐
aged.◀
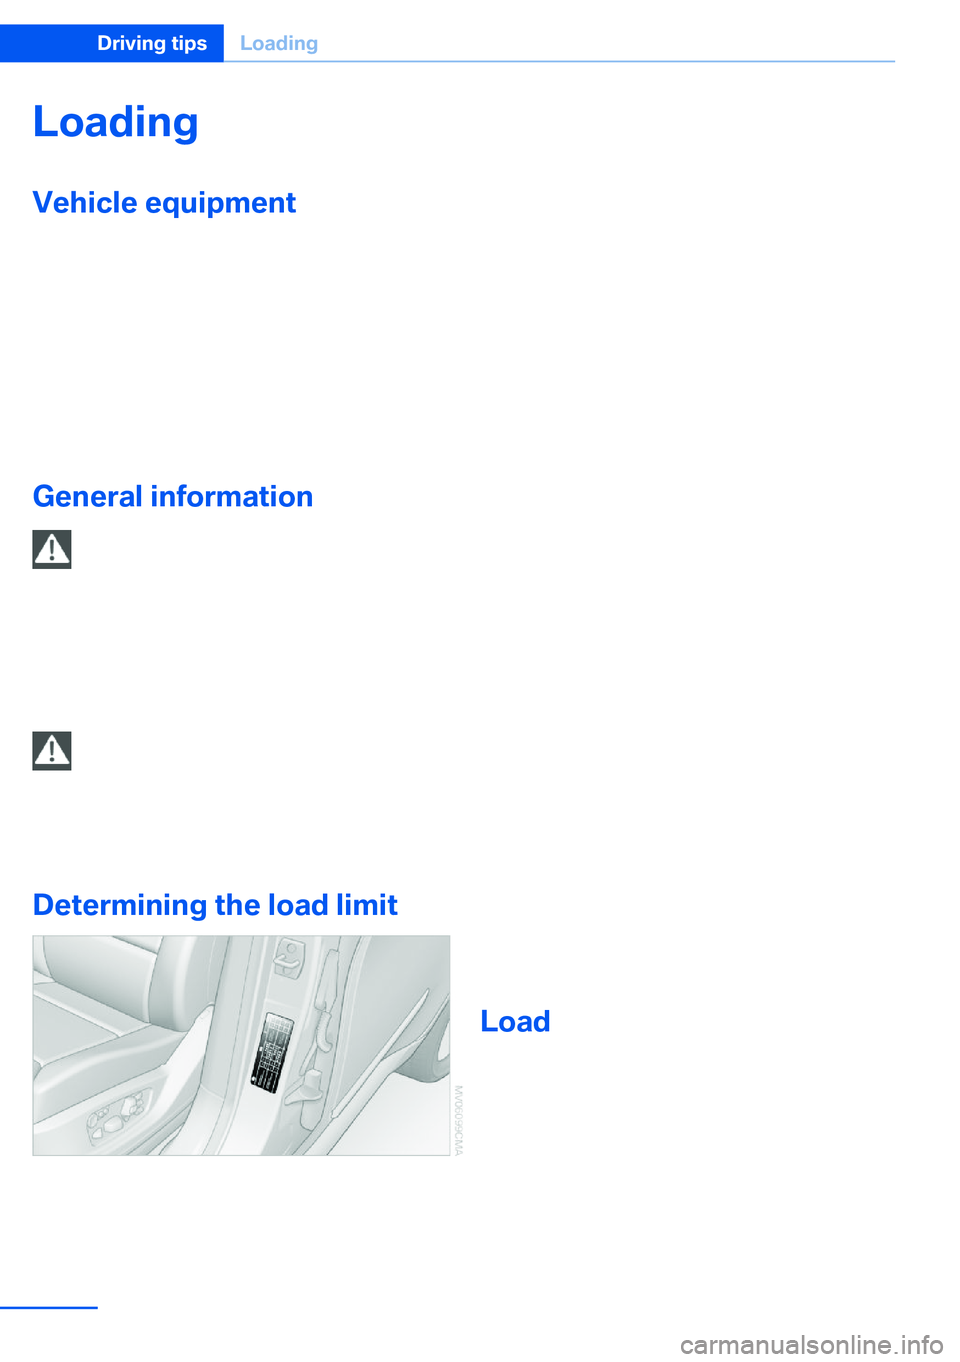
Determining the load limit1.Locate the following statement on your ve‐
hicle’s placard:▷The combined weight of occupants
and cargo should never exceed XXX kgor YYY lbs. Otherwise, damage to the
vehicle and unstable driving situations
may result.2.Determine the combined weight of the
driver and passengers that will be riding in
your vehicle.3.Subtract the combined weight of the driver
and passengers from XXX kilograms or
YYY pounds.4.The resulting figure equals the available
amount of cargo and luggage load ca‐
pacity.
For example, if the YYY amount equals
1,400 lbs and there will be five 150 lbs pas‐
sengers in your vehicle, the amount of
available cargo and luggage load capacity
is 650 lbs: 1,400 lbs minus 750 lbs =
650 lbs.5.Determine the combined weight of lug‐
gage and cargo being loaded on the vehi‐
cle. That weight may not safely exceed the
available cargo and luggage load capacity
calculated in Step 4.6.If your vehicle will be towing a trailer, load
from your trailer will be transfered to your
vehicle. Consult the manual for transport‐
ing a trailer to determine how this may re‐
duce the available cargo and luggage load
capacity of your vehicle.
Load
BMW X5:
Seite 160Driving tipsLoading160
Online Edition for Part no. 01 40 2 918 395 - III/13
Page 220 of 345
DVD system in rearVehicle equipmentThis chapter describes all series equipment as
well as country-specific and special equipment
offered for this model series.Therefore, it also
describes equipment that may not be found in
your vehicle, for instance due to the selected
special equipment or the country version. This
also applies to safety-related functions and
systems.
General information
With the DVD system in the rear you can play
CDs and DVDs with audio, video and image
data. The DVD system can also play data from
attached external audio and video devices. Au‐
dio output is possible both via headphones
and via the vehicle speakers.
You can control the DVD system using the but‐
tons on the CD-/DVD player or using the re‐
mote control.
Some functions are operated using the remote
control.
Enabling DVD system
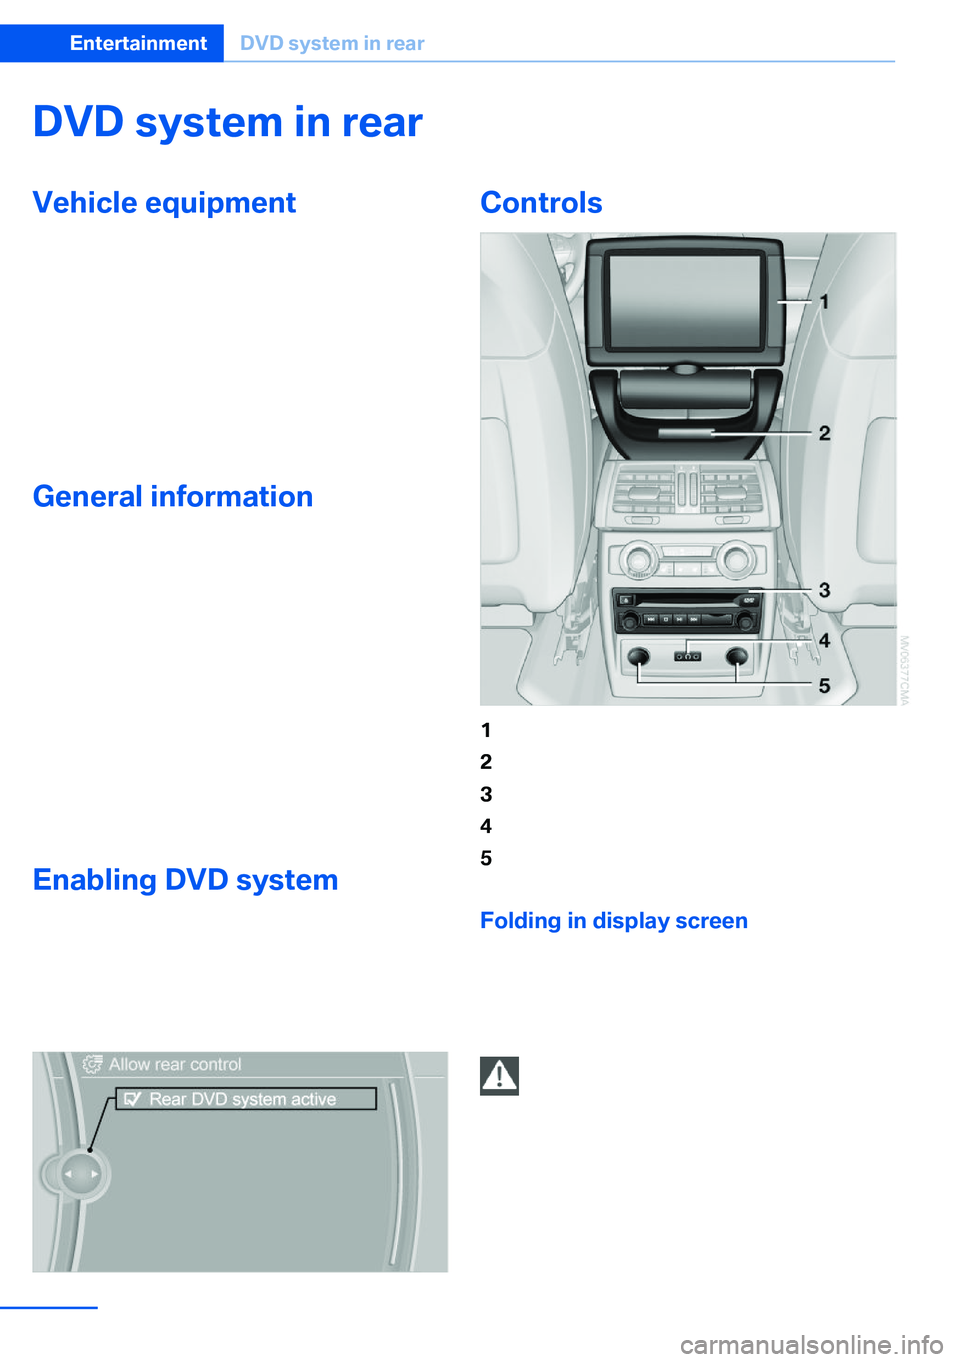
The DVD system can be enabled via iDrive.1."Settings"2."Allow rear control"3."Rear DVD system active"Controls1Display screen2Infrared interface for headphones3CD/DVD player4Headphone connection: jack plug512 V sockets 143
Folding in display screen
When using the ski bag or when transporting
bulky pieces of luggage, the display screen
should be folded in, as otherwise it may be
damaged.
Note when the display screen is folded
down
When the screen is folded down, do not open
the lid of the center armrest or rest your arm on
the screen; otherwise, you may damage the
screen.◀
Seite 220EntertainmentDVD system in rear220
Online Edition for Part no. 01 40 2 918 395 - III/13
Page 312 of 345
CareVehicle equipmentThis chapter describes all series equipment as
well as country-specific and special equipment
offered for this model series.Therefore, it also
describes equipment that may not be found in
your vehicle, for instance due to the selected
special equipment or the country version. This
also applies to safety-related functions and
systems.
Car washes
Notes Steam jets or high-pressure washers
When using steam jets or high-pressure
washers, hold them a sufficient distance away
and use a maximum temperature of
140 ℉/60 ℃.
Holding them too close or using excessively
high pressures or temperatures can cause
damage or preliminary damage that may then lead to long-term damage.
Follow the operating instructions for the high-
pressure washer.◀
Cleaning sensors/cameras with high-
pressure washers
When using high-pressure washers, do not
spray the exterior sensors and cameras, for
Park Distance Control or the backup camera,
for instance, for extended periods of time and
only from a distance of at least 12 in/30 cm.◀
Regularly remove foreign bodies, such as
leaves, from the area below the windshield
when the hood is open.
Wash your vehicle frequently, particularly in
winter.
Intense soiling and road salt can damage the
vehicle.Washing in automatic car washes
Give preference to cloth car washes or those
that use soft brushes in order to avoid paint
damage.
Notes
Note the following:▷Make sure that the wheels and tires are not
damaged by the transport mechanisms.▷Fold in the exterior mirrors; otherwise, they
may be damaged, depending on the width
of the vehicle.▷Deactivate rain sensor, refer to page 74, to
prevent unintentional wiper action.▷BMW X5: deactivate the rear window wiper
and protect it from damage. Ask the car
wash operator about any necessary pro‐
tective measures.▷Remove additional attachments, for in‐
stance a spoiler or telephone antenna, if
there is a risk that these may be damaged.
Guide rails in car washes
Avoid car washes with guide rails higher
than 4 in/10 cm; otherwise, the vehicle body
could be damaged.◀
Before driving into a car wash The vehicle is able to roll if the following steps
are taken.
1.Insert the remote control into the ignition
lock, even with Comfort Access.2.Engage transmission position N.3.Release the parking brake.4.Deactivating Automatic Hold, refer to
page 70.5.Switch the engine off.6.Leave the remote control in the ignition
lock so that the vehicle can roll.Seite 312MobilityCare312
Online Edition for Part no. 01 40 2 918 395 - III/13
Page 332 of 345
Bulb replacement, refer toLamp and bulb replace‐
ment 295
Button for starting the engine, refer to Start/Stop but‐
ton 67
C
Calendar 254
Calibration, driver's seat 55
California Proposition 65 Warning 7
Camera, care 315
Camera, refer to Backup cam‐ era 122
Camera, Side View 127
Camera, Top View 126
Can holder, refer to Cu‐ pholder 149
Car battery, refer to Vehicle battery 304
Car care products 313
Care 312
Care, displays 315
Care, vehicle 313
Cargo 160
Cargo area– Comfort Access 41
Cargo area, capacities 320
Cargo area, enlarging 146
Cargo area lamp, refer to Inte‐ rior lamps 94
Cargo area lid, refer to Tail‐ gate 36, 38
Cargo area, opening/closing, refer to Lower tailgate 38
Cargo area, opening/closing, refer to Tailgate 36, 38
Cargo area, opening from the inside 36
Cargo area, opening from the outside 36
Cargo area, refer to Cargo area 145
Cargo cover, refer to Luggage
compartment roller
cover 145
Cargo, securing with ski bag, refer to Securing cargo 152
Cargo straps, securing cargo 162
Car key, refer to Integrated key/remote control 30
Carpet, care 315
Car phone, installation loca‐ tion, refer to Center arm‐
rest 148
Car phone, refer to Tele‐ phone 236
Car vacuum cleaner, connect‐ ing, refer to Connecting
electrical devices 143
Car wash 312
Catalytic converter, refer to Hot exhaust system 157
CBC, refer to Cornering Brake Control 105
CBS Condition Based Serv‐ ice 293
CD/DVD 200
CD/DVD changer 204
CD/DVD in rear 221
CD/DVD notes 206
CD, refer to Playing audio tracks, rear DVD sys‐
tem 226
CDs, storing 207
Cell phone 236
Cell phone, installation loca‐ tion, refer to Center arm‐
rest 148
Center armrest, front 148
Center armrest, rear 148
Center brake lamp 298, 301
Center console, refer to Around the center con‐
sole 16 Central locking– Comfort Access 40– From the inside 35– Setting the unlocking char‐
acteristics 32
Central locking system
– From the outside 32– Principle 32
Central screen, refer to Con‐
trol Display 19
Changes, technical, refer to Safety 6
Changing wheels/tires 285
Chassis number, refer to En‐ gine compartment 288
Check Control 85
Children, transporting 61
Child restraint fixing system LATCH 62
Child restraint fixing sys‐ tems 61
Child restraint fixing systems, mounting 61
Child safety locks 66
Child seat, mounting 61
Child seats, refer to Trans‐ porting children safely 61
Chrome parts, care 314
Cigarette lighter, connecting electrical devices 143
Cigarette lighter, refer to Lighter 143
Cigarette lighter socket 143
Circulation of air, refer to Re‐ circulated air mode 133
Cleaning, displays 315
Cleaning your BMW, refer to Care 312
Clock 79
Clock, 12h/24h mode 87
Closing
– From the inside 35– From the outside 32
Clothes hooks 149
Cockpit 12
Cold start, refer to Starting the engine 68
Seite 332ReferenceEverything from A to Z332
Online Edition for Part no. 01 40 2 918 395 - III/13
Page 341 of 345

Settings on the Control Dis‐play, changing 87
Shifting, automatic transmis‐ sion with Steptronic 77
Shift paddles 77
Short commands, voice acti‐ vation 322
Side airbags 95
Side View 126
Side windows, refer to Win‐ dows 43
Size, refer to Dimensions 318
Ski bag 151
Slide/tilt glass roof, refer to Glass sunroof 46
Slide/tilt glass roof, refer to Panoramic glass sunroof 45
Slot for remote control 67
Smokers' package, refer to Ashtray 143
Snap-in adapter, mobile phone 247
Snap-in adapter, refer to Storage compartment of
center armrest 148
Snow chains 287
Socket, OBD Onboard Diag‐ nosis 294
Socket, refer to Connecting electrical devices 143
Software applications, iPhone 265
Software part number 236
Software update 218
Soot particulate filter, refer to Diesel particulate filter 157
SOS, refer to Emergency Re‐ quest, initiating 307
Sound output 192, 200
Spare fuse 305
Special destinations, naviga‐ tion 173
Special equipment, series equipment 6
Speed, average 81
Speed limit 86 Speed limit, setting 86
Speedometer 14
Speed, with winter tires 286
Split screen 22
Split screen map set‐ tings 183
Spoken instructions, naviga‐ tion 181
Sport program, automatic transmission with Step‐
tronic 77
Spray nozzles, refer to Clean‐ ing the windshield and head‐
lamps 74
Spray nozzles, refer to Wind‐ shield washer nozzles 74
Stability control systems 105
Start/Stop button 67
Start/Stop button, starting the engine 68
Start/Stop button, switching off the engine 69
Starting the engine 68
Start problems, refer to Jump-starting 308
State/province, selecting for navigation 170
Stations, stored 198
Station, storing 192
Status information, iDrive 22
Status of Owner's Manual 6
Steam jets 312
Steering wheel 60
Steering wheel, adjusting 60
Steering wheel, easy entry/ exit 60
Steering wheel lock 67
Steering with variable transla‐ tion, refer to Active steer‐
ing 110
Steptronic, refer to Sport pro‐ gram and manual mode M/
S 77
Stopping, engine 69
Storage compartment nets 148 Storage compart‐
ments 147, 148
Storage, tires 286
Storing the seat position, re‐ fer to Seat and mirror mem‐
ory 57
Storing the vehicle 315
Street, entering for naviga‐ tion 171
Summer tires, refer to Wheels and tires 275
Summer tires, tread 284
Sunblinds, roller sun‐ blinds 45
Surround View 122
Switches, refer to Cockpit 12
Switching off, engine 69
Switching off, vehicle 69
Switch-on times, parked-car ventilation 137
Symbols 6
T Tachometer 80
Tailgate– Comfort Access 41– Remote control 33
Tailgate, adjusting the open‐
ing height 37, 38
Tailgate, automatic opera‐ tion 38
Tail lamps 297, 300
Tank gauge, refer to Fuel gauge 81
Tasks 255
Technical changes, refer to Safety 6
Technical data 318
Telephone 236
Telephone, adjusting the vol‐ ume 240
Telephone, installation loca‐ tion, refer to Center arm‐
rest 148
TeleService 261
Seite 341Everything from A to ZReference341
Online Edition for Part no. 01 40 2 918 395 - III/13