2013 BMW X3 XDRIVE 28I lock
[x] Cancel search: lockPage 121 of 211
The programs can be combined as necessary.
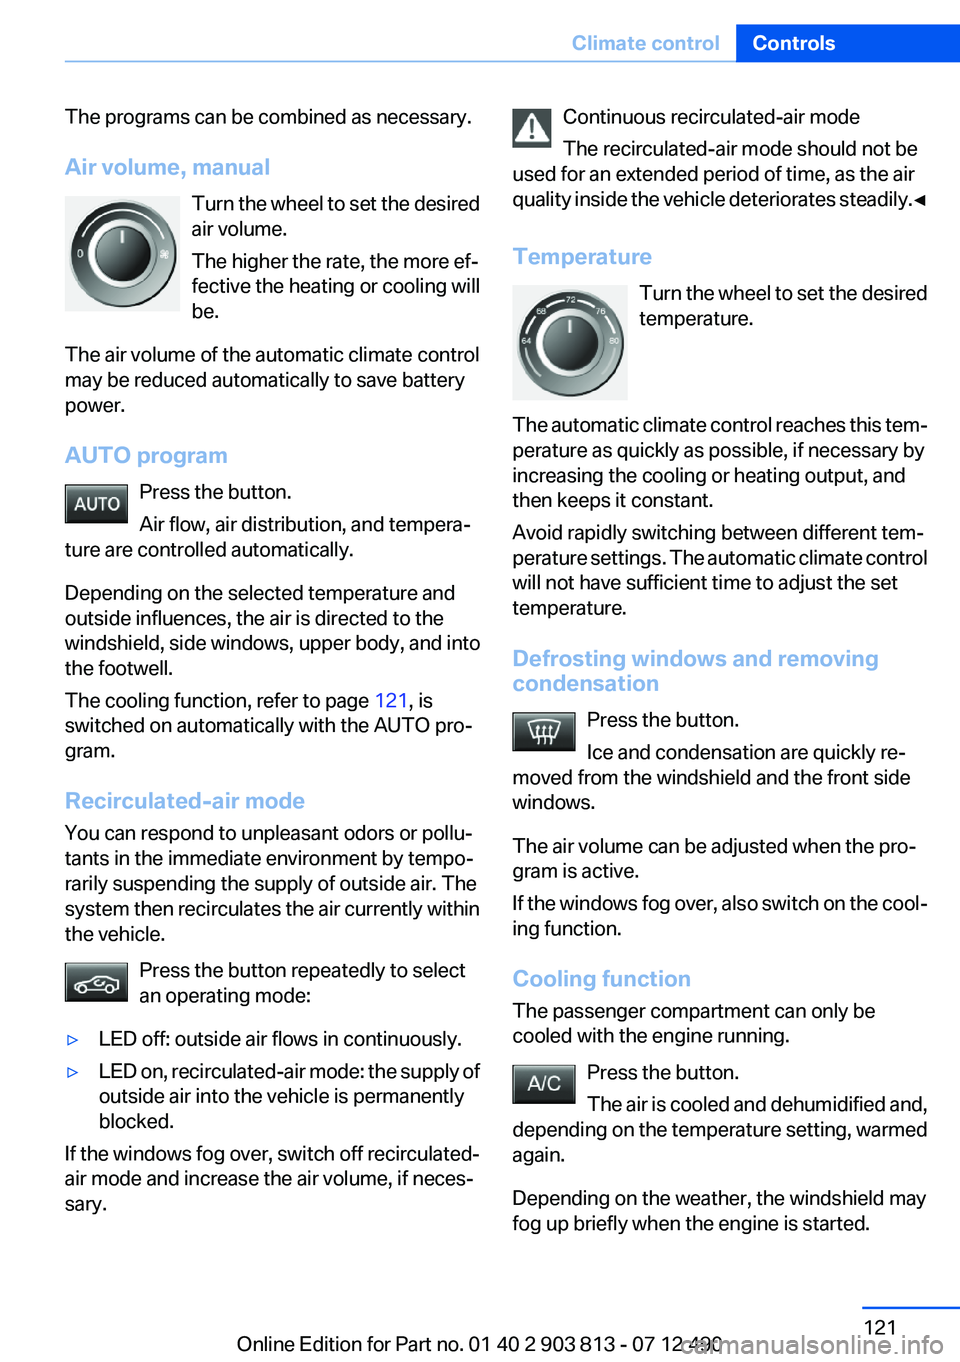
Air volume, manual Turn the wheel to set the desired
air volume.
The higher the rate, the more ef‐
fective the heating or cooling will
be.
The air volume of the automatic climate control
may be reduced automatically to save battery
power.
AUTO program Press the button.
Air flow, air distribution, and tempera‐
ture are controlled automatically.
Depending on the selected temperature and
outside influences, the air is directed to the
windshield, side windows, upper body, and into
the footwell.
The cooling function, refer to page 121, is
switched on automatically with the AUTO pro‐
gram.
Recirculated-air mode
You can respond to unpleasant odors or pollu‐
tants in the immediate environment by tempo‐
rarily suspending the supply of outside air. The
system then recirculates the air currently within
the vehicle.
Press the button repeatedly to select
an operating mode:▷LED off: outside air flows in continuously.▷LED on, recirculated-air mode: the supply of
outside air into the vehicle is permanently
blocked.
If the windows fog over, switch off recirculated-
air mode and increase the air volume, if neces‐
sary.
Continuous recirculated-air mode
The recirculated-air mode should not be
used for an extended period of time, as the air
quality inside the vehicle deteriorates steadily. ◀
Temperature Turn the wheel to set the desired
temperature.
The automatic climate control reaches this tem‐
perature as quickly as possible, if necessary by
increasing the cooling or heating output, and
then keeps it constant.
Avoid rapidly switching between different tem‐
perature settings. The automatic climate control
will not have sufficient time to adjust the set
temperature.
Defrosting windows and removing
condensation
Press the button.
Ice and condensation are quickly re‐
moved from the windshield and the front side
windows.
The air volume can be adjusted when the pro‐
gram is active.
If the windows fog over, also switch on the cool‐
ing function.
Cooling function
The passenger compartment can only be
cooled with the engine running.
Press the button.
The air is cooled and dehumidified and,
depending on the temperature setting, warmed
again.
Depending on the weather, the windshield may
fog up briefly when the engine is started.Seite 121Climate controlControls121
Online Edition for Part no. 01 40 2 903 813 - 07 12 490
Page 124 of 211

Air flow, manual
To be able to manually adjust the air flow, switch
off the AUTO program first.
Press the left or right side of the button:
decrease or increase air flow.
The selected air flow is shown on the display of
the automatic climate control.
The air flow of the automatic climate control may
be reduced automatically to save battery power.
Automatic recirculated-air control/
recirculated-air mode
You can respond to unpleasant odors or pollu‐
tants in the immediate environment by tempo‐
rarily suspending the supply of outside air. The
system then recirculates the air currently within
the vehicle.
Press the button repeatedly to select
an operating mode:▷LEDs off: outside air flows in continuously.▷Left LED on, automatic recirculated-air con‐
trol: a sensor detects pollutants in the out‐
side air and controls the shutoff automati‐
cally.▷Right LED on, recirculated-air mode: the
supply of outside air into the vehicle is per‐
manently blocked.
If the windows are fogged over, switch off the
recirculated-air mode and press the AUTO but‐
ton to utilize the condensation sensor. Make
sure that air can flow onto the windshield.
Continuous recirculated-air mode
The recirculated-air mode should not be
used for an extended period of time, as the air
quality inside the vehicle deteriorates steadily. ◀
ALL program Press the button.
The current setting or later settings of
the temperature on the driver's side are trans‐
ferred to the front passenger side.
The program is switched off if the settings on
the front passenger side are changed.
Defrosting windows and removing
condensation
Press the button.
Ice and condensation are quickly re‐
moved from the windshield and the front side
windows.
The air flow can be adjusted when the program
is active.
If the windows are fogged over, you can also
switch on the cooling function or press the
AUTO button to utilize the condensation sensor.
Cooling function
The passenger compartment can only be
cooled with the engine running.
Press the button.
The air is cooled and dehumidified and,
depending on the temperature setting, warmed
again.
Depending on the weather, the windshield may
fog up briefly when the engine is started.
The cooling function is switched on automati‐
cally with the AUTO program.
When using the automatic climate control, con‐
densation water, refer to page 142, develops
that exits underneath the vehicle.
Rear window defroster Press the button.
The rear window defroster switches off
automatically after a certain period of time.
Switching the system on/off
Switching off Press and hold the left button until the
control switches off.Seite 124ControlsClimate control124
Online Edition for Part no. 01 40 2 903 813 - 07 12 490
Page 131 of 211
Cargo area
Cargo cover
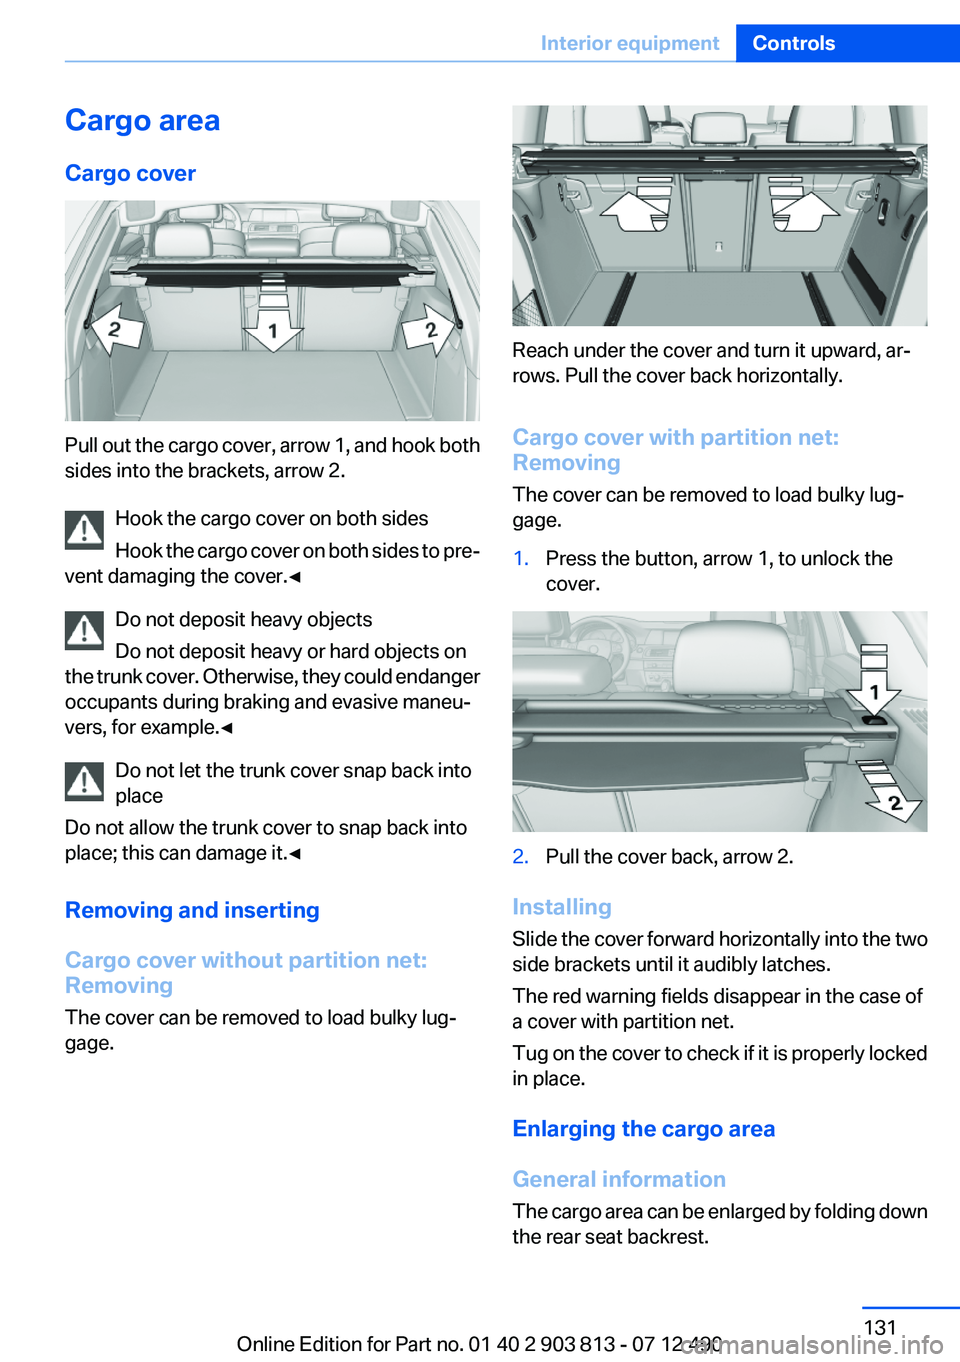
Pull out the cargo cover, arrow 1, and hook both
sides into the brackets, arrow 2.
Hook the cargo cover on both sides
Hook the cargo cover on both sides to pre‐
vent damaging the cover.◀
Do not deposit heavy objects
Do not deposit heavy or hard objects on
the trunk cover. Otherwise, they could endanger
occupants during braking and evasive maneu‐
vers, for example.◀
Do not let the trunk cover snap back into
place
Do not allow the trunk cover to snap back into
place; this can damage it.◀
Removing and inserting
Cargo cover without partition net:
Removing
The cover can be removed to load bulky lug‐
gage.
Reach under the cover and turn it upward, ar‐
rows. Pull the cover back horizontally.
Cargo cover with partition net:
Removing
The cover can be removed to load bulky lug‐
gage.
1.Press the button, arrow 1, to unlock the
cover.2.Pull the cover back, arrow 2.
Installing
Slide the cover forward horizontally into the two
side brackets until it audibly latches.
The red warning fields disappear in the case of
a cover with partition net.
Tug on the cover to check if it is properly locked
in place.
Enlarging the cargo area
General information
The cargo area can be enlarged by folding down
the rear seat backrest.
Seite 131Interior equipmentControls131
Online Edition for Part no. 01 40 2 903 813 - 07 12 490
Page 132 of 211
The rear seat backrest is divided into two parts
at a ratio of 60 to 40.
If equipped with through-loading system: the
rear seat backrest is divided in the ratio 40–20–
40. The sides and the middle section can be
folded down separately.
Danger of pinching
Before folding down the rear seat backr‐
ests, ensure that the area of movement of the
backrests is clear. In particular, ensure that no
one is located in or reaches into the area of
movement of the rear seat backrests when the
middle section is folded down. Otherwise, injury
or damage may result.◀
Locking the backrests
Before letting passengers ride in the rear,
engage the seat backrests, locking them in
place. Otherwise, there is the danger of an ac‐
cident due to unexpected seat movement.◀
Ensure that the lock is securely engaged
When folding back the backrest, be sure
that it locks in place securely. The red warning
field in the control display disappears. If it is not
properly engaged, transported cargo could en‐
ter the passenger compartment during braking
or evasive maneuvers and endanger the vehicle
occupants.◀
Using the middle safety belt
If the middle safety belt in the rear is used,
the larger section of the backrest must be
locked. Otherwise, the safety belt will not have
a restraining effect.◀
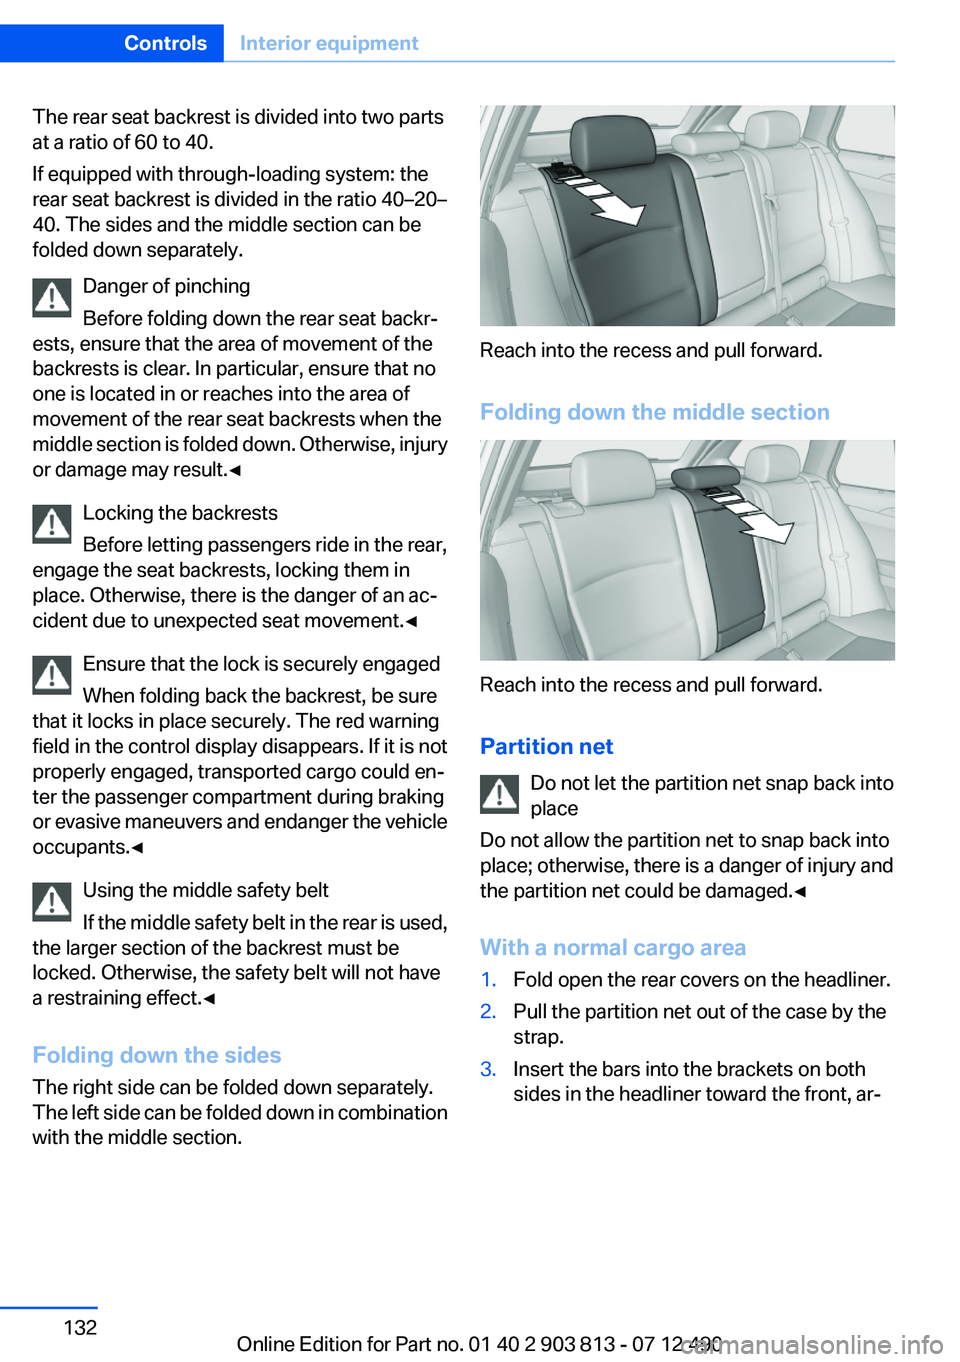
Folding down the sides
The right side can be folded down separately.
The left side can be folded down in combination
with the middle section.
Reach into the recess and pull forward.
Folding down the middle section
Reach into the recess and pull forward.
Partition net Do not let the partition net snap back into
place
Do not allow the partition net to snap back into
place; otherwise, there is a danger of injury and
the partition net could be damaged.◀
With a normal cargo area
1.Fold open the rear covers on the headliner.2.Pull the partition net out of the case by the
strap.3.Insert the bars into the brackets on both
sides in the headliner toward the front, ar‐Seite 132ControlsInterior equipment132
Online Edition for Part no. 01 40 2 903 813 - 07 12 490
Page 133 of 211
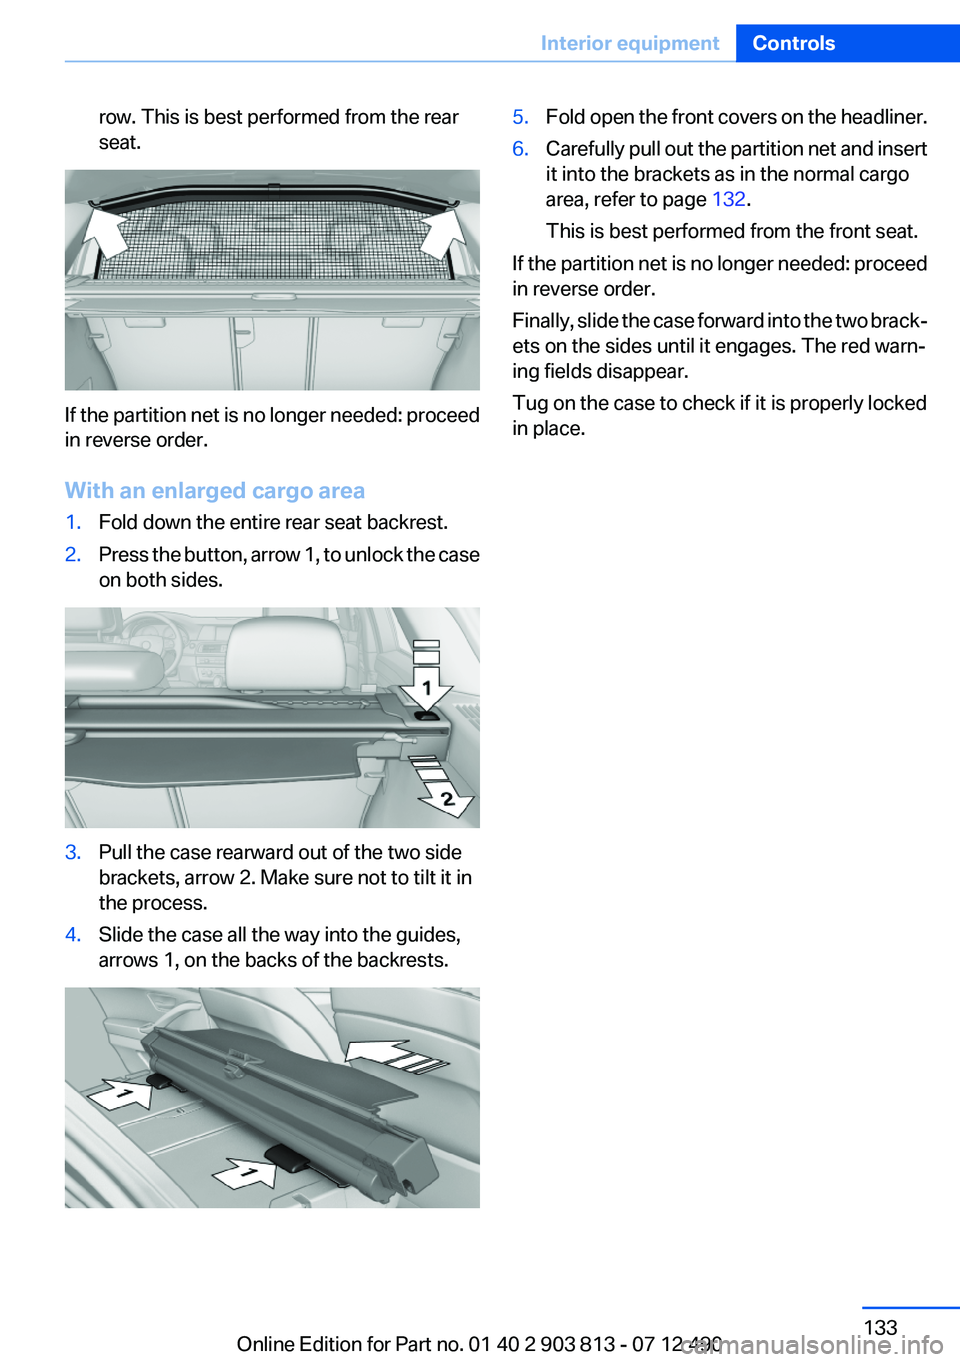
row. This is best performed from the rear
seat.
If the partition net is no longer needed: proceed
in reverse order.
With an enlarged cargo area
1.Fold down the entire rear seat backrest.2.Press the button, arrow 1, to unlock the case
on both sides.3.Pull the case rearward out of the two side
brackets, arrow 2. Make sure not to tilt it in
the process.4.Slide the case all the way into the guides,
arrows 1, on the backs of the backrests.5.Fold open the front covers on the headliner.6.Carefully pull out the partition net and insert
it into the brackets as in the normal cargo
area, refer to page 132.
This is best performed from the front seat.
If the partition net is no longer needed: proceed
in reverse order.
Finally, slide the case forward into the two brack‐
ets on the sides until it engages. The red warn‐
ing fields disappear.
Tug on the case to check if it is properly locked
in place.
Seite 133Interior equipmentControls133
Online Edition for Part no. 01 40 2 903 813 - 07 12 490
Page 134 of 211
Storage compartmentsVehicle equipment
All standard, country-specific and optional
equipment that is offered in the model series is
described in this chapter. Therefore, equipment
is also described that is not available in a vehicle,
e. g., because of the selected optional equip‐
ment or country variant. This also applies for
safety-related functions and systems.
Notes No loose objects in the passenger com‐
partment
Do not stow any objects in the passenger com‐
partment without securing them; otherwise,
they may present a danger to occupants for in‐
stance during braking and avoidance maneu‐
vers.◀
Do not place anti-slip mats on the dash‐
board
Do not place anti-slip mats on the dashboard.
The mat materials could damage the dash‐
board.◀
Storage compartments
The following storage compartments are avail‐
able in the vehicle interior:▷Glove compartment on the front passenger
side, refer to page 134.▷Storage compartment in the front center
armrest, refer to page 135.▷Compartments in the doors.▷Pockets on the backrests of the front seats.▷Net in the front passenger footwell.Glove compartment
Front passenger side
Opening
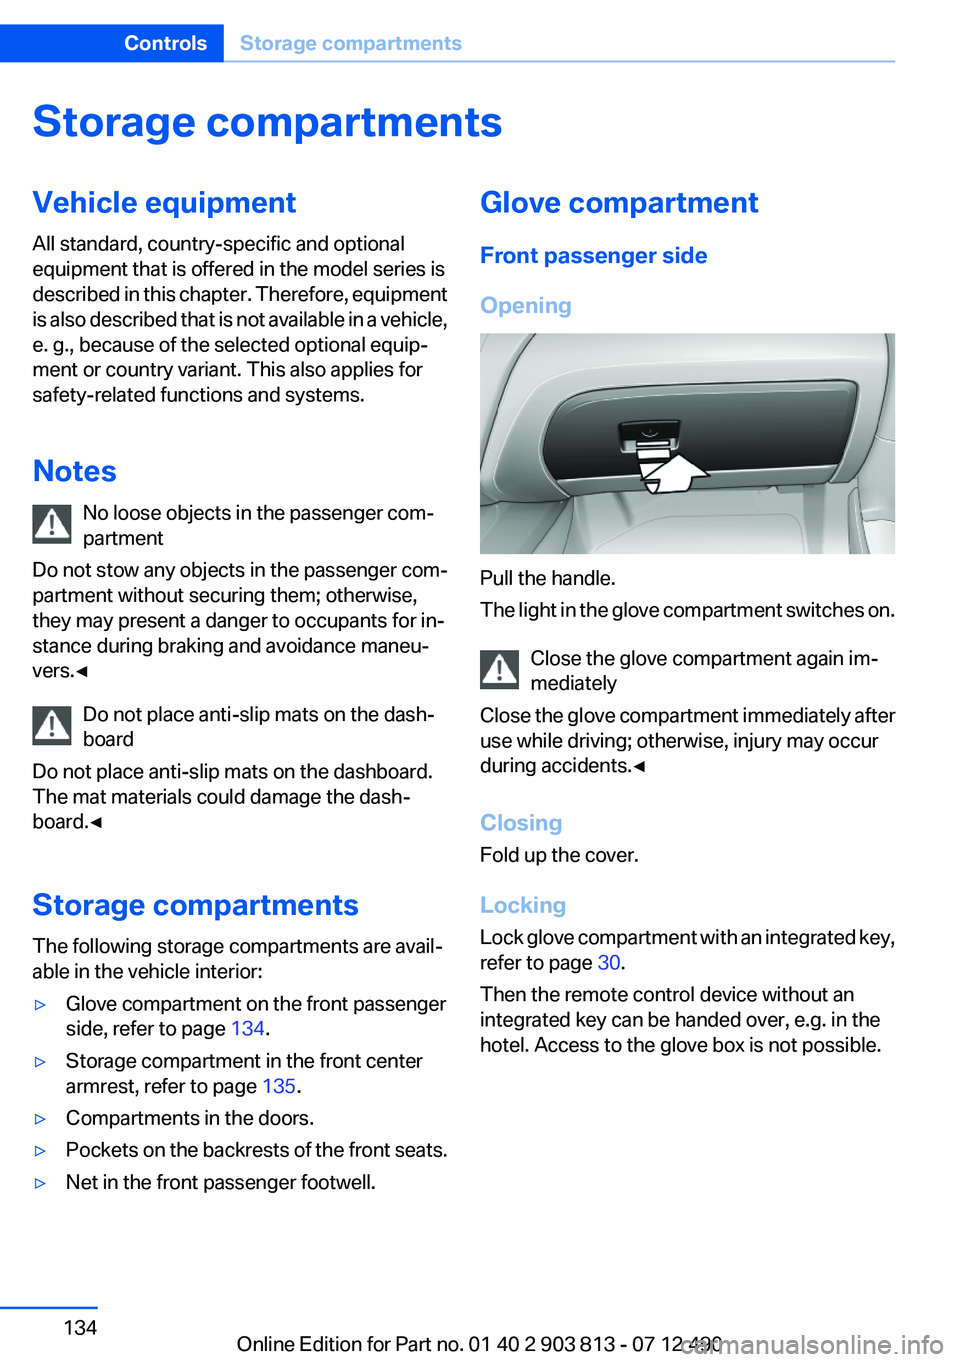
Pull the handle.
The light in the glove compartment switches on.
Close the glove compartment again im‐
mediately
Close the glove compartment immediately after
use while driving; otherwise, injury may occur
during accidents.◀
Closing
Fold up the cover.
Locking
Lock glove compartment with an integrated key,
refer to page 30.
Then the remote control device without an
integrated key can be handed over, e.g. in the
hotel. Access to the glove box is not possible.
Seite 134ControlsStorage compartments134
Online Edition for Part no. 01 40 2 903 813 - 07 12 490
Page 152 of 211
RefuelingVehicle equipment
All standard, country-specific and optional
equipment that is offered in the model series is
described in this chapter. Therefore, equipment
is also described that is not available in a vehicle,
e. g., because of the selected optional equip‐
ment or country variant. This also applies for
safety-related functions and systems.
General information Refuel promptly
Refuel no later than at a range of
30 miles/50 km, or operation of the engine is not
ensured and damage may occur.◀
Fuel cap
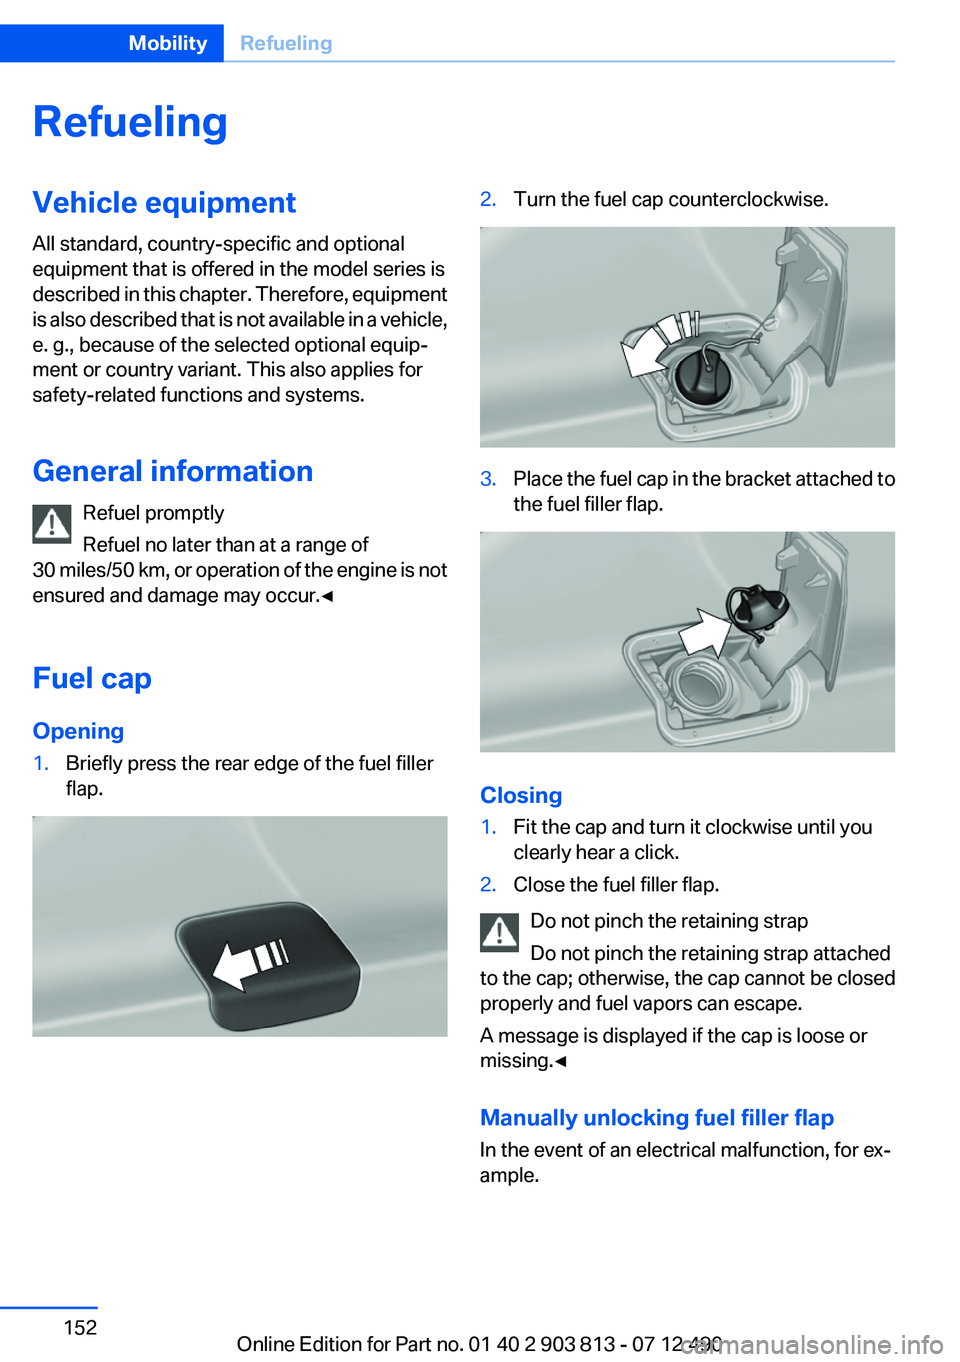
Opening1.Briefly press the rear edge of the fuel filler
flap.2.Turn the fuel cap counterclockwise.3.Place the fuel cap in the bracket attached to
the fuel filler flap.
Closing
1.Fit the cap and turn it clockwise until you
clearly hear a click.2.Close the fuel filler flap.
Do not pinch the retaining strap
Do not pinch the retaining strap attached
to the cap; otherwise, the cap cannot be closed
properly and fuel vapors can escape.
A message is displayed if the cap is loose or
missing.◀
Manually unlocking fuel filler flap
In the event of an electrical malfunction, for ex‐
ample.
Seite 152MobilityRefueling152
Online Edition for Part no. 01 40 2 903 813 - 07 12 490
Page 164 of 211
Never reach into the engine compartment
Never reach into the intermediate spaces
or gaps in the engine compartment. Otherwise,
there is risk of injury, e.g. from rotating or hot
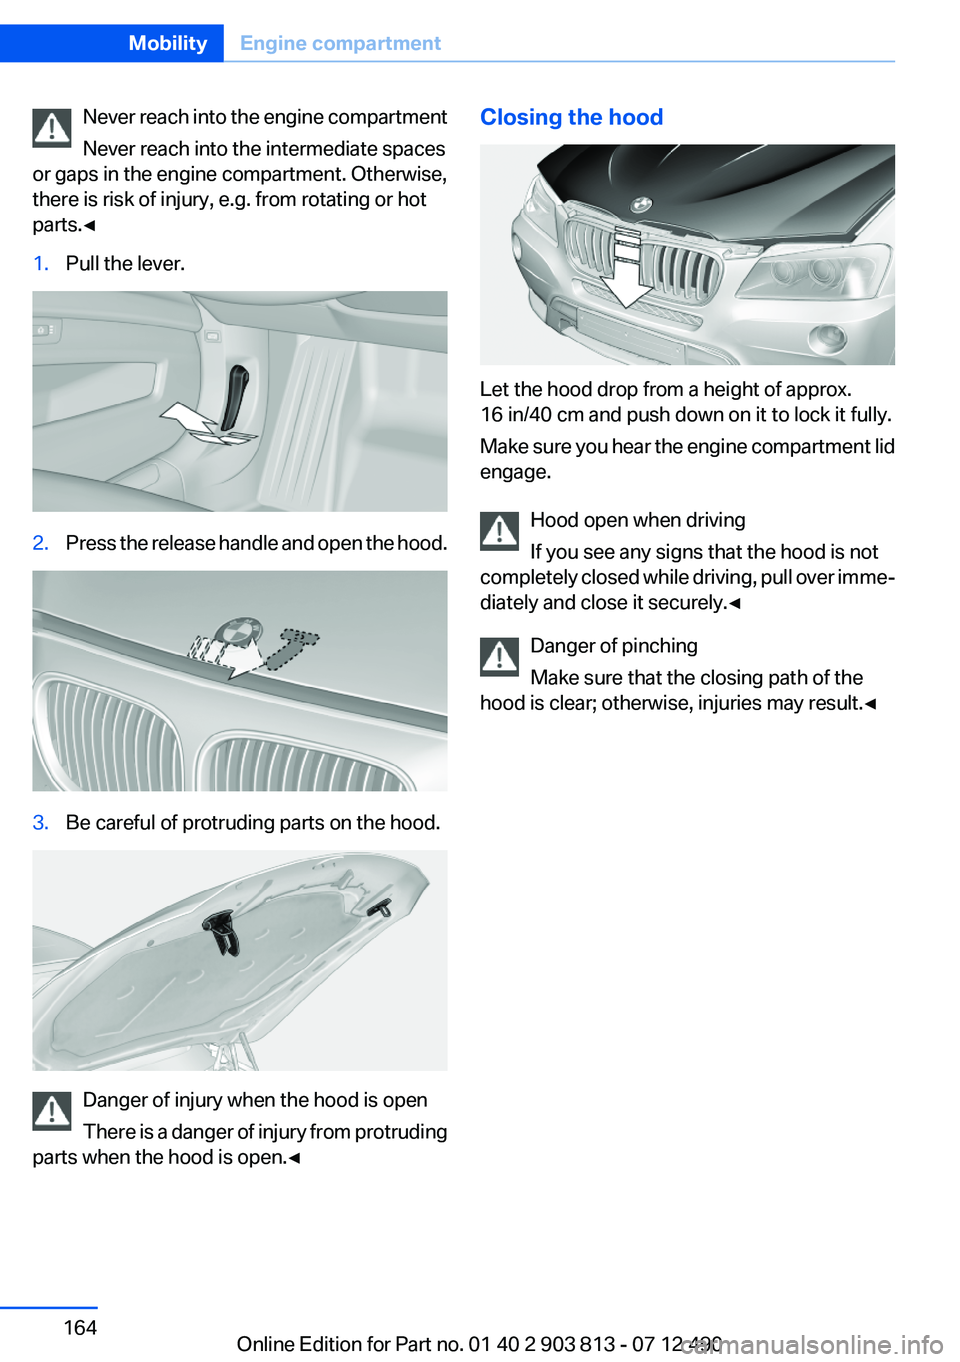
parts.◀1.Pull the lever.2.Press the release handle and open the hood.3.Be careful of protruding parts on the hood.
Danger of injury when the hood is open
There is a danger of injury from protruding
parts when the hood is open.◀
Closing the hood
Let the hood drop from a height of approx.
16 in/40 cm and push down on it to lock it fully.
Make sure you hear the engine compartment lid
engage.
Hood open when driving
If you see any signs that the hood is not
completely closed while driving, pull over imme‐
diately and close it securely.◀
Danger of pinching
Make sure that the closing path of the
hood is clear; otherwise, injuries may result.◀
Seite 164MobilityEngine compartment164
Online Edition for Part no. 01 40 2 903 813 - 07 12 490