2013 BMW X3 XDRIVE 28I steering
[x] Cancel search: steeringPage 62 of 211
When Automatic Hold is activated: press the
accelerator.
After the engine starts, accelerate as usual.
Safety mode
After the engine switches off automatically, it
will not start again automatically if any one of the
following conditions are met.
▷The driver's safety belt is unbuckled and the
driver's door is open.▷The hood was unlocked.
Some indicator lamps light up for varying
lengths of time.
The engine can only be started via the Start/
Stop button.
Note
Even if driving away was not intended, the de‐
activated engine starts up automatically in the
following situations:
▷Excessive warming of the passenger com‐
partment when the cooling function is
switched on.▷The steering wheel is turned.▷Automatic transmission: the transmission
position is changed from D to N, R, or M/S.▷Automatic transmission: the transmission
position is changed from P to N, D, R, or M/
S.▷Fogging of the windows when the automatic
climate control is switched on.▷The vehicle battery charge is very low.▷Excessive cooling of the passenger com‐
partment when the heating is switched on.
Preventing an automatic engine stop
with automatic transmission
The concept
To make it possible to drive away very quickly,
such as at an intersection, the automatic engine
stop can be actively prevented.
Preventing an engine stop using the
brake pedal
The engine stop can be actively prevented
within one second after the vehicle comes to a
standstill.▷Immediately after the vehicle comes to a
standstill, briefly press the brake pedal
forcefully.▷Then press the brake pedal with normal
braking force.
Activating/deactivating the system
manually
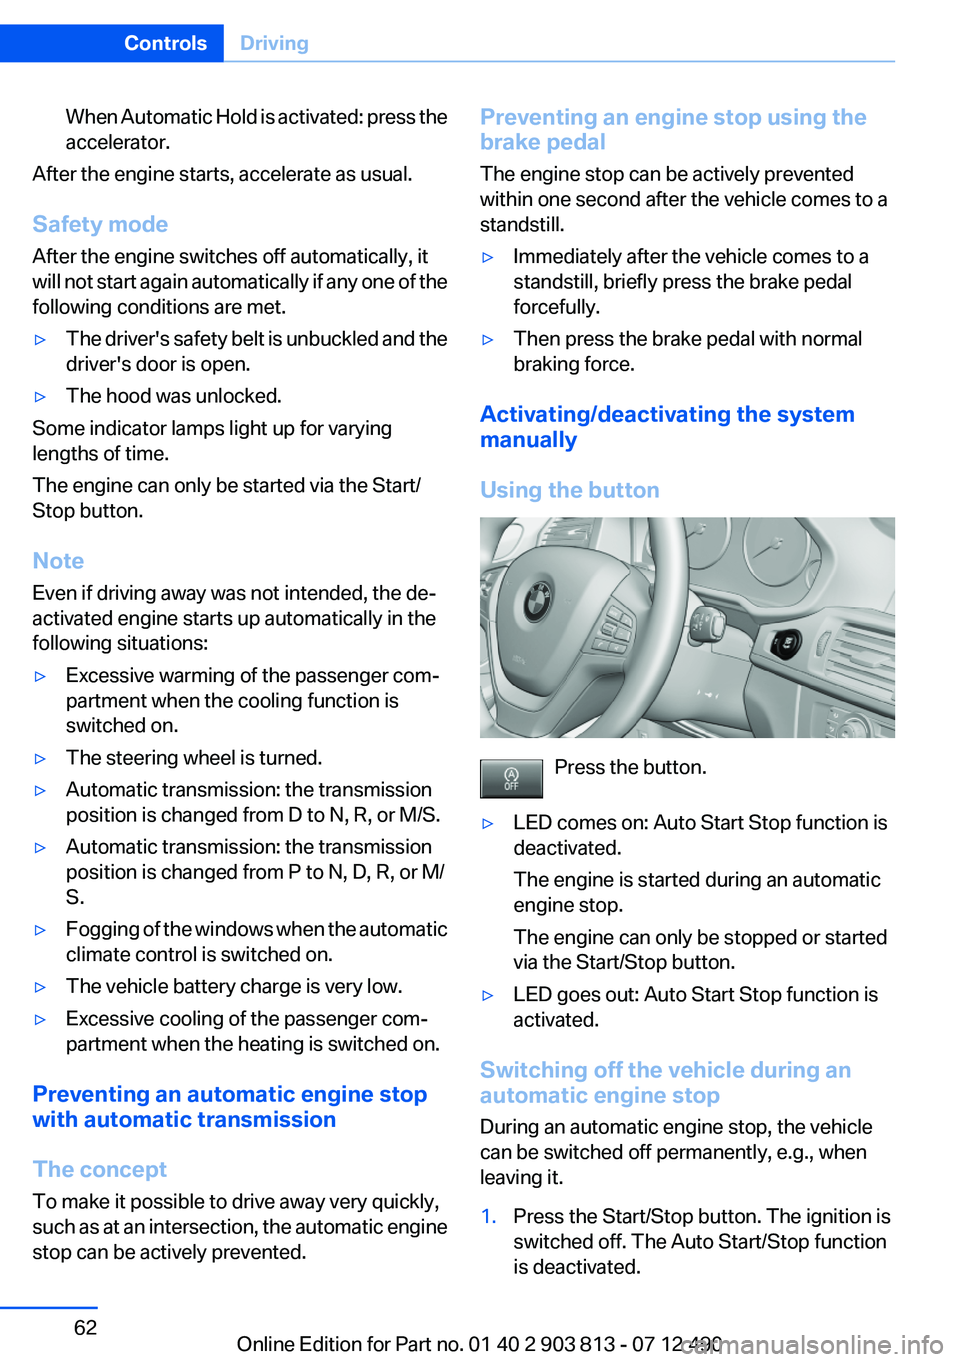
Using the button
Press the button.
▷LED comes on: Auto Start Stop function is
deactivated.
The engine is started during an automatic
engine stop.
The engine can only be stopped or started
via the Start/Stop button.▷LED goes out: Auto Start Stop function is
activated.
Switching off the vehicle during an
automatic engine stop
During an automatic engine stop, the vehicle
can be switched off permanently, e.g., when
leaving it.
1.Press the Start/Stop button. The ignition is
switched off. The Auto Start/Stop function
is deactivated.Seite 62ControlsDriving62
Online Edition for Part no. 01 40 2 903 813 - 07 12 490
Page 63 of 211
Automatic transmission: the transmission
position P is engaged automatically.2.Set the parking brake.
Engine start as usual via Start/Stop button.
Automatic deactivation
In certain situations, the Auto Start/Stop func‐
tion is deactivated automatically for safety rea‐
sons, such as when the driver is detected to be
absent.
Malfunction
The Auto Start/Stop function no longer
switches of the engine automatically. A Check
Control message is displayed. It is possible to
continue driving. Have the system checked.
Parking brake
The concept
The parking brake is used to prevent the vehicle
from rolling when it is parked.
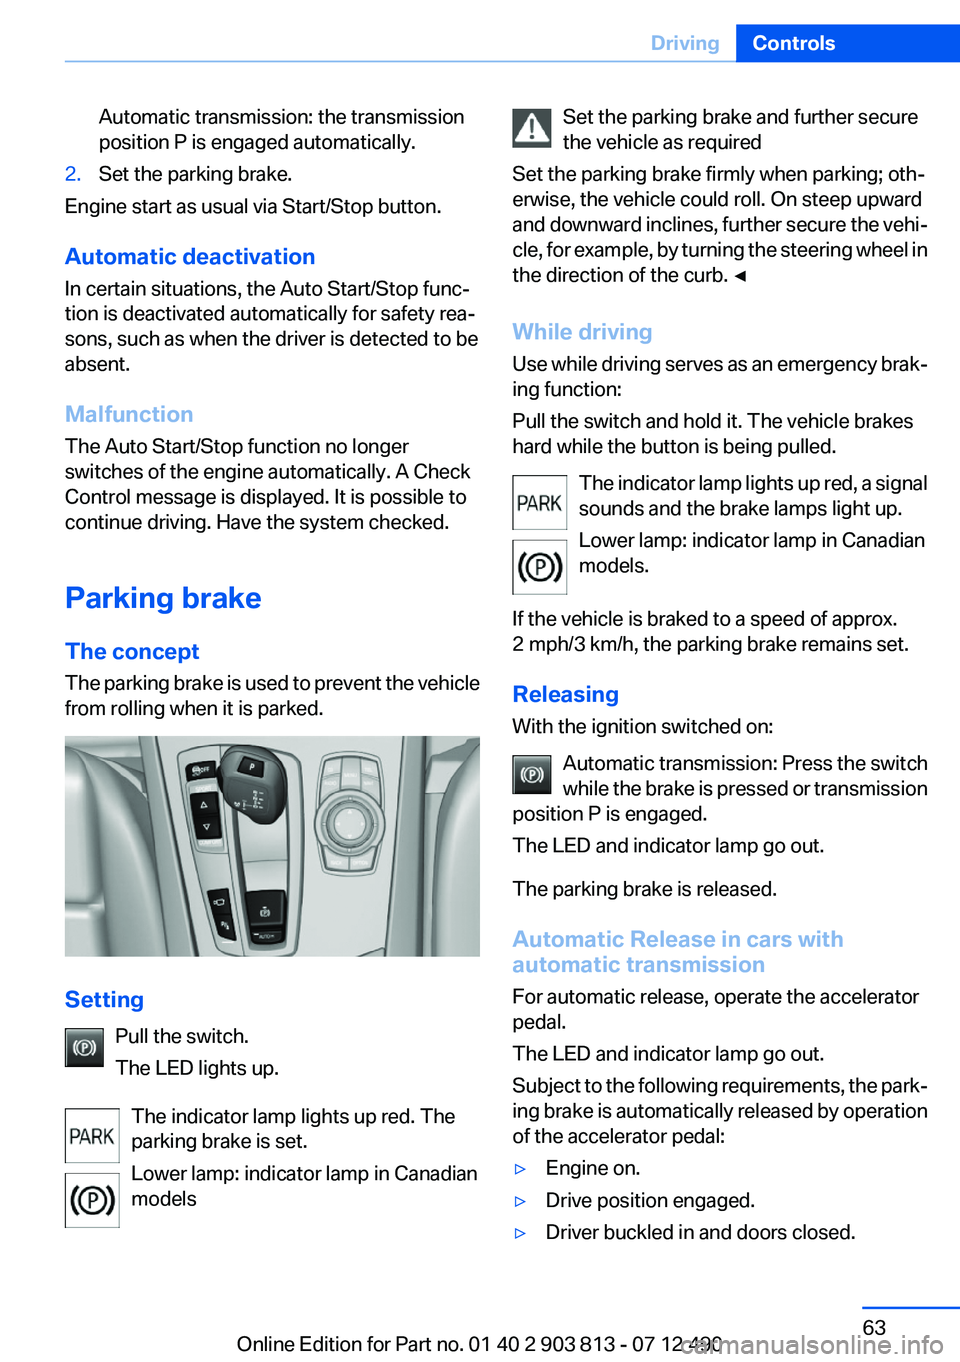
Setting
Pull the switch.
The LED lights up.
The indicator lamp lights up red. The
parking brake is set.
Lower lamp: indicator lamp in Canadian
models
Set the parking brake and further secure
the vehicle as required
Set the parking brake firmly when parking; oth‐
erwise, the vehicle could roll. On steep upward
and downward inclines, further secure the vehi‐
cle, for example, by turning the steering wheel in
the direction of the curb. ◀
While driving
Use while driving serves as an emergency brak‐
ing function:
Pull the switch and hold it. The vehicle brakes
hard while the button is being pulled.
The indicator lamp lights up red, a signal
sounds and the brake lamps light up.
Lower lamp: indicator lamp in Canadian
models.
If the vehicle is braked to a speed of approx.
2 mph/3 km/h, the parking brake remains set.
Releasing
With the ignition switched on:
Automatic transmission: Press the switch
while the brake is pressed or transmission
position P is engaged.
The LED and indicator lamp go out.
The parking brake is released.
Automatic Release in cars with
automatic transmission
For automatic release, operate the accelerator
pedal.
The LED and indicator lamp go out.
Subject to the following requirements, the park‐
ing brake is automatically released by operation
of the accelerator pedal:▷Engine on.▷Drive position engaged.▷Driver buckled in and doors closed.Seite 63DrivingControls63
Online Edition for Part no. 01 40 2 903 813 - 07 12 490
Page 67 of 211

Intermittent operation or rain sensor
The concept
The rain sensor automatically controls the time
between wipes depending on the intensity of
the rainfall. The sensor is located on the wind‐
shield, directly behind the interior rearview mir‐
ror.
Activating/deactivating
Press the button on the wiper lever.
The LED in the steering column stalk lights up.
Deactivate the rain sensor in car washes
Deactivate the rain sensor when passing
through an automatic car wash; otherwise, dam‐
age could be caused by undesired wiper activa‐
tion.◀
Setting the frequency or sensitivity of
the rain sensor
Turn the thumbwheel.
Clean the windshield, headlamps
Pull the lever.
The system sprays washer fluid on the wind‐
shield and activates the wipers briefly.
In addition, the headlamps are cleaned at regular
intervals when the vehicle lights are switched
on.
Do not use the washer system at freezing
temperatures
Do not use the washers if there is any danger
that the fluid will freeze on the windshield; oth‐
erwise, your vision could be obscured. For this
reason, use antifreeze.
Avoid using the washer when the reservoir is
empty; otherwise, you could damage the
pump.◀
Windshield washer nozzles
The windshield washer nozzles are automati‐
cally heated while the ignition is switched on.
Switching on the rear window wiper
Seite 67DrivingControls67
Online Edition for Part no. 01 40 2 903 813 - 07 12 490
Page 70 of 211
Sport program DS and manual mode M/
S
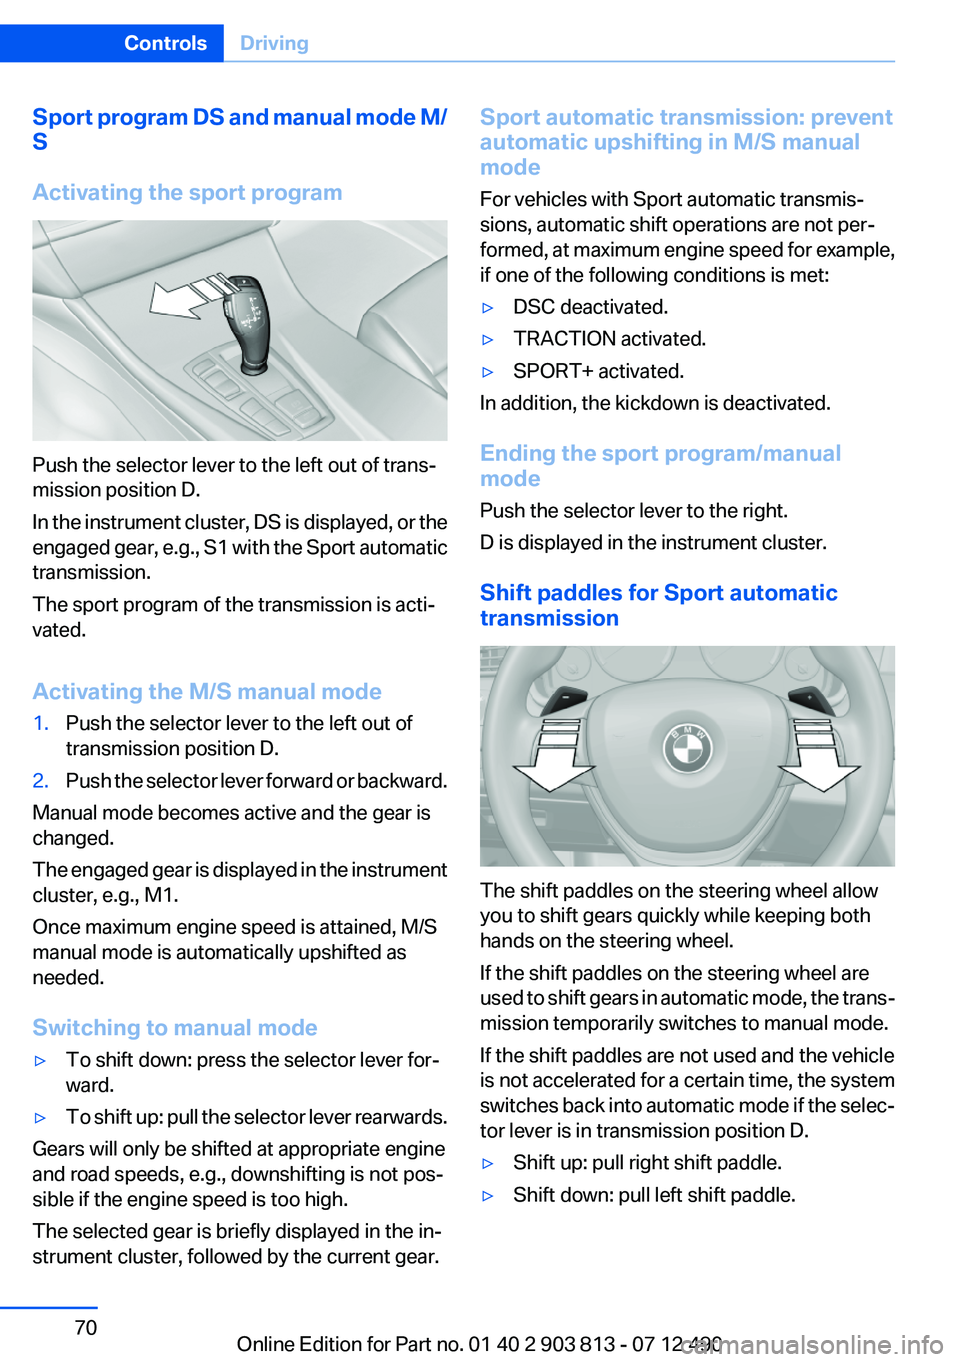
Activating the sport program
Push the selector lever to the left out of trans‐
mission position D.
In the instrument cluster, DS is displayed, or the
engaged gear, e.g., S1 with the Sport automatic
transmission.
The sport program of the transmission is acti‐
vated.
Activating the M/S manual mode
1.Push the selector lever to the left out of
transmission position D.2.Push the selector lever forward or backward.
Manual mode becomes active and the gear is
changed.
The engaged gear is displayed in the instrument
cluster, e.g., M1.
Once maximum engine speed is attained, M/S
manual mode is automatically upshifted as
needed.
Switching to manual mode
▷To shift down: press the selector lever for‐
ward.▷To shift up: pull the selector lever rearwards.
Gears will only be shifted at appropriate engine
and road speeds, e.g., downshifting is not pos‐
sible if the engine speed is too high.
The selected gear is briefly displayed in the in‐
strument cluster, followed by the current gear.
Sport automatic transmission: prevent
automatic upshifting in M/S manual
mode
For vehicles with Sport automatic transmis‐
sions, automatic shift operations are not per‐
formed, at maximum engine speed for example,
if one of the following conditions is met:▷DSC deactivated.▷TRACTION activated.▷SPORT+ activated.
In addition, the kickdown is deactivated.
Ending the sport program/manual
mode
Push the selector lever to the right.
D is displayed in the instrument cluster.
Shift paddles for Sport automatic
transmission
The shift paddles on the steering wheel allow
you to shift gears quickly while keeping both
hands on the steering wheel.
If the shift paddles on the steering wheel are
used to shift gears in automatic mode, the trans‐
mission temporarily switches to manual mode.
If the shift paddles are not used and the vehicle
is not accelerated for a certain time, the system
switches back into automatic mode if the selec‐
tor lever is in transmission position D.
▷Shift up: pull right shift paddle.▷Shift down: pull left shift paddle.Seite 70ControlsDriving70
Online Edition for Part no. 01 40 2 903 813 - 07 12 490
Page 75 of 211
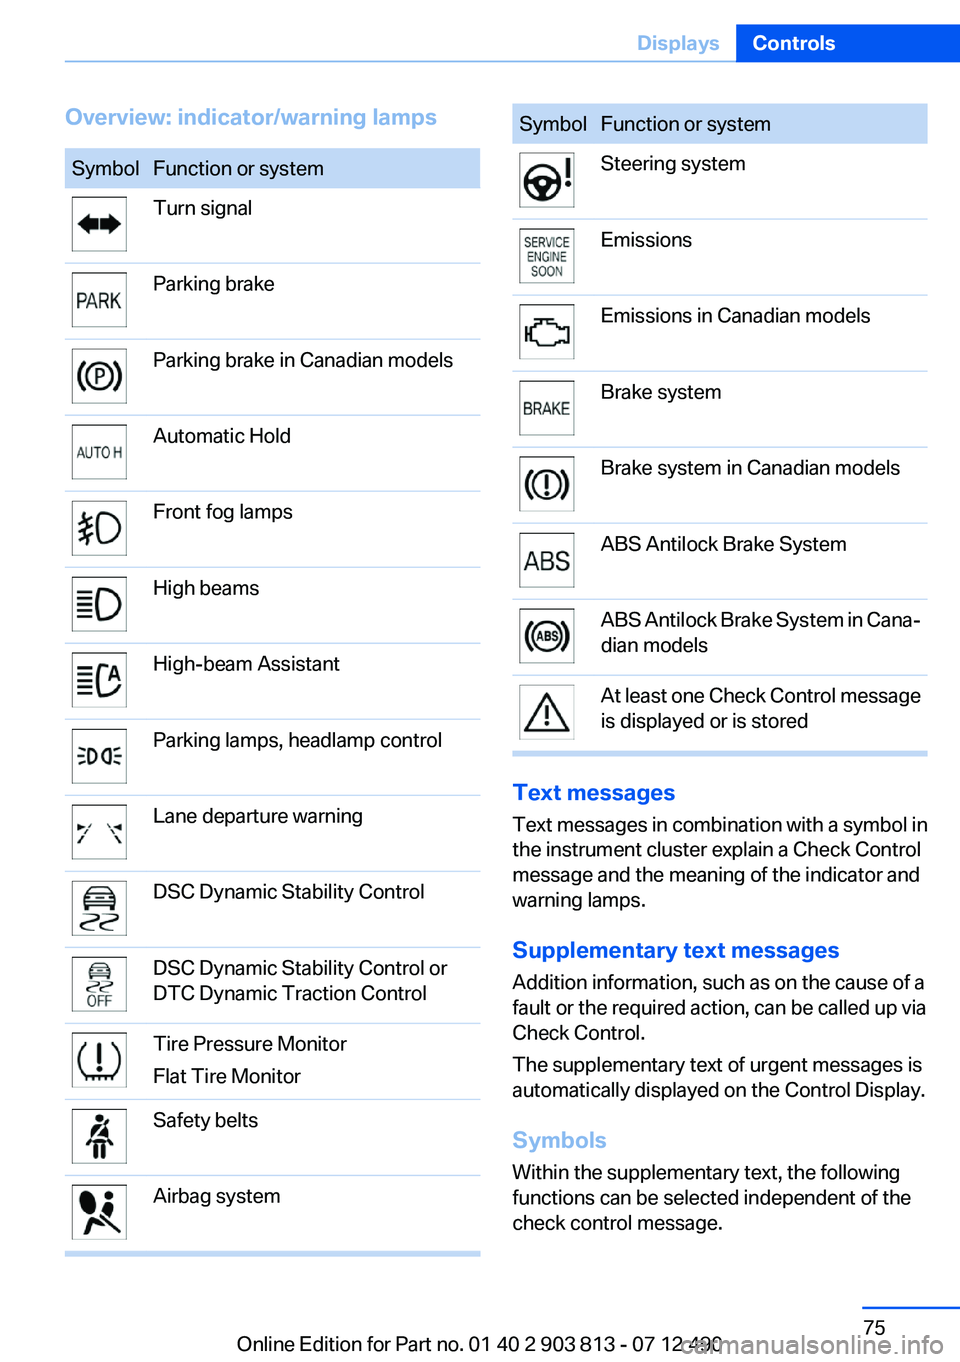
Overview: indicator/warning lampsSymbolFunction or systemTurn signalParking brakeParking brake in Canadian modelsAutomatic HoldFront fog lampsHigh beamsHigh-beam AssistantParking lamps, headlamp controlLane departure warningDSC Dynamic Stability ControlDSC Dynamic Stability Control or
DTC Dynamic Traction ControlTire Pressure Monitor
Flat Tire MonitorSafety beltsAirbag systemSymbolFunction or systemSteering systemEmissionsEmissions in Canadian modelsBrake systemBrake system in Canadian modelsABS Antilock Brake SystemABS Antilock Brake System in Cana‐
dian modelsAt least one Check Control message
is displayed or is stored
Text messages
Text messages in combination with a symbol in
the instrument cluster explain a Check Control
message and the meaning of the indicator and
warning lamps.
Supplementary text messages
Addition information, such as on the cause of a
fault or the required action, can be called up via
Check Control.
The supplementary text of urgent messages is
automatically displayed on the Control Display.
Symbols
Within the supplementary text, the following
functions can be selected independent of the
check control message.
Seite 75DisplaysControls75
Online Edition for Part no. 01 40 2 903 813 - 07 12 490
Page 81 of 211
Selection lists in the
instrument cluster
The concept
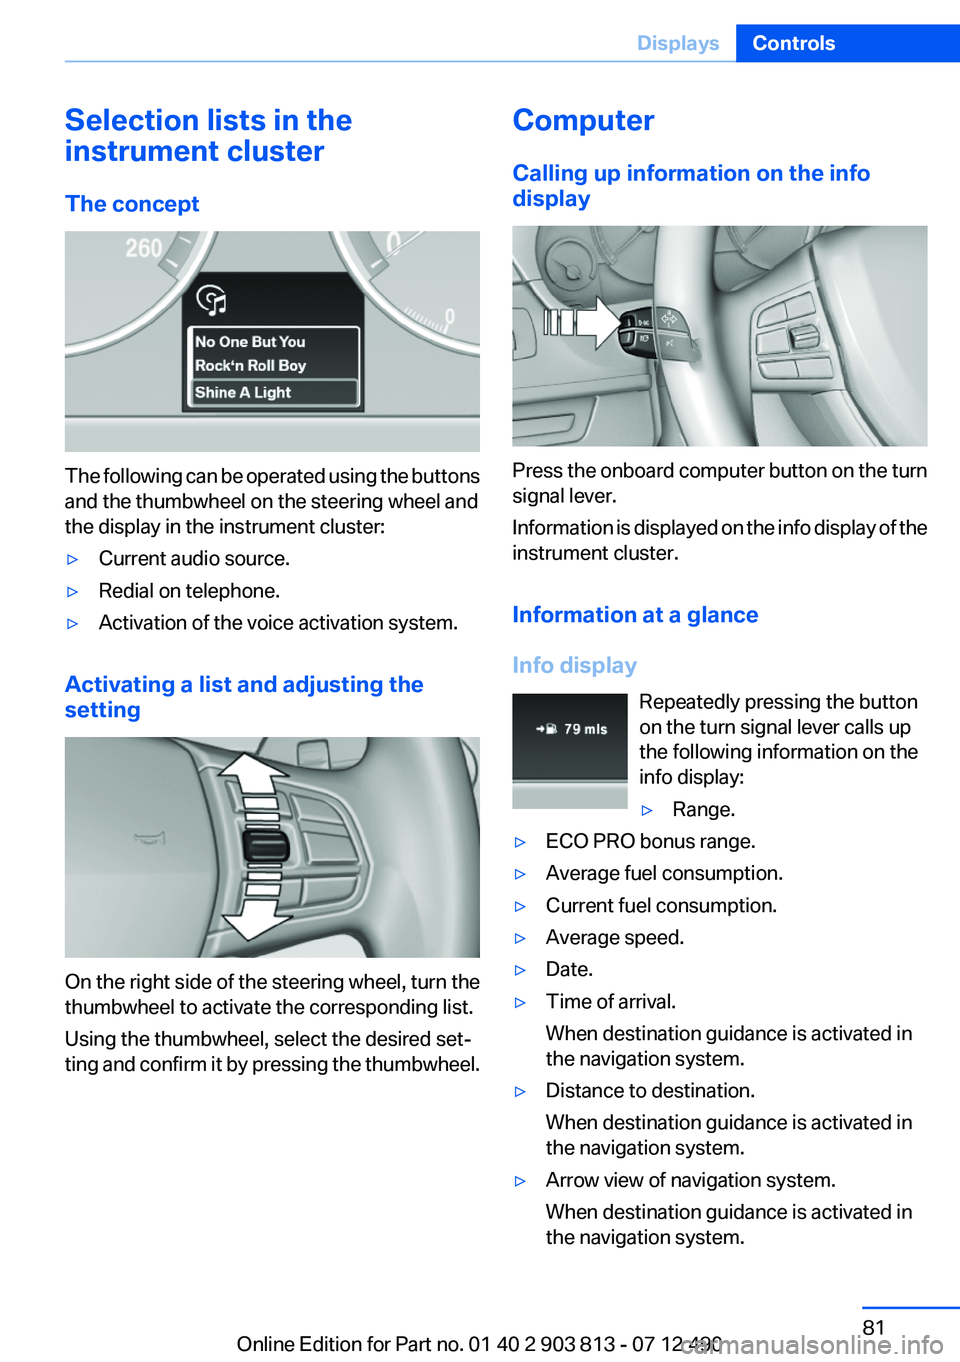
The following can be operated using the buttons
and the thumbwheel on the steering wheel and
the display in the instrument cluster:
▷Current audio source.▷Redial on telephone.▷Activation of the voice activation system.
Activating a list and adjusting the
setting
On the right side of the steering wheel, turn the
thumbwheel to activate the corresponding list.
Using the thumbwheel, select the desired set‐
ting and confirm it by pressing the thumbwheel.
Computer
Calling up information on the info
display
Press the onboard computer button on the turn
signal lever.
Information is displayed on the info display of the
instrument cluster.
Information at a glance
Info display Repeatedly pressing the button
on the turn signal lever calls up
the following information on the
info display:
▷Range.▷ECO PRO bonus range.▷Average fuel consumption.▷Current fuel consumption.▷Average speed.▷Date.▷Time of arrival.
When destination guidance is activated in
the navigation system.▷Distance to destination.
When destination guidance is activated in
the navigation system.▷Arrow view of navigation system.
When destination guidance is activated in
the navigation system.Seite 81DisplaysControls81
Online Edition for Part no. 01 40 2 903 813 - 07 12 490
Page 88 of 211

Adaptive light control
The concept
Adaptive light control is a variable headlamp
control system that enables dynamic illumina‐
tion of the road surface.
Depending on the steering angle and other pa‐
rameters, the light from the headlamp follows
the course of the road.
Activating
Switch position
with the ignition switched
on.
The turning lamps are automatically switched
on depending on the steering angle or the use
of turn signals.
To avoid blinding oncoming traffic, the Adaptive
Light Control does not swivel to the driver's side
when the vehicle is at a standstill.
When driving in reverse, only the turning lamp is
active.
Self-leveling headlights
The self-leveling headlights feature adapts the
light distribution to the contours of the road.
The light distribution is lowered on hilltops to
avoid blinding oncoming traffic and tilted in de‐
pressions to increase visibility.
Malfunction
A Check Control message is displayed.
Adaptive light control is malfunctioning or has
failed. Have the system checked as soon as pos‐
sible.
Headlamp range control
With halogen headlamps, the headlamp range of
the low beams can be manually adjusted for the
vehicle load to avoid blinding oncoming traffic.
The values following the slash apply to trailer
operation.
0 / 1 = 1 to 2 people without luggage.
1 / 1 = 5 people without luggage.
1 / 2 = 5 people with luggage.
2 / 2 = 1 person, full cargo area.
High-beam Assistant
The concept
If while in switch position
or the low
beams are automatically switched on, this sys‐
tem automatically switches the high beams on
and then off. The procedure is controlled by a
sensor on the front of the interior rearview mir‐
ror. The assistant ensures that the high beams
are switched on whenever the traffic situation
allows. The driver can intervene at any time and
switch the high beams on and off as usual.
Activating
1.Turn the light switch to or .2.Press the button on the turn signal lever, ar‐
row.
The indicator lamp in the instrument
cluster lights up.
When the lights are switched on, the
high beams are switched on and off automati‐
cally.
The system responds to light from oncoming
traffic and traffic driving ahead of you, and to ad‐
equate illumination, e.g., in towns and cities.
Seite 88ControlsLamps88
Online Edition for Part no. 01 40 2 903 813 - 07 12 490
Page 92 of 211
Knee airbag
The knee airbag supports the legs in a frontal
impact.
Protective action
Airbags are not triggered in every impact situa‐
tion, e.g., in less severe accidents or rear-end
collisions.
Information on how to ensure the optimal
protective effect of the airbags▷Keep at a distance from the airbags.▷Always grasp the steering wheel on the
steering wheel rim, holding your hands at
the 3 o'clock and 9 o'clock positions, to keep
the danger of injury to your hands or arms as
low as possible if the airbag is triggered.▷There should be no people, animals, or ob‐
jects between an airbag and a person.▷Do not use the cover of the front airbag on
the front passenger side as a storage area.▷Keep the dashboard and window on the
front passenger side clear, i.e., do not cover
with adhesive labels or coverings, and do not
attach holders such as for navigation instru‐
ments and mobile phones.▷Make sure that the front passenger is sitting
correctly, i.e., keeps his or her feet and legs
in the footwell; otherwise, leg injuries can
occur if the front airbag is triggered.▷Do not place slip covers, seat cushions or
other objects on the front passenger seat
that are not approved specifically for seats
with integrated side airbags.▷Do not hang pieces of clothing, such as jack‐
ets, over the backrests.▷Make sure that occupants keep their heads
away from the side airbag and do not rest
against the head airbag; otherwise, injuries
can occur if the airbags are triggered.▷Do not remove the airbag restraint system.▷Do not remove the steering wheel.▷Do not apply adhesive materials to the air‐
bag cover panels, cover them or modify
them in any way.▷Never modify either the individual compo‐
nents or the wiring in the airbag system. This
also applies to steering wheel covers, the
dashboard, the seats, the roof pillars and the
sides of the headliner.◀
Even when all instructions are followed closely,
injury from contact with the airbags cannot be
ruled out in certain situations.
The ignition and inflation noise may lead to
short-term and, in most cases, temporary hear‐
ing impairment in sensitive individuals.
In the case of a malfunction, deactivation
and after triggering of the airbags
Do not touch the individual components imme‐
diately after the system has been triggered; oth‐
erwise, there is the danger of burns.
Only have the airbags checked, repaired or dis‐
mantled and the airbag generator scrapped by
your service center or a workshop that has the
necessary authorization for handling explosives.
Non-professional attempts to service the sys‐
tem could lead to failure in an emergency or un‐
desired triggering of the airbag, either of which
could result in injury.◀
Warnings and information on the airbags are
also found on the sun visors.
Functional readiness of the airbag
system
When the ignition is switch on, the warn‐
ing lamp in the instrument cluster lights
up briefly and thereby indicates the op‐
erational readiness of the entire airbag system
and the belt tensioner.
Airbag system malfunctioning
▷Warning lamp does not come on when the
ignition is turned on.▷The warning lamp lights up continuously.Seite 92ControlsSafety92
Online Edition for Part no. 01 40 2 903 813 - 07 12 490