2013 BMW X1 XDRIVE 35I instrument cluster
[x] Cancel search: instrument clusterPage 102 of 291
Malfunction
A Check Control message, refer to page 77, is
displayed in the instrument cluster.
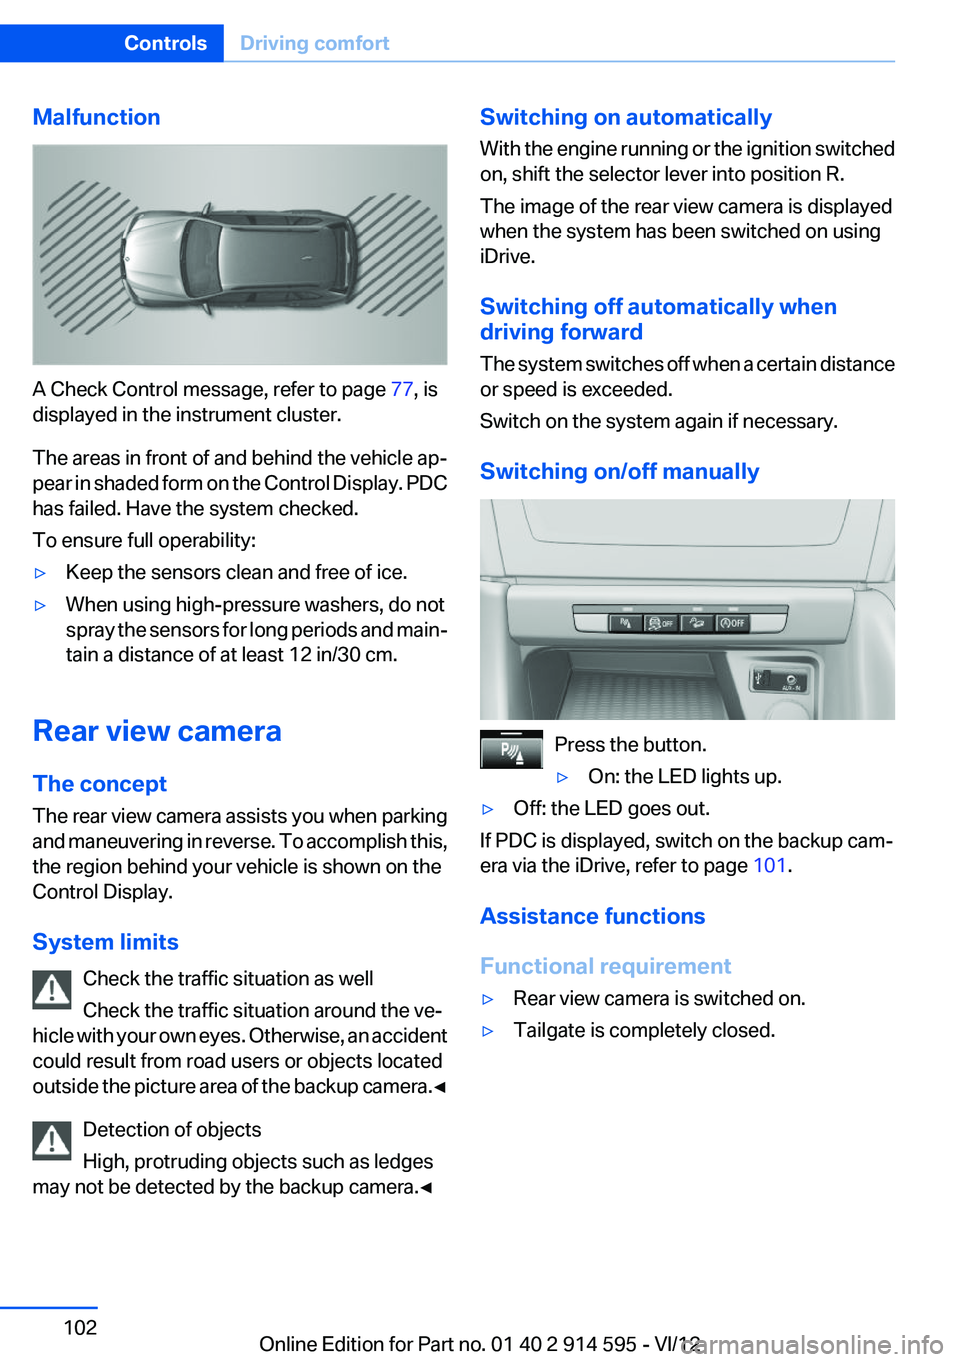
The areas in front of and behind the vehicle ap‐
pear in shaded form on the Control Display. PDC
has failed. Have the system checked.
To ensure full operability:
▷Keep the sensors clean and free of ice.▷When using high-pressure washers, do not
spray the sensors for long periods and main‐
tain a distance of at least 12 in/30 cm.
Rear view camera
The concept
The rear view camera assists you when parking
and maneuvering in reverse. To accomplish this,
the region behind your vehicle is shown on the
Control Display.
System limits Check the traffic situation as well
Check the traffic situation around the ve‐
hicle with your own eyes. Otherwise, an accident
could result from road users or objects located
outside the picture area of the backup camera. ◀
Detection of objects
High, protruding objects such as ledges
may not be detected by the backup camera.◀
Switching on automatically
With the engine running or the ignition switched
on, shift the selector lever into position R.
The image of the rear view camera is displayed
when the system has been switched on using
iDrive.
Switching off automatically when
driving forward
The system switches off when a certain distance
or speed is exceeded.
Switch on the system again if necessary.
Switching on/off manually
Press the button.
▷On: the LED lights up.▷Off: the LED goes out.
If PDC is displayed, switch on the backup cam‐
era via the iDrive, refer to page 101.
Assistance functions
Functional requirement
▷Rear view camera is switched on.▷Tailgate is completely closed.Seite 102ControlsDriving comfort102
Online Edition for Part no. 01 40 2 914 595 - VI/12
Page 134 of 291
Use coasting conditions
When approaching a red light, take your foot off
the accelerator and let the vehicle coast to a halt.
On a downhill gradient, take your foot off the ac‐
celerator and let the vehicle roll.
The flow of fuel is interrupted while coasting.
Switch off the engine during
longer stops
Switch off the engine during longer stops, e.g.,
at traffic lights, railroad crossings or in traffic
congestion.
Fuel savings are already achieved after the en‐
gine is turned off for as little as 4 seconds.
Automatic Engine Start/Stop Function
The Automatic Start/Stop Function of your ve‐
hicle automatically switches off the engine dur‐
ing a stop. Additional information on the Auto‐
matic Engine Start/Stop Function, refer to
page 56.
If the engine is stopped and then started again,
fuel consumption and emissions drop com‐
pared to an engine that runs permanently. Stop‐
ping the engine even for just a few seconds can
result in savings.
Use of this system can cause premature wear on
certain vehicle components.
In addition, fuel consumption depends on other
factors as well, such as driving style, road con‐
ditions, maintenance, and environmental fac‐
tors.
Switch off any functions that
are not currently needed
Functions such as seat heating and the rear win‐
dow defroster require a lot of energy and con‐
sume additional fuel, especially in city and stop-
and-go traffic.Therefore, switch off these functions if they are
not actually needed.
Have maintenance carried out
Have vehicles maintained regularly to achieve
optimal vehicle economy and operating life.
Have the maintenance carried out by your serv‐
ice center.
Please also note the BMW Maintenance Sys‐
tem, refer to page 243.
ECO PRO
The concept
ECO PRO supports the driver in achieving high
fuel economy. Engine control and comfort func‐
tions, such as the climate control system, are
adjusted accordingly.
In addition, situation-related information can be
displayed that helps the driver achieve lower fuel
consumption.
The resulting range extension can be displayed
in the instrument cluster.
Activating ECO PRO Press the button; the LED above the
button lights up.
ECO PRO appears in the instrument cluster and
DSC is activated if necessary.Seite 134Driving tipsSaving fuel134
Online Edition for Part no. 01 40 2 914 595 - VI/12
Page 135 of 291
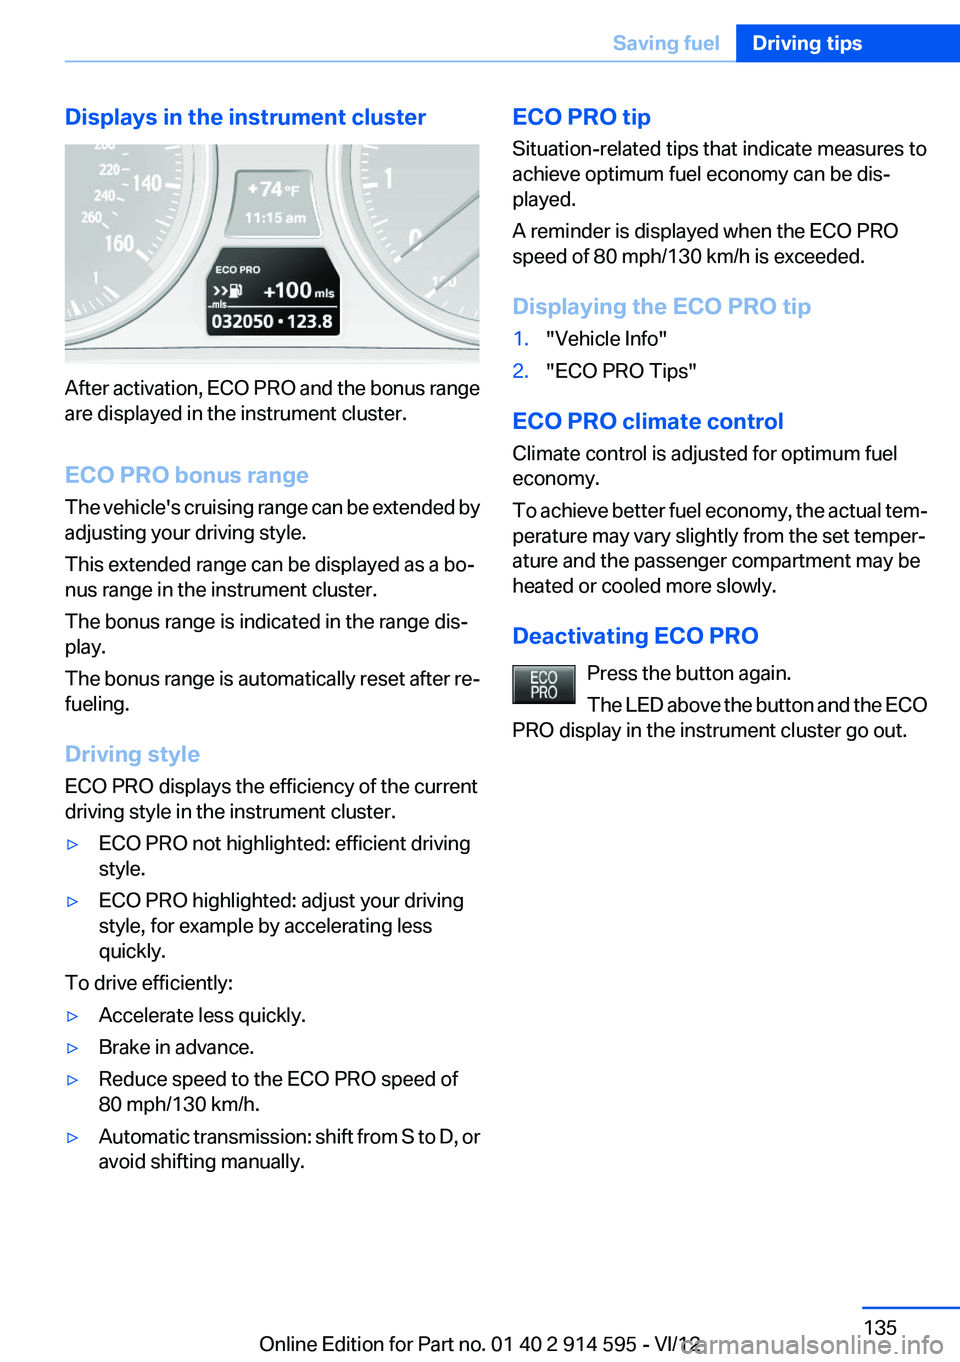
Displays in the instrument cluster
After activation, ECO PRO and the bonus range
are displayed in the instrument cluster.
ECO PRO bonus range
The vehicle's cruising range can be extended by
adjusting your driving style.
This extended range can be displayed as a bo‐
nus range in the instrument cluster.
The bonus range is indicated in the range dis‐
play.
The bonus range is automatically reset after re‐
fueling.
Driving style
ECO PRO displays the efficiency of the current
driving style in the instrument cluster.
▷ECO PRO not highlighted: efficient driving
style.▷ECO PRO highlighted: adjust your driving
style, for example by accelerating less
quickly.
To drive efficiently:
▷Accelerate less quickly.▷Brake in advance.▷Reduce speed to the ECO PRO speed of
80 mph/130 km/h.▷Automatic transmission: shift from S to D, or
avoid shifting manually.ECO PRO tip
Situation-related tips that indicate measures to
achieve optimum fuel economy can be dis‐
played.
A reminder is displayed when the ECO PRO
speed of 80 mph/130 km/h is exceeded.
Displaying the ECO PRO tip1."Vehicle Info"2."ECO PRO Tips"
ECO PRO climate control
Climate control is adjusted for optimum fuel
economy.
To achieve better fuel economy, the actual tem‐
perature may vary slightly from the set temper‐
ature and the passenger compartment may be
heated or cooled more slowly.
Deactivating ECO PRO Press the button again.
The LED above the button and the ECO
PRO display in the instrument cluster go out.
Seite 135Saving fuelDriving tips135
Online Edition for Part no. 01 40 2 914 595 - VI/12
Page 239 of 291
Risk of damage
Before opening the hood, ensure that the
wiper arms with wiper blades are folded onto the
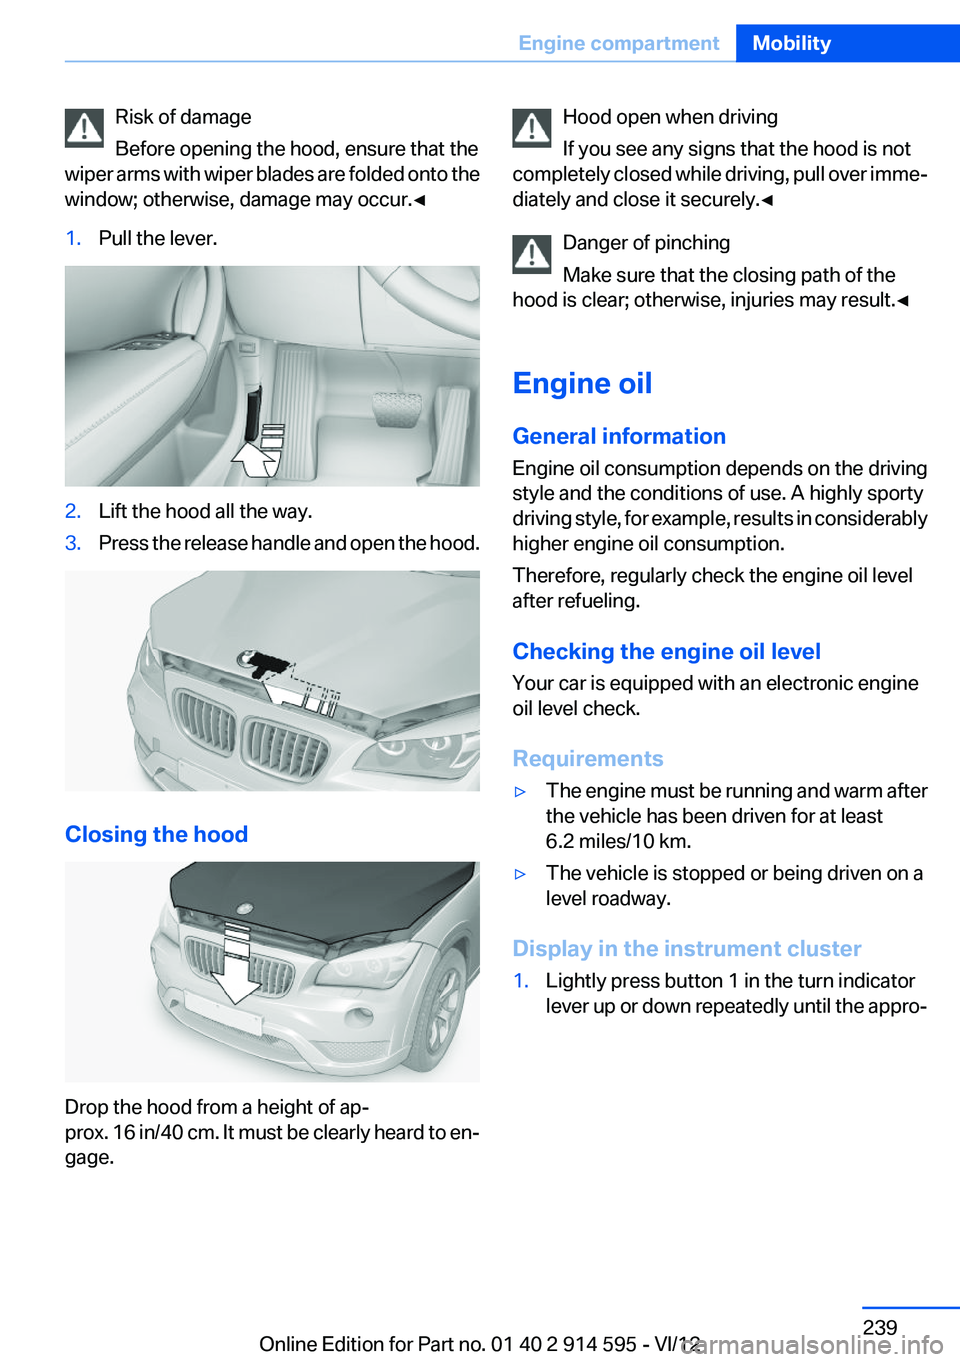
window; otherwise, damage may occur.◀1.Pull the lever.2.Lift the hood all the way.3.Press the release handle and open the hood.
Closing the hood
Drop the hood from a height of ap‐
prox. 16 in/40 cm. It must be clearly heard to en‐
gage.
Hood open when driving
If you see any signs that the hood is not
completely closed while driving, pull over imme‐
diately and close it securely.◀
Danger of pinching
Make sure that the closing path of the
hood is clear; otherwise, injuries may result.◀
Engine oil
General information
Engine oil consumption depends on the driving
style and the conditions of use. A highly sporty
driving style, for example, results in considerably
higher engine oil consumption.
Therefore, regularly check the engine oil level
after refueling.
Checking the engine oil level
Your car is equipped with an electronic engine
oil level check.
Requirements▷The engine must be running and warm after
the vehicle has been driven for at least
6.2 miles/10 km.▷The vehicle is stopped or being driven on a
level roadway.
Display in the instrument cluster
1.Lightly press button 1 in the turn indicator
lever up or down repeatedly until the appro‐Seite 239Engine compartmentMobility239
Online Edition for Part no. 01 40 2 914 595 - VI/12
Page 261 of 291
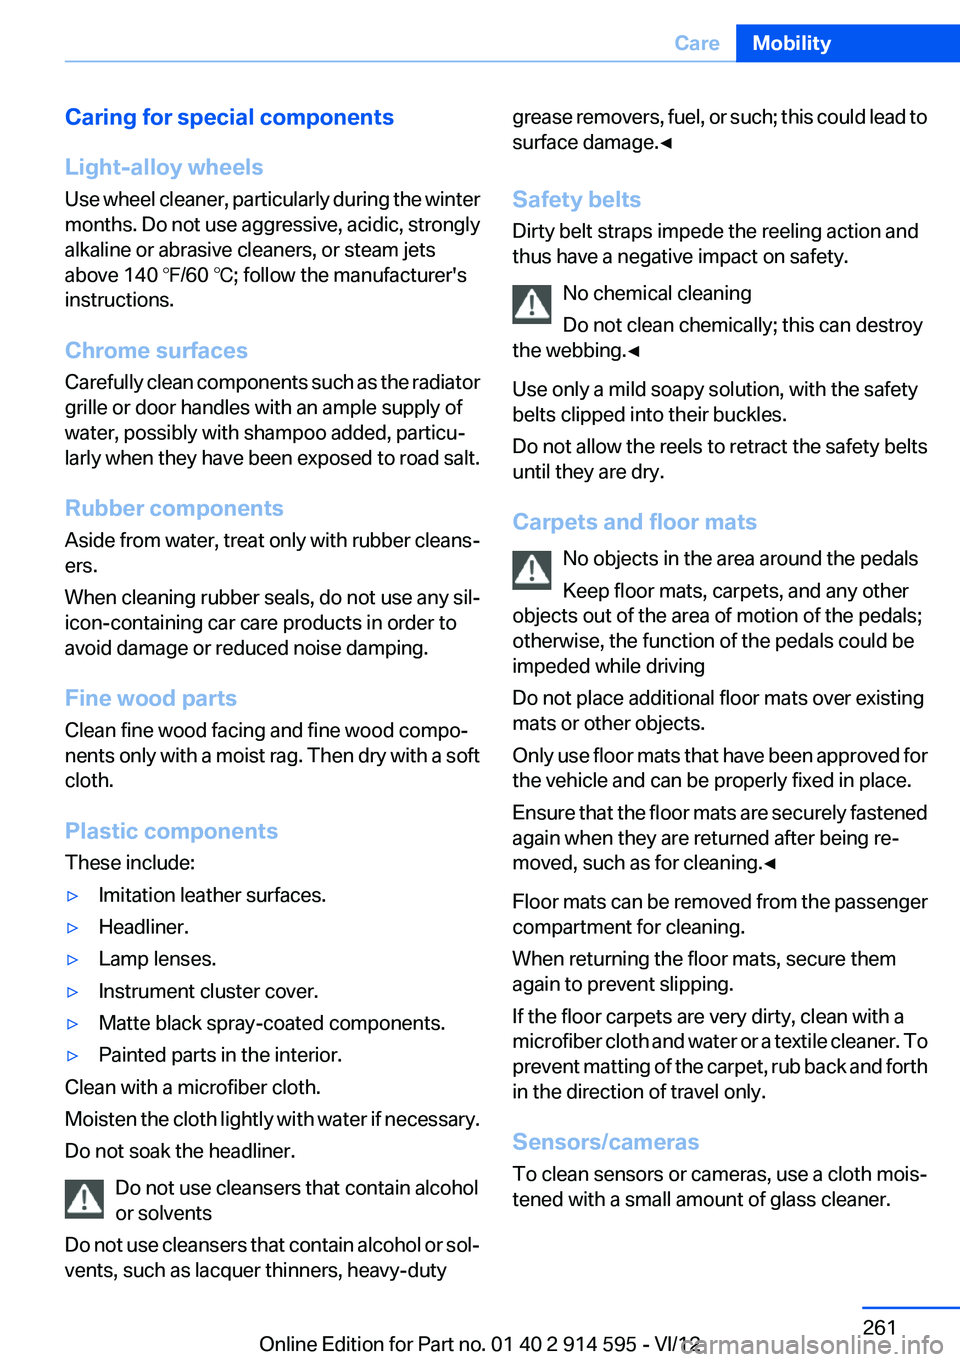
Caring for special components
Light-alloy wheels
Use wheel cleaner, particularly during the winter
months. Do not use aggressive, acidic, strongly
alkaline or abrasive cleaners, or steam jets
above 140 ℉/60 ℃; follow the manufacturer's
instructions.
Chrome surfaces
Carefully clean components such as the radiator
grille or door handles with an ample supply of
water, possibly with shampoo added, particu‐
larly when they have been exposed to road salt.
Rubber components
Aside from water, treat only with rubber cleans‐
ers.
When cleaning rubber seals, do not use any sil‐
icon-containing car care products in order to
avoid damage or reduced noise damping.
Fine wood parts
Clean fine wood facing and fine wood compo‐
nents only with a moist rag. Then dry with a soft
cloth.
Plastic components
These include:▷Imitation leather surfaces.▷Headliner.▷Lamp lenses.▷Instrument cluster cover.▷Matte black spray-coated components.▷Painted parts in the interior.
Clean with a microfiber cloth.
Moisten the cloth lightly with water if necessary.
Do not soak the headliner.
Do not use cleansers that contain alcohol
or solvents
Do not use cleansers that contain alcohol or sol‐
vents, such as lacquer thinners, heavy-duty
grease removers, fuel, or such; this could lead to
surface damage.◀
Safety belts
Dirty belt straps impede the reeling action and
thus have a negative impact on safety.
No chemical cleaning
Do not clean chemically; this can destroy
the webbing.◀
Use only a mild soapy solution, with the safety
belts clipped into their buckles.
Do not allow the reels to retract the safety belts
until they are dry.
Carpets and floor mats No objects in the area around the pedals
Keep floor mats, carpets, and any other
objects out of the area of motion of the pedals;
otherwise, the function of the pedals could be
impeded while driving
Do not place additional floor mats over existing
mats or other objects.
Only use floor mats that have been approved for
the vehicle and can be properly fixed in place.
Ensure that the floor mats are securely fastened
again when they are returned after being re‐
moved, such as for cleaning.◀
Floor mats can be removed from the passenger
compartment for cleaning.
When returning the floor mats, secure them
again to prevent slipping.
If the floor carpets are very dirty, clean with a
microfiber cloth and water or a textile cleaner. To
prevent matting of the carpet, rub back and forth
in the direction of travel only.
Sensors/cameras
To clean sensors or cameras, use a cloth mois‐
tened with a small amount of glass cleaner.Seite 261CareMobility261
Online Edition for Part no. 01 40 2 914 595 - VI/12
Page 278 of 291
Carpet, care 261
Car phone, installation loca‐ tion, refer to Center arm‐
rest 120
Car phone, refer to Tele‐ phone 192
Car vacuum cleaner, connect‐ ing, refer to Connecting elec‐
trical devices 114
Car wash 259
Catalytic converter, refer to Hot exhaust system 126
CBS Condition Based Serv‐ ice 243
CD/DVD 170
CD/DVD notes 175
CD changer 174
CDs, storing 176
Cell phone 192
Cell phone, installation loca‐ tion, refer to Center arm‐
rest 120
Center armrest, front 120
Center armrest, rear 121
Center brake lamp, bulb re‐ placement 250
Center console, refer to Around the center con‐
sole 16
Central locking– Comfort Access 36– From the inside 34– Setting the unlocking char‐
acteristics 32
Central locking system
– From the outside 31– Principle 31
Central screen, refer to Control
Display 18
Changes, technical, refer to Safety 6
Changing wheels/tires 235
Check Control 77
Children, transporting 50
Child restraint fixing system LATCH 51
Child restraint fixing sys‐
tems 50
Child restraint fixing systems, mounting 50
Child safety locks 53
Child seat, mounting 50
Child seats, refer to Transport‐ ing children safely 50
Chrome parts, care 261
Cigarette lighter, connecting electrical devices 114
Cigarette lighter, refer to Lighter 114
Cigarette lighter socket 114
Circulation of air, refer to Re‐ circulated air mode 107
Cleaning, displays 262
Cleaning your BMW, refer to Care 259
Clock 68
Clock– 12h/24h format 73– Setting the time and date 73
Closing
– From the inside 34– From the outside 32
Clothes hooks 122
Cockpit 12
Cold start, refer to Starting the engine 55
Combination instrument, refer to Instrument cluster 14
Combination switch, refer to Turn signal/high beams/
headlamp flasher 59
Combination switch, refer to Washer/wiper system 59
Comfort Access
– Battery replacement 38
Comfort area, refer to Around
the center console 16
Compact wheel, inflation pres‐ sure 228
Compartment for remote con‐ trol, refer to Ignition lock 54
Compartment in floor 118
Compartments, refer to Stor‐
age compartments 120, 121
Compass, digital 112
Computer 70
Computer, displaying informa‐ tion 70
Computer, displays on the Control Display 70
Concierge service 216
Condensation under the vehi‐ cle 128
Condition Based Service CBS 243
Confirmation signals for lock‐ ing/unlocking the vehicle 33
ConnectedDrive 215
Connecting, mobile phone, re‐ fer to Pairing the mobile
phone 193
Consumption, refer to Aver‐ age fuel consumption 70
Contacts 205, 213
Control Display 18
Control Display, care 262
Control Display, settings 74
Controller 19
Controls and displays 12
Control systems, driving sta‐ bility 94
Convenient operation– Glass sunroof 32– Window 32
Coolant 242
Coolant, checking the level 242
Coolant temperature 69
Cooling function, switching on and off 107
Cooling, maximum 106
Cooling system, refer to Cool‐ ant 242
Corrosion on brake discs 128
Courtesy lamps, refer to Inte‐ rior lamps 84
Cradle for telephone or mobile phone, refer to Snap-in
adapter 202
Seite 278ReferenceEverything from A to Z278
Online Edition for Part no. 01 40 2 914 595 - VI/12
Page 279 of 291

Cruise control 98
Cruise control– Malfunction 99
Cupholder 122
Curb weight, refer to Weights 267
Current fuel consumption 69
Current location, storing 142
Curve lights, refer to Adaptive light control 81
D
Dashboard lighting, refer to In‐ strument lighting 83
Dashboard, refer to Cock‐ pit 12
Data, technical 266
Date
– Date format 74– Setting 73
Daytime running lights 81
Daytime running lights, bulb replacement 248
Defroster
– Rear window 107
Destination entry via the ad‐
dress book 142
Destination guidance 149
Destination guidance with in‐ termediate destinations 147
Destination input, naviga‐ tion 140
Digital clock 68
Digital compass 112
Digital radio 163
Dimming mirrors 49
Directional indicators, refer to Turn signals 59
Display lighting, refer to Instru‐ ment lighting 83
Displays and controls 12
Displays, care 262
Displays, cleaning 262
Displays, refer to Instrument cluster 14
Disposal, coolant 242
Disposal, vehicle battery 251
Distance warning, refer to Park Distance Control PDC 100
Divided rear seat backrest, re‐ fer to Enlarging the cargo
area 115
Divided screen view, split screen 22
Door key, refer to Remote con‐ trol with integrated key 30
Door lock 34
Doors, manual operation 34
Doors, unlocking and locking– Confirmation signals 33– From the inside 34– From the outside 32
DOT Quality Grades 233
Downhill control 96
Draft-free ventilation 108
Drive-off assistant 97
Driving away on inclines, refer to Drive-off assistant 97
Driving notes, breaking in 126
Driving notes, general 126
Driving on poor roads 128
Driving stability control sys‐ tems 94
Driving through water 127
Driving tips, refer to Driving notes 126
Dry air, refer to Cooling func‐ tion 107
DSC Dynamic Stability Con‐ trol 94
DTC Dynamic Traction Con‐ trol 95
DTMF suffix dialing 198
DVD/CD 170
DVDs, storing 176
DVD, video 172
Dynamic destination guid‐ ance 156
Dynamic Stability Control DSC 94
Dynamic Traction Control DTC 95
E
ECO PRO 134
ECO PRO display 134
ECO PRO driving mode 134
ECO PRO mode 134
EfficientDynamics, refer to Saving fuel 133
Electrical malfunction– Door lock 34– Driver's door 34– Fuel filler flap 225– Tailgate 36
Electric seat adjustment 44
Electronic brake-force distri‐ bution 94
Electronic engine oil level check 239
Electronic Stability Program ESP, refer to Dynamic Stabil‐
ity Control DSC 94
Emergency activation
– Automatic transmission, re‐
fer to Overriding selector
lever lock 64
Emergency operation
– Door lock, refer to Manual
operation 34
Emergency operation, fuel
filler flap, unlocking man‐
ually 225
Emergency Request 253
Emergency service, refer to Roadside Assistance 254
Energy-conscious driving, re‐ fer to Current fuel consump‐
tion 69
Energy, saving
– Automatic Engine Start/Stop
Function 56
Energy, saving, refer to Saving
fuel 133
Engine, breaking in 126
Engine compartment 238
Engine coolant, refer to Cool‐ ant 242
Engine oil, adding 241
Seite 279Everything from A to ZReference279
Online Edition for Part no. 01 40 2 914 595 - VI/12
Page 282 of 291
Inflation pressure monitor, re‐fer to Flat Tire Monitor 88
Inflation pressure, refer to Tire inflation pressure 228
Information on the navigation data 138
Initialization after power fail‐ ure 251
Initializing– Compass, refer to Calibrat‐
ing 113– Panoramic glass sunroof 42– Refer to Setting the time and
date 73
Initializing, Flat Tire Monitor
FTM 88
Initializing, Tire Pressure Mon‐ itor TPM 91
Inside brake lamps
– Bulb replacement 250
Installation location, tele‐
phone 120
Instrument cluster 14
Instrument lighting 83
Instrument panel, refer to In‐ strument cluster 14
Instruments, refer to Cock‐ pit 12
Integrated key 30
Interactive map 145
Interior equipment 110
Interior lamps 84
Interior lamps
– Remote control 32
Interior mirror 49
Interior rearview mirror, auto‐ matic dimming 49
Interior rearview mirror, com‐ pass 112
Interior temperature, setting
– Automatic climate con‐
trol 105
Interlock, refer to Disengaging
the remote control 62
Intermediate destinations 147
Internet page 6
Intersection, entering for navi‐
gation 141
iPod/iPhone 182
J
Jacking points for the vehicle jack 251
Jack, refer to Vehicle jack 251
Joystick, refer to Selector lever 65
Jump-starting 255
K
Keyless Go, refer to Comfort Access 36
Keyless opening and closing, refer to Comfort Access 36
Key Memory, refer to Personal Profile 30
Key, refer to Integrated key/re‐ mote control 30
Kickdown– Automatic transmission with
Steptronic 63, 64
Knee airbag 85
Knocking control 226
L
Label, run-flat tire 236
Lamp and bulb replacement, lamp replacement 246
Lamps 80
Lamps, automatic headlamp control 80, 81
Lamps, High-beam Assis‐ tant 82
Lamps, parking lamps/low beams 80
Lamps, replacing, refer to Lamp and bulb replace‐
ment 246
Language, changing on the Control Display 74
Lap-and-shoulder belt, refer to
Safety belts 45
Lashing eyes, securing cargo 131
LATCH child restraint fixing system 51
Leather, care 260
LEDs, light-emitting di‐ odes 246
Length, refer to Dimen‐ sions 266
Letters and numbers, enter‐ ing 23
License plate lamp, bulb re‐ placement 250
Light-alloy wheels, care 261
Light-emitting diodes, LEDs 246
Lighter 114
Lighting– Instruments 83– Lamp and bulb replace‐
ment 246
Lighting, vehicle, refer to
Lamps 80
Light switch 80
Limit, refer to Speed limit 78
Load 130
Loading 130
Lock buttons, doors, refer to Locking 35
Locking
– From the inside 35– From the outside 32– Setting the confirmation sig‐
nals 33– Without remote control, refer
to Comfort Access 36
Locking the vehicle
– From the inside 34– From the outside 32
Locks, doors, and win‐
dows 53
Longlife oils, alternative oil types 241
Longlife oils, refer to Approved engine oils 241
Seite 282ReferenceEverything from A to Z282
Online Edition for Part no. 01 40 2 914 595 - VI/12