2013 BMW X1 XDRIVE 28I light
[x] Cancel search: lightPage 33 of 291

Panic mode
You can trigger the alarm system if you find
yourself in a dangerous situation.
Press the button on the remote control for at
least 3 seconds.
To switch off the alarm: press any button.
Unlocking tailgate
Press the button on the remote control for
approx. 1 second and release.
The tailgate will open slightly, regardless of
whether it was previously locked or unlocked.
The tailgate pivots back and up when it opens.
Ensure that adequate clearance is available be‐
fore opening.
To avoid locking yourself out of the vehicle, do
not place the remote control into the cargo area.
The tailgate is locked again as soon as it is
pushed closed.
Before and after each trip, check that the tailgate
has not been inadvertently unlocked.
Confirmation signals from the vehicle
1."Settings"2."Door locks"3."Flash when lock/unlock"
Retrieving the seat and mirror settings
The driver's seat and exterior mirror positions
used last are stored for the remote control cur‐
rently in use.
When the vehicle is being unlocked, these po‐
sitions are automatically retrieved if the setting
is activated.
Pinch hazard when moving back the seat
If this function is used, first make sure that
the footwell behind the driver's seat is empty.
Failure to do so could cause injury to persons or
damage to objects behind the seat as a result of
a rearward movement of the seat.◀
The adjustment procedure is interrupted:▷When a seat position switch is pressed.▷When a button of the seat and mirror mem‐
ory is pressed.
Selecting automatic activation
1."Settings"2."Door locks"3."Last seat position auto."
Malfunctions
Local radio waves may interfere with the remote
control.
In this case, unlock and lock the car at the door
lock with the integrated key.
In vehicles without an alarm system or Comfort
Access, only the driver's door can be unlocked
and locked using the integrated key in the door
lock.
If the car can no longer be locked with a remote
control, the battery in the remote control is dis‐
charged. Use the remote control during an ex‐
tended drive in order to recharge the battery,
refer to page 30. The remote control for Comfort
Seite 33Opening and closingControls33
Online Edition for Part no. 01 40 2 914 595 - VI/12
Page 36 of 291

Opening from the outside▷Press the button next to the tailgate.▷ Press the remote control button for ap‐
prox. 1 second and then release.
The tailgate opens slightly. It can be swung up‐
ward.
Opening manually
In case of an electrical malfunction:
1.Fold down the rear seat backrest, enlarge
the cargo area, refer to page 115.2.From the cargo area, press out the handle in
the tailgate, see arrow, and pull out as far as
possible. The tailgate is unlocked.3.Open the tailgate from the outside and press
in the handle.
The tailgate is locked again as soon as it is
closed.
Closing
Recessed grips on the inside trim of the tailgate
can be used to conveniently pull down the tail‐
gate.
Before closing the tailgate, ensure that the
cargo floor panel is not raised, refer to
page 118.
Keep the closing area clear
Make sure that the closing area of the tail‐
gate is clear; otherwise, injuries or damage may
result.◀
Comfort Access
The concept
The vehicle can be accessed without activating
the remote control.
All you need to do is to have the remote control
with you, e.g., in your jacket pocket.
The vehicle automatically detects the remote
control when it is nearby or in the passenger
compartment.
Comfort Access supports the following func‐
tions:
▷Unlocking/locking of the vehicle.▷Unlocking of the tailgate separately.▷Starting the engine.▷Convenient closing.Seite 36ControlsOpening and closing36
Online Edition for Part no. 01 40 2 914 595 - VI/12
Page 38 of 291

To switch the engine off with transmission po‐
sition N engaged, insert the remote control in
the ignition lock.
Malfunction
The Comfort Access functions can be disturbed
by local radio waves, such as by a mobile phone
in the immediate vicinity of the remote control or
when a mobile phone is being charged in the
vehicle.
If this occurs, open or close the vehicle using the
buttons on the remote control or use the
integrated key in the door lock.
To start the engine afterward, insert the remote
control into the ignition switch.
Warning lamps The warning lamp in the instrument
cluster lights up when you attempt to
start the engine: the engine cannot be
started.
The remote control is not in the vehicle or has a
malfunction. Take the remote control with you
inside the vehicle or have it checked. If neces‐
sary, insert another remote control into the ig‐
nition switch.
The warning lamp in the instrument
cluster lights up while the engine is
running: the remote control is no lon‐
ger inside the vehicle.
After switching off the engine, the engine can
only be started again within approx. 10 seconds
if no door has been opened.
The indicator lamp in the instrument
cluster comes on and a message ap‐
pears on the Control Display: replace
the remote control battery.Replacing the battery
The remote control for Comfort Access con‐
tains a battery that will need to be replaced from
time to time.1.Take the integrated key out of the remote
control, refer to page 30.2.Remove the cover.3.Insert a new battery of the same type with
the positive side facing upwards.4.Press the cover closed.
Return used battery to a recycling collec‐
tion point or to your service center.
Alarm system
The concept
The vehicle alarm system responds to:
▷Opening of a door, the hood or the tailgate.▷Movements in the vehicle: interior motion
sensor, refer to page 39.▷Changes in the vehicle tilt, e.g., during at‐
tempts to steal a wheel or tow the car.▷Interruptions in battery voltage.
The alarm system briefly indicates tampering:
▷By sounding an acoustic alarm.▷By switching on the hazard warning system.▷By flashing the high beams.Seite 38ControlsOpening and closing38
Online Edition for Part no. 01 40 2 914 595 - VI/12
Page 40 of 291

▷When animals are to remain in the vehicle.
Switching off the tilt alarm sensor and
interior motion sensor
Press the remote control button again
within 10 seconds after the vehicle is locked.
The indicator lamp lights up for approx. 2 sec‐
onds and then flashes continuously.
The tilt alarm sensor and interior motion sensor
remain switched off until the vehicle is locked
again.
Power windows
General information Take the remote control with you
Take the remote control with you when
leaving the vehicle so that children, for example,
cannot operate the power windows and injure
themselves.◀
Opening
▷ Press the switch to the resistance
point.
The window opens while the switch is held.▷ Press the switch beyond the resist‐
ance point.
The window opens automatically.
Pressing again stops the motion.
Closing
Danger of pinching
Monitor the closing process and make
sure that the closing path of the window is clear;
otherwise, injuries may result.◀▷ Pull the switch to the resistance point.
The window closes while the switch is held.▷ Pull the switch beyond the resistance
point.
The window closes automatically.
Pressing the switch stops the motion.
Convenient operation, refer to page 32, via the
remote control or the door lock.
Convenient closing, refer to page 37, with Com‐
fort Access.
After the ignition is switched off
When the remote control is removed or the ig‐
nition is switched off, the windows can continue
to be operated for approx. 1 minute as long as
no door is opened.
Pinch protection system
If the closing force exceeds a specific value as a
window closes, the closing action is interrupted.
The window reopens slightly.
Danger of pinching even with pinch pro‐
tection
Even with the pinch protection system, check
that the window's closing path is clear; other‐
wise, the closing action may not stop in certain
situations, e.g., if thin objects are present.◀
Do not use window accessories
Do not install any accessories in the range
of movement of the windows; otherwise, the
pinch protection system will be impaired.◀
Seite 40ControlsOpening and closing40
Online Edition for Part no. 01 40 2 914 595 - VI/12
Page 41 of 291

Closing without the pinch protection
system
For example, if there is an external danger or if
ice on the windows prevents a window from
closing normally, proceed as follows:1.Pull the switch past the resistance point and
hold it there.
Pinch protection is limited and the window
reopens slightly if the closing force exceeds
a certain value.2.Pull the switch past the resistance point
again within approx. 4 seconds and hold it
there.
The window closes without pinch protec‐
tion.
Safety switch
With the safety switch, the rear windows are
prevented from being opened or closed via the
switches in the rear passenger area, such as by
children.
Press the button.
The LED lights up if the safety function is
switched on.
Safety switch for rear operation
Press the safety switch when transporting
children in the rear; otherwise, injury may result
if the windows are closed without supervision. ◀
Panoramic glass sunroof
General information
The glass sunroof and the sliding visor can be
operated together or separately using the
switch.
Danger of pinching
Monitor the closing process and make
sure that the closing path of the glass sunroof is
clear; otherwise, injuries may result.◀
Take the remote control with you
Take the remote control with you when
leaving the vehicle so that children, for example,
cannot operate the roof and injure themselves. ◀
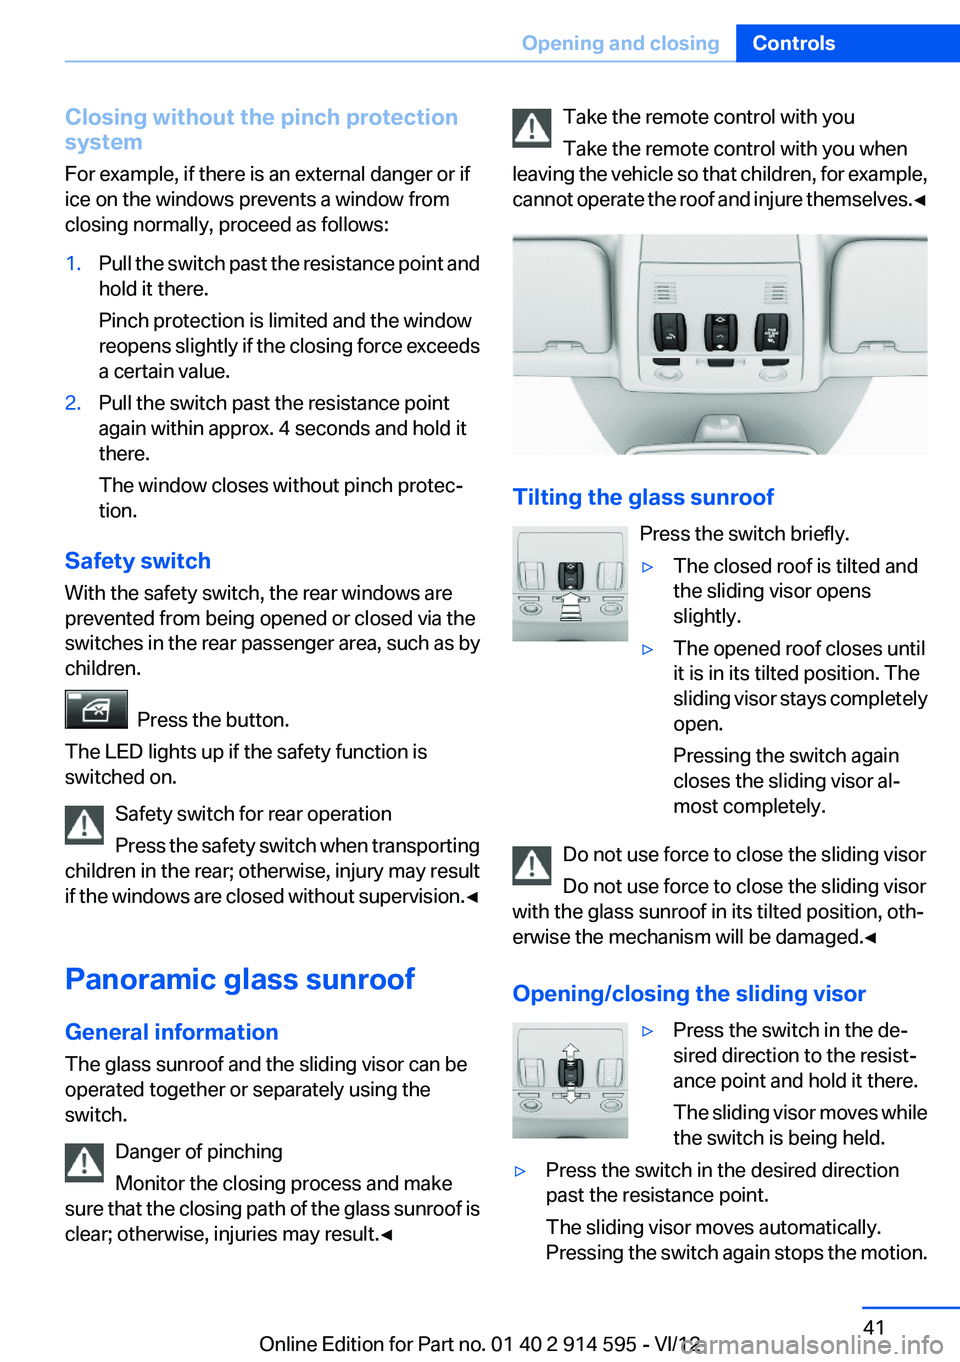
Tilting the glass sunroof
Press the switch briefly.
▷The closed roof is tilted and
the sliding visor opens
slightly.▷The opened roof closes until
it is in its tilted position. The
sliding visor stays completely
open.
Pressing the switch again
closes the sliding visor al‐
most completely.
Do not use force to close the sliding visor
Do not use force to close the sliding visor
with the glass sunroof in its tilted position, oth‐
erwise the mechanism will be damaged.◀
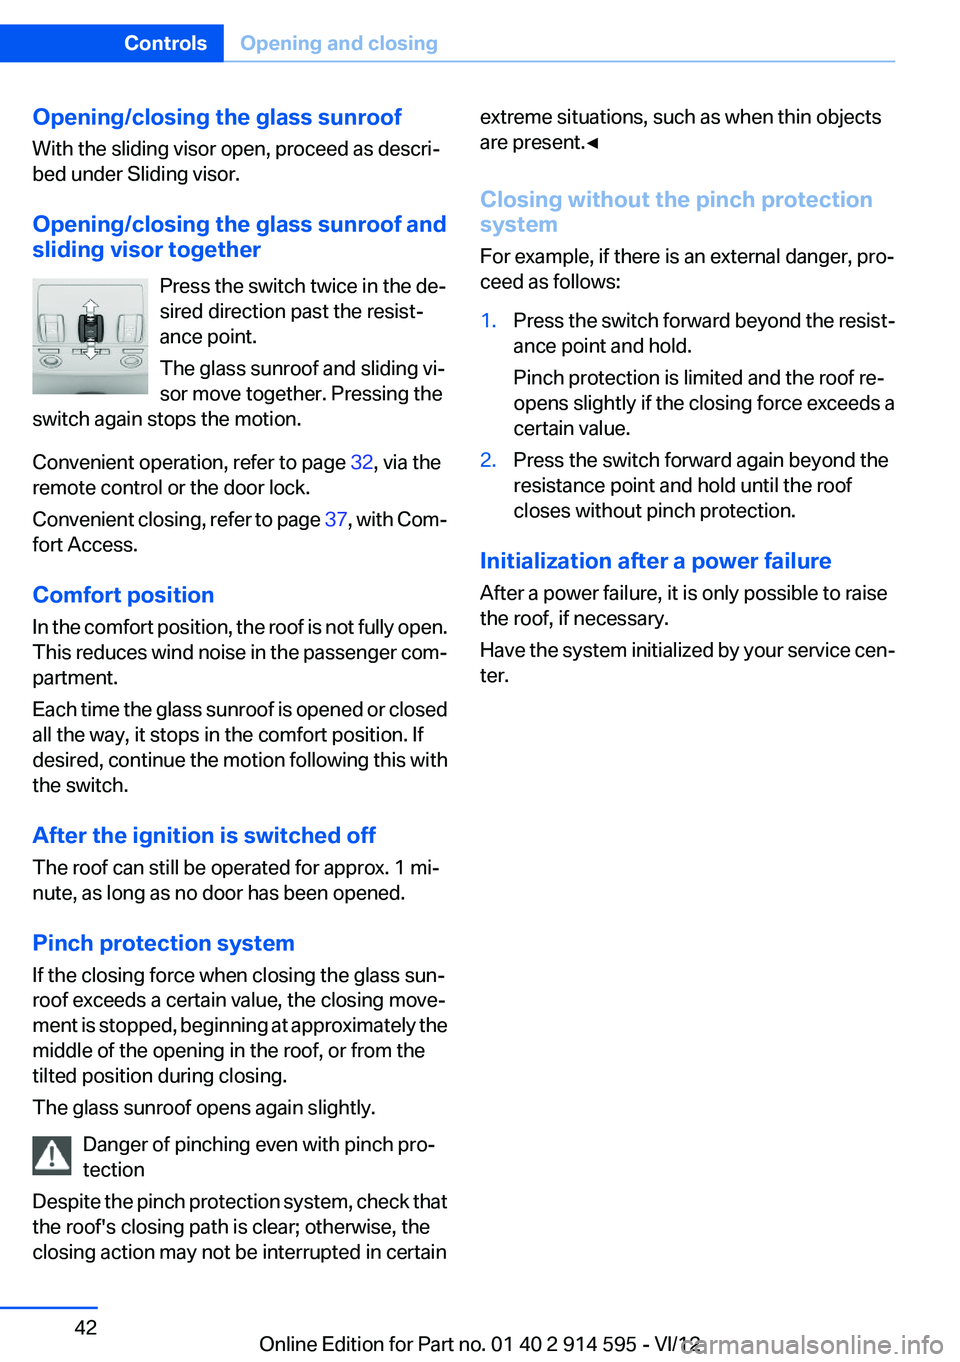
Opening/closing the sliding visor
▷Press the switch in the de‐
sired direction to the resist‐
ance point and hold it there.
The sliding visor moves while
the switch is being held.▷Press the switch in the desired direction
past the resistance point.
The sliding visor moves automatically.
Pressing the switch again stops the motion.Seite 41Opening and closingControls41
Online Edition for Part no. 01 40 2 914 595 - VI/12
Page 42 of 291

Opening/closing the glass sunroof
With the sliding visor open, proceed as descri‐
bed under Sliding visor.
Opening/closing the glass sunroof and
sliding visor together
Press the switch twice in the de‐
sired direction past the resist‐
ance point.
The glass sunroof and sliding vi‐
sor move together. Pressing the
switch again stops the motion.
Convenient operation, refer to page 32, via the
remote control or the door lock.
Convenient closing, refer to page 37, with Com‐
fort Access.
Comfort position
In the comfort position, the roof is not fully open.
This reduces wind noise in the passenger com‐
partment.
Each time the glass sunroof is opened or closed
all the way, it stops in the comfort position. If
desired, continue the motion following this with
the switch.
After the ignition is switched off
The roof can still be operated for approx. 1 mi‐
nute, as long as no door has been opened.
Pinch protection system
If the closing force when closing the glass sun‐
roof exceeds a certain value, the closing move‐
ment is stopped, beginning at approximately the
middle of the opening in the roof, or from the
tilted position during closing.
The glass sunroof opens again slightly.
Danger of pinching even with pinch pro‐
tection
Despite the pinch protection system, check that
the roof's closing path is clear; otherwise, the
closing action may not be interrupted in certainextreme situations, such as when thin objects
are present.◀
Closing without the pinch protection
system
For example, if there is an external danger, pro‐
ceed as follows:1.Press the switch forward beyond the resist‐
ance point and hold.
Pinch protection is limited and the roof re‐
opens slightly if the closing force exceeds a
certain value.2.Press the switch forward again beyond the
resistance point and hold until the roof
closes without pinch protection.
Initialization after a power failure
After a power failure, it is only possible to raise
the roof, if necessary.
Have the system initialized by your service cen‐
ter.
Seite 42ControlsOpening and closing42
Online Edition for Part no. 01 40 2 914 595 - VI/12
Page 43 of 291

AdjustingVehicle equipment
This chapter describes all series equipment as
well as country-specific and special equipment
offered for this model series.Therefore, it also
describes equipment that may not be found in
your vehicle, for instance due to the selected
special equipment or the country version. This
also applies to safety-related functions and sys‐
tems.
Sitting safely
The ideal seating position can make a vital con‐
tribution to relaxed, fatigue-free driving.
The seating position plays an important role in
an accident in combination with:▷Safety belts, refer to page 45.▷Head restraints, refer to page 46.▷Airbags, refer to page 85.
Seats
Note before adjusting Do not adjust the seat while driving
Never attempt to adjust the driver's seat
while driving.
The seat could respond with unexpected move‐
ment and the ensuing loss of vehicle control
could lead to an accident.◀
Do not incline the backrest too far to the
rear
Do not incline the backrest on the front passen‐
ger side too far to the rear during driving. Oth‐
erwise, there is the danger of sliding under the
safety belt in an accident. This would eliminate
the protection normally provided by the belt.◀
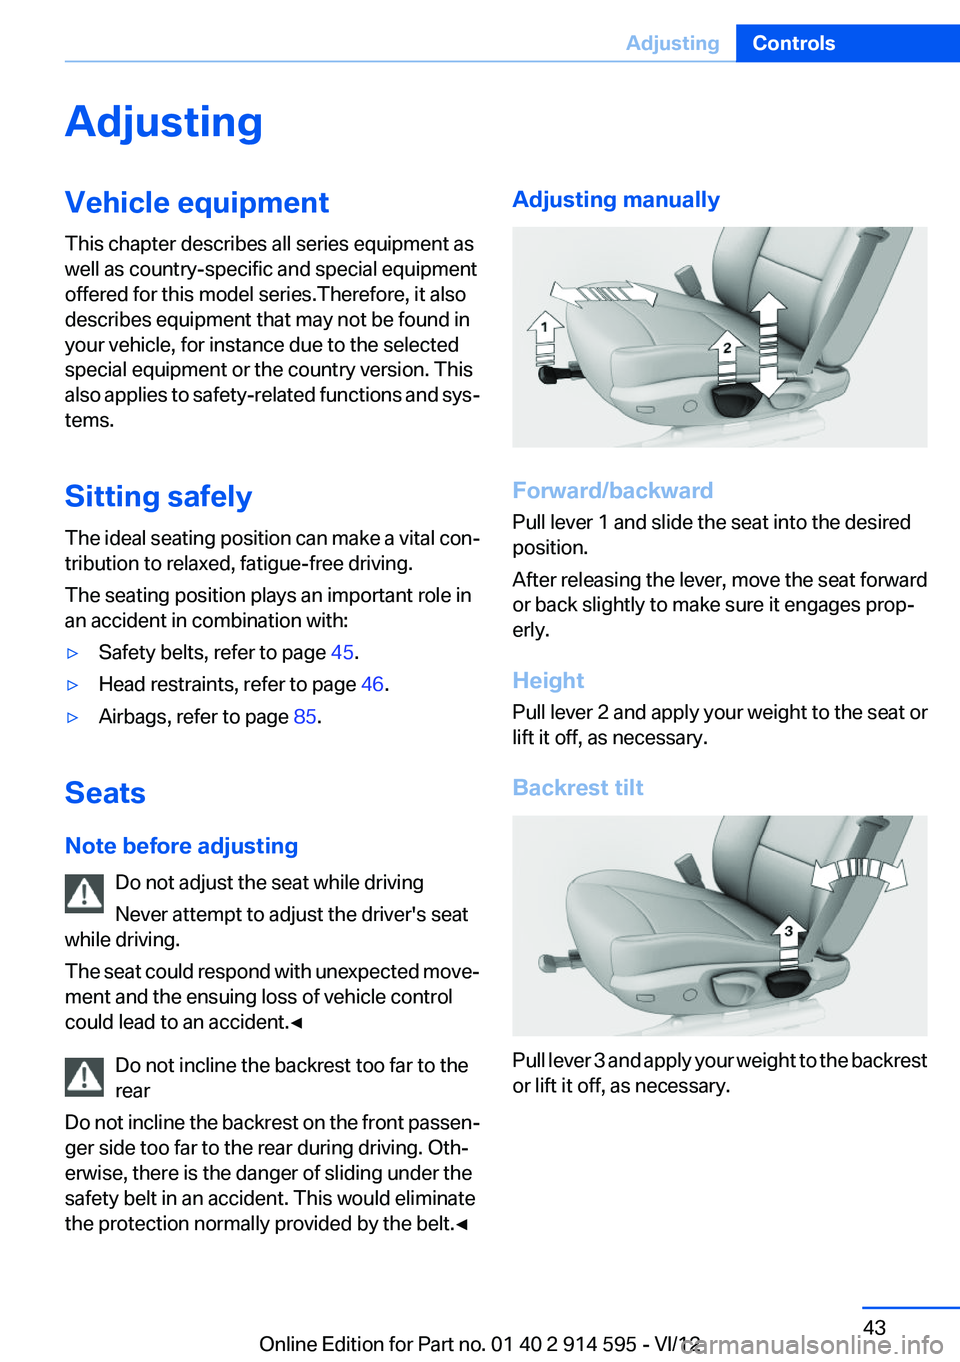
Adjusting manually
Forward/backward
Pull lever 1 and slide the seat into the desired
position.
After releasing the lever, move the seat forward
or back slightly to make sure it engages prop‐
erly.
Height
Pull lever 2 and apply your weight to the seat or
lift it off, as necessary.
Backrest tilt
Pull lever 3 and apply your weight to the backrest
or lift it off, as necessary.
Seite 43AdjustingControls43
Online Edition for Part no. 01 40 2 914 595 - VI/12
Page 46 of 291

Reduction of restraining effect
Avoid wearing clothing that prevents the
belt from fitting properly, and pull the shoulder
belt periodically to readjust the tension across
your lap; otherwise, the retention effect of the
safety belt may be reduced.◀
Buckling the belt
Make sure you hear the latch plate engage in the
belt buckle.
Unbuckling the belt
1.Hold the belt firmly.2.Press the red button in the belt buckle.3.Guide the belt back into its reel.
Safety belt reminder for the driver's and
front passenger seat
The indicator lamp lights up and a sig‐
nal sounds. In addition, a message ap‐
pears on the Control Display. Check
whether the safety belt has been fas‐
tened correctly.
The safety belt reminder is active at speeds
above approx. 5 mph/8 km/h. It can also be ac‐
tivated if objects are placed on the front pas‐
senger seat.
Damage to safety belts
In the case of strain caused by accidents or
damage:
Have the safety belts, including the safety belt
tensioners, replaced and have the belt anchors
checked.
Checking and replacing safety belts
Have the work performed only by your
service center; otherwise, it cannot be ensured
that this safety feature will function properly.◀
Head restraints
Correctly adjusted head restraints
A correctly adjusted head restraint reduces the
risk of spinal injury in the event of an accident.
Adjusting the head restraint
Correctly adjust the head restraints of all
occupied seats; otherwise, there is an increased
risk of injury in an accident.◀
Height
Adjust the head restraint so that its center is ap‐
prox. at ear level.
Distance
Adjust the distance so that the head restraint is
as close as possible to the back of the head.
Front
Height adjustment▷To raise: pull.▷To lower: press the button, arrow 1, and
push the head restraint down.Seite 46ControlsAdjusting46
Online Edition for Part no. 01 40 2 914 595 - VI/12