2013 BMW M5 transmission
[x] Cancel search: transmissionPage 131 of 230

Pathway lines▷Can be shown in the rearview camera im‐
age when in transmission position R.▷Help you to estimate the space required
when parking and maneuvering on level
roads.▷Are dependent on the current steering an‐
gle and are continuously adjusted to the
steering wheel movements.
Turning circle lines
▷Can be shown in the rearview camera im‐
age.▷Show the course of the smallest possible
turning circle on a level road.▷Only one turning circle line is displayed
when the steering wheel is turned.Obstacle marking
General information▷Spatially-shaped markings can be shown
in the rearview camera image.
Their colored steps match the markings of the
PDC. This simplifies estimation of the distance
to the object shown.
Parking using pathway and turning
circle lines
1.Position the vehicle so that the turning cir‐
cle lines lead to within the limits of the
parking space.Seite 127Driving comfortControls127
Online Edition for Part no. 01 40 2 909 953 - VI/13
Page 133 of 230

Cameras
The lenses of the Top View cameras are lo‐
cated at the bottom of the exterior mirror hous‐
ings. The image quality may be impaired by
dirt.
Clean the lens, refer to page 208.
Switching on/off
Switching on automatically Select transmission position R with the engine
running.
The Top View and PDC images are displayed if
the system is switched on via iDrive.
Automatic deactivation during forward
travel
The system switches off when a certain driving
distance or speed is exceeded.
Switch the system back on if necessary.
Switching on/off manually Press the button.
▷On: the LED lights up.▷Off: the LED goes out.
Top View is displayed.
Switching on the backup camera via
the iDrive
With Top View switched on:
"Rear view camera"
The backup camera image is displayed. The
setting is stored for the remote control cur‐
rently in use.
Display
Visual warning The approach of the vehicle to an object can
be shown on the Control Display.
When the distance to an object is small, a red
bar is shown in front of the vehicle, as it is in
the PDC display.
The display appears as soon as Top View is
activated.
If the rearview camera image was selected last,
it again appears on the display when reverse
gear is selected. To switch to Top View:
"Rear view camera" Select the symbol on
the Control Display.
The setting is stored for the remote control
currently in use.
Brightness
With Top View switched on:
1. Select the symbol.2.Turn the controller until the desired setting
is reached, and press the controller.
Contrast
With Top View switched on:
1. Select the symbol.2.Turn the controller until the desired setting
is reached, and press the controller.Seite 129Driving comfortControls129
Online Edition for Part no. 01 40 2 909 953 - VI/13
Page 147 of 230

4.Likewise, press and hold the button of the
desired function on the hand-held trans‐
mitter.5.Release both buttons as soon as the inte‐
rior rearview mirror LED flashes more rap‐
idly. When the LED is flashing faster, this
indicates that the button on the interior
rearview mirror has been programmed.
The system can then be controlled by the
button on the interior rearview mirror.
If the LED does not flash faster after at
least 60 seconds, change the distance and
repeat the step. Several more attempts at
different distances may be necessary. Wait
at least 15 seconds between attempts.
Canada: if programming with the hand-
held transmitter was interrupted, hold
down the interior rearview mirror button
and repeatedly press and release the
hand-held transmitter button for 2 sec‐
onds.
Controls
Before operation
Before operating a system using the
integrated universal remote control, ensure
that there are no people, animals, or objects
within the range of movement of the remote- controlled system; otherwise, there is a risk of
injury or damage.
Also follow the safety instructions of the hand-
held transmitter.◀
The system, such as the garage door, can be
operated using the button on the interior rear‐
view mirror while the engine is running or when
the ignition is started. To do this, hold down
the button within receiving range of the system
until the function is activated. The interior rear‐ view mirror LED stays lit while the wireless sig‐
nal is being transmitted.
Deleting stored functions Press and hold the left and right button on the
interior rearview mirror simultaneously for ap‐
proximately 20 seconds until the LED flashes
rapidly. All stored functions are deleted. The
functions cannot be deleted individually.
Ashtray/cigarette lighter Manual transmission: Front
Opening
Press on the cover.
Emptying Take out the insert.
Lighter Push in the lighter.
The lighter can be removed as
soon as it pops back out.
Danger of burns
Only hold the hot lighter by its knob; oth‐
erwise, there is the danger of getting burned.
Switch off the ignition and take the remote
control with you when leaving the vehicle so
that children cannot use the lighter and burn
themselves.◀
Replace the cover after use
Reinsert the lighter or socket cover after
use, otherwise objects may get into the lighter
socket or fixture and cause a short circuit.◀
Seite 143Interior equipmentControls143
Online Edition for Part no. 01 40 2 909 953 - VI/13
Page 148 of 230

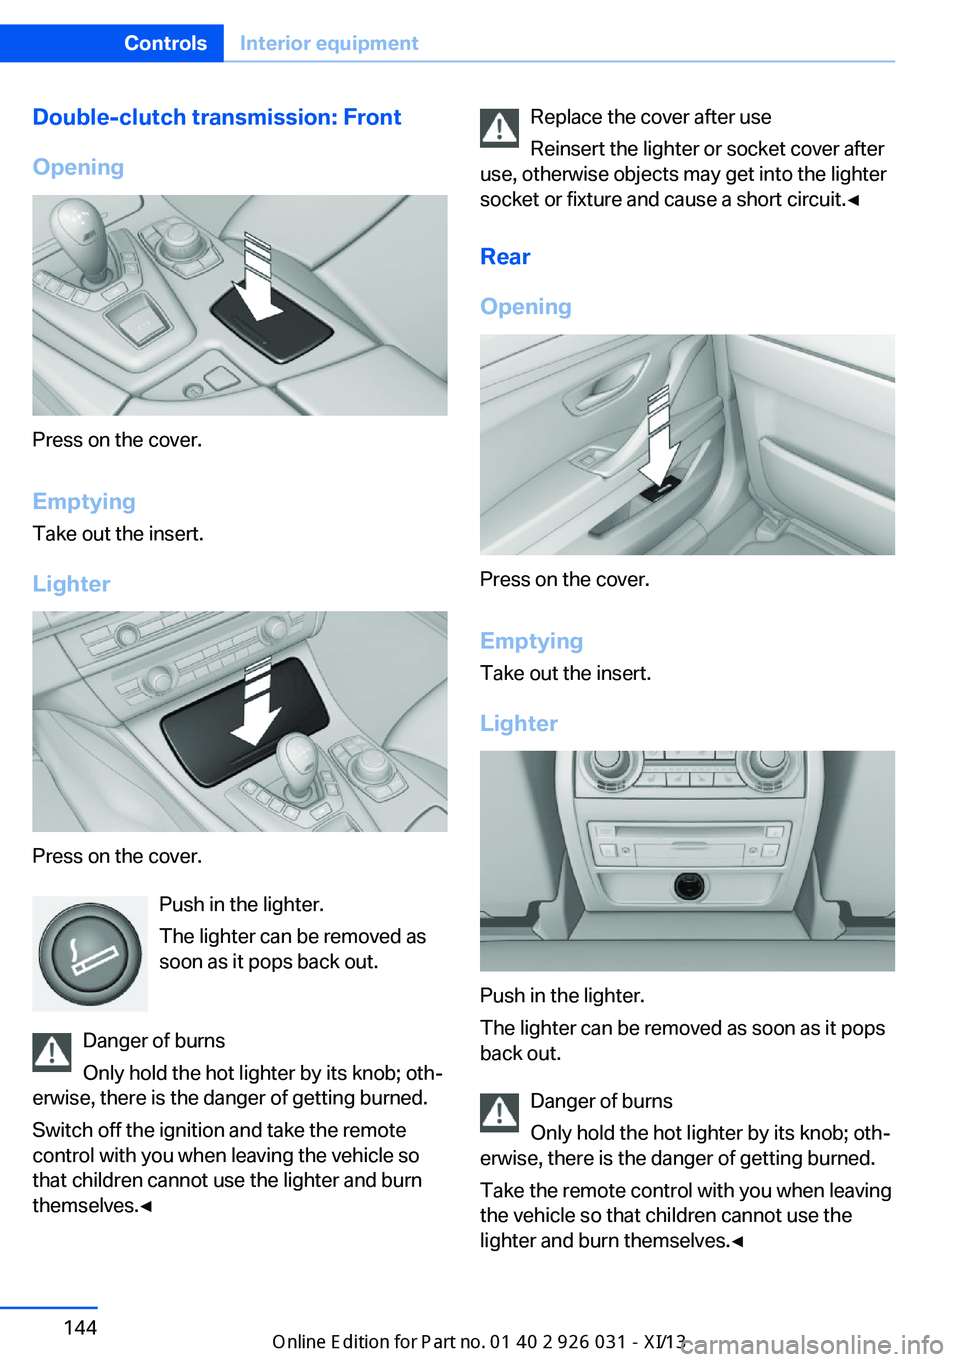
Double-clutch transmission: Front
Opening
Press on the cover.
Emptying Take out the insert.
Lighter
Press on the cover. Push in the lighter.
The lighter can be removed as
soon as it pops back out.
Danger of burns
Only hold the hot lighter by its knob; oth‐
erwise, there is the danger of getting burned.
Switch off the ignition and take the remote
control with you when leaving the vehicle so
that children cannot use the lighter and burn
themselves.◀
Replace the cover after use
Reinsert the lighter or socket cover after
use, otherwise objects may get into the lighter
socket or fixture and cause a short circuit.◀
Rear
Opening
Press on the cover.
Emptying Take out the insert.
Lighter
Push in the lighter.
The lighter can be removed as soon as it pops
back out.
Danger of burns
Only hold the hot lighter by its knob; oth‐
erwise, there is the danger of getting burned.
Take the remote control with you when leaving
the vehicle so that children cannot use the
lighter and burn themselves.◀
Seite 144ControlsInterior equipment144
Online Edition for Part no. 01 40 2 909 953 - VI/13
Page 149 of 230

Replace the cover after use
Reinsert the lighter or socket cover after
use, otherwise objects may get into the lighter
socket or fixture and cause a short circuit.◀
Connecting electrical
devices
Hints Do not plug chargers into the socketDo not connect battery chargers to the
factory-installed sockets in the vehicle as this
may damage the battery.◀
Replace the cover after use
Reinsert the lighter or socket cover after
use, otherwise objects may get into the lighter
socket or fixture and cause a short circuit.◀
Sockets
The lighter socket can be used as a socket for
electrical equipment while the engine is run‐
ning or when the ignition is switched on. The
total load of all sockets must not exceed
140 watts at 12 volts.
Do not damage the socket by using unsuitable
connectors.
Front center console: manualtransmission
Press on the cover.
Remove the cover or cigarette lighter.
Automatic transmission, Front center
console: double-clutch transmission
Press on the cover.
Remove the cover or cigarette lighter.
Center armrest
Remove cover. Rear center console
Remove the cover or cigarette lighter.
Seite 145Interior equipmentControls145
Online Edition for Part no. 01 40 2 909 953 - VI/13
Page 156 of 230

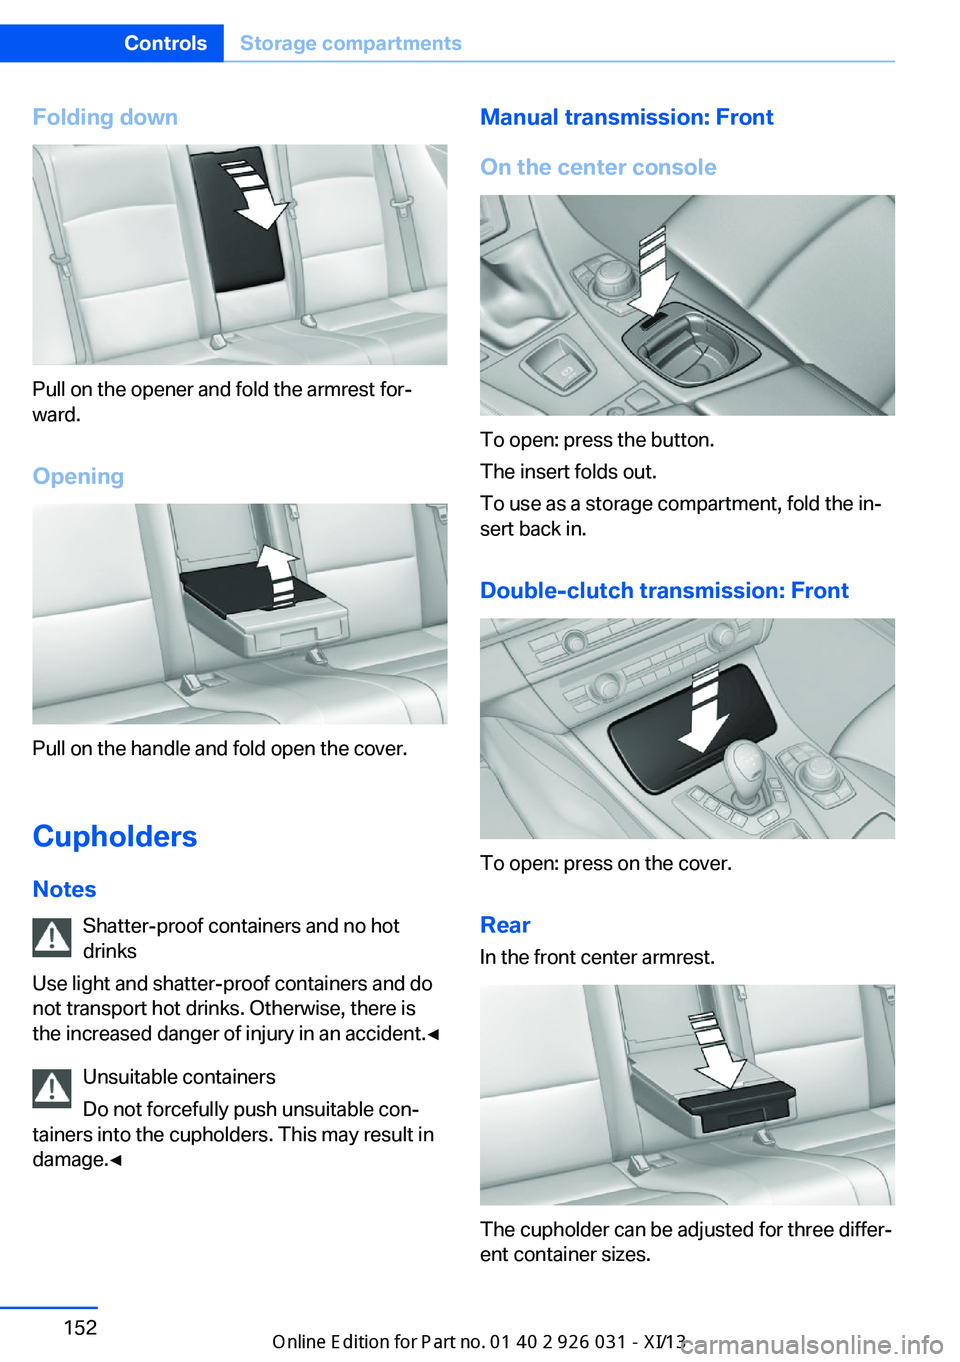
Folding down
Pull on the opener and fold the armrest for‐
ward.
Opening
Pull on the handle and fold open the cover.
Cupholders Notes Shatter-proof containers and no hot
drinks
Use light and shatter-proof containers and do
not transport hot drinks. Otherwise, there is
the increased danger of injury in an accident.◀
Unsuitable containers
Do not forcefully push unsuitable con‐
tainers into the cupholders. This may result in
damage.◀
Manual transmission: Front
On the center console
To open: press the button.
The insert folds out.
To use as a storage compartment, fold the in‐
sert back in.
Double-clutch transmission: Front
To open: press on the cover.Rear In the front center armrest.
The cupholder can be adjusted for three differ‐
ent container sizes.
Seite 152ControlsStorage compartments152
Online Edition for Part no. 01 40 2 909 953 - VI/13
Page 163 of 230

ramic brake discs designed for use on race‐
tracks.
Due to properties of the materials used, brak‐
ing may be associated with louder function
noises, particularly in wet conditions, just be‐
fore the vehicle comes to a stop. However, this
has no effect on the performance, operational
reliability and durability of the brake.
The effects of moisture and road salt, from us‐
ing a carwash or dew formation overnight for
example, may render the braking effect com‐
parable to that of a conventional braking sys‐
tem. This may be perceived as reduced brak‐
ing effect and can be compensated for if
necessary by pressing the brake pedal harder.
Before washing the vehicle in an automatic
carwash or wash tunnel, clean the brake discs
and brake calipers with a steam jet or high-
pressure washer as well, to prevent encrusta‐
tions and dirt build-ups, caused by salt crys‐
tals, for example, if the car is immobile
afterwards. The cleaning effect of automatic
carwashes or wash tunnels is usually not ade‐
quate for this in the area around the wheels.
To do this, also follow the instructions in
Washing the vehicle, refer to page 205, and
Braking safely, refer to page 162.
Drive train With this vehicle, particular value was placed
on the direct connection from engine to the
drive train. Due to the torsionally rigid design of
the drive train, as is typical in a sports car, the
transmission of the torque also gives acoustic
feedback.
When there are load changes, this may result
in clacker noises. They do not cause any im‐
pairment of the operation or the service life of
the components.Driving on racetracks
Requirements Before driving on a racetrack:▷Participation in the BMW Driver Training.▷Check engine oil fill level and replenish as
necessary.▷Have vehicle checked at a service center.
Hints
Racetrack operation leads to increased wear.
The vehicle is not designed for motorsports
competitive use. This wear is not covered by
the warranty.
The standard brake linings and the wear indi‐
cators are not designed for racetrack opera‐
tion. For more information and advice, contact
your service center.
Seite 159BMW M5 technologyDriving tips159
Online Edition for Part no. 01 40 2 909 953 - VI/13
Page 165 of 230

General driving notes
Closing the trunk lid Drive with the trunk lid closed
Only drive with the tailgate closed; other‐
wise, in the event of an accident or braking and
evasive maneuvers, passengers and other road
users may be injured, and the vehicle may be
damaged. In addition, exhaust fumes may en‐
ter the passenger compartment.◀
If driving with the tailgate open cannot be avoided:▷Close all windows and the glass sunroof.▷Greatly increase the blower speed.▷Drive moderately.
Hot exhaust system
Hot exhaust system
High temperatures are generated in the
exhaust system.
Do not remove the heat shields installed and
never apply undercoating to them. Make sure
that flammable materials, e. g. hay, leaves,
grass, etc. do not come in contact with the hot
exhaust system during driving, while in idle po‐
sition mode, or when parked. Such contact
could lead to a fire, and with it the risk of seri‐
ous personal injury as well as property dam‐
age.
Do not touch hot exhaust pipes; otherwise,
there is the danger of getting burned.◀
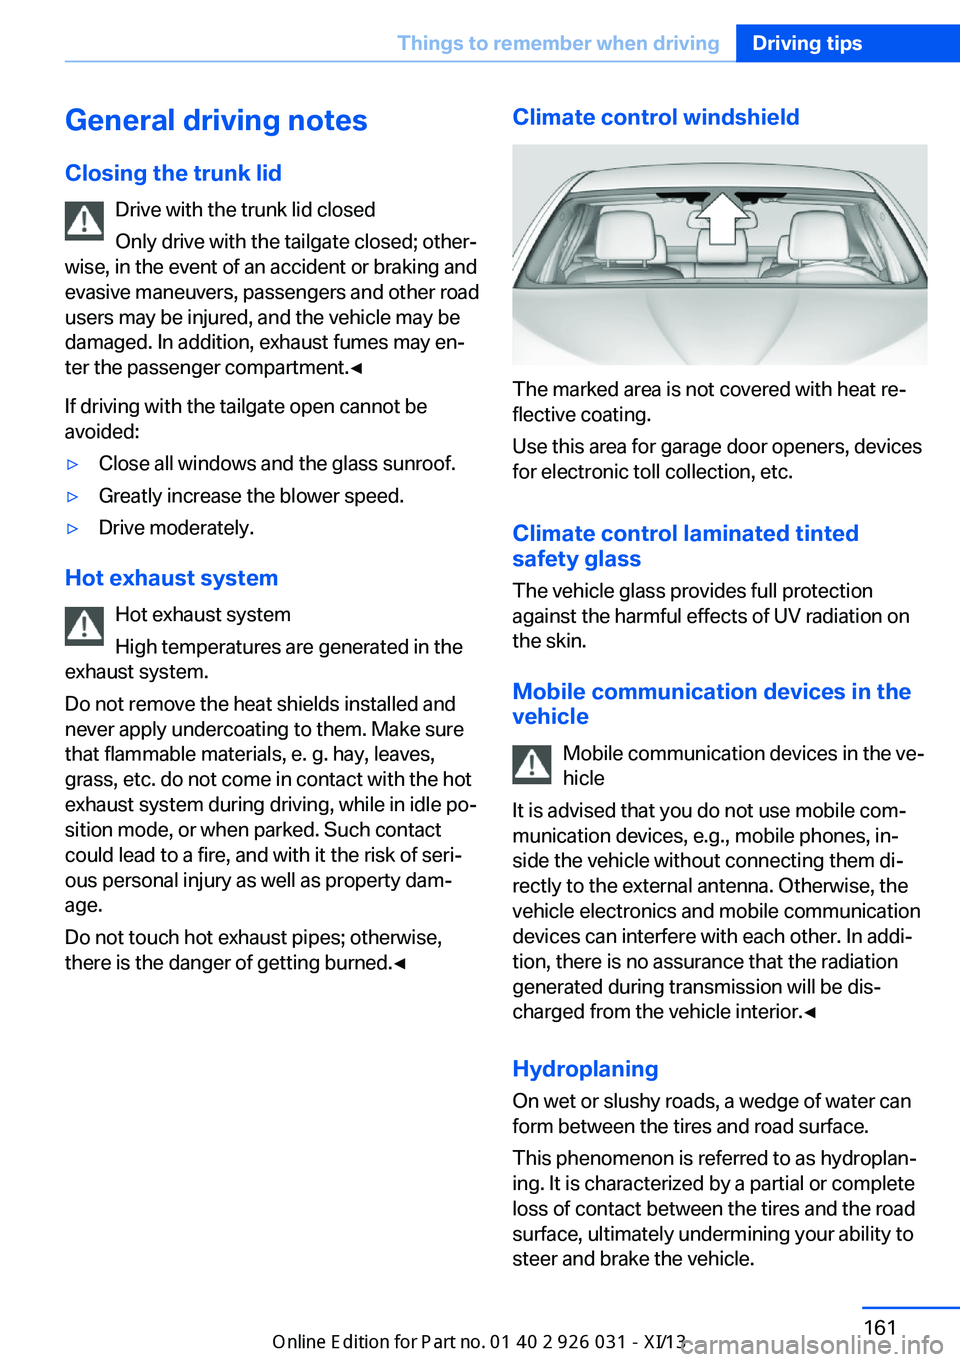
Climate control windshield
The marked area is not covered with heat re‐
flective coating.
Use this area for garage door openers, devices
for electronic toll collection, etc.
Climate control laminated tinted
safety glass
The vehicle glass provides full protection
against the harmful effects of UV radiation on
the skin.
Mobile communication devices in thevehicle
Mobile communication devices in the ve‐
hicle
It is advised that you do not use mobile com‐
munication devices, e.g., mobile phones, in‐
side the vehicle without connecting them di‐
rectly to the external antenna. Otherwise, the
vehicle electronics and mobile communication
devices can interfere with each other. In addi‐
tion, there is no assurance that the radiation
generated during transmission will be dis‐
charged from the vehicle interior.◀
Hydroplaning
On wet or slushy roads, a wedge of water can
form between the tires and road surface.
This phenomenon is referred to as hydroplan‐
ing. It is characterized by a partial or complete
loss of contact between the tires and the road
surface, ultimately undermining your ability to
steer and brake the vehicle.
Seite 161Things to remember when drivingDriving tips161
Online Edition for Part no. 01 40 2 909 953 - VI/13