2013 BMW ACTIVEHYBRID3 wheel
[x] Cancel search: wheelPage 45 of 220

Panic mode
You can trigger the alarm system if you find
yourself in a dangerous situation.
Press the button on the remote control
for at least 3 seconds.
To switch off the alarm: press any button.
Switching off the alarm▷Unlock the vehicle using the remote control.▷With Comfort Access: If you are carrying the
remote control with you, pull on the driver
side or front passenger side door handle.
Indicator lamp on the interior rear view
mirror
▷The indicator lamp flashes briefly every
2 seconds:
The system is armed.▷The indicator lamp flashes after locking:
The doors, hood or trunk lid is not closed
properly, but the rest of the vehicle is se‐
cured.
After 10 seconds, the indicator lamp flashes
continuously. Interior motion sensor and tilt
alarm sensor are not active.▷The indicator lamp goes out after unlocking:
The vehicle has not been tampered with.▷The indicator lamp flashes after unlocking
until the engine ignition is switched on, but
no longer than approx. 5 minutes:
An alarm has been triggered.Tilt alarm sensor
The tilt of the vehicle is monitored.
The alarm system responds in situations such
as attempts to steal a wheel or when the car is
towed.
Interior motion sensor
The windows and glass sunroof must be closed
for the system to function properly.
Avoiding unintentional alarms
The tilt alarm sensor and interior motion sensor
can be switched off together, such as in the fol‐
lowing situations:▷In automatic car washes.▷In duplex garages.▷During transport on car-carrying trains, at
sea or on a trailer.▷When animals are to remain in the vehicle.
Switching off the tilt alarm sensor and
interior motion sensor
Press the remote control button again
within 10 seconds as soon as the vehicle
is locked.
The indicator lamp lights up for approx. 2 sec‐
onds and then continues to flash.
The tilt alarm sensor and interior motion sensor
are switched off until the vehicle is locked again.
Power windows
General information Take the remote control with you
Take the remote control with you when
leaving the vehicle so that children, for example,
cannot operate the power windows and injure
themselves.◀
Seite 45Opening and closingControls45
Online Edition for Part no. 01 40 2 917 825 - II/13
Page 56 of 220

3. Press the button. The LED in the
button lights up.4.Press the desired button 1 or 2. The LED
goes out.
If the M button is pressed accidentally:
Press the button again.
The LED goes out.
Calling up settings Do not retrieve the memory while driving
Do not retrieve the memory setting while
driving, as an unexpected movement of the seat
or steering wheel could result in an accident.◀
Comfort function
1.Open the driver's door.2.Switch off the ignition.3.Briefly press the desired button 1 or 2.
The corresponding seat position is performed
automatically.
The procedure stops when a switch for adjust‐
ing the seat or one of the buttons is pressed.
Safety mode
1.Close the driver's door or switch on the ig‐
nition.2.Press and hold the desired button 1 or 2 until
the adjustment procedure is completed.
Calling up of a seat position
deactivated
After a brief period, the calling up of stored seat
positions is deactivated to save battery power.
To reactivate calling up of a seat position:
▷Open and close the door or trunk lid.▷Press a button on the remote control.▷Press the Start/Stop button.Mirrors
Exterior mirrors
At a glance1Adjusting2Left/right, Automatic Curb Monitor3Fold in and out
General information
The mirror on the passenger side is more curved
than the driver's side mirror.
Estimating distances correctly
Objects reflected in the mirror are closer
than they appear. Do not estimate the distance
to the traffic behind you based on what you see
in the mirror, as this will increase your risk of an
accident.◀
Depending on how the vehicle is equipped, the
mirror setting is stored for the remote control in
use. When the vehicle is unlocked via the remote
control, the position is automatically retrieved if
the setting for this function is active.
Selecting a mirror To change over to the other mirror:
Slide the mirror changeover switch.
Adjusting electrically The setting corresponds to the direction
in which the button is pressed.
Seite 56ControlsAdjusting56
Online Edition for Part no. 01 40 2 917 825 - II/13
Page 58 of 220

Functional requirement
For proper operation:▷Keep the photocells clean.▷Do not cover the area between the inside
rearview mirror and the windshield.
Steering wheel
General information Do not adjust while driving
Do not adjust the steering wheel while
driving; otherwise, an unexpected movement
could result in an accident.◀
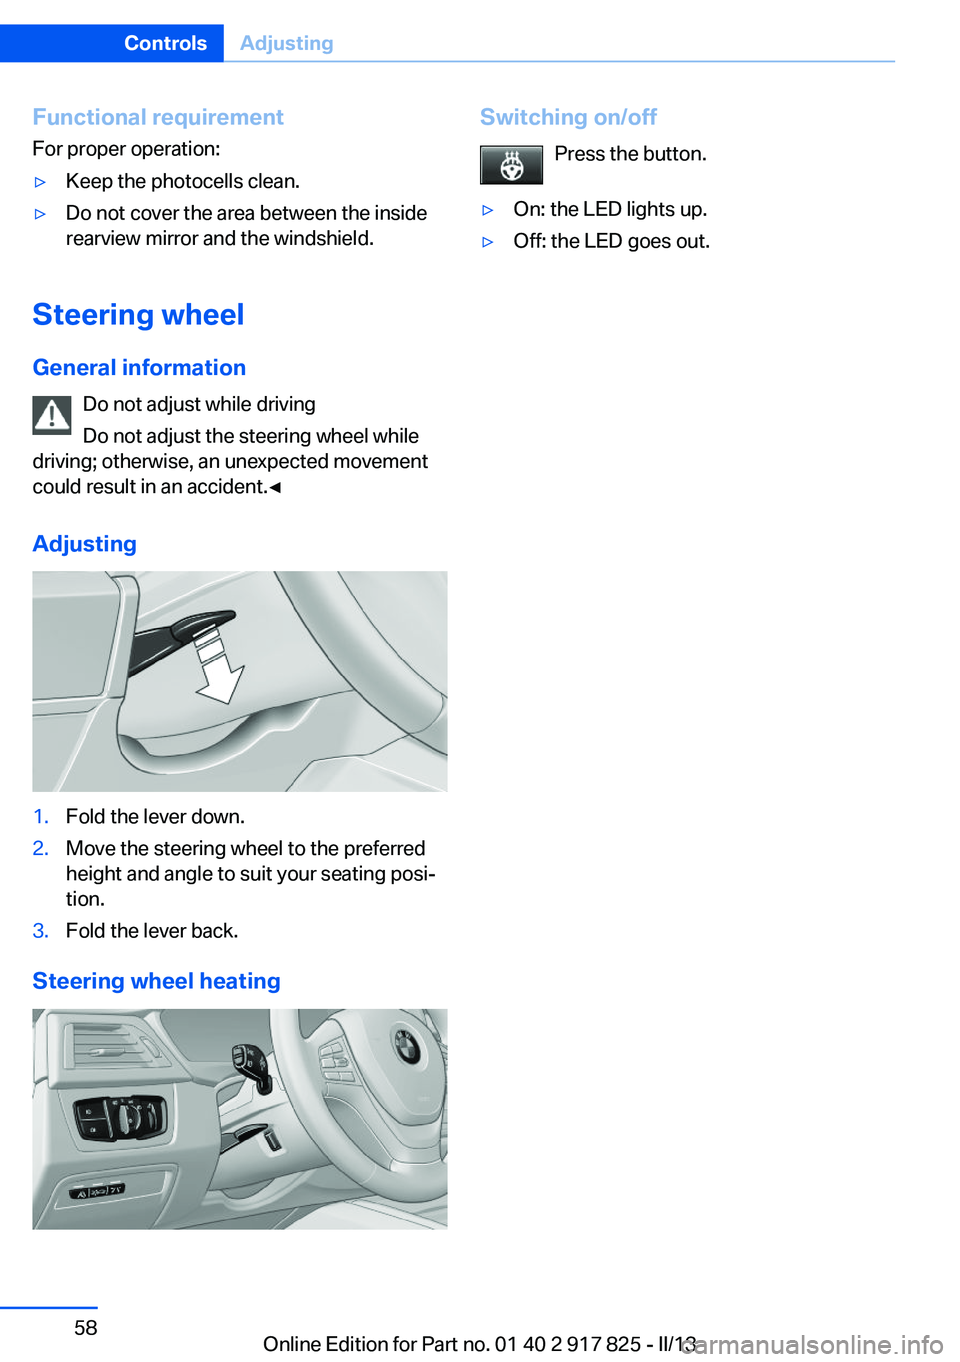
Adjusting
1.Fold the lever down.2.Move the steering wheel to the preferred
height and angle to suit your seating posi‐
tion.3.Fold the lever back.
Steering wheel heating
Switching on/off
Press the button.▷On: the LED lights up.▷Off: the LED goes out.Seite 58ControlsAdjusting58
Online Edition for Part no. 01 40 2 917 825 - II/13
Page 68 of 220

HintsUse while driving
If on a rare occasion it is necessary to use
the parking brake while driving, do not use ex‐
cessive force when applying it. When using it,
keep the button on the lever depressed.
Otherwise, using excessive force when applying
the parking brake may cause the rear wheels to
lock, resulting in fishtailing.◀
To prevent corrosion and braking control on one
side only, lightly apply the parking brake period‐
ically while coasting, if traffic conditions permit.
The brake lamps will not light up if the parking
brake is engaged.
Turn signal, high beams,
headlamp flasher
Turn signal Do not fold in the exterior mirrors
Do not fold in the exterior mirror while driv‐
ing and when the turn signals/warning flashers
are working, or else the additional flasher lights
in the exterior mirror will no longer be in the pre‐
scribed position and will be difficult to see.◀
Using turn signals
Press the lever beyond the resistance point.
To switch off manually, press the lever to the re‐
sistance point.
Unusually rapid flashing of the indicator lamp in‐
dicates that a turn signal bulb has failed.
Triple turn signal activation
Press the lever to the resistance point.
The turn signal flashes three times.
The function can be activated or deactivated:1."Settings"2."Lighting"3."Triple turn signal"
Signaling briefly
Press the lever to the resistance point and hold
it there for as long as you want the turn signal to
flash.
High beams, headlamp flasher
▷High beams, arrow 1.▷Headlamp flasher, arrow 2.Seite 68ControlsDriving68
Online Edition for Part no. 01 40 2 917 825 - II/13
Page 70 of 220

Deactivate the rain sensor in car washes
Deactivate the rain sensor when passing
through an automatic car wash; otherwise, dam‐
age could be caused by undesired wiper activa‐
tion.◀
Setting the frequency or sensitivity of
the rain sensor
Turn the thumbwheel.
Clean the windshield, headlamps
Pull the wiper lever.
The system sprays washer fluid on the wind‐
shield and activates the wipers briefly.
In addition, the headlamps are cleaned at regular
intervals when the vehicle lights are switched
on.
Do not use the washer system at freezing
temperatures
Do not use the washers if there is any danger
that the fluid will freeze on the windshield; oth‐
erwise, your vision could be obscured. For this
reason, use antifreeze.
Avoid using the washer when the reservoir is
empty; otherwise, you could damage the
pump.◀
Windshield washer nozzles
The windshield washer nozzles are automati‐
cally heated while the ignition is switched on.
Fold-out position of the wipers
Required when changing the wiper blades or
under frosty conditions, for example.1.Switch the ignition on and off again.2.Under frosty conditions, ensure that the
wiper blades are not frozen onto the wind‐
shield.3.Press the wiper lever up beyond the point of
resistance and hold it for approx. 3 seconds,
until the wiper remains in a nearly vertical
position.
After the wipers are folded back down, the wiper
system must be reactivated.
Fold the wipers back down
Before switching the ignition on, fold the
wipers back down to the windshield; otherwise,
the wipers may become damaged when they are
switched on.◀
1.Switch on the ignition.2.Press the wiper levers down. The wipers
move to their resting position and are ready
for operation.
Washer fluid
General information Antifreeze for washer fluid
Antifreeze is flammable and can cause in‐
jury if it is used incorrectly.
Therefore, keep it away from sources of ignition.
Only keep it in the closed original container and
inaccessible to children.
Seite 70ControlsDriving70
Online Edition for Part no. 01 40 2 917 825 - II/13
Page 71 of 220

Follow the notes and instructions on the con‐
tainer.
United States: The washer fluid mixture ratio is
regulated by the U.S. EPA and many individual
states; do not exceed the allowable washer fluid
dilution ratios limits that apply. Follow the usage
instructions on the washer fluid container. Use
BMW’s Windshield Washer Concentrate or the
equivalent.◀
Washer fluid reservoir Adding washer fluid
Only add washer fluid when the engine is
cool, and then close the cover completely to
avoid contact between the washer fluid and hot
engine parts.
Otherwise, there is the danger of fire and a risk
to personal safety if the fluid is spilled.◀
All washer nozzles are supplied from one reser‐
voir.
Fill with a mixture of windshield washer concen‐
trate and water and – if required – with a washer
antifreeze, according to the manufacturer's rec‐
ommendations.
Mix the washer fluid before adding to maintain
the correct mixing ratio.
Do not add windshield washer concentrate un‐
diluted and do not fill with pure water; this could
damage the wiper system.
Do not fill with undiluted antifreeze.
For the capacity, refer to technical data.
Automatic transmission with
Steptronic
Transmission positions
D Drive, automatic position
Position for normal vehicle operation. All for‐
ward gears are available.
R is Reverse
Select only when the vehicle is stationary.
N is Neutral
Use in automatic car washes, for example. The
vehicle can roll.
When the ignition is switched off, refer to
page 63, position P is engaged automatically.
P Park
Select only when the vehicle is stationary. The
drive wheels are blocked.
P is engaged automatically:▷After deactivating drive readiness when the
vehicle is in radio ready state, refer to
page 63, or when the ignition is switched off,
refer to page 63, and when position R or D is
engaged.▷With the ignition is off, if position N is en‐
gaged.▷If the safety belt is unbuckled, the driver's
door is opened, and the brake pedal is not
pressed while the vehicle is stationary and
transmission position R or D is engaged.
Before exiting the vehicle, make sure that posi‐
tion P of the automatic transmission is engaged.
Otherwise, the vehicle may begin to roll.
Kickdown
Kickdown is used to achieve maximum driving
performance. Press on the gas pedal beyond the
resistance point at the full throttle position.
Seite 71DrivingControls71
Online Edition for Part no. 01 40 2 917 825 - II/13
Page 73 of 220

The engaged gear is displayed in the instrument
cluster, e.g., M1.
Once maximum engine speed is attained, M/S
manual mode is automatically upshifted as
needed.
Switching to manual mode▷To shift down: press the selector lever for‐
ward.▷To shift up: pull the selector lever rearwards.
Gears will only be shifted at appropriate engine
and road speeds, e.g., downshifting is not pos‐
sible if the engine speed is too high.
The selected gear is briefly displayed in the in‐
strument cluster, followed by the current gear.
Sport automatic transmissions:
prevent automatic upshifting in M/S
manual mode
For vehicles with Sport automatic transmis‐
sions, automatic shift operations are not per‐
formed, at maximum engine speed for example,
if one of the following conditions is met:
▷DSC deactivated.▷TRACTION activated.▷SPORT+ activated.
In addition, the kickdown is deactivated.
Ending the sport program/manual
mode
Push the selector lever to the right.
D is displayed in the instrument cluster.
Shift paddles for Sport automatic
transmission
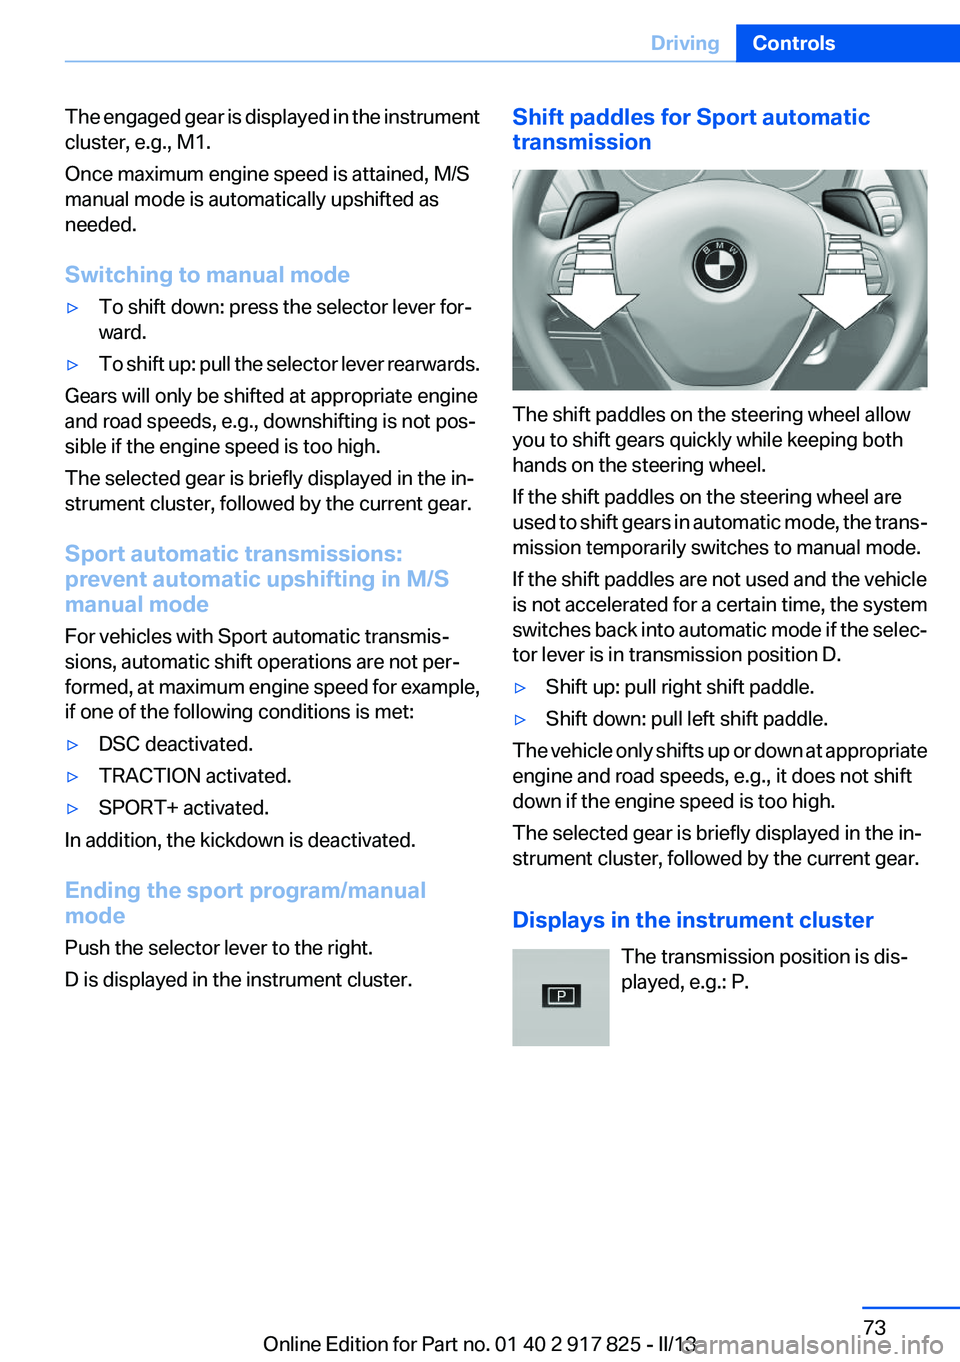
The shift paddles on the steering wheel allow
you to shift gears quickly while keeping both
hands on the steering wheel.
If the shift paddles on the steering wheel are
used to shift gears in automatic mode, the trans‐
mission temporarily switches to manual mode.
If the shift paddles are not used and the vehicle
is not accelerated for a certain time, the system
switches back into automatic mode if the selec‐
tor lever is in transmission position D.
▷Shift up: pull right shift paddle.▷Shift down: pull left shift paddle.
The vehicle only shifts up or down at appropriate
engine and road speeds, e.g., it does not shift
down if the engine speed is too high.
The selected gear is briefly displayed in the in‐
strument cluster, followed by the current gear.
Displays in the instrument cluster The transmission position is dis‐
played, e.g.: P.
Seite 73DrivingControls73
Online Edition for Part no. 01 40 2 917 825 - II/13
Page 84 of 220

▷If the speed limits stored in the navigation
system are incorrect.▷In areas not covered by the navigation sys‐
tem.▷When roads differ from the navigation, such
as due to changes in the road network.▷When passing buses or trucks with a speed
sticker.▷If the traffic signs are non-conforming.▷During calibration of the camera immedi‐
ately after vehicle shipment.
Selection lists in the
instrument cluster
The concept
The following can be displayed or operated us‐
ing the buttons and the thumbwheel on the
steering wheel and the display in the instrument
cluster:
▷Current audio source.▷Redial on telephone.▷Activation of the voice activation system.
In addition, programs of the Driving Dynamics
Control are displayed.
Display
Instrument cluster with enhanced
features
Activating a list and adjusting the
setting
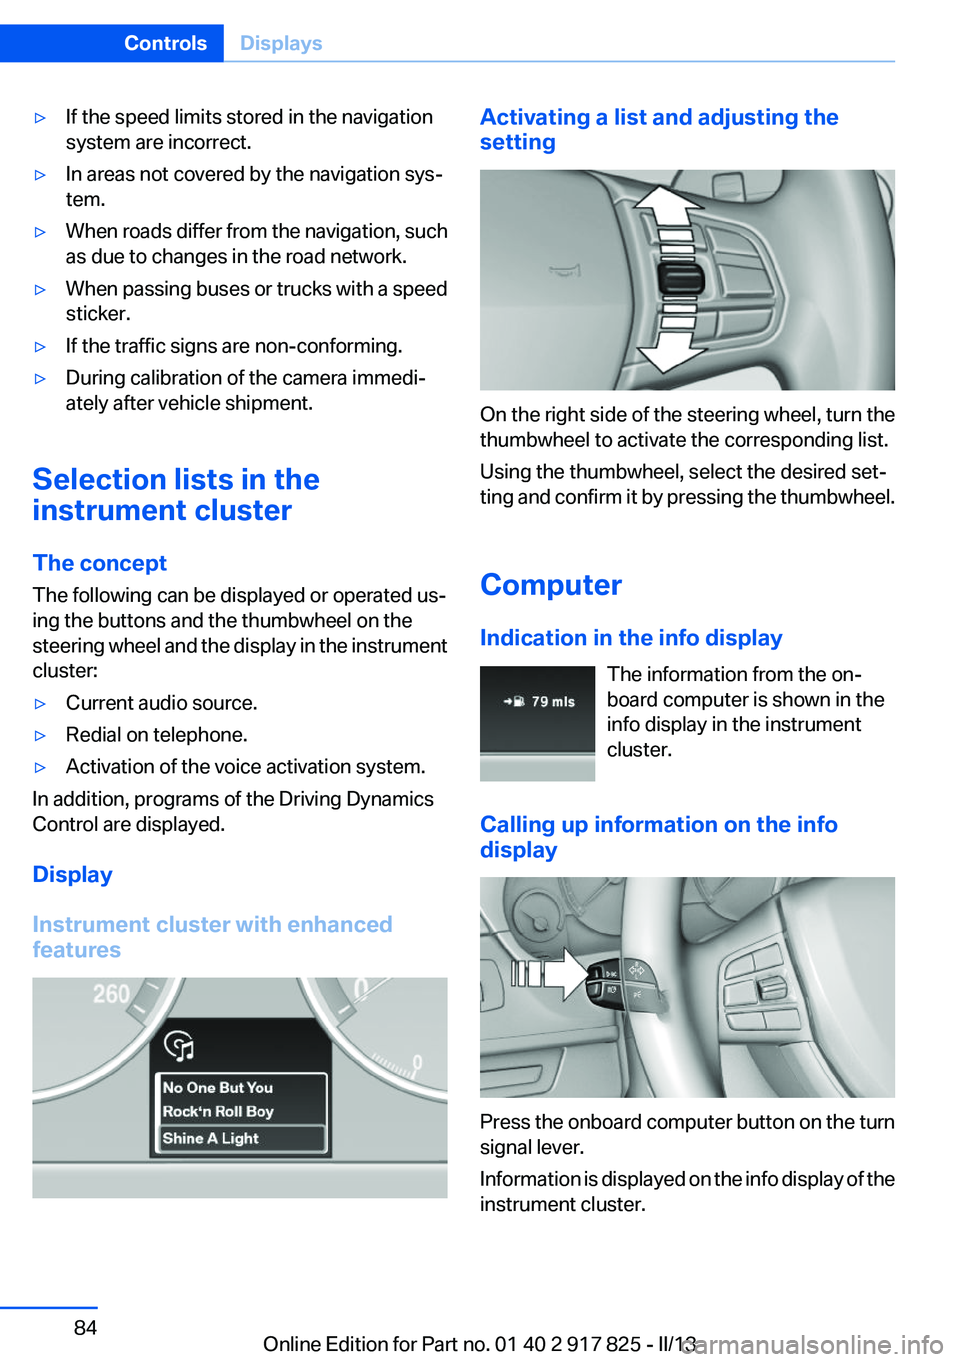
On the right side of the steering wheel, turn the
thumbwheel to activate the corresponding list.
Using the thumbwheel, select the desired set‐
ting and confirm it by pressing the thumbwheel.
Computer
Indication in the info display The information from the on‐
board computer is shown in the
info display in the instrument
cluster.
Calling up information on the info
display
Press the onboard computer button on the turn
signal lever.
Information is displayed on the info display of the
instrument cluster.
Seite 84ControlsDisplays84
Online Edition for Part no. 01 40 2 917 825 - II/13