2013 BMW 650I XDRIVE GRAN COUPE warning light
[x] Cancel search: warning lightPage 138 of 232
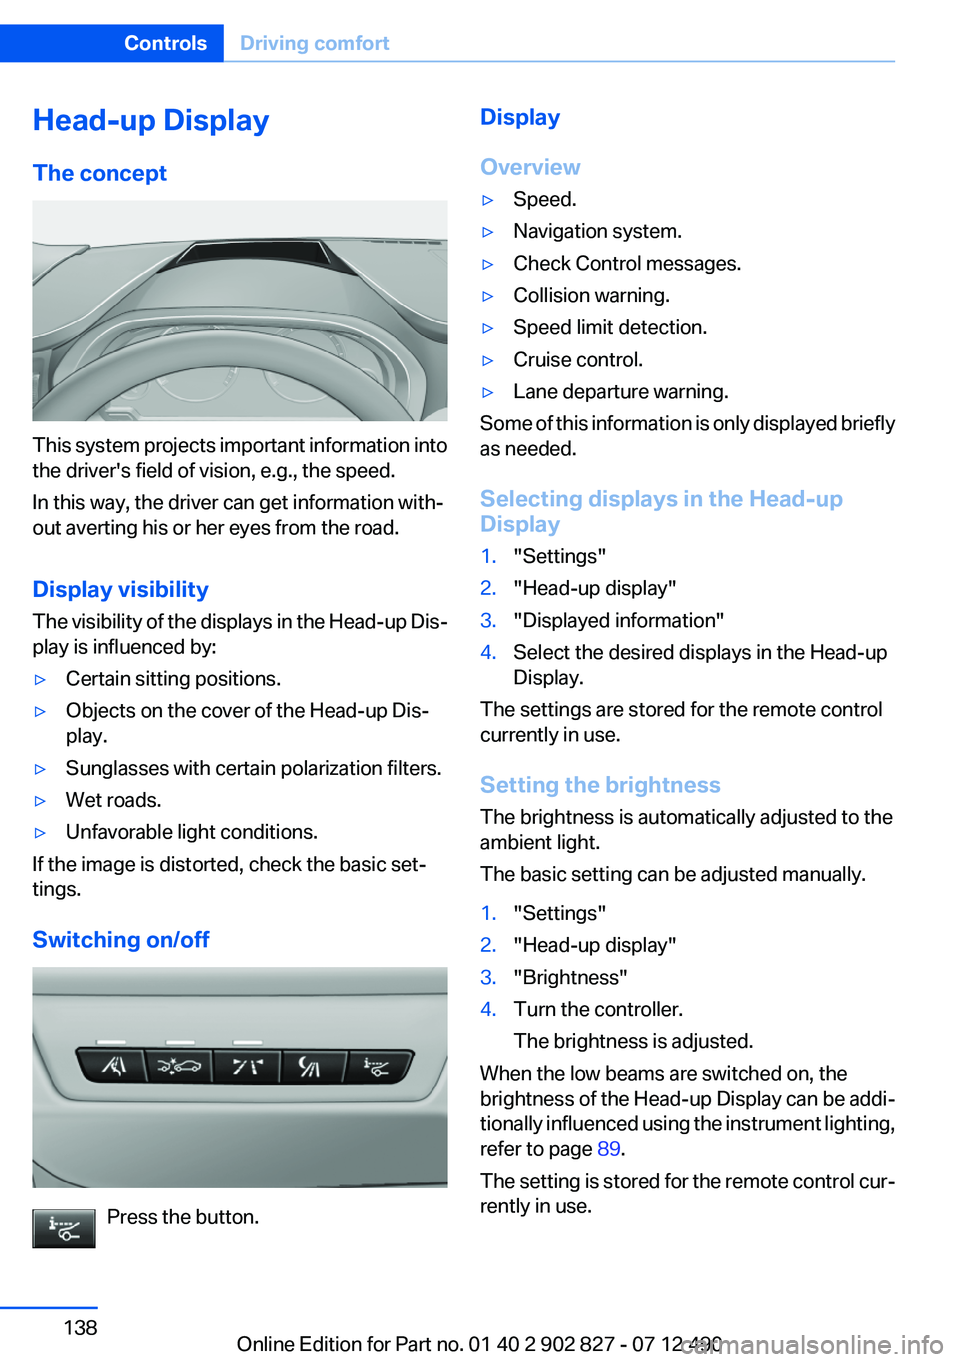
Head-up Display
The concept
This system projects important information into
the driver's field of vision, e.g., the speed.
In this way, the driver can get information with‐
out averting his or her eyes from the road.
Display visibility
The visibility of the displays in the Head-up Dis‐
play is influenced by:
▷Certain sitting positions.▷Objects on the cover of the Head-up Dis‐
play.▷Sunglasses with certain polarization filters.▷Wet roads.▷Unfavorable light conditions.
If the image is distorted, check the basic set‐
tings.
Switching on/off
Press the button.
Display
Overview▷Speed.▷Navigation system.▷Check Control messages.▷Collision warning.▷Speed limit detection.▷Cruise control.▷Lane departure warning.
Some of this information is only displayed briefly
as needed.
Selecting displays in the Head-up
Display
1."Settings"2."Head-up display"3."Displayed information"4.Select the desired displays in the Head-up
Display.
The settings are stored for the remote control
currently in use.
Setting the brightness
The brightness is automatically adjusted to the
ambient light.
The basic setting can be adjusted manually.
1."Settings"2."Head-up display"3."Brightness"4.Turn the controller.
The brightness is adjusted.
When the low beams are switched on, the
brightness of the Head-up Display can be addi‐
tionally influenced using the instrument lighting,
refer to page 89.
The setting is stored for the remote control cur‐
rently in use.
Seite 138ControlsDriving comfort138
Online Edition for Part no. 01 40 2 902 827 - 07 12 490
Page 165 of 232
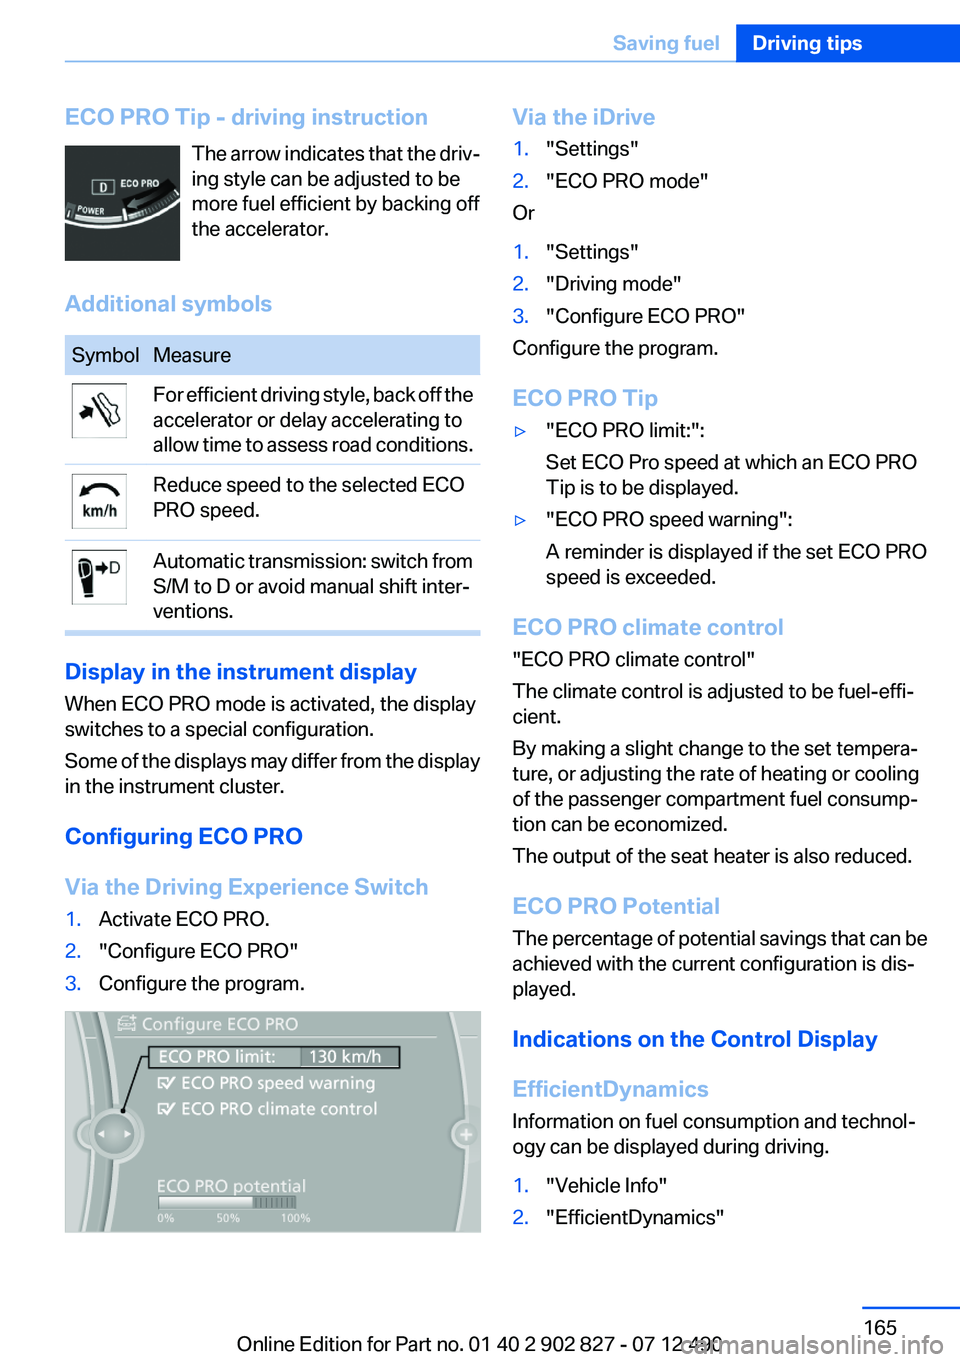
ECO PRO Tip - driving instructionThe arrow indicates that the driv‐
ing style can be adjusted to be
more fuel efficient by backing off
the accelerator.
Additional symbolsSymbolMeasureFor efficient driving style, back off the
accelerator or delay accelerating to
allow time to assess road conditions.Reduce speed to the selected ECO
PRO speed.Automatic transmission: switch from
S/M to D or avoid manual shift inter‐
ventions.
Display in the instrument display
When ECO PRO mode is activated, the display
switches to a special configuration.
Some of the displays may differ from the display
in the instrument cluster.
Configuring ECO PRO
Via the Driving Experience Switch
1.Activate ECO PRO.2."Configure ECO PRO"3.Configure the program.Via the iDrive1."Settings"2."ECO PRO mode"
Or
1."Settings"2."Driving mode"3."Configure ECO PRO"
Configure the program.
ECO PRO Tip
▷"ECO PRO limit:":
Set ECO Pro speed at which an ECO PRO
Tip is to be displayed.▷"ECO PRO speed warning":
A reminder is displayed if the set ECO PRO
speed is exceeded.
ECO PRO climate control
"ECO PRO climate control"
The climate control is adjusted to be fuel-effi‐
cient.
By making a slight change to the set tempera‐
ture, or adjusting the rate of heating or cooling
of the passenger compartment fuel consump‐
tion can be economized.
The output of the seat heater is also reduced.
ECO PRO Potential
The percentage of potential savings that can be
achieved with the current configuration is dis‐
played.
Indications on the Control Display
EfficientDynamics
Information on fuel consumption and technol‐
ogy can be displayed during driving.
1."Vehicle Info"2."EfficientDynamics"Seite 165Saving fuelDriving tips165
Online Edition for Part no. 01 40 2 902 827 - 07 12 490
Page 187 of 232
3. "Measure engine oil level"4."Start measurement"
The oil level is checked and displayed via a scale.
Duration: approx. 1 minute.
Adding engine oil
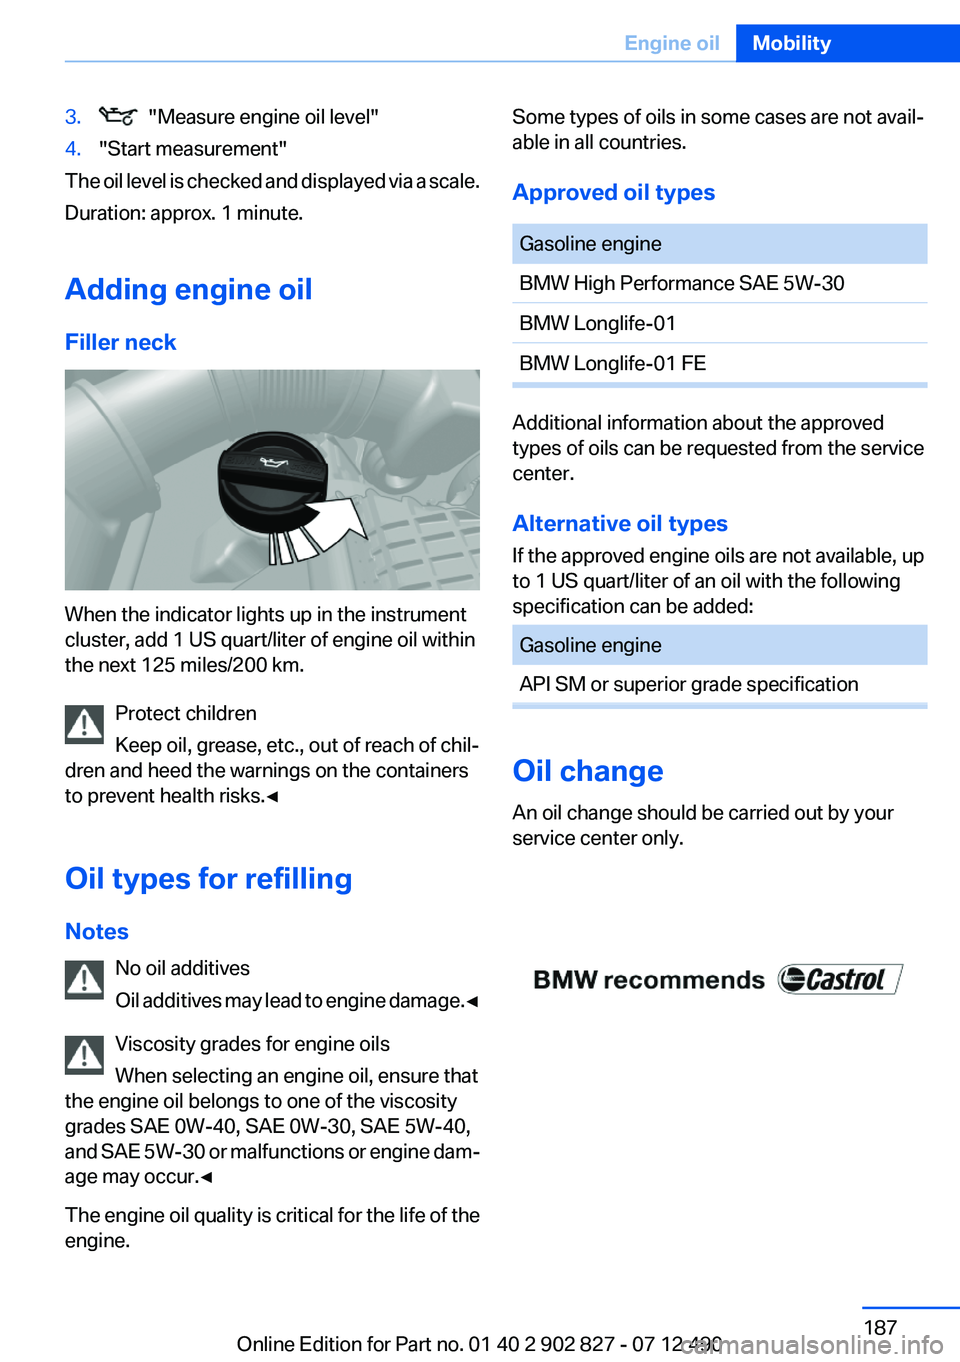
Filler neck
When the indicator lights up in the instrument
cluster, add 1 US quart/liter of engine oil within
the next 125 miles/200 km.
Protect children
Keep oil, grease, etc., out of reach of chil‐
dren and heed the warnings on the containers
to prevent health risks.◀
Oil types for refilling
Notes No oil additives
Oil additives may lead to engine damage. ◀
Viscosity grades for engine oils
When selecting an engine oil, ensure that
the engine oil belongs to one of the viscosity
grades SAE 0W-40, SAE 0W-30, SAE 5W-40,
and SAE 5W-30 or malfunctions or engine dam‐
age may occur.◀
The engine oil quality is critical for the life of the
engine.
Some types of oils in some cases are not avail‐
able in all countries.
Approved oil typesGasoline engineBMW High Performance SAE 5W-30BMW Longlife-01BMW Longlife-01 FE
Additional information about the approved
types of oils can be requested from the service
center.
Alternative oil types
If the approved engine oils are not available, up
to 1 US quart/liter of an oil with the following
specification can be added:
Gasoline engineAPI SM or superior grade specification
Oil change
An oil change should be carried out by your
service center only.
Seite 187Engine oilMobility187
Online Edition for Part no. 01 40 2 902 827 - 07 12 490
Page 190 of 232
Socket for OBD Onboard
Diagnosis
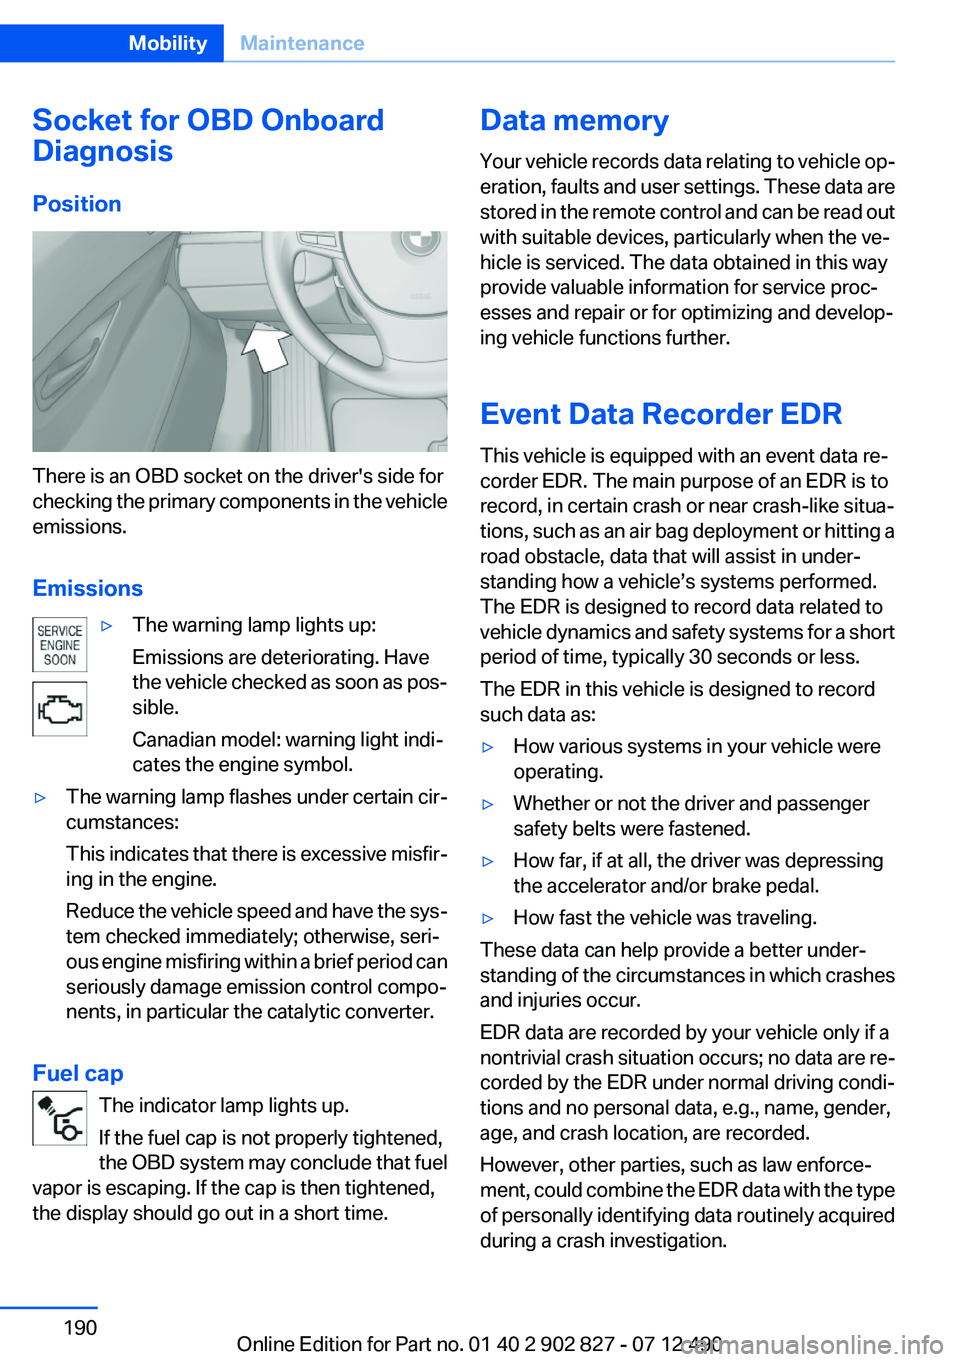
Position
There is an OBD socket on the driver's side for
checking the primary components in the vehicle
emissions.
Emissions
▷The warning lamp lights up:
Emissions are deteriorating. Have
the vehicle checked as soon as pos‐
sible.
Canadian model: warning light indi‐
cates the engine symbol.▷The warning lamp flashes under certain cir‐
cumstances:
This indicates that there is excessive misfir‐
ing in the engine.
Reduce the vehicle speed and have the sys‐
tem checked immediately; otherwise, seri‐
ous engine misfiring within a brief period can
seriously damage emission control compo‐
nents, in particular the catalytic converter.
Fuel cap
The indicator lamp lights up.
If the fuel cap is not properly tightened,
the OBD system may conclude that fuel
vapor is escaping. If the cap is then tightened,
the display should go out in a short time.
Data memory
Your vehicle records data relating to vehicle op‐
eration, faults and user settings. These data are
stored in the remote control and can be read out
with suitable devices, particularly when the ve‐
hicle is serviced. The data obtained in this way
provide valuable information for service proc‐
esses and repair or for optimizing and develop‐
ing vehicle functions further.
Event Data Recorder EDR
This vehicle is equipped with an event data re‐
corder EDR. The main purpose of an EDR is to
record, in certain crash or near crash-like situa‐
tions, such as an air bag deployment or hitting a
road obstacle, data that will assist in under‐
standing how a vehicle’s systems performed.
The EDR is designed to record data related to
vehicle dynamics and safety systems for a short
period of time, typically 30 seconds or less.
The EDR in this vehicle is designed to record
such data as:▷How various systems in your vehicle were
operating.▷Whether or not the driver and passenger
safety belts were fastened.▷How far, if at all, the driver was depressing
the accelerator and/or brake pedal.▷How fast the vehicle was traveling.
These data can help provide a better under‐
standing of the circumstances in which crashes
and injuries occur.
EDR data are recorded by your vehicle only if a
nontrivial crash situation occurs; no data are re‐
corded by the EDR under normal driving condi‐
tions and no personal data, e.g., name, gender,
age, and crash location, are recorded.
However, other parties, such as law enforce‐
ment, could combine the EDR data with the type
of personally identifying data routinely acquired
during a crash investigation.
Seite 190MobilityMaintenance190
Online Edition for Part no. 01 40 2 902 827 - 07 12 490
Page 198 of 232
Breakdown assistanceVehicle equipment
All standard, country-specific and optional
equipment that is offered in the model series is
described in this chapter. Therefore, equipment
is also described that is not available in a vehicle,
e. g., because of the selected optional equip‐
ment or country variant. This also applies for
safety-related functions and systems.
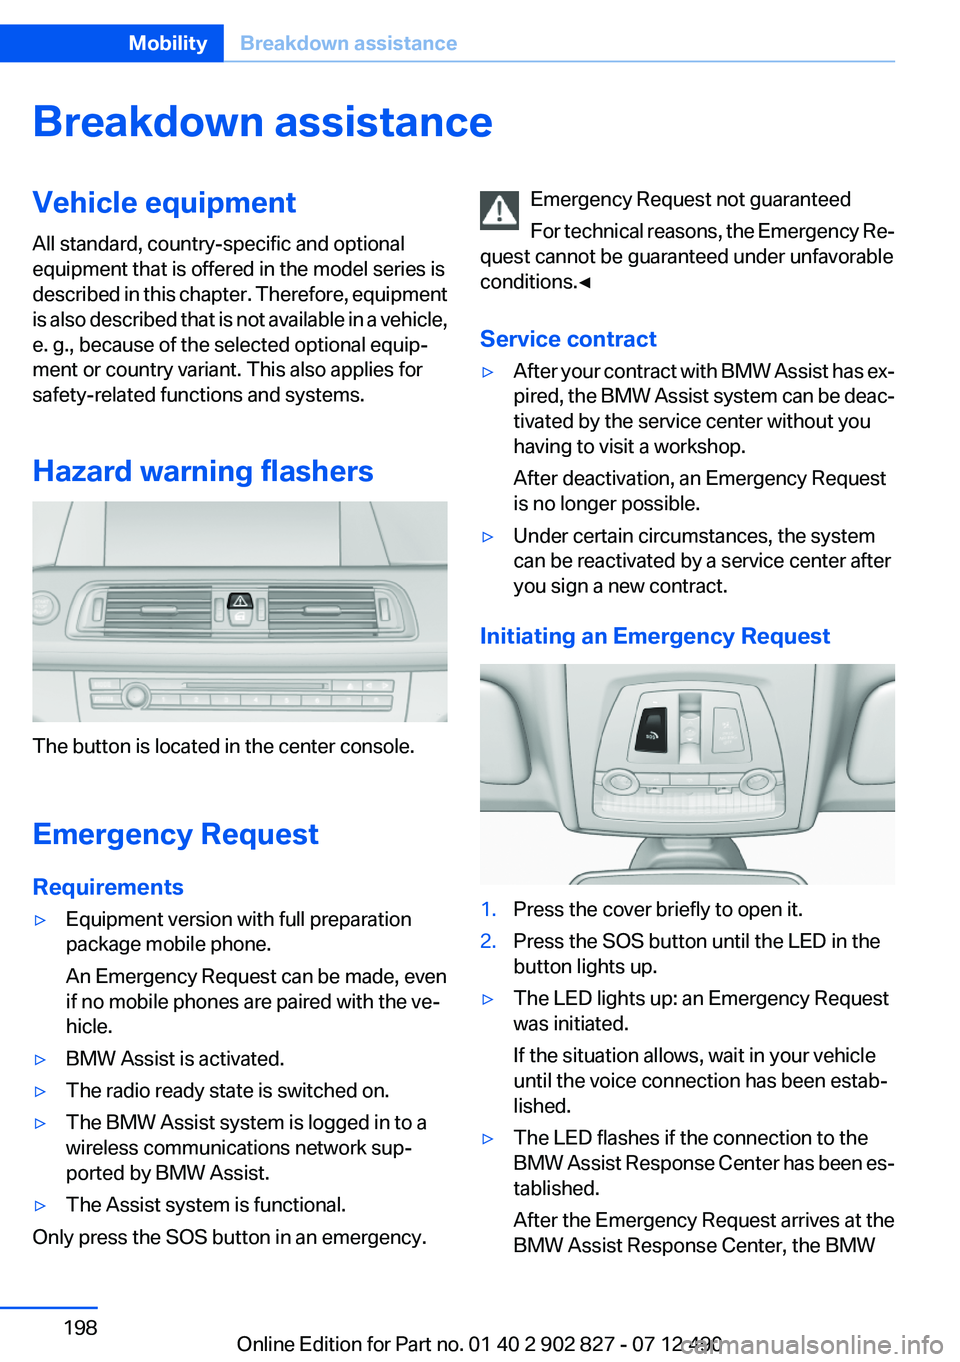
Hazard warning flashers
The button is located in the center console.
Emergency Request
Requirements
▷Equipment version with full preparation
package mobile phone.
An Emergency Request can be made, even
if no mobile phones are paired with the ve‐
hicle.▷BMW Assist is activated.▷The radio ready state is switched on.▷The BMW Assist system is logged in to a
wireless communications network sup‐
ported by BMW Assist.▷The Assist system is functional.
Only press the SOS button in an emergency.
Emergency Request not guaranteed
For technical reasons, the Emergency Re‐
quest cannot be guaranteed under unfavorable
conditions.◀
Service contract▷After your contract with BMW Assist has ex‐
pired, the BMW Assist system can be deac‐
tivated by the service center without you
having to visit a workshop.
After deactivation, an Emergency Request
is no longer possible.▷Under certain circumstances, the system
can be reactivated by a service center after
you sign a new contract.
Initiating an Emergency Request
1.Press the cover briefly to open it.2.Press the SOS button until the LED in the
button lights up.▷The LED lights up: an Emergency Request
was initiated.
If the situation allows, wait in your vehicle
until the voice connection has been estab‐
lished.▷The LED flashes if the connection to the
BMW Assist Response Center has been es‐
tablished.
After the Emergency Request arrives at the
BMW Assist Response Center, the BMWSeite 198MobilityBreakdown assistance198
Online Edition for Part no. 01 40 2 902 827 - 07 12 490
Page 201 of 232
3.Let both engines run for several minutes.4.Disconnect the jumper cables in the reverse
order.
Check the battery and recharge if necessary.
Tow-starting and towing
Transportieren Transporting your
vehicle
Note
Your vehicle is not permitted to be towed.
Therefore, contact a service center in the event
of a breakdown.
Do not have the vehicle towed
Have your vehicle transported on a loading
platform only; otherwise, damage may occur.◀
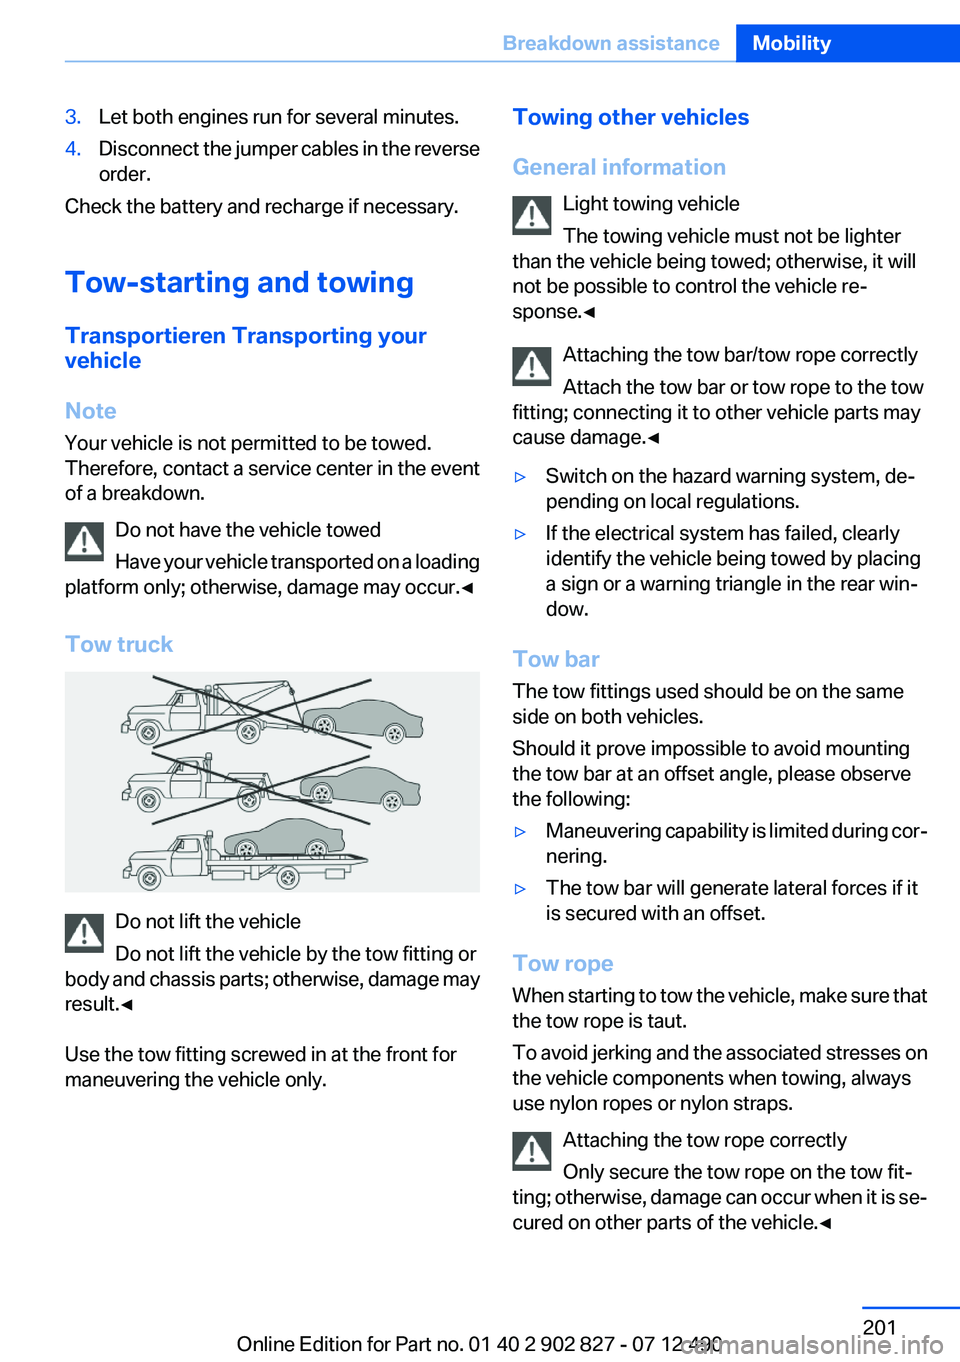
Tow truck
Do not lift the vehicle
Do not lift the vehicle by the tow fitting or
body and chassis parts; otherwise, damage may
result.◀
Use the tow fitting screwed in at the front for
maneuvering the vehicle only.
Towing other vehicles
General information Light towing vehicle
The towing vehicle must not be lighter
than the vehicle being towed; otherwise, it will
not be possible to control the vehicle re‐
sponse.◀
Attaching the tow bar/tow rope correctly
Attach the tow bar or tow rope to the tow
fitting; connecting it to other vehicle parts may
cause damage.◀▷Switch on the hazard warning system, de‐
pending on local regulations.▷If the electrical system has failed, clearly
identify the vehicle being towed by placing
a sign or a warning triangle in the rear win‐
dow.
Tow bar
The tow fittings used should be on the same
side on both vehicles.
Should it prove impossible to avoid mounting
the tow bar at an offset angle, please observe
the following:
▷Maneuvering capability is limited during cor‐
nering.▷The tow bar will generate lateral forces if it
is secured with an offset.
Tow rope
When starting to tow the vehicle, make sure that
the tow rope is taut.
To avoid jerking and the associated stresses on
the vehicle components when towing, always
use nylon ropes or nylon straps.
Attaching the tow rope correctly
Only secure the tow rope on the tow fit‐
ting; otherwise, damage can occur when it is se‐
cured on other parts of the vehicle.◀
Seite 201Breakdown assistanceMobility201
Online Edition for Part no. 01 40 2 902 827 - 07 12 490
Page 222 of 232
Everything from A to Z
IndexA
ABS, Antilock Brake Sys‐ tem 110
ACC, Active Cruise Control with Stop & Go 118
Activated-charcoal filter 143
Active Blind Spot Detec‐ tion 108
Active Cruise Control with Stop & Go, ACC 118
Active seat, front 47
Active seat ventilation, front 48
Active Steering, integral 113
Adaptive brake assistant 110
Adaptive brake lights, refer to Brake force display 109
Adaptive drive 113
Adaptive light control 88
Additives, oil 187
Adjustments, seats/head re‐ straints 45
After washing vehicle 204
Airbags 91
Airbags, indicator/warning light 92
Air circulation, refer to Recir‐ culated-air mode 142
Air, dehumidifying, refer to Cooling function 142
Air distribution, manual 141
Air flow, automatic climate control 141
Air pressure, tires 173
Air vents, refer to Ventila‐ tion 143
Alarm system 40
Alarm, unintentional 41
All around the center con‐ sole 14 All around the interior rearview
mirror 15
All around the steering wheel 12
ALL program, automatic cli‐ mate control 142
All-season tires, refer to Win‐ ter tires 181
All-wheel-drive 112
Alternating-code hand-held transmitter 146
Alternative oil types 187
Ambient light 90
Antifreeze, washer fluid 67
Antilock Brake System, ABS 110
Anti-slip control, refer to DSC 110
Approved axle load 211
Approved engine oils 187
Armrest, refer to Front center armrest 152
Armrest, refer to Rear center armrest 152
Arrival time 82
Ashtray 147
Ashtray, rear 147
Assistance, Roadside Assis‐ tance 199
Assistance when driving off 110
AUTO H button, refer to Auto‐ matic Hold 63
AUTO intensity 141
Automatic car wash 203
Automatic Cruise Control with Stop & Go 118
Automatic Curb Monitor 52
Automatic deactivation, front passenger airbags 93 Automatic headlamp con‐
trol 87
Automatic Hold 63
Automatic locking 37
Automatic recirculated-air control 142
Automatic Soft Closing, doors 37
Automatic transmission with Steptronic 67
AUTO program, automatic cli‐ mate control 141
AUTO program, intensity 141
Auto Start/Stop function 60
Average fuel consumption 82
Average speed 82
Axle loads, weights 211
B
Backrest curvature, refer to Lumbar support 46
Backrest, seats 45
Backrest, width 46
Backup camera 128
Band-aids, refer to First aid kit 199
Bar for tow-starting/tow‐ ing 201
Battery replacement, vehicle battery 196
Battery replacement, vehicle remote control 30
Battery, vehicle 196
Belts, safety belts 49
Beverage holder, cu‐ pholder 153
Blinds, sun protection 42
BMW Assist, see user's manual for Navigation, Enter‐Seite 222ReferenceEverything from A to Z222
Online Edition for Part no. 01 40 2 902 827 - 07 12 490
Page 223 of 232
tainment and Communica‐
tion
BMW Homepage 6
BMW Internet page 6
BMW Maintenance Sys‐ tem 189
Bottle holder, refer to Cu‐ pholder 153
Brake assistant 110
Brake assistant, adaptive 110
Brake discs, breaking in 158
Brake force display 109
Brake lamps, brake force dis‐ play 109
Brake lamps, bulb replace‐ ment 194
Brake lights, adaptive 109
Brake pads, breaking in 158
Braking, notes 159
Breakdown assis‐ tance 198, 199
Breaking in 158
Brightness of Control Dis‐ play 85
Bulb replacement 192
Bulb replacement, front 0
Bulb replacement, rear 194
Bulbs and lamps 192
Button, RES 120
Button, Start/Stop 58
Bypassing, refer to Jump- starting 199
C
California Proposition 65 Warning 7
Camera, backup camera 129
Camera, care 206
Camera, Side View 133
Camera, Top View 131
Can holder, refer to Cu‐ pholder 153
Car battery 196
Car care products 204
Care, displays 206 Care, vehicle 204
Cargo 161
Cargo area, enlarging 148
Cargo area lid 37
Cargo area, storage compart‐ ments 154
Cargo straps, securing cargo 162
Car key, refer to Remote con‐ trol 30
Carpet, care 205
Car wash 203
Catalytic converter, refer to Hot exhaust system 158
CBS Condition Based Serv‐ ice 189
CD/Multimedia, see user's manual for Navigation, Enter‐
tainment and Communica‐
tion
Center console 14
Central locking system 33
Central screen, refer to Control Display 16
Changes, technical, refer to Safety 7
Changing parts 192
Changing wheels 195
Changing wheels/tires 180
Check Control 74
Children, seating position 54
Children, transporting safely 54
Child restraint fixing sys‐ tem 54
Child restraint fixing system LATCH 55
Child restraint fixing systems, mounting 54
Child safety locks 57
Child seat, mounting 54
Child seats 54
Chrome parts, care 205
Cigarette lighter 147
Cleaning, displays 206
Climate control 140 Climate control wind‐
shield 159
Clock 77
Closing/opening from in‐ side 37
Closing/opening via door lock 36
Closing/opening with remote control 34
Clothes hooks 153
Collision warning 99, 101
Combination switch, refer to Turn signals 64
Combination switch, refer to Wiper system 65
Comfort Access 38
COMFORT program, Driving Experience Switch 116
Computer 81
Condensation on win‐ dows 141
Condensation under the vehi‐ cle 160
Condition Based Service CBS 189
Configure driving mode 116
Confirmation signal 35
ConnectedDrive, see user's manual for Navigation, Enter‐
tainment and Communica‐
tion
Control Display 16
Control Display, settings 83
Controller 16
Control systems, driving sta‐ bility 110
Convenient opening 34
Coolant 188
Coolant temperature 77
Cooling function 142
Cooling, maximum 141
Cooling system 188
Corrosion on brake discs 160
Cruise control 124
Cruise control, active with Stop & Go 118 Seite 223Everything from A to ZReference223
Online Edition for Part no. 01 40 2 902 827 - 07 12 490