2013 BMW 535I XDRIVE GRAN TURISMO reset
[x] Cancel search: resetPage 107 of 240
braking distance, and altered self-steering
properties. Adjust your driving style accord‐
ingly. Avoid abrupt steering maneuvers or driv‐
ing over obstacles, e.g., curbs, potholes, etc.
Because the possible driving distance depends
on how the vehicle is used during the trip, the
actual distance may be smaller or greater de‐
pending on the driving speed, road conditions,
external temperature, cargo load, etc.
Continued driving with a flat tire
Drive moderately and do not exceed a
speed of 50 mph/80 km/h.
A loss of tire inflation pressure results in a
change in the handling characteristics, e.g., re‐
duced lane stability during braking, a longer
braking distance and altered self-steering prop‐
erties.◀
Final tire failure
Vibrations or loud noises while driving can
indicate the final failure of the tire. Reduce speed
and stop; otherwise, pieces of the tire could
come loose and cause an accident. Do not con‐
tinue driving, and contact your service center. ◀
Tire Pressure Monitor TPM
The concept
The system monitors tire pressure in the four
mounted tires. The system warns you if there is
a significant loss of pressure in one or more tires.
For this purpose, sensors in the tire valves
measure the tire pressure and tire temperature.
Hints Tire damage due to external factors
Sudden tire damage caused by external
influences cannot be indicated in advance.◀
Pay attention to the other information and indi‐
cations under Tire inflation pressure, refer to
page 191, as well when using the system.Functional requirements
The system must have been reset with the cor‐
rect tire inflation pressure; otherwise, reliable
signaling of tire pressure loss is not ensured.
Reset the system again after each correction of
the tire inflation pressure and after every tire or
wheel change.
Always use wheels with TPM electronics to en‐
sure that the system will operate properly.
Status display
The current status of the Tire Pressure Monitor
TPM can be displayed on the Control Display,
e.g., whether or not the TPM is active.1."Vehicle Info"2."Vehicle status"3. "Tire Pressure Monitor - TPM"
The status is displayed.
Status display
The tire and system status is indicated by the
color of the tires and a text message on the Con‐
trol Display.
All wheels green
System is active and will issue a warning relative
to the tire inflation pressures stored during the
last reset.
One wheel is yellow
A flat tire or major drop in inflation pressure in
the indicated tire.
All wheels are yellow
A flat tire or major drop in inflation pressure in
several tires.
Wheels, gray
The system cannot detect a flat tire. Reasons for
this may be:
▷The system is being reset.▷Malfunction.Seite 107SafetyControls107
Online Edition for Part no. 01 40 2 917 498 - II/13
Page 108 of 240
For Canadian models: Additional
information
The status display additionally shows the cur‐
rent tire inflation pressures and tire tempera‐
tures. The values shown are current measure‐
ment values and may vary depending on driving
style or weather conditions.
Carry out reset
Reset the system after each correction of the
tire inflation pressure and after every tire or
wheel change.1."Vehicle Info"2."Vehicle status"3. "Reset"4.Start the engine - do not drive away.5.Carry out the reset with "Reset".6.Drive away.
The tires are shown in gray and the status is dis‐
played.
After driving faster than 19 mph/30 km/h for a
short period, the tire inflation pressures set are
accepted as reference values. The reset is com‐
pleted automatically during driving. After suc‐
cessful completion of the reset, the tires appear
in green on the Control Display and "TPM
active" is displayed.
The trip can be interrupted at any time. If you
drive away again, the reset resumes automati‐
cally.
Low tire pressure message The yellow warning lamp lights up. A
Check Control message is displayed.
▷There is a flat tire or a major loss in
tire inflation pressure.▷A reset of the system was not carried out af‐
ter a wheel was changed. The system there‐fore issues a warning based on the tire pres‐
sures before the last reset.1.Reduce your speed and stop cautiously.
Avoid sudden braking and steering maneu‐
vers.2.Check whether the vehicle is fitted with reg‐
ular tires or run-flat tires.
Run-flat tires, refer to page 198, are labeled
with a circular symbol containing the letters
RSC marked on the tire sidewall.
Do not continue driving without run-flat
tires
Do not continue driving if the vehicle is not
equipped with run-flat tires; continued driving
may result in serious accidents.◀
When a low inflation pressure is indicated, DSC
Dynamic Stability Control is switched on if nec‐
essary.
Actions in the event of a flat tire
Normal tires
1.Identify the damaged tire.
Do this by checking the air pressure in all
four tires.
If the tire inflation pressure in all four tires is
correct, it is possible that a reset was not
carried out for the Tire Pressure Monitor. In
that case, carry out a reset.
If an identification is not possible, please
contact the service center.2.Rectify the flat tire.
Use of tire sealant, e.g., the Mobility System,
may damage the TPM wheel electronics. In
this case, have the electronics checked at
the next opportunity and have them re‐
placed if necessary.Seite 108ControlsSafety108
Online Edition for Part no. 01 40 2 917 498 - II/13
Page 109 of 240
Run-flat tires
Maximum speed
You can continue driving with a damaged tire at
speeds up to 50 mph/80 km/h.
Continued driving with a flat tire
If continuing to drive with a damaged tire:1.Avoid sudden braking and steering maneu‐
vers.2.Do not exceed a speed of 50 mph/80 km/h.3.Check the air pressure in all four tires at the
next opportunity.
If the tire inflation pressure in all four tires is
correct, it is possible that a reset was not
carried out for the Tire Pressure Monitor. In
that case, carry out a reset.
Possible driving distance with complete loss of
tire inflation pressure:
The possible driving distance after a loss of tire
inflation pressure depends on the cargo load
and the driving style and conditions.
For a vehicle containing an average load, the
possible driving distance is approx.
50 miles/80 km.
When the vehicle is driven with a damaged tire,
its handling characteristics change, e.g., re‐
duced lane stability during braking, a longer
braking distance, and altered self-steering
properties. Adjust your driving style accord‐
ingly. Avoid abrupt steering maneuvers or driv‐
ing over obstacles, e.g., curbs, potholes, etc.
Because the possible driving distance depends
on how the vehicle is used during the trip, the
actual distance may be smaller or greater de‐
pending on the driving speed, road conditions,
external temperature, cargo load, etc.
Continued driving with a flat tire
Drive moderately and do not exceed a
speed of 50 mph/80 km/h.
A loss of tire inflation pressure results in a
change in the handling characteristics, e.g., re‐
duced lane stability during braking, a longer
braking distance and altered self-steering prop‐
erties.◀
Final tire failure
Vibrations or loud noises while driving can
indicate the final failure of the tire. Reduce speed
and stop; otherwise, pieces of the tire could
come loose and cause an accident. Do not con‐
tinue driving, and contact your service center. ◀
Message when the system was not
reset
A Check Control message is displayed.
The system has detected a wheel change, but
no reset was carried out
Warnings regarding the current tire inflation
pressure are not reliable.
Check the tire inflation pressure and carry out a
reset of the system.
System limits
The system does not function properly if a reset
has not been carried out, e.g., a flat tire is re‐
ported even though the tire inflation pressures
are correct.
The tire pressure depends on the temperature
of the tire. If the tire temperature rises, e.g., due
to driving or because of the heat of the Sun, the
tire inflation pressure increases also. The tire
pressure is reduced when the tire temperature
falls again. This behavior may cause a warning
to be issued if temperatures fall very sharply.
Malfunction The yellow warning lamp flashes and
then lights up continuously. A Check
Control message is displayed. No flat
tire or loss of tire pressure can be detected.
Display in the following situations:Seite 109SafetyControls109
Online Edition for Part no. 01 40 2 917 498 - II/13
Page 110 of 240
▷A wheel without TPM electronics is fitted:
have the service center check it if necessary.▷Malfunction: have the system checked by
your service center.▷TPM was unable to complete the reset. Re‐
set the system again.▷Disturbance by systems or devices with the
same radio frequency: after leaving the area
of the disturbance, the system automatically
becomes active again.
Declaration according to NHTSA/
FMVSS 138 Tire Pressure Monitoring
System
Each tire, including the spare (if provided)
should be checked monthly when cold and in‐
flated to the inflation pressure recommended by
the vehicle manufacturer on the vehicle placard
or tire inflation pressure label. (If your vehicle has
tires of a different size than the size indicated on
the vehicle placard or tire inflation pressure la‐
bel, you should determine the proper tire infla‐
tion pressure for those tires.) As an added safety
feature, your vehicle has been equipped with a
tire pressure monitoring system (TPMS) that il‐
luminates a low tire pressure telltale when one
or more of your tires is significantly under-in‐
flated. Accordingly, when the low tire pressure
telltale illuminates, you should stop and check
your tires as soon as possible, and inflate them
to the proper pressure. Driving on a significantly
under-inflated tire causes the tire to overheat
and can lead to tire failure. Under-inflation also
reduces fuel efficiency and tire tread life, and
may affect the vehicle's handling and stopping
ability. Please note that the TPMS is not a sub‐
stitute for proper tire maintenance, and it is the
driver's responsibility to maintain correct tire
pressure, even if under-inflation has not reached
the level to trigger illumination of the TPMS low
tire pressure telltale. Your vehicle has also been
equipped with a TPMS malfunction indicator to
indicate when the system is not operating prop‐
erly. The TPMS malfunction indicator is com‐
bined with the low tire pressure telltale. When
the system detects a malfunction, the telltale will
flash for approximately one minute and then re‐
main continuously illuminated. This sequence
will continue upon subsequent vehicle start-ups
as long as the malfunction exists. When the mal‐
function indicator is illuminated, the system may
not be able to detect or signal low tire pressure
as intended. TPMS malfunctions may occur for
a variety of reasons, including the installation of
replacement or alternate tires or wheels on the
vehicle that prevent the TPMS from functioning
properly. Always check the TPMS malfunction
telltale after replacing one or more tires or
wheels on your vehicle to ensure that the re‐
placement or alternate tires and wheels allow
the TPMS to continue to function properly.
Collision warning with
braking function
The concept
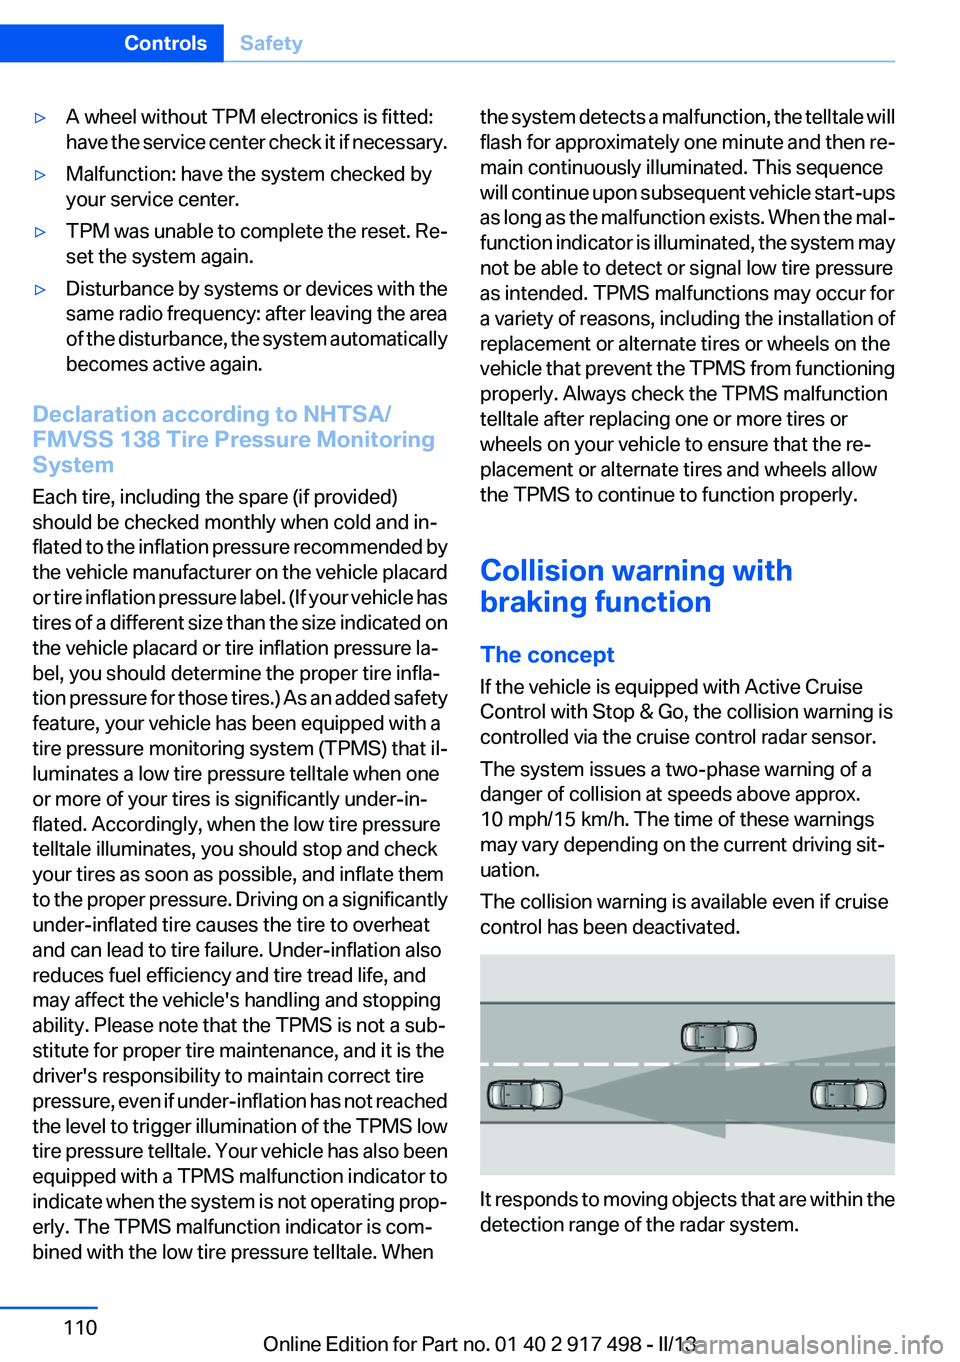
If the vehicle is equipped with Active Cruise
Control with Stop & Go, the collision warning is
controlled via the cruise control radar sensor.
The system issues a two-phase warning of a
danger of collision at speeds above approx.
10 mph/15 km/h. The time of these warnings
may vary depending on the current driving sit‐
uation.
The collision warning is available even if cruise
control has been deactivated.
It responds to moving objects that are within the
detection range of the radar system.
Seite 110ControlsSafety110
Online Edition for Part no. 01 40 2 917 498 - II/13
Page 157 of 240
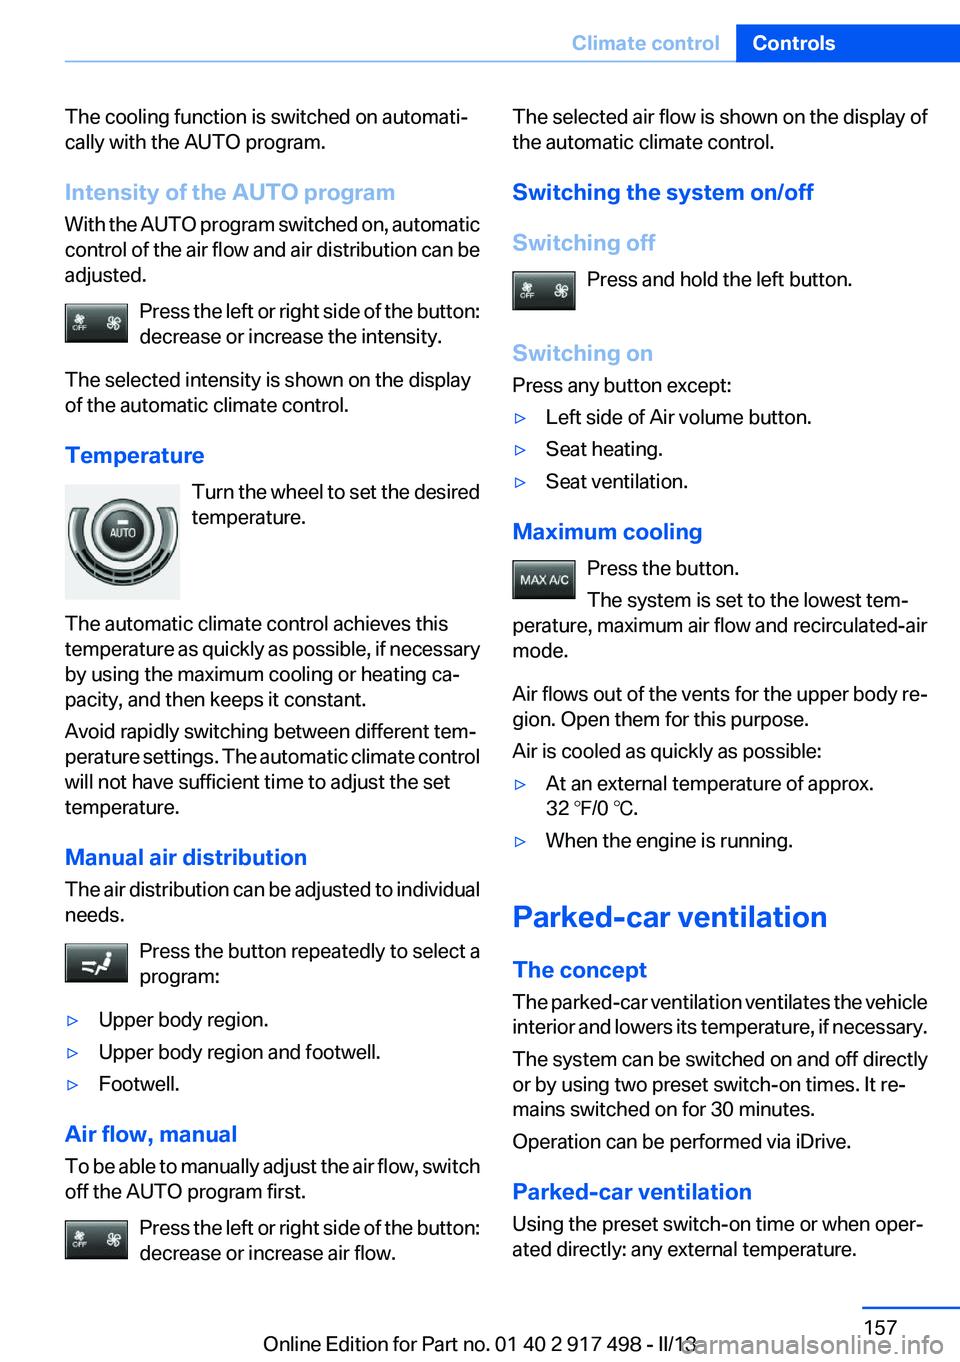
The cooling function is switched on automati‐
cally with the AUTO program.
Intensity of the AUTO program
With the AUTO program switched on, automatic
control of the air flow and air distribution can be
adjusted.
Press the left or right side of the button:
decrease or increase the intensity.
The selected intensity is shown on the display
of the automatic climate control.
Temperature Turn the wheel to set the desired
temperature.
The automatic climate control achieves this
temperature as quickly as possible, if necessary
by using the maximum cooling or heating ca‐
pacity, and then keeps it constant.
Avoid rapidly switching between different tem‐
perature settings. The automatic climate control
will not have sufficient time to adjust the set
temperature.
Manual air distribution
The air distribution can be adjusted to individual
needs.
Press the button repeatedly to select a
program:▷Upper body region.▷Upper body region and footwell.▷Footwell.
Air flow, manual
To be able to manually adjust the air flow, switch
off the AUTO program first.
Press the left or right side of the button:
decrease or increase air flow.
The selected air flow is shown on the display of
the automatic climate control.
Switching the system on/off
Switching off Press and hold the left button.
Switching on
Press any button except:▷Left side of Air volume button.▷Seat heating.▷Seat ventilation.
Maximum cooling
Press the button.
The system is set to the lowest tem‐
perature, maximum air flow and recirculated-air
mode.
Air flows out of the vents for the upper body re‐
gion. Open them for this purpose.
Air is cooled as quickly as possible:
▷At an external temperature of approx.
32 ℉/0 ℃.▷When the engine is running.
Parked-car ventilation
The concept
The parked-car ventilation ventilates the vehicle
interior and lowers its temperature, if necessary.
The system can be switched on and off directly
or by using two preset switch-on times. It re‐
mains switched on for 30 minutes.
Operation can be performed via iDrive.
Parked-car ventilation
Using the preset switch-on time or when oper‐
ated directly: any external temperature.
Seite 157Climate controlControls157
Online Edition for Part no. 01 40 2 917 498 - II/13
Page 182 of 240
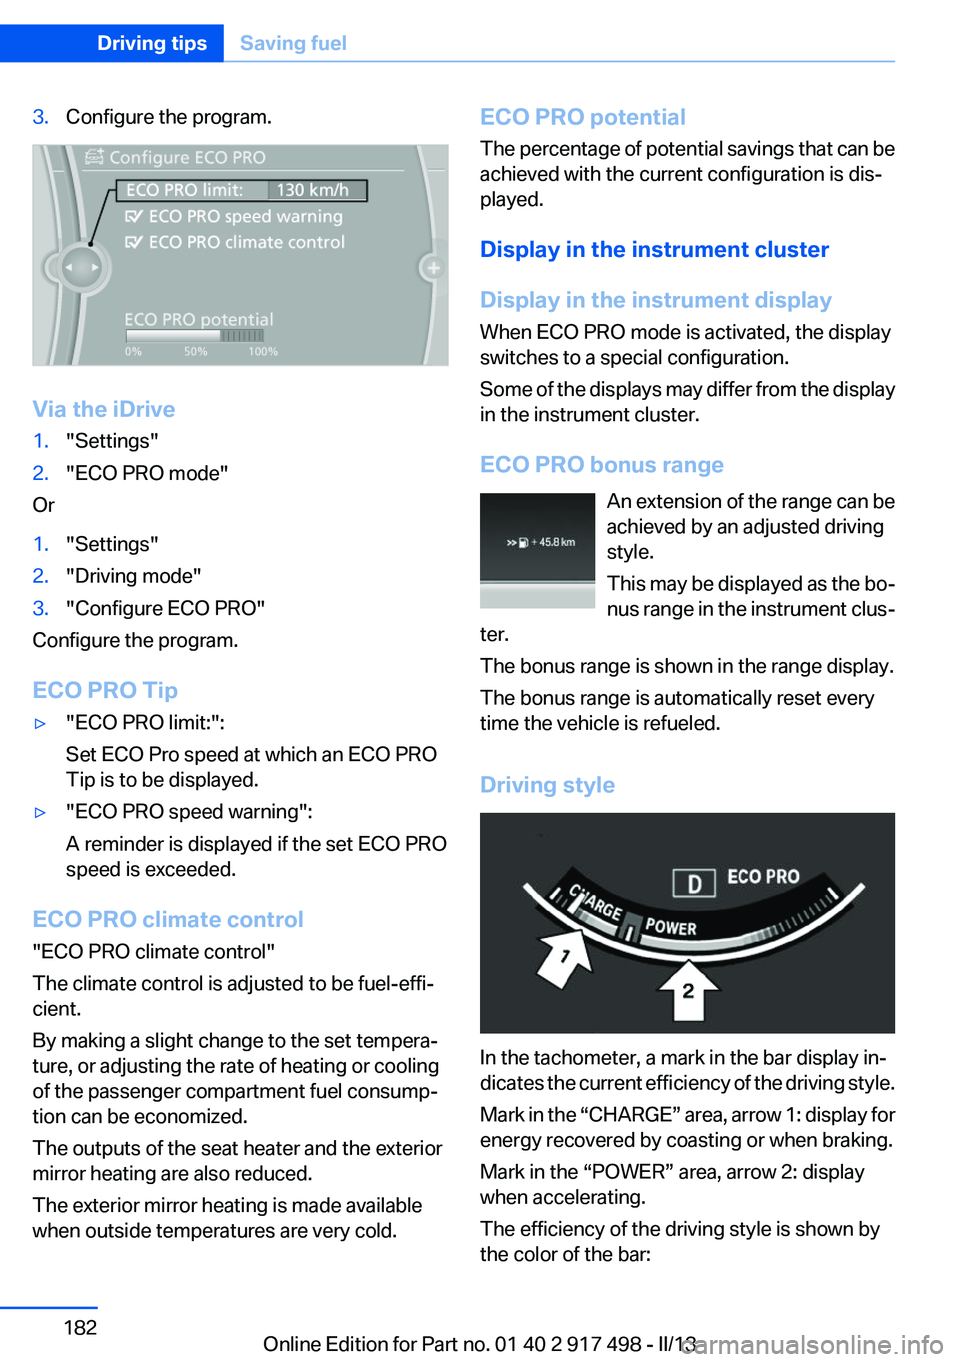
3.Configure the program.
Via the iDrive
1."Settings"2."ECO PRO mode"
Or
1."Settings"2."Driving mode"3."Configure ECO PRO"
Configure the program.
ECO PRO Tip
▷"ECO PRO limit:":
Set ECO Pro speed at which an ECO PRO
Tip is to be displayed.▷"ECO PRO speed warning":
A reminder is displayed if the set ECO PRO
speed is exceeded.
ECO PRO climate control
"ECO PRO climate control"
The climate control is adjusted to be fuel-effi‐
cient.
By making a slight change to the set tempera‐
ture, or adjusting the rate of heating or cooling
of the passenger compartment fuel consump‐
tion can be economized.
The outputs of the seat heater and the exterior
mirror heating are also reduced.
The exterior mirror heating is made available
when outside temperatures are very cold.
ECO PRO potential
The percentage of potential savings that can be
achieved with the current configuration is dis‐
played.
Display in the instrument cluster
Display in the instrument display
When ECO PRO mode is activated, the display
switches to a special configuration.
Some of the displays may differ from the display
in the instrument cluster.
ECO PRO bonus range An extension of the range can be
achieved by an adjusted driving
style.
This may be displayed as the bo‐
nus range in the instrument clus‐
ter.
The bonus range is shown in the range display.
The bonus range is automatically reset every
time the vehicle is refueled.
Driving style
In the tachometer, a mark in the bar display in‐
dicates the current efficiency of the driving style.
Mark in the “CHARGE” area, arrow 1: display for
energy recovered by coasting or when braking.
Mark in the “POWER” area, arrow 2: display
when accelerating.
The efficiency of the driving style is shown by
the color of the bar:
Seite 182Driving tipsSaving fuel182
Online Edition for Part no. 01 40 2 917 498 - II/13
Page 183 of 240
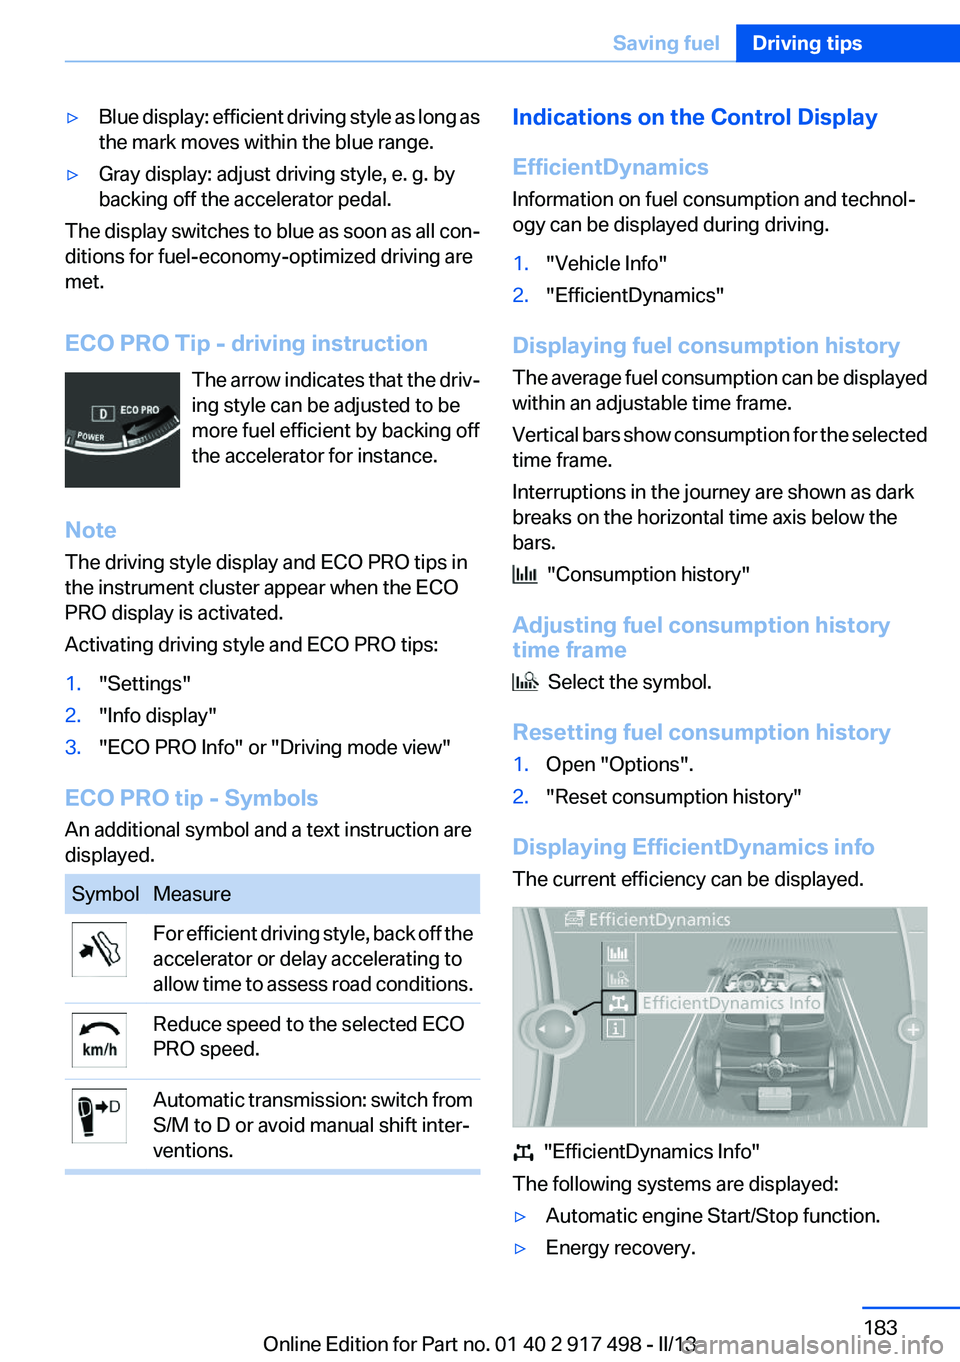
▷Blue display: efficient driving style as long as
the mark moves within the blue range.▷Gray display: adjust driving style, e. g. by
backing off the accelerator pedal.
The display switches to blue as soon as all con‐
ditions for fuel-economy-optimized driving are
met.
ECO PRO Tip - driving instruction The arrow indicates that the driv‐
ing style can be adjusted to be
more fuel efficient by backing off
the accelerator for instance.
Note
The driving style display and ECO PRO tips in
the instrument cluster appear when the ECO
PRO display is activated.
Activating driving style and ECO PRO tips:
1."Settings"2."Info display"3."ECO PRO Info" or "Driving mode view"
ECO PRO tip - Symbols
An additional symbol and a text instruction are
displayed.
SymbolMeasureFor efficient driving style, back off the
accelerator or delay accelerating to
allow time to assess road conditions.Reduce speed to the selected ECO
PRO speed.Automatic transmission: switch from
S/M to D or avoid manual shift inter‐
ventions.Indications on the Control Display
EfficientDynamics
Information on fuel consumption and technol‐
ogy can be displayed during driving.1."Vehicle Info"2."EfficientDynamics"
Displaying fuel consumption history
The average fuel consumption can be displayed
within an adjustable time frame.
Vertical bars show consumption for the selected
time frame.
Interruptions in the journey are shown as dark
breaks on the horizontal time axis below the
bars.
"Consumption history"
Adjusting fuel consumption history
time frame
Select the symbol.
Resetting fuel consumption history
1.Open "Options".2."Reset consumption history"
Displaying EfficientDynamics info
The current efficiency can be displayed.
"EfficientDynamics Info"
The following systems are displayed:
▷Automatic engine Start/Stop function.▷Energy recovery.Seite 183Saving fuelDriving tips183
Online Edition for Part no. 01 40 2 917 498 - II/13
Page 236 of 240
People detection, refer toNight Vision 114
Personal Profile 31
Pinch protection system, glass sunroof 47
Pinch protection system, win‐ dows 45
Plastic, care 222
Power failure 213
Power windows 45
Pressure, tire air pres‐ sure 191
Pressure warning FTM, tires 105
Profile, refer to Personal Pro‐ file 31
Programmable memory but‐ tons, iDrive 20
Protective function, glass sun‐ roof 47
Protective function, win‐ dows 45
Push-and-turn switch, refer to Controller 16
R
Radiator fluid 205
Radio-operated key, refer to Remote control 30
Radio ready state 69
Radio, see user's manual for Navigation, Entertainment
and Communication
Rain sensor 77
Rear automatic climate con‐ trol 156
Rear axle steering 125
Rear lamps 211
Rear seats, adjusting 53
Rear seats, basic position 55
Rear sockets 162
Rearview mirror 60
Rear window defroster 154
Recirculated-air mode 154 Recommended tire
brands 197
Refueling 188
Remaining range 89
Remote control/key 30
Remote control, button as‐ signment 30
Remote control, malfunc‐ tion 36
Remote control, universal 159
Replacement fuse 213
Replacing parts 208
Replacing wheels/tires 197
Reporting safety defects 9
RES button 132
Reserve warning, refer to Range 89
Reset, Tire Pressure Monitor TPM 108
Residual heat, automatic cli‐ mate control 154
Retaining straps, securing cargo 178
Retreaded tires 198
Reversing lamp, bulb replace‐ ment 211
Roadside parking lamps 98
Roller sunblinds 46
Roll stabilization, refer to Adaptive Drive 125
Roll stabilization, refer to Dy‐ namic Drive 125
RON gasoline quality 190
Roof load capacity 227
Roof-mounted luggage rack 178
Rope for tow-starting/tow‐ ing 219
RSC Run Flat System Compo‐ nent, refer to Run-flat
tires 198
Rubber components, care 222
Run-flat tires 198 S
Safe braking 175
Safety 7
Safety belt reminder for driv‐ er's seat and front passenger
seat 56
Safety belts 56
Safety belts, care 222
Safety Package, refer to Active Protection 120
Safety switch, windows 46
Safety systems, airbags 102
Saving fuel 180
Screen, refer to Control Dis‐ play 16
Screwdriver 208
Screw thread for tow fit‐ ting 219
Seat belts, refer to Safety belts 56
Seat heating, front 52
Seat heating, rear 55
Seating position for chil‐ dren 63
Seat, mirror, and steering wheel memory 59
Seats 49
Seats, rear, adjusting 53
Seat ventilation, front 52
Seat ventilation, rear 55
Selection list in instrument cluster 92
Selector lever, automatic transmission 79
Self-leveling suspension, air suspension 126
Self-leveling suspension, mal‐ function 126
Sensors, care 223
Service and warranty 7
Service requirements, Condi‐ tion Based Service CBS 206
Service requirements, dis‐ play 89 Seite 236ReferenceEverything from A to Z236
Online Edition for Part no. 01 40 2 917 498 - II/13