2013 BMW 528I XDRIVE SEDAN ESP
[x] Cancel search: ESPPage 144 of 273
General information
The congestion assistant determines speed
and distance from the vehicle in front via a ra‐
dar sensor and the position of the lane marking
via a camera.
Sensors on the steering wheel detect whether
the steering wheel is being touched.
The system is deactivated as soon as contact
with the steering wheel is no longer detected.
In order to be able to use the Congestion As‐
sistant, place your hands around the steering
wheel.
When driving with gloves or with protective
covers, contact with the steering wheel cannot
be detected by the sensors. The system in this
case cannot be used.
Notes Personal responsibility
The system does not relieve the driver of
the responsibility to adapt his or her speed,
distance and driving style to the traffic condi‐
tions. Drive attentively, and react to the current
traffic events. Intervene actively when neces‐
sary, e.g., by braking, steering or making an
evasive maneuver, otherwise, there is danger
of an accident.◀
Functional requirements▷Drive on approved road type. The data on
this are stored in the navigation system.▷Driving on the limited access highway or
divided lane roads.▷Sufficient lane width.▷Lane marking is detected.▷Vehicle driving ahead is detected.▷Speed below 25 mph/40 km/h.▷Both hands on the steering wheel rim.At a glance
Buttons on the steering wheelPress the
buttonFunctionCongestion Assistant ON/OFF,
Pause, refer to page 141.Rocker switch:
Store, change/maintain speed,
refer to page 135.Maintain, store speed, refer to
page 135.Resume speed, refer to
page 136.Adjust distance, refer to
page 136.
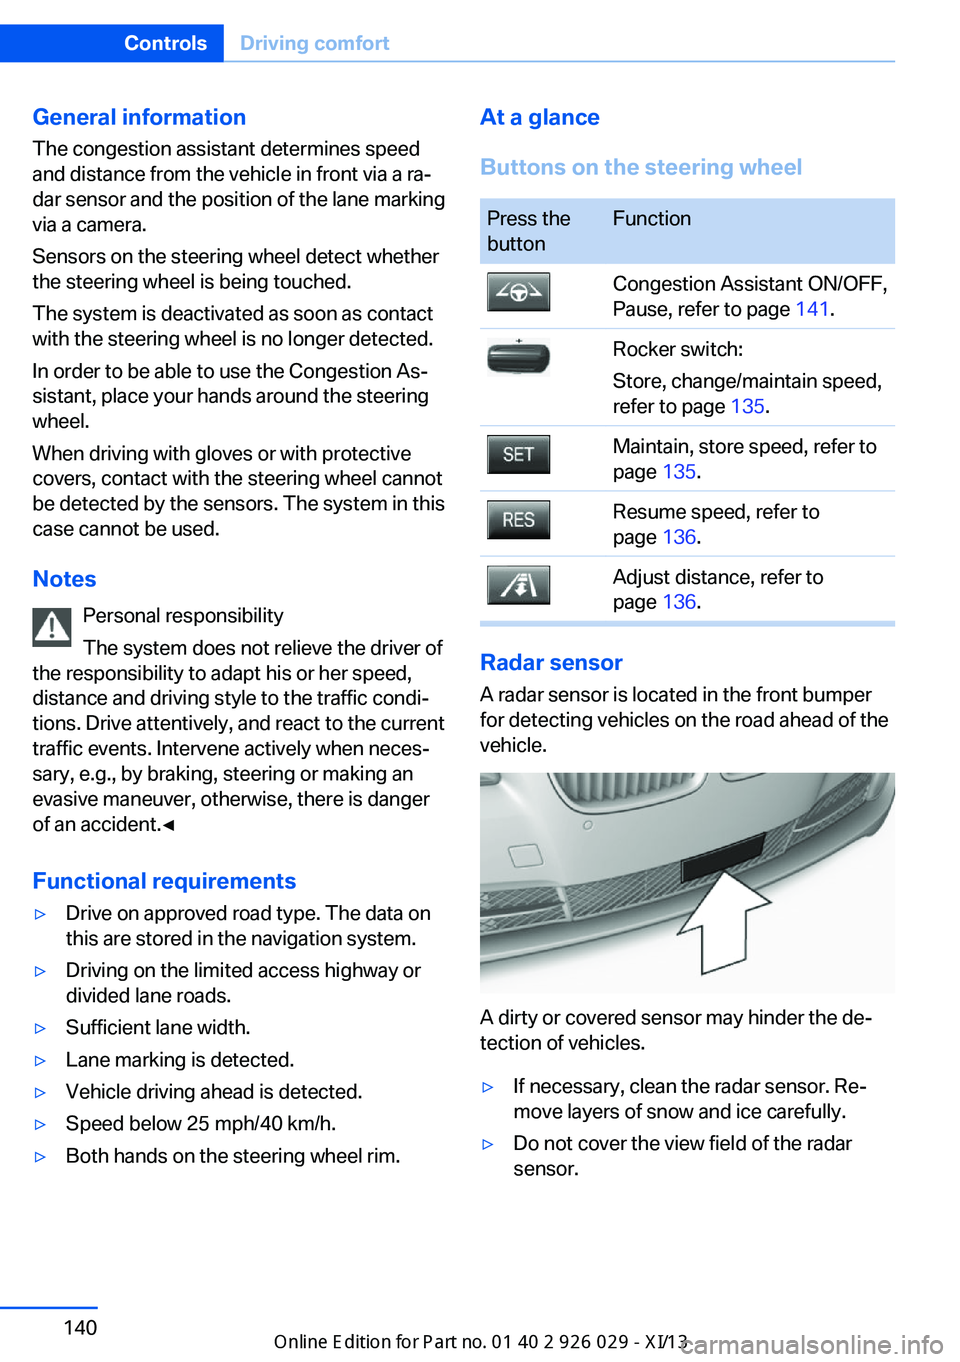
Radar sensor
A radar sensor is located in the front bumper
for detecting vehicles on the road ahead of the
vehicle.
A dirty or covered sensor may hinder the de‐
tection of vehicles.
▷If necessary, clean the radar sensor. Re‐
move layers of snow and ice carefully.▷Do not cover the view field of the radar
sensor.Seite 140ControlsDriving comfort140
Online Edition for Part no. 01 40 2 911 177 - VI/13
Page 153 of 273
Obstacle marking
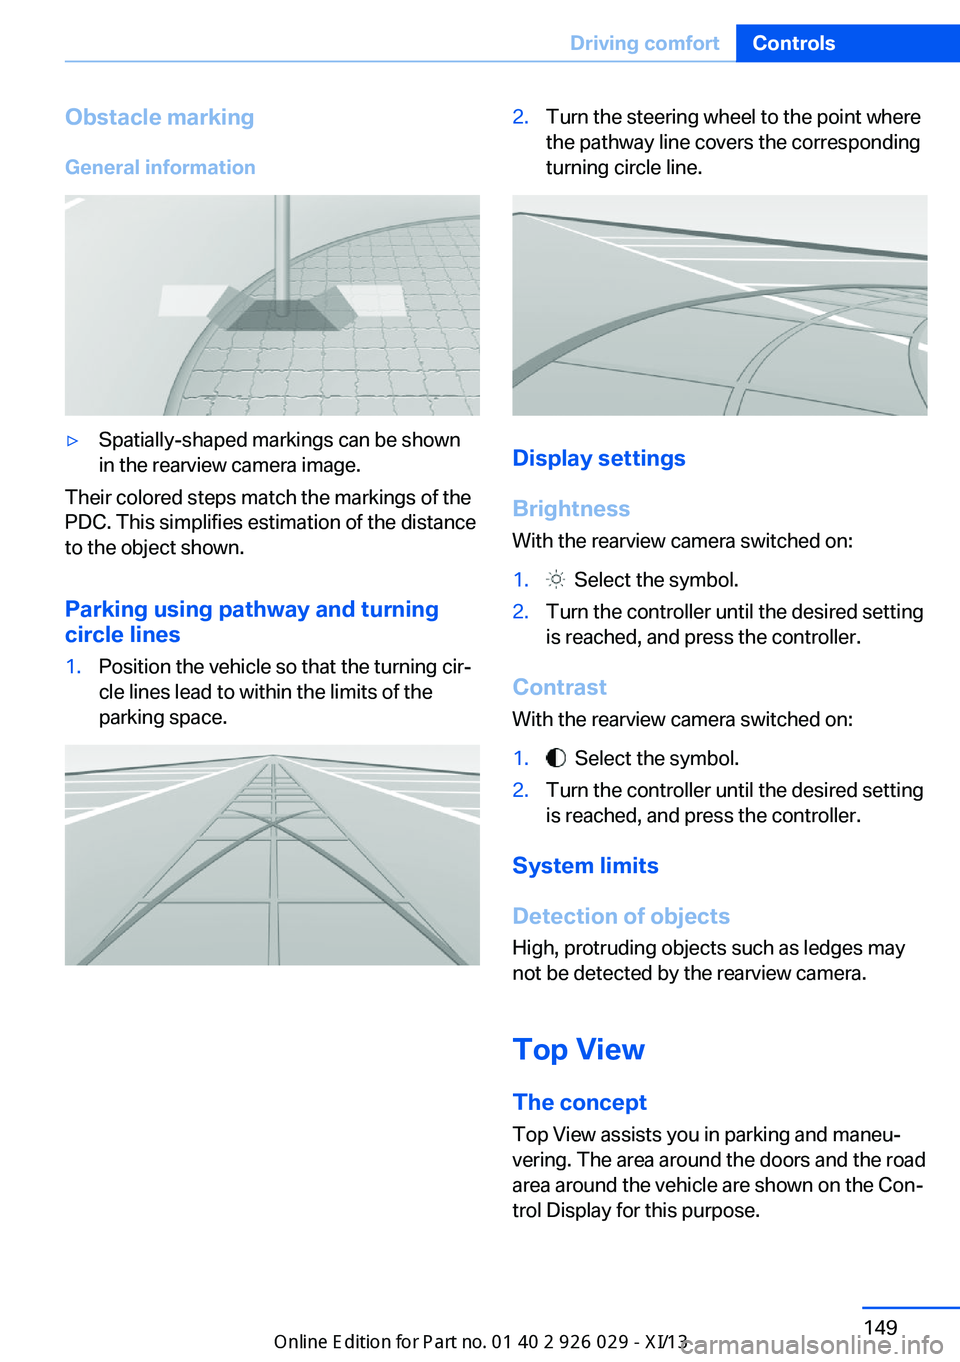
General information▷Spatially-shaped markings can be shown
in the rearview camera image.
Their colored steps match the markings of the
PDC. This simplifies estimation of the distance
to the object shown.
Parking using pathway and turning
circle lines
1.Position the vehicle so that the turning cir‐
cle lines lead to within the limits of the
parking space.2.Turn the steering wheel to the point where
the pathway line covers the corresponding
turning circle line.
Display settings
Brightness
With the rearview camera switched on:
1. Select the symbol.2.Turn the controller until the desired setting
is reached, and press the controller.
Contrast
With the rearview camera switched on:
1. Select the symbol.2.Turn the controller until the desired setting
is reached, and press the controller.
System limits
Detection of objects
High, protruding objects such as ledges may
not be detected by the rearview camera.
Top View The concept
Top View assists you in parking and maneu‐
vering. The area around the doors and the road
area around the vehicle are shown on the Con‐
trol Display for this purpose.
Seite 149Driving comfortControls149
Online Edition for Part no. 01 40 2 911 177 - VI/13
Page 157 of 273
System limits
The cameras capture a maximum range of
330 ft/100 m.
Parking assistantThe concept
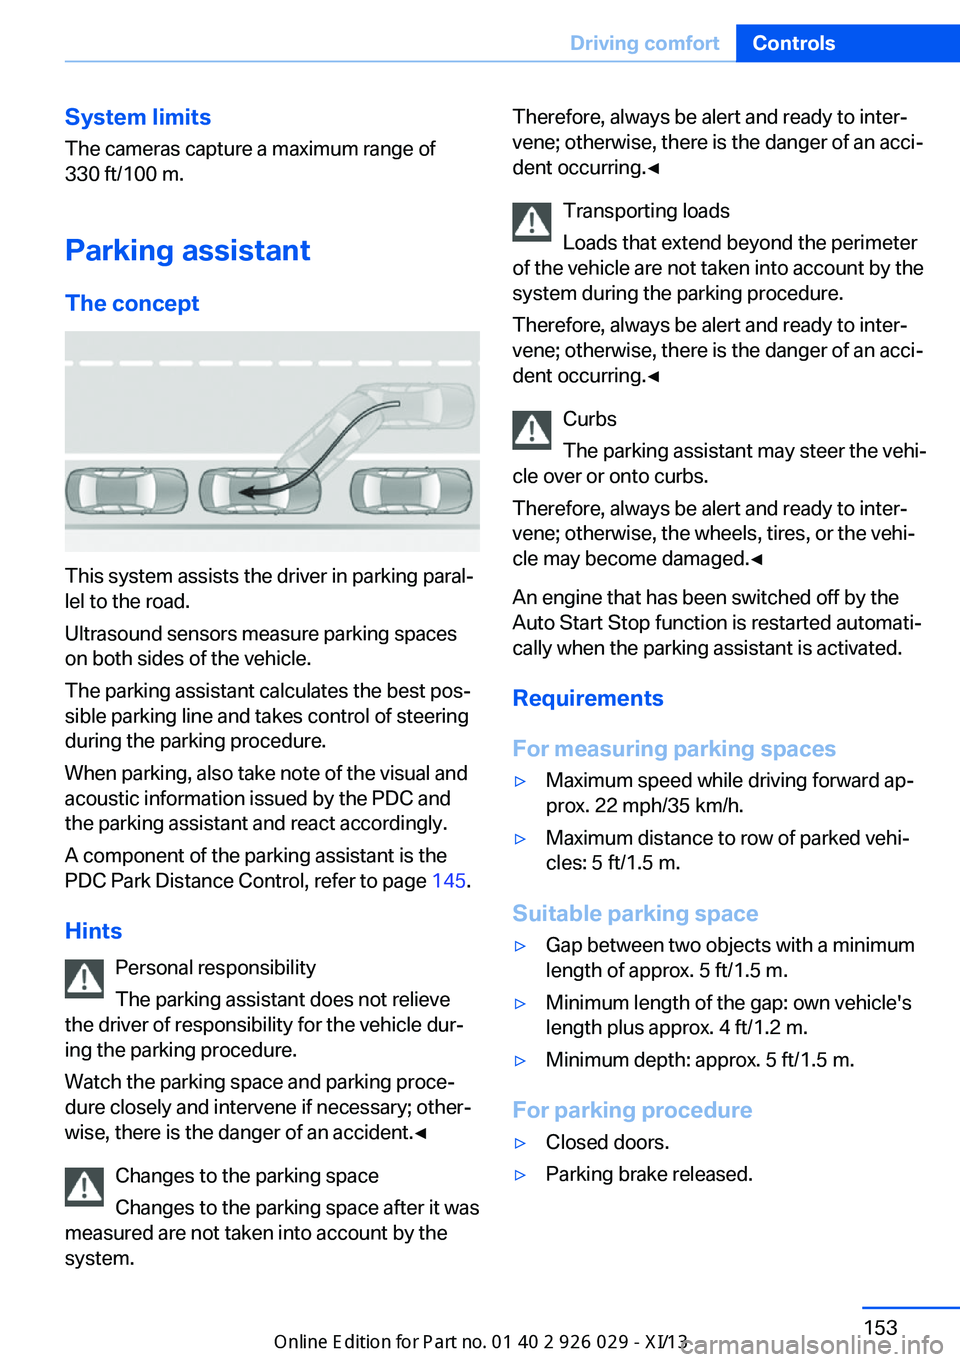
This system assists the driver in parking paral‐
lel to the road.
Ultrasound sensors measure parking spaces
on both sides of the vehicle.
The parking assistant calculates the best pos‐
sible parking line and takes control of steering
during the parking procedure.
When parking, also take note of the visual and
acoustic information issued by the PDC and
the parking assistant and react accordingly.
A component of the parking assistant is the
PDC Park Distance Control, refer to page 145.
Hints Personal responsibility
The parking assistant does not relieve
the driver of responsibility for the vehicle dur‐
ing the parking procedure.
Watch the parking space and parking proce‐
dure closely and intervene if necessary; other‐
wise, there is the danger of an accident.◀
Changes to the parking space
Changes to the parking space after it was
measured are not taken into account by the
system.
Therefore, always be alert and ready to inter‐
vene; otherwise, there is the danger of an acci‐
dent occurring.◀
Transporting loads
Loads that extend beyond the perimeter
of the vehicle are not taken into account by the
system during the parking procedure.
Therefore, always be alert and ready to inter‐
vene; otherwise, there is the danger of an acci‐
dent occurring.◀
Curbs
The parking assistant may steer the vehi‐
cle over or onto curbs.
Therefore, always be alert and ready to inter‐
vene; otherwise, the wheels, tires, or the vehi‐
cle may become damaged.◀
An engine that has been switched off by the
Auto Start Stop function is restarted automati‐
cally when the parking assistant is activated.
Requirements
For measuring parking spaces▷Maximum speed while driving forward ap‐
prox. 22 mph/35 km/h.▷Maximum distance to row of parked vehi‐
cles: 5 ft/1.5 m.
Suitable parking space
▷Gap between two objects with a minimum
length of approx. 5 ft/1.5 m.▷Minimum length of the gap: own vehicle's
length plus approx. 4 ft/1.2 m.▷Minimum depth: approx. 5 ft/1.5 m.
For parking procedure
▷Closed doors.▷Parking brake released.Seite 153Driving comfortControls153
Online Edition for Part no. 01 40 2 911 177 - VI/13
Page 162 of 273
Adjusting the height1."Settings"2."Head-Up Display"3."Height"4.Turn the controller.
The setting is stored for the remote control
currently in use.
Setting the rotation
1."Settings"2."Head-Up Display"3."Rotation"4.Turn the controller.
The setting is stored for the remote control
currently in use.
Special windshield
The windshield is part of the system.
The shape of the windshield makes it possible
to display a precise image.
A film in the windshield prevents double im‐
ages from being displayed.
Therefore, have the special windshield re‐
placed by a service center only.
Distance information The conceptThe system displays a symbol in the Head-up
Display to indicate that the distance behind the
vehicle in front is not sufficient.
General information The distance is determined by the radar sen‐
sor of the Active Cruise Control.
Hints
Personal responsibility
The display does not relieve the driver of
the responsibility to adapt his or her distance
and driving style to the traffic conditions. Main‐
tain the prescribed safety distance.◀
At a glance
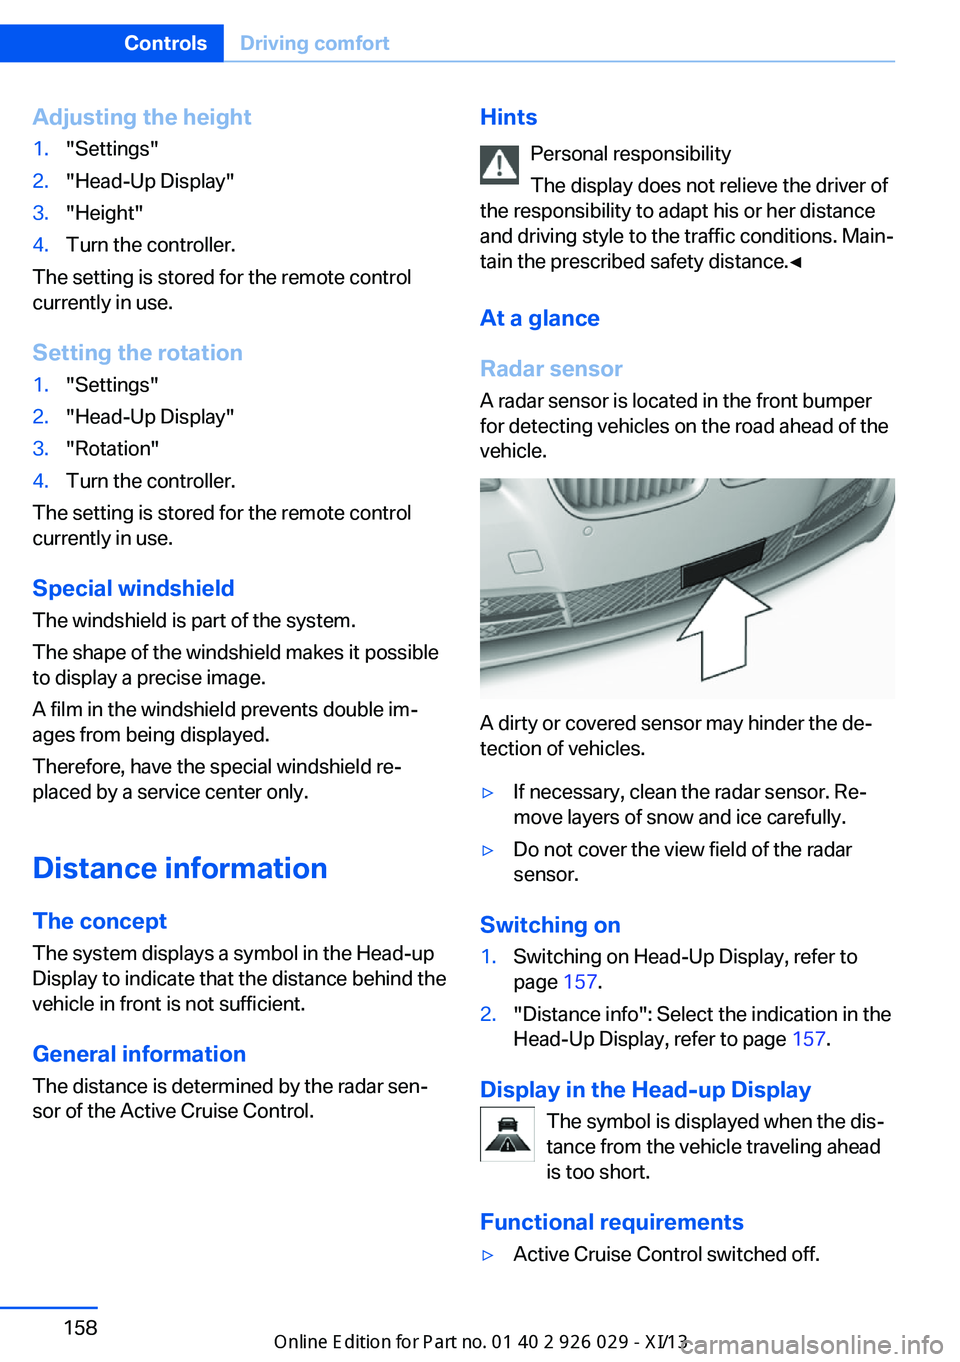
Radar sensor
A radar sensor is located in the front bumper
for detecting vehicles on the road ahead of the
vehicle.
A dirty or covered sensor may hinder the de‐
tection of vehicles.
▷If necessary, clean the radar sensor. Re‐
move layers of snow and ice carefully.▷Do not cover the view field of the radar
sensor.
Switching on
1.Switching on Head-Up Display, refer to
page 157.2."Distance info": Select the indication in the
Head-Up Display, refer to page 157.
Display in the Head-up Display
The symbol is displayed when the dis‐
tance from the vehicle traveling ahead
is too short.
Functional requirements
▷Active Cruise Control switched off.Seite 158ControlsDriving comfort158
Online Edition for Part no. 01 40 2 911 177 - VI/13
Page 166 of 273
Maximum coolingPress the button.
The system is set to the lowest tem‐
perature, maximum air flow and air circulation
mode.
Air flows out of the vents for the upper body
region. The vents need to be open for this.
Air is cooled as quickly as possible:▷At an external temperature of approx.
32 ℉/0 ℃.▷When the engine is running.
The air volume can be adjusted when the pro‐
gram is active.
Automatic recirculated-air control/recirculated-air mode
You can respond to unpleasant odors or pollu‐
tants in the immediate environment by tempo‐
rarily suspending the supply of outside air. The
system then recirculates the air currently
within the vehicle.
Press the button repeatedly to select
an operating mode:
▷LEDs off: outside air flows in continuously.▷Left LED on, automatic recirculated-air
control: a sensor detects pollutants in the
outside air and controls the shutoff auto‐
matically.▷Right LED on, recirculated-air mode: the
supply of outside air into the vehicle is per‐
manently blocked.
If the windows are fogged over, switch off the
recirculated-air mode and press the AUTO
button on the driver's side to utilize the con‐
densation sensor. Make sure that air can flow
onto the windshield.
Continuous recirculated-air mode
The recirculated-air mode should not be
used for an extended period of time, as the air
quality inside the vehicle deteriorates stead‐
ily.◀
Cooling function
The passenger compartment can only be
cooled with the engine running.
Press the button.
The air is cooled and dehumidified
and – depending on the temperature setting –
warmed again.
Depending on the weather, the windshield may
fog up briefly when the engine is started.
The cooling function is switched on automati‐
cally with the AUTO program.
When using the automatic climate control,
condensation water, refer to page 187, devel‐
ops that exits underneath the vehicle.
Rear window defroster Press the button.
The rear window defroster switches
off automatically after a certain period of time.
SYNC program The current settings on the driver's
side for temperature, air flow, air distri‐
bution, and AUTO program are transferred to
the front passenger side and to the left and
right rear.
The program is switched off if the settings on
the front passenger side or in the rear are
changed.
Residual heat The heat stored in the engine is used to heat
the interior.
Functional requirement▷Up to 20 minutes after the engine has been
switched off.▷Warm engine.▷The battery is sufficiently charged.▷External temperature below 77 ℉/25 ℃.Seite 162ControlsClimate control162
Online Edition for Part no. 01 40 2 911 177 - VI/13
Page 177 of 273
Through-loading systemThe concept The cargo area can be enlarged by folding
down the rear seat backrest.
The rear seat backrest is divided into two parts at a ratio of 60 to 40.
The sides can be folded down separately or to‐
gether.
Hints Danger of pinching
Before folding down the rear seat back‐
rests, ensure that the area of movement of the
backrests is clear. In particular, ensure that no
one is located in the area of movement and
that no one reaches into the area of movement
of the rear seat backrests when the middle
section is folded down. Otherwise, injury or
damage may result.◀
Lock the rear seat backrests in position
Before mounting child restraint fixing
systems, place the seat backrest as far as pos‐
sible at an angle at which the child seat is rest‐
ing firmly against the backrest and all back‐
rests can be locked securely in place.
Otherwise, the child seat will not be as stable
as it should be, and there is increased danger
of injury due to unexpected movement of the
seat backrest.◀
Opening Move the front seats to an upright posi‐
tion
Before folding down the rear backrests, ensure
that the front seats are moved forward slightlyand are in an upright position. Otherwise, the
head restraint and screen could be damaged.◀1.Unlock the belt lock of the center safety
belt in the rear using the latch plate of an‐
other safety belt.2.Insert the latch plate at the end of the belt
into the specially designated fixture on the
rear window shelf.3.Push the corresponding head restraint
down as far as it will go.4.Pull the corresponding lever in the cargo
area to release the rear seat backrest.5.The unlocked rear seat backrest moves
forward slightly.6.Fold backrest forward.Seite 173Interior equipmentControls173
Online Edition for Part no. 01 40 2 911 177 - VI/13
Page 190 of 273
Adhere to water depth and speed limita‐
tions
Do not exceed this water depth and walking
speed; otherwise, the vehicle's engine, the
electrical systems and the transmission may
be damaged.◀
Braking safely
Your vehicle is equipped with ABS as a stand‐ ard feature.
Applying the brakes fully is the most effective
way of braking in situations when this is neces‐
sary.
The vehicle maintains steering responsive‐
ness. You can still avoid any obstacles with a
minimum of steering effort.
Pulsation of the brake pedal and sounds from
the hydraulic circuits indicate that ABS is in its
active mode.
Objects in the area around the pedals No objects in the area around the pedals
Keep floor mats, carpets, and any other
objects out of the area of motion of the pedals;
otherwise, the function of the pedals could be
impeded while driving
Do not place additional floor mats over existing
mats or other objects.
Only use floor mats that have been approved
for the vehicle and can be properly fixed in
place.
Ensure that the floor mats are securely fas‐
tened again after they were removed for clean‐
ing, for example.◀
Driving in wet conditions When roads are wet coated with road salt or
there is heavy rain, briefly exert gentle pres‐
sure on the brake pedal every few miles.
Ensure that this action does not endanger
other road users.The heat generated in this process helps dry
the brake discs and pads.
In this way braking efficiency will be available
when you need it.
Hills
Drive long or steep downhill gradients in the
gear in which the least braking is required.
Otherwise, the brake system may overheat, re‐
sulting in a reduction in the brake system effi‐
ciency.
You can increase the engine's braking effect
by shifting down, going all the way to first gear,
if necessary.
Avoid load on the brakes
Avoid placing excessive load on the
brake system. Light but consistent brake pres‐
sure can lead to high temperatures, brake wear
and possibly even brake failure.◀
Do not drive in neutral
Do not drive in neutral or with the engine
stopped, as doing so disables engine braking.
In addition, steering and brake assist is un‐
available with the engine stopped.◀
Brake disc corrosion
The corrosion on the brake discs and the con‐
tamination on the brake pads are furthered by:▷Low mileage.▷Extended periods when the vehicle is not
used at all.▷Infrequent use of the brakes.
Corrosion occurs when the minimum pressure
that must be exerted by the pads during brake
applications to clean the discs is not reached.
Should corrosion form on the brake discs, the
brakes will tend to respond with a pulsating ef‐
fect that generally cannot be corrected.
Seite 186Driving tipsThings to remember when driving186
Online Edition for Part no. 01 40 2 911 177 - VI/13
Page 196 of 273
Avoid high engine speeds
Use 1st gear to get the vehicle in motion. Be‐
ginning with 2nd gear, accelerate rapidly.
When accelerating, shift up before reaching
high engine speeds.
When you reach the desired speed, shift into
the highest applicable gear and drive with the
engine speed as low as possible and at a con‐
stant speed.
As a rule: driving at low engine speeds lowers
fuel consumption and reduces wear.
The gear shift indicator of your vehicle indi‐
cates the most fuel efficient gear.
Use coasting conditions When approaching a red light, take your foot
off the accelerator and let the vehicle coast to
a halt.
On a downhill gradient, take your foot off the
accelerator and let the vehicle roll.
The flow of fuel is interrupted while coasting.
Switch off the engine during
longer stops
Switch off the engine during longer stops, e.g.,
at traffic lights, railroad crossings or in traffic
congestion.
Automatic Engine Start/Stop Function
The Auto Start/Stop function of your vehicle
automatically switches off the engine during a
stop.
If the engine is switched off and then restarted
rather than leaving the engine running con‐
stantly, fuel consumption and emissions are
reduced. Savings can begin within a few sec‐
onds of switching off the engine.
Using this system can cause certain compo‐
nents of the vehicle to become worn prema‐
turely.In addition, fuel consumption is also deter‐
mined by other factors, such as driving style,
road conditions, maintenance or environmental
factors.
Switch off any functions that
are not currently needed
Functions such as seat heating and the rear
window defroster require a lot of energy and
consume additional fuel, especially in city and
stop-and-go traffic.
Therefore, switch off these functions if they
are not actually needed.
Have maintenance carried
out
Have vehicles maintained regularly to achieve
optimal vehicle economy and operating life.
Have the maintenance carried out by your
service center.
Please also note the BMW Maintenance Sys‐
tem, refer to page 231.
ECO PRO
The concept ECO PRO supports a driving style that saves
on fuel consumption. For this purpose, the en‐
gine control and comfort functions, e. g. the
climate control output, are adjusted.
In addition, context-sensitive instructions can
be displayed that assist in driving in a manner
that optimizes fuel consumption.
The extension of the range that is achieved as
a result can be displayed in the instrument
cluster.
At a glance
The system includes the following
EfficientDynamics functions and displays:Seite 192Driving tipsSaving fuel192
Online Edition for Part no. 01 40 2 911 177 - VI/13