2013 BMW 528I SEDAN child lock
[x] Cancel search: child lockPage 47 of 273

Indicator lamp on the interior rearview
mirror▷The indicator lamp flashes briefly every
2 seconds:
The system is armed.▷The indicator lamp flashes after locking:
The doors, hood or trunk lid is not closed
properly, but the rest of the vehicle is se‐
cured.
After 10 seconds, the indicator lamp
flashes continuously. Interior motion sen‐
sor and tilt alarm sensor are not active.▷The indicator lamp goes out after unlock‐
ing:
The vehicle has not been tampered with.▷The indicator lamp flashes after unlocking
until the engine ignition is switched on, but
no longer than approx. 5 minutes:
An alarm has been triggered.
Tilt alarm sensor The tilt of the vehicle is monitored.
The alarm system responds in situations such
as attempts to steal a wheel or when the car is
towed.
Interior motion sensor The windows and glass sunroof must be
closed for the system to function properly.
Avoiding unintentional alarms
The tilt alarm sensor and interior motion sen‐
sor can be switched off together, such as in
the following situations:▷In automatic car washes.▷In duplex garages.▷During transport on car-carrying trains, at
sea or on a trailer.▷When animals are to remain in the vehicle.
Switching off the tilt alarm sensor and
interior motion sensor
Press the remote control button again
within 10 seconds as soon as the vehicle
is locked.
The indicator lamp lights up for approx. 2 sec‐
onds and then continues to flash.
The tilt alarm sensor and interior motion sen‐
sor are switched off until the vehicle is locked
again.
Power windows
General information Take the remote control with you
Take the remote control with you when
leaving the vehicle so that children, for exam‐
ple, cannot operate the power windows and in‐
jure themselves.◀
Seite 43Opening and closingControls43
Online Edition for Part no. 01 40 2 911 177 - VI/13
Page 49 of 273
Safety switch for rear operation
Press the safety switch when transport‐
ing children in the rear; otherwise, injury may
result if the windows are closed without super‐
vision.◀
Roller sunblinds
General information If you are no longer able to move the roller sun‐
blind for the rear window after having activated
it a number of times in a row, the system is
blocked for a limited time to prevent overheat‐
ing. Let the system cool.
The roller sunblind for the rear window cannot
be moved at low interior temperatures.
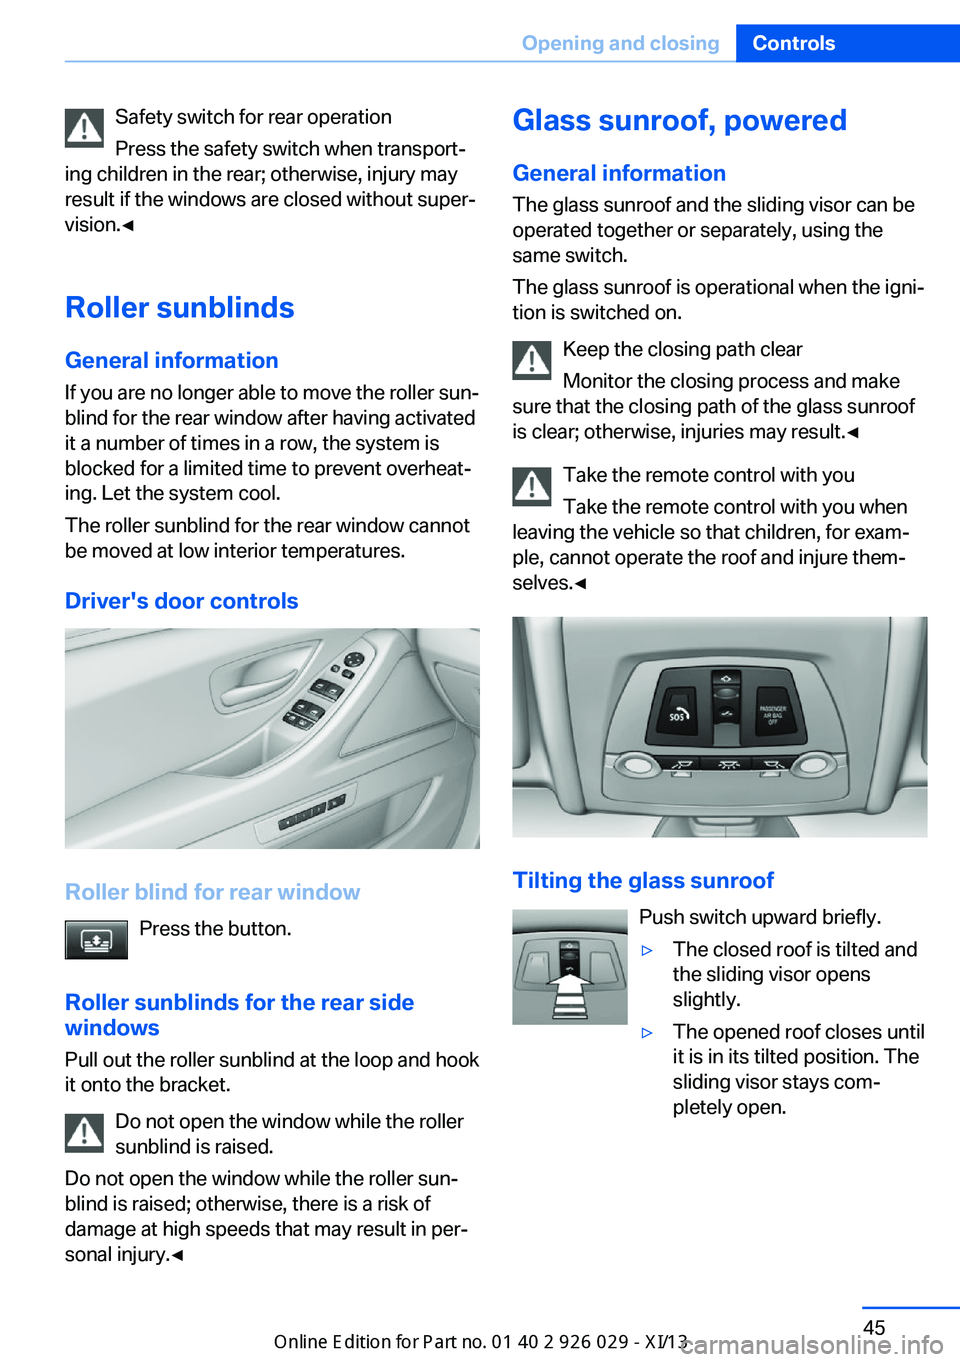
Driver's door controls
Roller blind for rear window Press the button.
Roller sunblinds for the rear side windows
Pull out the roller sunblind at the loop and hook
it onto the bracket.
Do not open the window while the roller
sunblind is raised.
Do not open the window while the roller sun‐
blind is raised; otherwise, there is a risk of
damage at high speeds that may result in per‐
sonal injury.◀
Glass sunroof, powered
General information
The glass sunroof and the sliding visor can be
operated together or separately, using the
same switch.
The glass sunroof is operational when the igni‐
tion is switched on.
Keep the closing path clear
Monitor the closing process and make
sure that the closing path of the glass sunroof
is clear; otherwise, injuries may result.◀
Take the remote control with youTake the remote control with you when
leaving the vehicle so that children, for exam‐
ple, cannot operate the roof and injure them‐
selves.◀
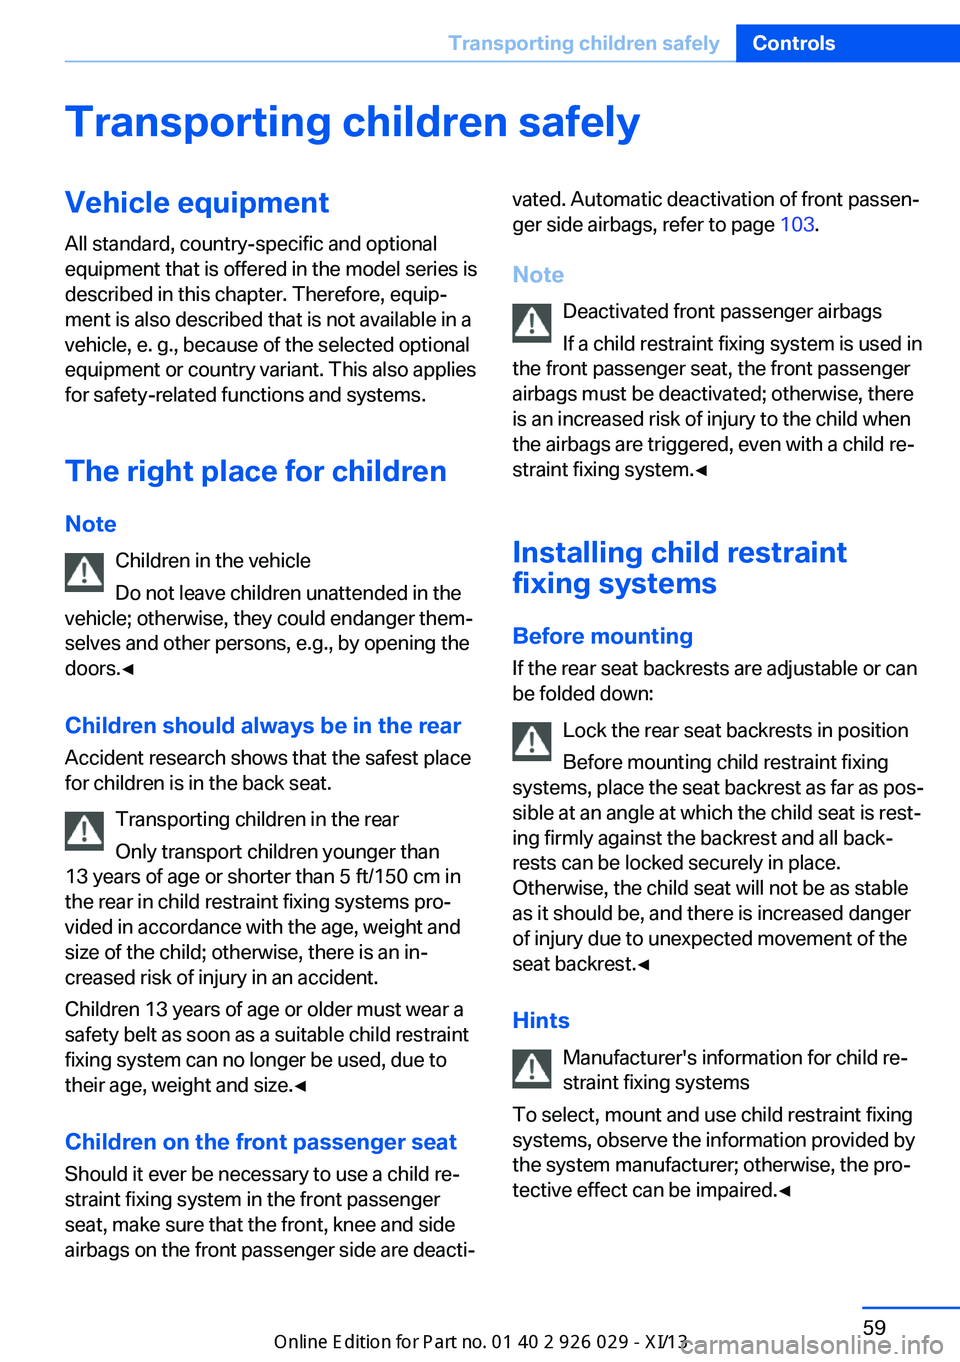
Tilting the glass sunroof
Push switch upward briefly.
▷The closed roof is tilted and
the sliding visor opens
slightly.▷The opened roof closes until
it is in its tilted position. The
sliding visor stays com‐
pletely open.Seite 45Opening and closingControls45
Online Edition for Part no. 01 40 2 911 177 - VI/13
Page 63 of 273
Transporting children safelyVehicle equipmentAll standard, country-specific and optional
equipment that is offered in the model series is
described in this chapter. Therefore, equip‐
ment is also described that is not available in a
vehicle, e. g., because of the selected optional
equipment or country variant. This also applies
for safety-related functions and systems.
The right place for children Note Children in the vehicle
Do not leave children unattended in the
vehicle; otherwise, they could endanger them‐
selves and other persons, e.g., by opening the
doors.◀
Children should always be in the rear
Accident research shows that the safest place
for children is in the back seat.
Transporting children in the rear
Only transport children younger than
13 years of age or shorter than 5 ft/150 cm in
the rear in child restraint fixing systems pro‐
vided in accordance with the age, weight and
size of the child; otherwise, there is an in‐
creased risk of injury in an accident.
Children 13 years of age or older must wear a
safety belt as soon as a suitable child restraint
fixing system can no longer be used, due to
their age, weight and size.◀
Children on the front passenger seat
Should it ever be necessary to use a child re‐
straint fixing system in the front passenger
seat, make sure that the front, knee and side
airbags on the front passenger side are deacti‐vated. Automatic deactivation of front passen‐
ger side airbags, refer to page 103.
Note Deactivated front passenger airbags
If a child restraint fixing system is used in
the front passenger seat, the front passenger
airbags must be deactivated; otherwise, there
is an increased risk of injury to the child when
the airbags are triggered, even with a child re‐
straint fixing system.◀
Installing child restraint
fixing systems
Before mounting
If the rear seat backrests are adjustable or can
be folded down:
Lock the rear seat backrests in position
Before mounting child restraint fixing
systems, place the seat backrest as far as pos‐
sible at an angle at which the child seat is rest‐
ing firmly against the backrest and all back‐
rests can be locked securely in place.
Otherwise, the child seat will not be as stable
as it should be, and there is increased danger
of injury due to unexpected movement of the
seat backrest.◀
Hints Manufacturer's information for child re‐
straint fixing systems
To select, mount and use child restraint fixing
systems, observe the information provided by
the system manufacturer; otherwise, the pro‐
tective effect can be impaired.◀Seite 59Transporting children safelyControls59
Online Edition for Part no. 01 40 2 911 177 - VI/13
Page 64 of 273
Lock the rear seat backrests in position
Before installing a child restraint system,
make sure that the rear seat backrests are
locked; otherwise, the protective effect is not
guaranteed and there is an increased risk of in‐
jury for the child in the event of an accident.◀
On the front passenger seat
Deactivating airbags
After installing a child restraint fixing system in
the front passenger seat, make sure that the
front, knee and side airbags on the front pas‐
senger side are deactivated.
Deactivate the front passenger airbags auto‐
matically, refer to page 103.
Deactivating the front passenger airbags
If a child restraint fixing system is used in
the front passenger seat, the front passenger
airbags must be deactivated; otherwise, there
is an increased risk of injury to the child when
the airbags are triggered, even with a child re‐
straint fixing system.◀
Seat position and height
Before installing a child restraint fixing system,
move the front passenger seat as far back as
possible and bring it up to medium height to
obtain the best possible position for the belt
and to offer optimal protection in the event of
an accident.
Do not change the seat position and height af‐
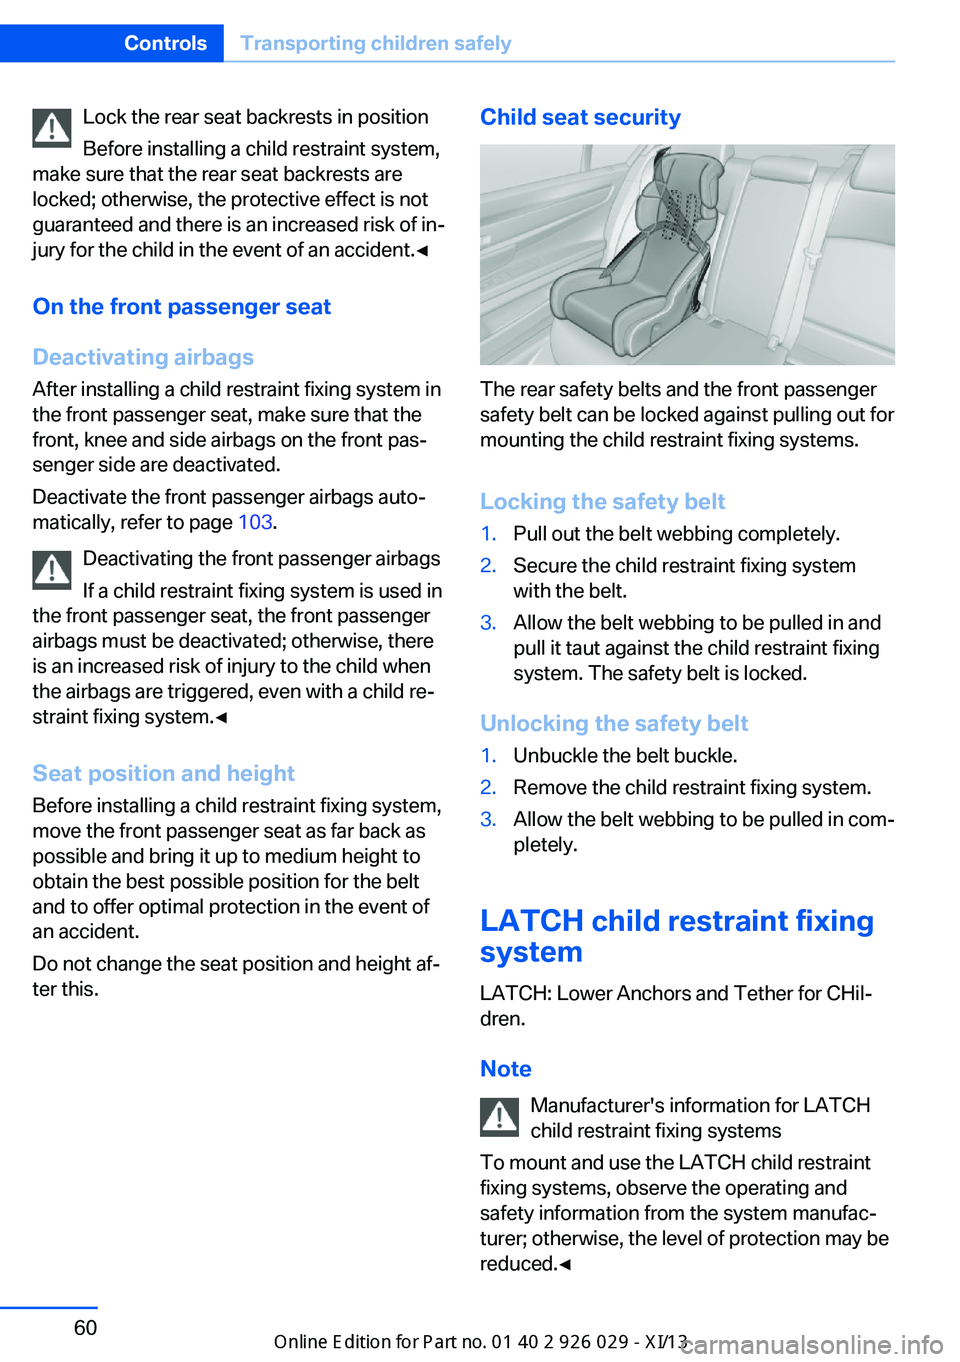
ter this.Child seat security
The rear safety belts and the front passenger
safety belt can be locked against pulling out for
mounting the child restraint fixing systems.
Locking the safety belt
1.Pull out the belt webbing completely.2.Secure the child restraint fixing system
with the belt.3.Allow the belt webbing to be pulled in and
pull it taut against the child restraint fixing
system. The safety belt is locked.
Unlocking the safety belt
1.Unbuckle the belt buckle.2.Remove the child restraint fixing system.3.Allow the belt webbing to be pulled in com‐
pletely.
LATCH child restraint fixing
system
LATCH: Lower Anchors and Tether for CHil‐dren.
Note Manufacturer's information for LATCH
child restraint fixing systems
To mount and use the LATCH child restraint
fixing systems, observe the operating and
safety information from the system manufac‐
turer; otherwise, the level of protection may be
reduced.◀
Seite 60ControlsTransporting children safely60
Online Edition for Part no. 01 40 2 911 177 - VI/13
Page 66 of 273
NoteMounting eyes
Only use the mounting eyes for the up‐
per retaining strap to secure child restraint fix‐
ing systems; otherwise, the mounting eyes
could be damaged.◀
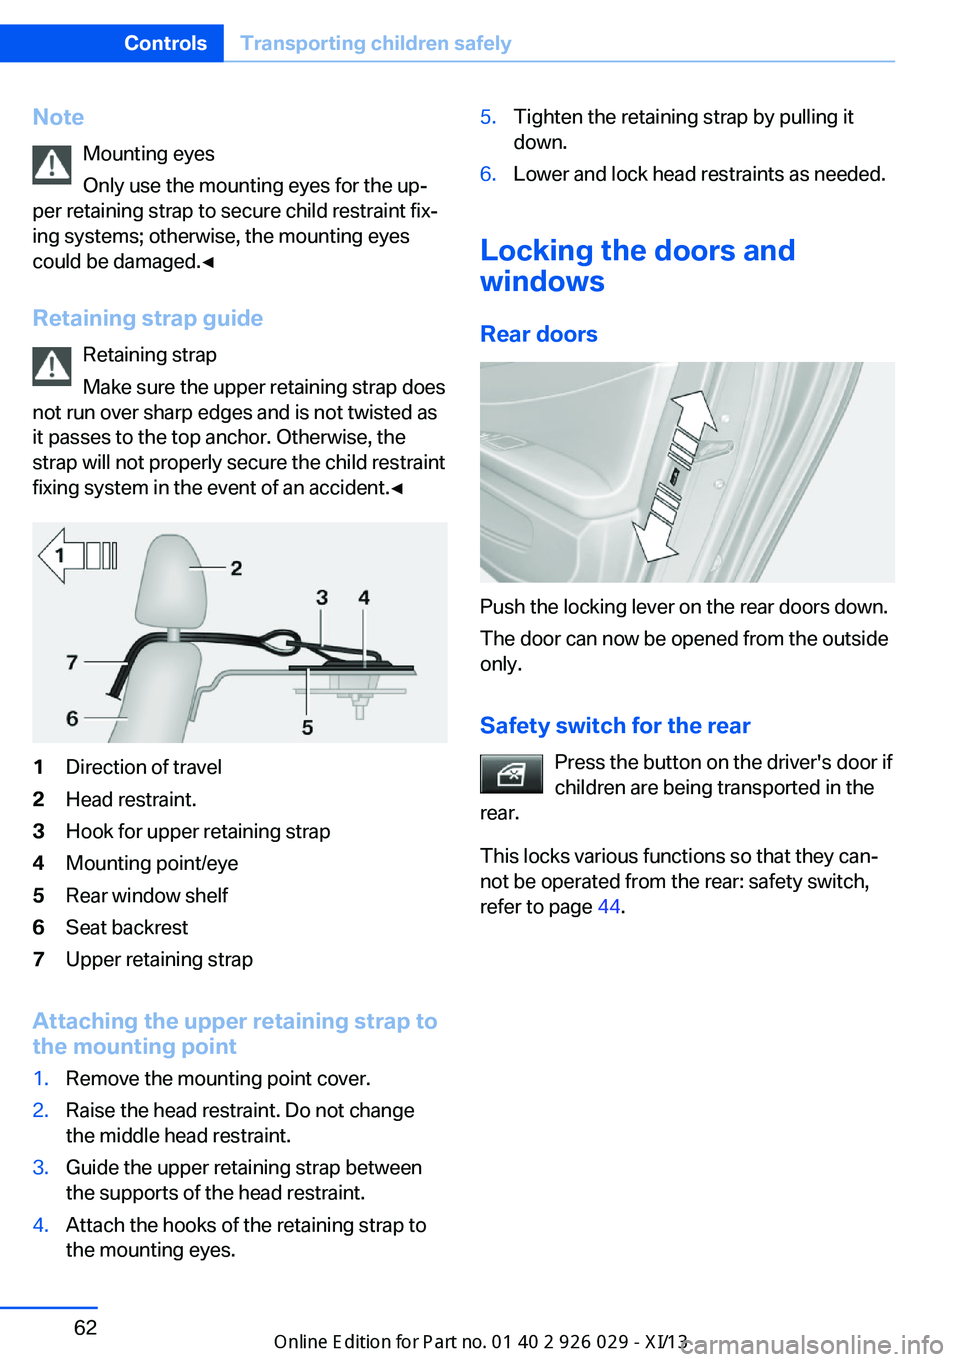
Retaining strap guide Retaining strap
Make sure the upper retaining strap does
not run over sharp edges and is not twisted as
it passes to the top anchor. Otherwise, the
strap will not properly secure the child restraint
fixing system in the event of an accident.◀1Direction of travel2Head restraint.3Hook for upper retaining strap4Mounting point/eye5Rear window shelf6Seat backrest7Upper retaining strap
Attaching the upper retaining strap to
the mounting point
1.Remove the mounting point cover.2.Raise the head restraint. Do not change
the middle head restraint.3.Guide the upper retaining strap between
the supports of the head restraint.4.Attach the hooks of the retaining strap to
the mounting eyes.5.Tighten the retaining strap by pulling it
down.6.Lower and lock head restraints as needed.
Locking the doors and
windows
Rear doors
Push the locking lever on the rear doors down.
The door can now be opened from the outside
only.
Safety switch for the rear Press the button on the driver's door if
children are being transported in the
rear.
This locks various functions so that they can‐
not be operated from the rear: safety switch,
refer to page 44.
Seite 62ControlsTransporting children safely62
Online Edition for Part no. 01 40 2 911 177 - VI/13
Page 77 of 273
Only keep it in the closed original container
and inaccessible to children.
Follow the notes and instructions on the con‐
tainer.
United States: The washer fluid mixture ratio is
regulated by the U.S. EPA and many individual
states; do not exceed the allowable washer
fluid dilution ratios limits that apply. Follow the
usage instructions on the washer fluid con‐
tainer. Use BMW’s Windshield Washer Con‐
centrate or the equivalent.◀
Washer fluid reservoir Adding washer fluid
Only add washer fluid when the engine is
cool, and then close the cover completely to
avoid contact between the washer fluid and
hot engine parts.
Otherwise, there is the danger of fire and a risk
to personal safety if the fluid is spilled.◀
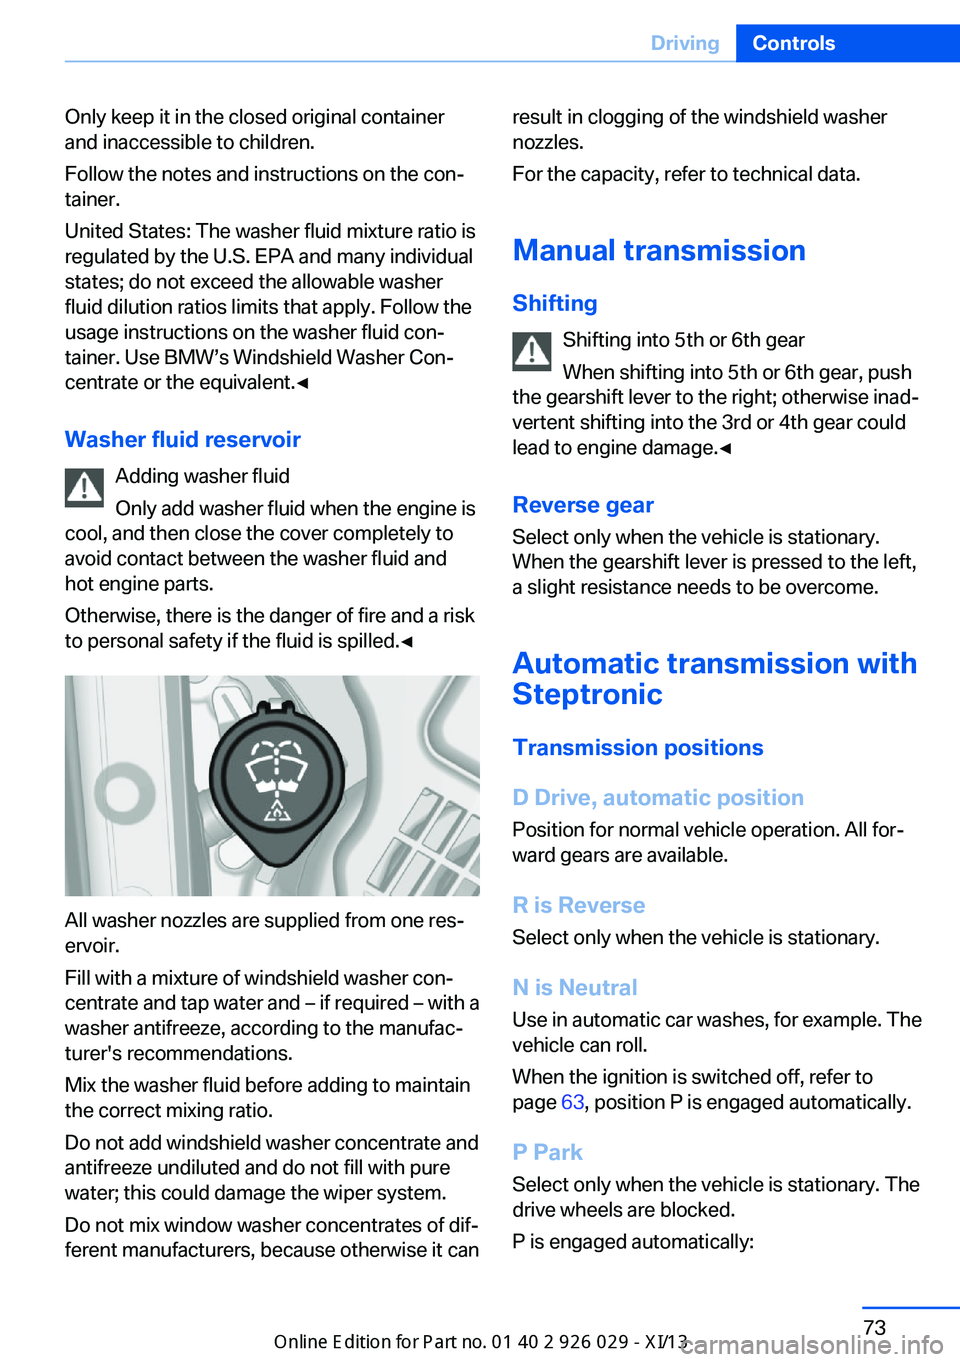
All washer nozzles are supplied from one res‐
ervoir.
Fill with a mixture of windshield washer con‐
centrate and tap water and – if required – with a
washer antifreeze, according to the manufac‐
turer's recommendations.
Mix the washer fluid before adding to maintain
the correct mixing ratio.
Do not add windshield washer concentrate and
antifreeze undiluted and do not fill with pure
water; this could damage the wiper system.
Do not mix window washer concentrates of dif‐
ferent manufacturers, because otherwise it can
result in clogging of the windshield washer
nozzles.
For the capacity, refer to technical data.
Manual transmissionShifting Shifting into 5th or 6th gear
When shifting into 5th or 6th gear, push
the gearshift lever to the right; otherwise inad‐
vertent shifting into the 3rd or 4th gear could
lead to engine damage.◀
Reverse gear
Select only when the vehicle is stationary.
When the gearshift lever is pressed to the left,
a slight resistance needs to be overcome.
Automatic transmission with
Steptronic
Transmission positions
D Drive, automatic position Position for normal vehicle operation. All for‐
ward gears are available.
R is Reverse
Select only when the vehicle is stationary.
N is Neutral Use in automatic car washes, for example. The
vehicle can roll.
When the ignition is switched off, refer to
page 63, position P is engaged automatically.
P Park Select only when the vehicle is stationary. The
drive wheels are blocked.
P is engaged automatically:Seite 73DrivingControls73
Online Edition for Part no. 01 40 2 911 177 - VI/13
Page 177 of 273
Through-loading systemThe concept The cargo area can be enlarged by folding
down the rear seat backrest.
The rear seat backrest is divided into two parts at a ratio of 60 to 40.
The sides can be folded down separately or to‐
gether.
Hints Danger of pinching
Before folding down the rear seat back‐
rests, ensure that the area of movement of the
backrests is clear. In particular, ensure that no
one is located in the area of movement and
that no one reaches into the area of movement
of the rear seat backrests when the middle
section is folded down. Otherwise, injury or
damage may result.◀
Lock the rear seat backrests in position
Before mounting child restraint fixing
systems, place the seat backrest as far as pos‐
sible at an angle at which the child seat is rest‐
ing firmly against the backrest and all back‐
rests can be locked securely in place.
Otherwise, the child seat will not be as stable
as it should be, and there is increased danger
of injury due to unexpected movement of the
seat backrest.◀
Opening Move the front seats to an upright posi‐
tion
Before folding down the rear backrests, ensure
that the front seats are moved forward slightlyand are in an upright position. Otherwise, the
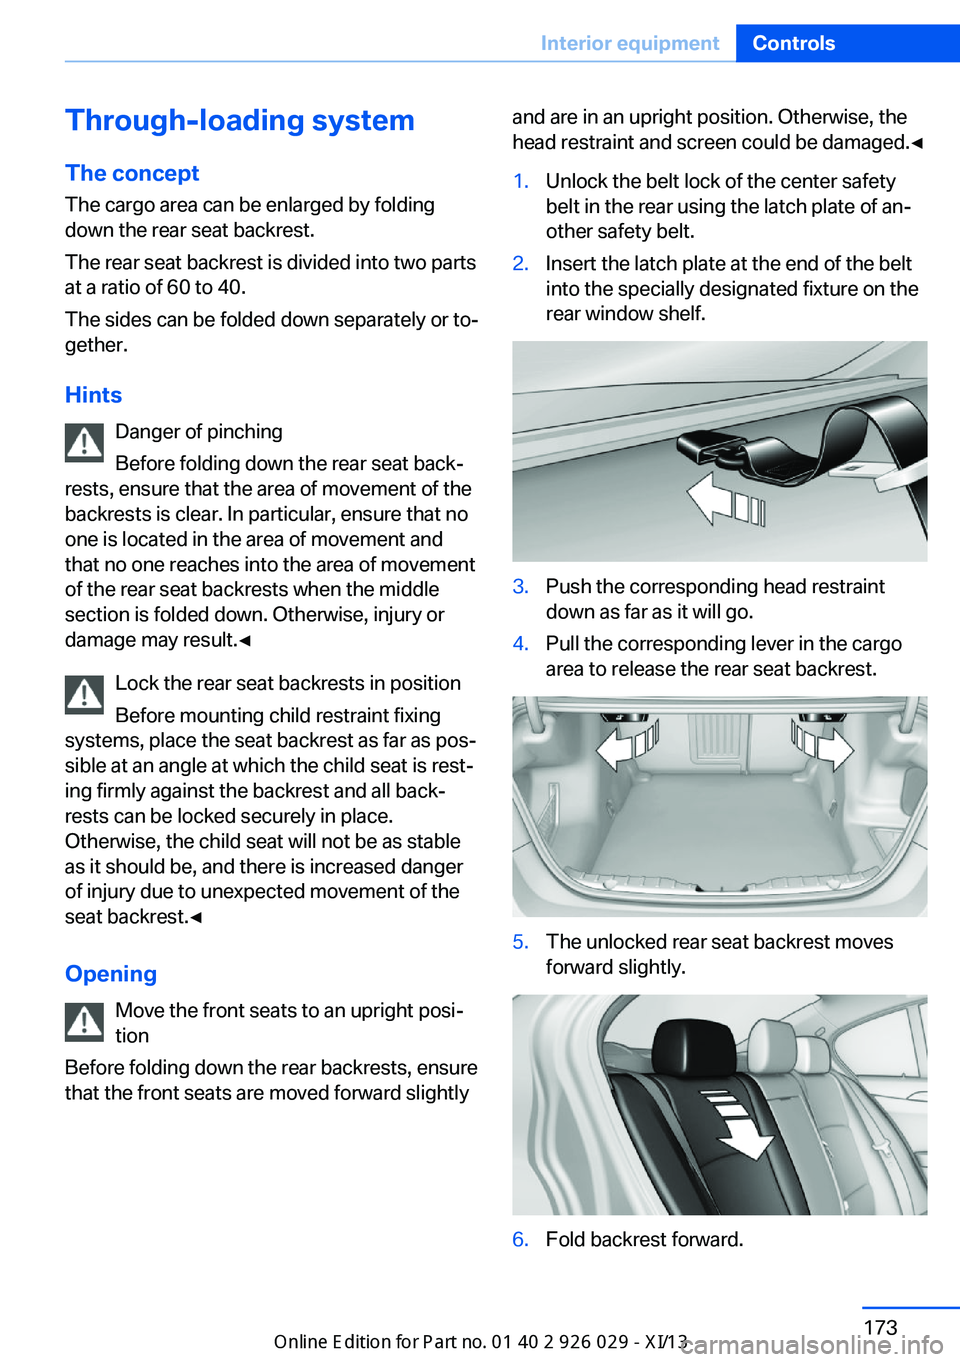
head restraint and screen could be damaged.◀1.Unlock the belt lock of the center safety
belt in the rear using the latch plate of an‐
other safety belt.2.Insert the latch plate at the end of the belt
into the specially designated fixture on the
rear window shelf.3.Push the corresponding head restraint
down as far as it will go.4.Pull the corresponding lever in the cargo
area to release the rear seat backrest.5.The unlocked rear seat backrest moves
forward slightly.6.Fold backrest forward.Seite 173Interior equipmentControls173
Online Edition for Part no. 01 40 2 911 177 - VI/13
Page 263 of 273
BMW Advanced Diesel 203
BMW Assist, see user's manual for Navigation, En‐
tertainment and Communi‐
cation
BMW Homepage 6
BMW Internet page 6
BMW maintenance sys‐ tem 231
Bonus range, ECO PRO 193
Bottle holder, refer to Cu‐ pholder 178
Brake assistant 126
Brake assistant, adaptive 126
Brake discs, breaking in 184
Brake force display 123
Brake lamps, brake force dis‐ play 123
Brake lamps, bulb replace‐ ment 236
Brake lights, adaptive 123
Brake pads, breaking in 184
Braking, hints 186
Breakdown assis‐ tance 240, 241
Breaking in 184
Brightness of Control Dis‐ play 95
Bulb replacement 233
Bulb replacement, front 234
Bulb replacement, rear 236
Bulbs and lamps 233
Button, RES 136
Button, Start/Stop 63
Bypassing, refer to Jump- starting 241
C
California Proposition 65 Warning 7
Calling up mirror adjust‐ ment 41
Calling up seat adjust‐ ment 41 Calling up steering wheel ad‐
justment 41
Camera, backup camera 147
Camera, care 249
Camera, Side View 152
Camera, Top View 150
Can holder, refer to Cu‐ pholder 178
Car battery 238
Car care products 247
Care, displays 249
Care, vehicle 247
Cargo 188
Cargo area, enlarging 173
Cargo area lid 36
Cargo area, storage compart‐ ments 179
Cargo, securing 189
Cargo straps, securing cargo 189
Car key, refer to Remote con‐ trol 30
Carpet, care 249
Car wash 246
Catalytic converter, refer to Hot exhaust system 185
CBS Condition Based Serv‐ ice 231
CD/Multimedia, see user's manual for Navigation, En‐
tertainment and Communi‐
cation
Center armrest 177
Center console 14
Center-Lock, see button for central locking 33
Central locking system 33
Central screen, refer to Con‐ trol Display 16
Changes, technical, refer to Safety 7
Changing parts 233
Changing wheels 238
Changing wheels/tires 220
Check Control 84 Checking the oil level elec‐
tronically 226
Children, seating position 59
Children, transporting safely 59
Child restraint fixing sys‐ tem 59
Child restraint fixing system LATCH 60
Child restraint fixing systems, mounting 59
Child safety locks 62
Child seat, mounting 59
Child seats 59
Chrome parts, care 248
Cigarette lighter 169
Cleaning, displays 249
Climate control 160
Climate control laminated tinted safety glass 185
Climate control wind‐ shield 185
Clock 87
Closing/opening from in‐ side 36
Closing/opening via door lock 35
Closing/opening with remote control 34
Clothes hooks 179
Coasting 195
Coasting with engine decou‐ pled, coasting 195
Coasting with idling en‐ gine 195
Cold starting, refer to Starting the engine 64
Collision warning with braking function 112
Collision warning with City Braking function 110
Combination switch, refer to Turn signals 70
Combination switch, refer to Wiper system 71 Seite 259Everything from A to ZReference259
Online Edition for Part no. 01 40 2 911 177 - VI/13