2013 BMW 335IS COUPE steering
[x] Cancel search: steeringPage 140 of 308
139
Things to remember when driving
Driving tips
Hills
To prevent overheating and the resulting
reduced efficiency of the brake system,
drive long or steep downhill gradients in the
gear in which the least braking is required. Even
light but consistent brake pressure can lead to
high temperatures, brake wear and possibly
even brake failure. <
You can increase the engine's braking effect by
shifting down, all the way to first gear if neces-
sary. This strategy helps you avoid placing
excessive loads on the brake system. Down-
shifting in manual mode of the automatic trans-
mission, refer to page 64.
Sport automatic transmission with double
clutch: never drive with the transmission
in neutral or with the engine switched off; other-
wise, there will be no engine braking action and
no power assistance to the brakes and steering.
Manual transmission: never drive with the
clutch held down, with the transmission in neu-
tral or with the engine switched off; otherwise,
there will be no engine braking action and no
power assistance to the brakes and steering.
Never allow floor mats, carpets or any other
objects to protrude into the area around the
pedals; otherwise, pedal function could be
impaired. <
Corrosion on brake rotors
When the vehicle is driven only occasionally,
during extended periods when the vehicle is not
used at all, and in operating conditions where
brake applications are less frequent, there is an
increased tendency for corrosion to form on
rotors, while contaminants accumulate on the
brake pads. This occurs because the minimum
pressure which must be exerted by the pads
during brake applications to clean the rotors is
not reached.
Should corrosion form on the brake rotors, the
brakes will tend to respond with a pulsating
effect that even extended application will fail to
cure.
When the vehicle is parked
Condensation forms while the automatic cli-
mate control is in operation, and then exits
under the vehicle. Traces of condensed water
under the vehicle are therefore normal.
Cargo loading
To avoid loading the tires beyond their
approved carrying capacity, never over-
load the vehicle. Overloading can lead to over-
heating and increases the rate at which damage
develops inside the tires. In some situations,
this can result in sudden loss of tire pressure. <
Make sure that no liquids are spilled or
leak from their containers in the trunk, as
this could result in damage to the vehicle. <
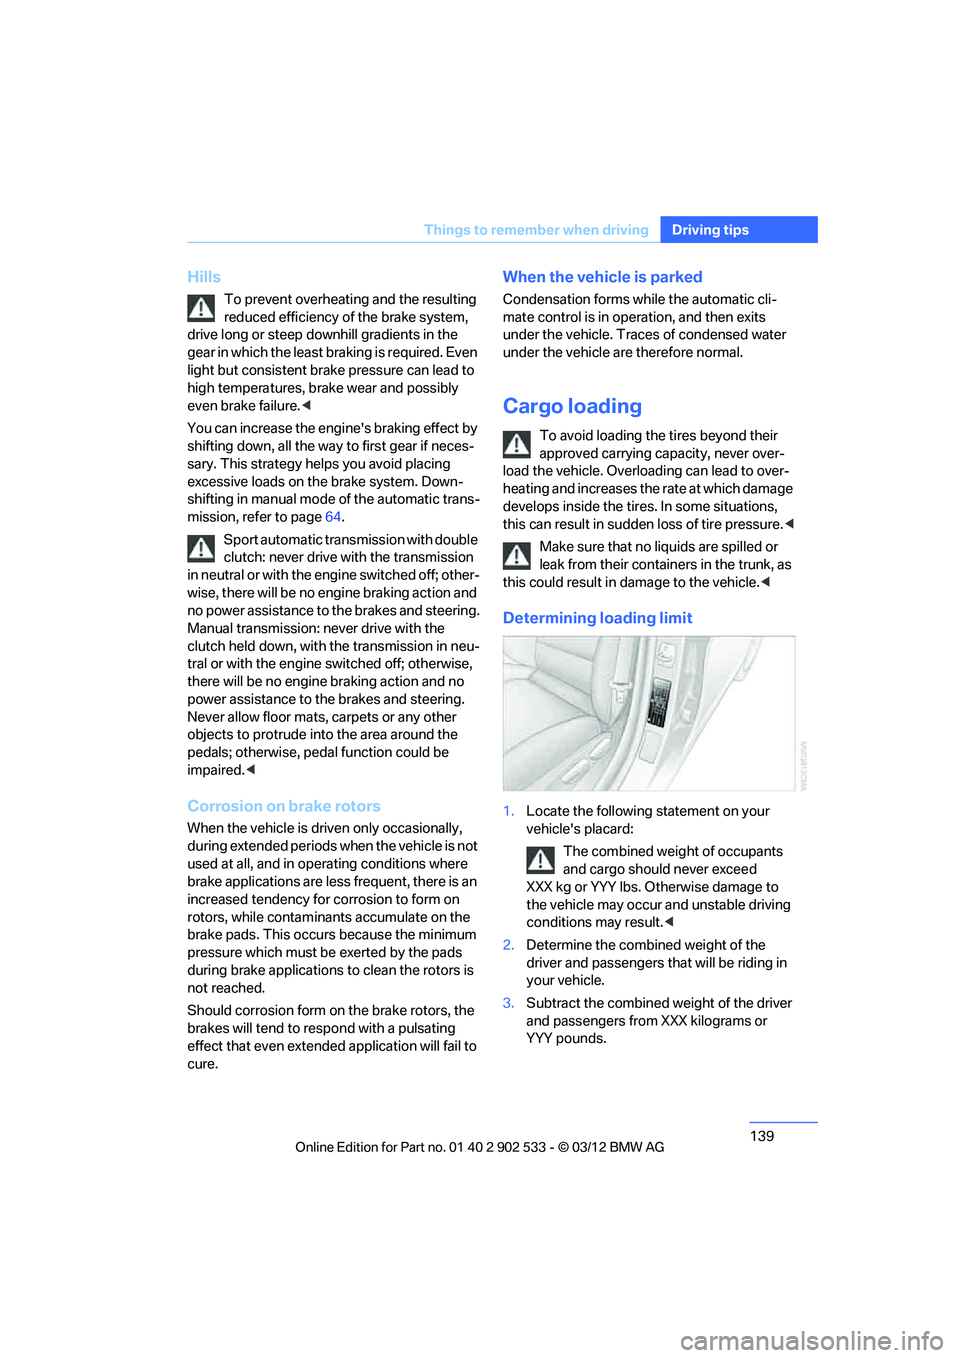
Determining loading limit
1.Locate the following statement on your
vehicle's placard:
The combined weight of occupants
and cargo should never exceed
XXX kg or YYY lbs. Otherwise damage to
the vehicle may occur and unstable driving
conditions may result. <
2. Determine the combined weight of the
driver and passengers that will be riding in
your vehicle.
3. Subtract the combined weight of the driver
and passengers from XXX kilograms or
YYY pounds.
00320051004F004C00510048000300280047004C0057004C005200510003
Page 142 of 308
141
Things to remember when driving
Driving tips
>
Secure smaller and lighter items using
retaining straps, a trunk net, or draw straps.
> Heavy-duty cargo straps for securing larger
and heavier objects are available at your
BMW center. Four lashing eyes are pro-
vided for attaching the cargo straps. Two
are located on the side walls of the trunk 1,
two additional ones are located on the
inside wall of the trunk 2.
Please note the information supplied with
the cargo straps.
Convertible: before opening the hardtop,
fold down the trunk partition. Make sure
the trunk is loaded correctly; otherwise parts of
the hardtop can be damaged, refer to
page 128.<
Always position and secure the cargo as
described above, so that it cannot endan-
ger the car's occupants, for example if sudden
braking or swerving is necessary.
Never exceed either the approved gross vehicle
weight or either of the approved axle loads, refer
to page 283, as excessive loads can pose a
safety hazard, and may also place you in viola-
tion of traffic safety laws.
Heavy or hard objects should not be carried
loose inside the car, since they could be thrown
around, for example as a result of heavy braking,
sudden swerves, etc., and endanger the occu-
pants.
Only attach the cargo straps using the lashing
eyes shown in the illustration. Do not secure
cargo with the anchors for tether straps, refer to
page 58; otherwise, these could be damaged.
A special rack system is available as an option
for your BMW. Comply with the directions given
in the installation instructions.
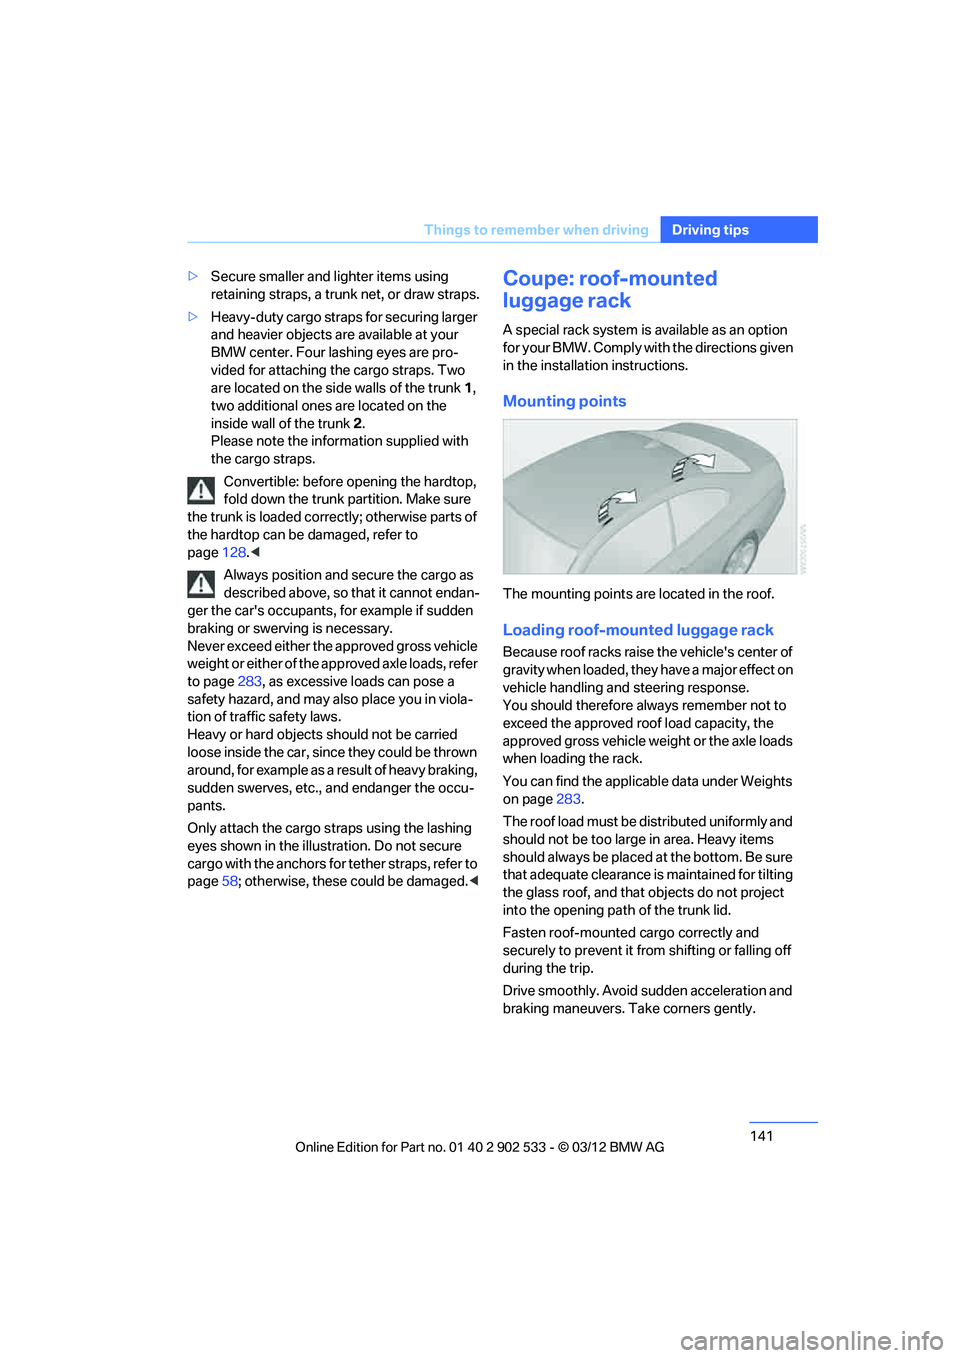
Mounting points
The mounting points are located in the roof.
Loading roof-mounted luggage rack
Because roof racks raise the vehicle's center of
gravity when loaded, they have a major effect on
vehicle handling and steering response.
You should therefore always remember not to
exceed the approved roof load capacity, the
approved gross vehicle weight or the axle loads
when loading the rack.
You can find the applicable data under Weights
on page283.
The roof load must be distributed uniformly and
should not be too large in area. Heavy items
should always be placed at the bottom. Be sure
that adequate clearance is maintained for tilting
the glass roof, and that objects do not project
into the opening path of the trunk lid.
Fasten roof-mounted cargo correctly and
securely to prevent it from shifting or falling off
during the trip.
Drive smoothly. Avoid sudden acceleration and
braking maneuvers. Take corners gently.
00320051004F004C00510048000300280047004C0057004C005200510003
Page 153 of 308
152
NavigationDestination entry
5.Press the controller to display additional
menu items.
>Select the symbol: "Start guidance"
or "Add as another destination".
> "Find points of interest": the search for
special destinations is started.
Specifying the street
If the system cannot recognize a street, it dis-
plays one of the following pieces of information:
> A street name in the vicinity.
> The district.
> The coordinates of the destination.
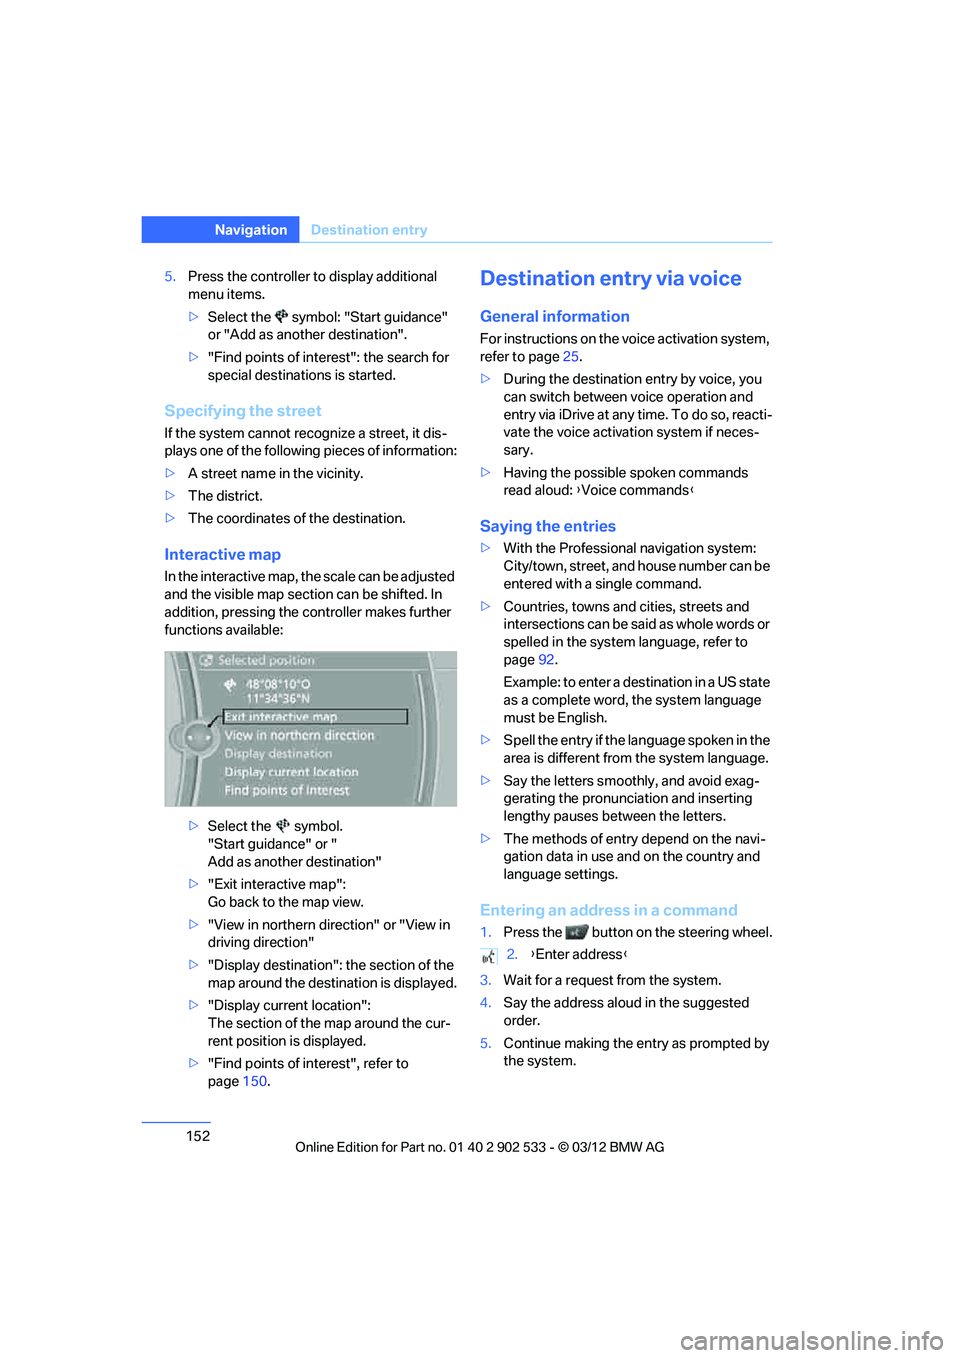
Interactive map
In the interactive map, the scale can be adjusted
and the visible map section can be shifted. In
addition, pressing the controller makes further
functions available:
>Select the symbol.
"Start guidance" or "
Add as another destination"
> "Exit interactive map":
Go back to the map view.
> "View in northern direction" or "View in
driving direction"
> "Display destination": the section of the
map around the destination is displayed.
> "Display current location":
The section of the map around the cur-
rent position is displayed.
> "Find points of interest", refer to
page 150.
Destination entry via voice
General information
For instructions on the voice activation system,
refer to page 25.
> During the destination entry by voice, you
can switch between voice operation and
entry via iDrive at any time. To do so, reacti-
vate the voice activation system if neces-
sary.
> Having the possible spoken commands
read aloud: {Voice commands }
Saying the entries
>With the Professional navigation system:
City/town, street, and house number can be
entered with a single command.
> Countries, towns and cities, streets and
intersections can be said as whole words or
spelled in the system language, refer to
page 92.
Example: to enter a destination in a US state
as a complete word, the system language
must be English.
> Spell the entry if the language spoken in the
area is different from the system language.
> Say the letters smoothly, and avoid exag-
gerating the pronunciation and inserting
lengthy pauses between the letters.
> The methods of entry depend on the navi-
gation data in use and on the country and
language settings.
Entering an address in a command
1.Press the button on the steering wheel.
3. Wait for a request from the system.
4. Say the address aloud in the suggested
order.
5. Continue making the entry as prompted by
the system.
2.{Enter address }
00320051004F004C00510048000300280047004C0057004C005200510003
Page 154 of 308
153
Destination entry
Navigation
If necessary, individually name the separate
components of the address, e.g. the town/city.
Entering a town/city
The town/city name can be spoken as a com-
plete word or spelled.
With the destination entry menu displayed:
1.
Press the button on the steering wheel.
3. Wait for the system to prompt you for the
town/city.
4. Say the name of the town/city or say at least
the first three letters.
Depending on the entry, up to 20 towns/cit-
ies may be suggested.
6. Continue making the entry as prompted by
the system.
If there are several towns/cities with the same
name:
Towns/cities that sound the same are compiled
in a separate list and are displayed as one town/
city followed by three dots.
1. Select an entry:
2. Select the desired town/city.
The town/city can also be selected from the list
via iDrive: turn the controller until the town/city
is selected and press the controller.
Entering a street or intersection
The street or intersection is entered in the same
manner as the town/city.
Entering a house number
Depending on the data in the navigation sys-
tem, house numbers up to the number 2,000
can be entered:
Starting destination guidance
Destination guidance starts immediately.
Planning a trip with
intermediate destinations
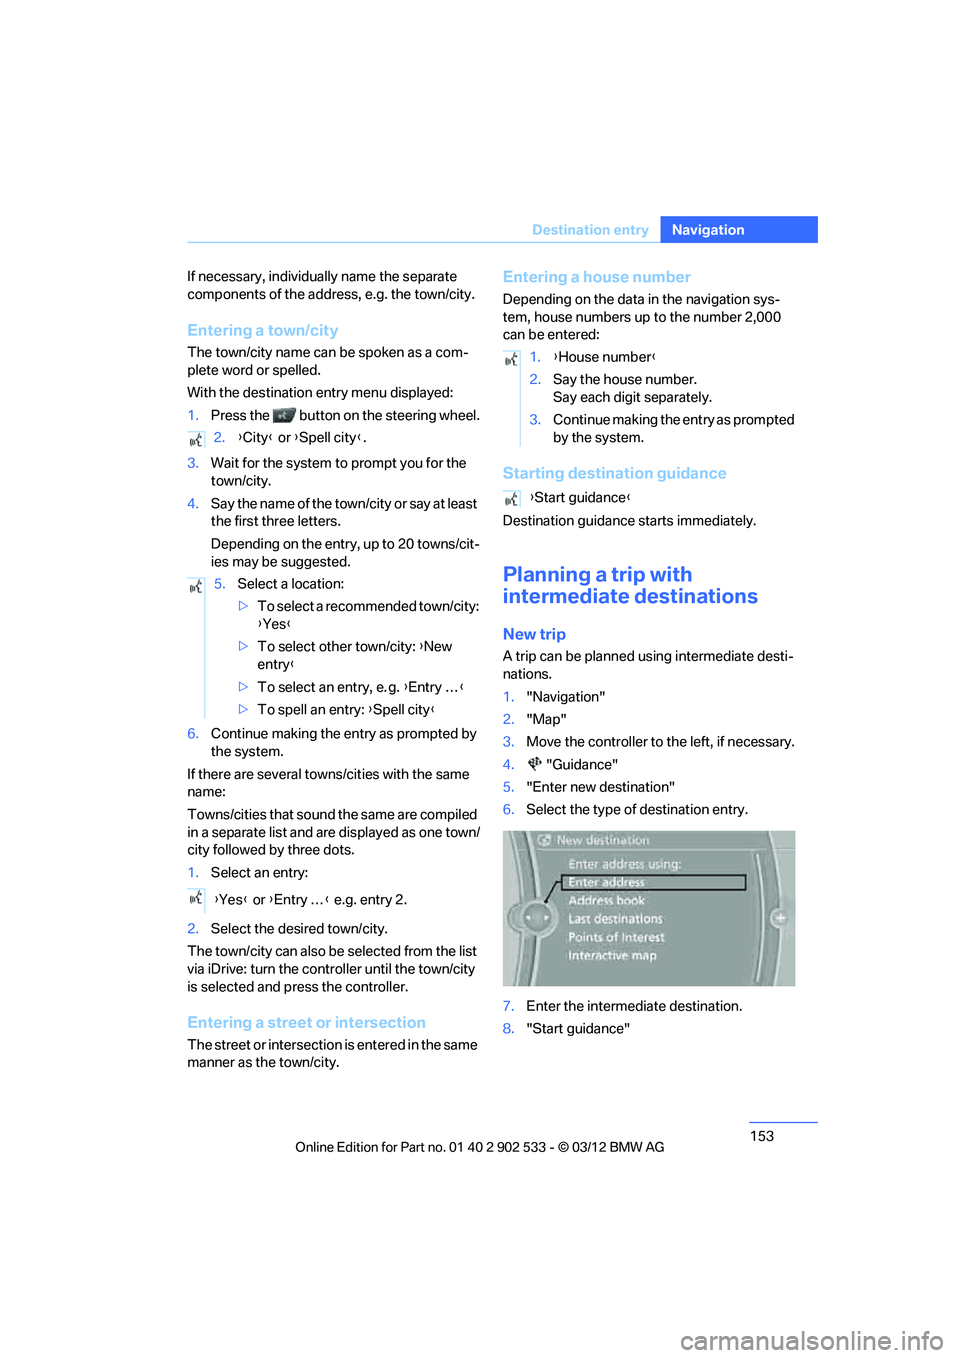
New trip
A trip can be planned using intermediate desti-
nations.
1. "Navigation"
2. "Map"
3. Move the controller to the left, if necessary.
4. "Guidance"
5. "Enter new destination"
6. Select the type of destination entry.
7. Enter the intermediate destination.
8. "Start guidance"
2.
{City } or { Spell city }.
5. Select a location:
>To select a recommended town/city:
{Yes }
> To select other town/city: {New
entry }
> To select an entry, e. g. {Entry … }
> To spell an entry: {Spell city }
{ Yes } or {Entry … } e.g. entry 2.
1. {House number }
2. Say the house number.
Say each digit separately.
3. Continue making the entry as prompted
by the system.
{ Start guidance }
00320051004F004C00510048000300280047004C0057004C005200510003
Page 167 of 308
166
EntertainmentOn/off and tone
On/off and tone
Vehicle equipment
In this chapter, all production, country, and
optional equipment that is offered in the model
range is described. Equipment is also described
that is not available because of, for example,
selected options or country version. This also
applies to safety related functions and systems.
General information
The following audio and video sources share
the same control elements and adjustments:
>Radio
> CD/DVD player
> CD changer
> Video
> External devices, e.g. MP3 player
Controls
The audio and video sources can be controlled
using the:
>Buttons near the CD/DVD player
> iDrive
> Buttons on the steering wheel, refer to
page 11
> Programmable memory keys, refer to
page 23
> Voice activation system
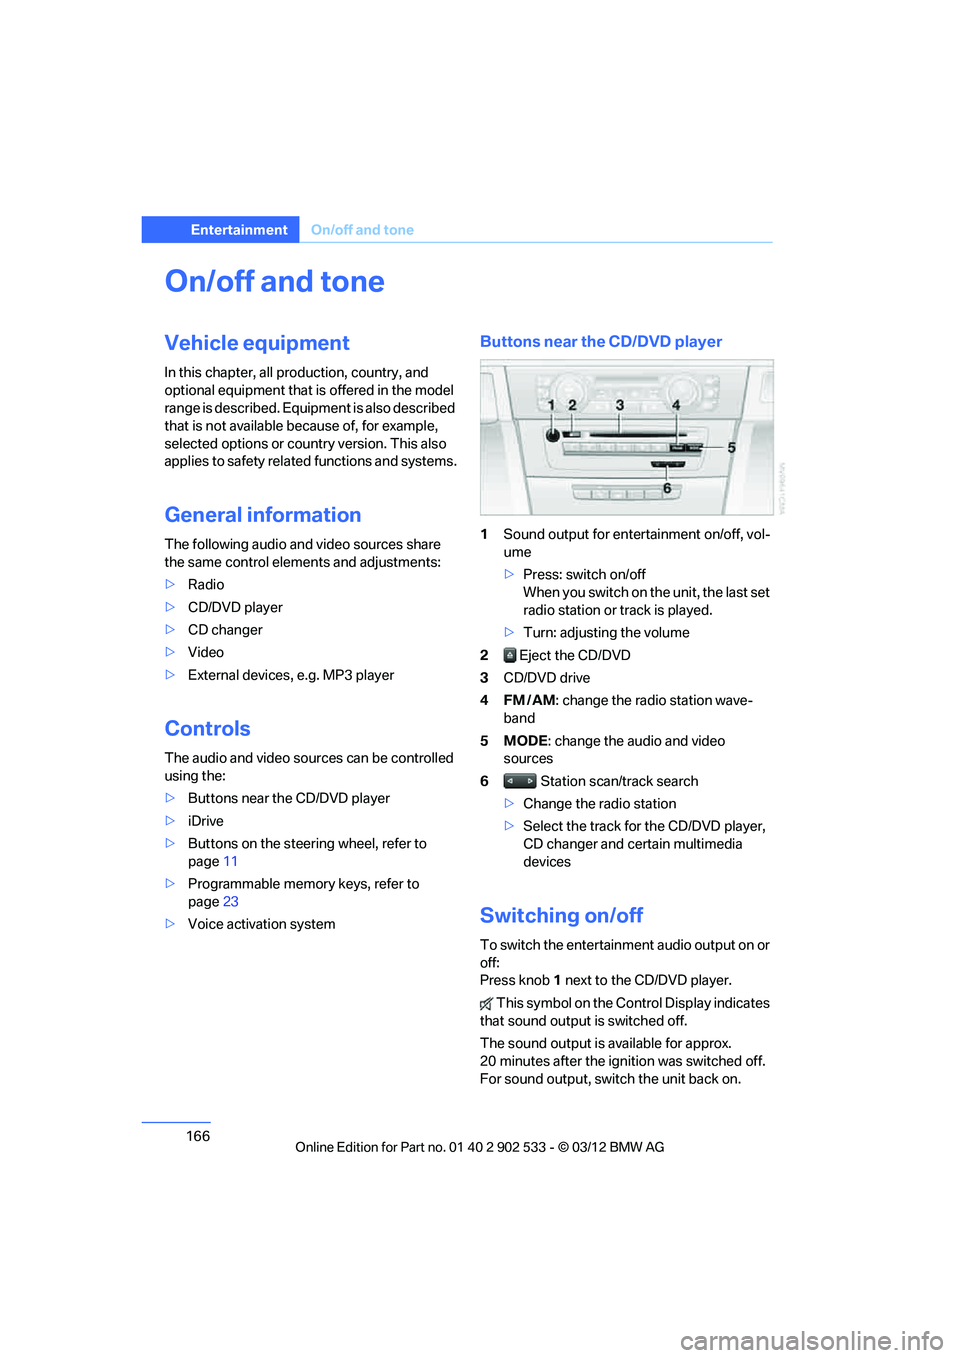
Buttons near the CD/DVD player
1Sound output for entertainment on/off, vol-
ume
>Press: switch on/off
When you switch on the unit, the last set
radio station or track is played.
> Turn: adjusting the volume
2 Eject the CD/DVD
3 CD/DVD drive
4FM/AM : change the radio station wave-
band
5MODE : change the audio and video
sources
6 Station scan/track search
> Change the radio station
> Select the track for the CD/DVD player,
CD changer and certain multimedia
devices
Switching on/off
To switch the entertainment audio output on or
off:
Press knob 1 next to the CD/DVD player.
This symbol on the Control Display indicates
that sound output is switched off.
The sound output is available for approx.
20 minutes after the ignition was switched off.
For sound output, switch the unit back on.
00320051004F004C00510048000300280047004C0057004C005200510003
Page 168 of 308
167
On/off and tone
Entertainment
Adjusting volume
Turn knob
1 next to the CD/DVD player until the
desired volume is obtained.
You can also adjust the volume with buttons on
the steering wheel, refer to page 11.
Setting tone controls
You can alter various tone settings, e.g. treble
and bass or the speed-dependent volume
increase.
The tone settings are set for all audio sources at
once.
The settings are stored for the remote control
currently in use.
Treble, bass, balance, fader
> "Treble": treble adjustment.
> "Bass": bass adjustment.
> "Balance": left/right volume distribution
> "Fader": front/rear volume distribution
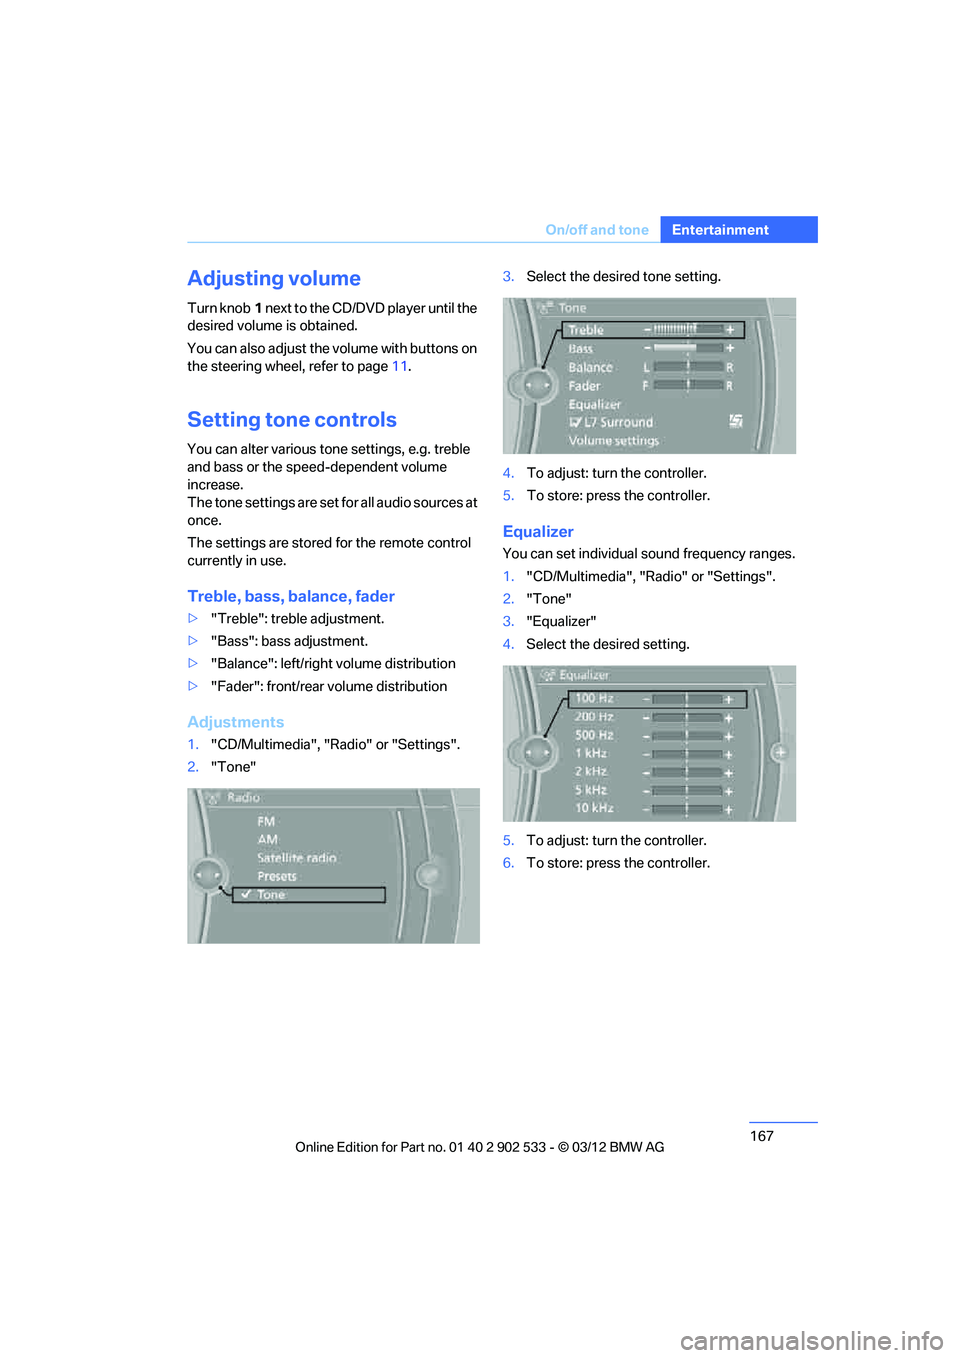
Adjustments
1."CD/Multimedia", "Radio" or "Settings".
2. "Tone" 3.
Select the desired tone setting.
4. To adjust: turn the controller.
5. To store: press the controller.
Equalizer
You can set individual sound frequency ranges.
1."CD/Multimedia", "Radio" or "Settings".
2. "Tone"
3. "Equalizer"
4. Select the desired setting.
5. To adjust: turn the controller.
6. To store: press the controller.
00320051004F004C00510048000300280047004C0057004C005200510003
Page 170 of 308
169
Radio
Entertainment
Radio
Vehicle equipment
In this chapter, all production, country, and
optional equipment that is offered in the model
range is described. Equipment is also described
that is not available because of, for example,
selected options or country version. This also
applies to safety related functions and systems.
General information
Your radio is designed for reception of the fol-
lowing stations:
>
FM and AM
> HD Radio
> Satellite radio
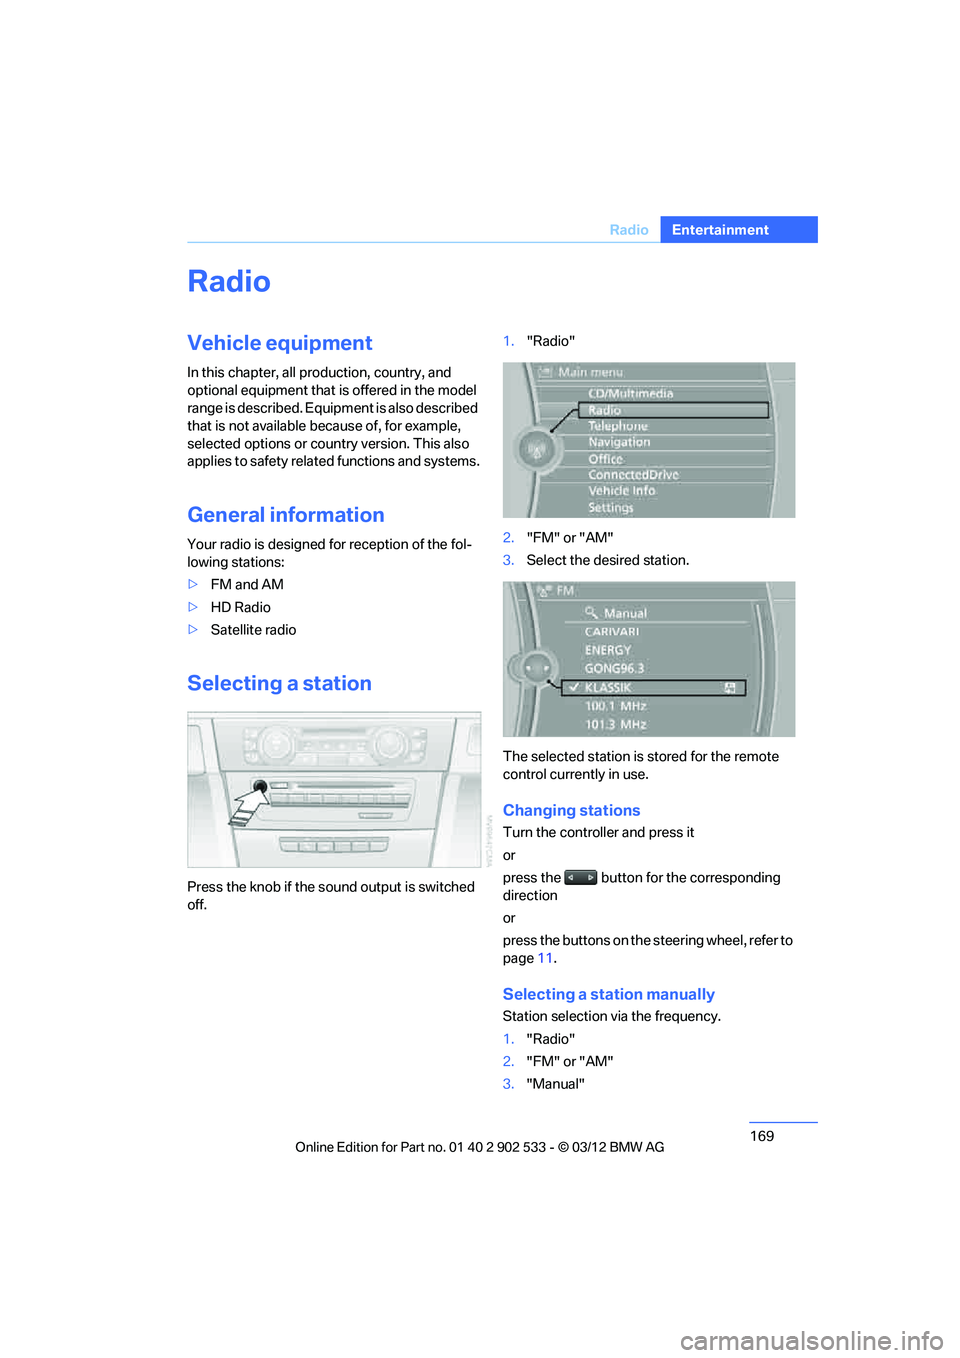
Selecting a station
Press the knob if the sound output is switched
off. 1.
"Radio"
2. "FM" or "AM"
3. Select the desired station.
The selected station is stored for the remote
control currently in use.
Changing stations
Turn the controller and press it
or
press the button for the corresponding
direction
or
press the buttons on the steering wheel, refer to
page 11.
Selecting a station manually
Station selection via the frequency.
1. "Radio"
2. "FM" or "AM"
3. "Manual"
00320051004F004C00510048000300280047004C0057004C005200510003
Page 187 of 308
186
EntertainmentMusic collection
search. Tracks without additional information
can be called up via the corresponding album.
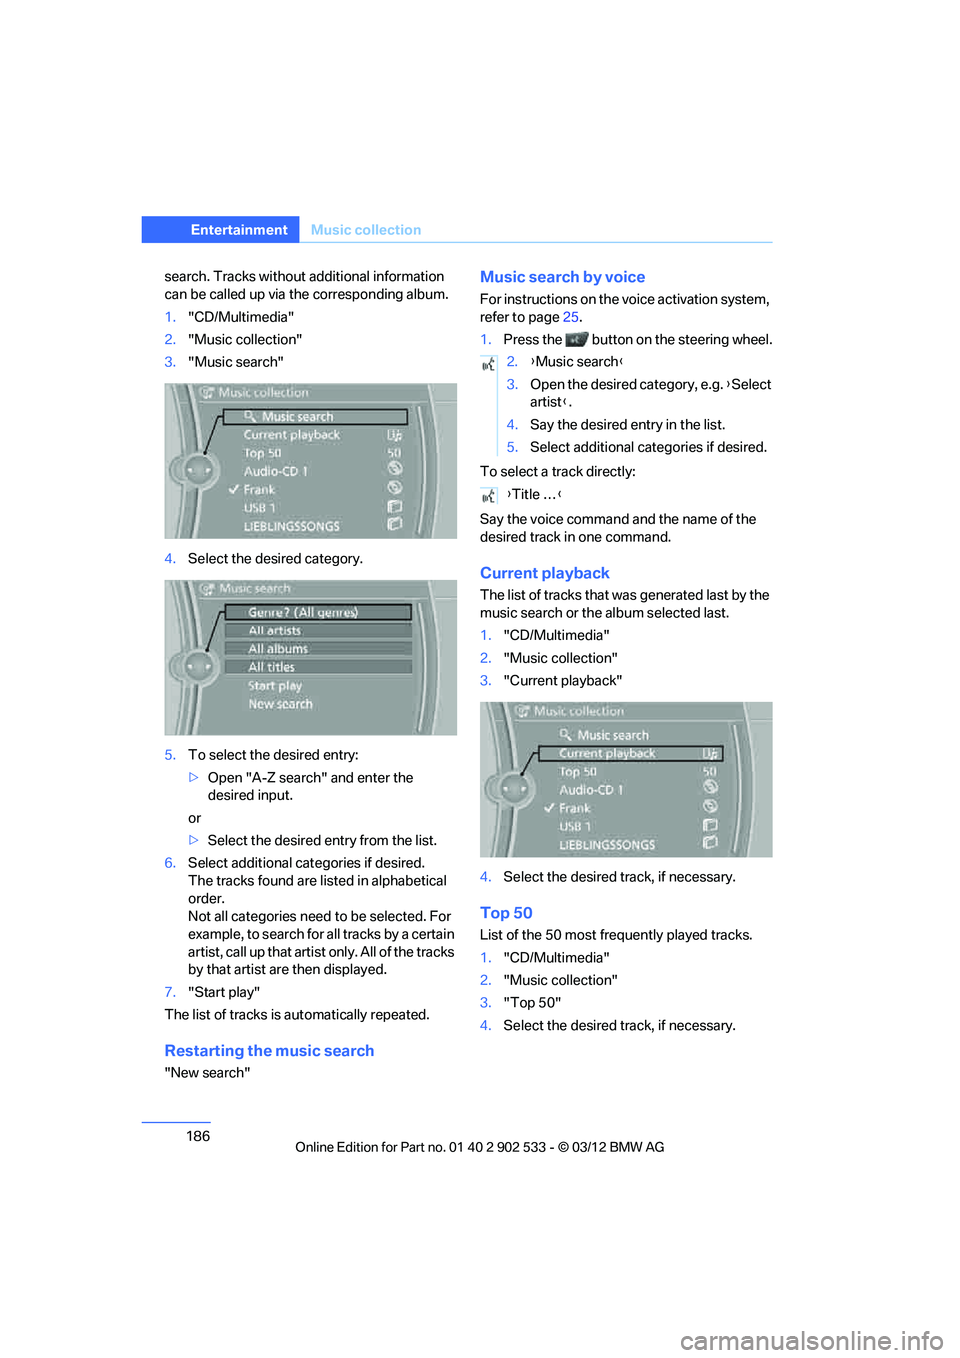
1."CD/Multimedia"
2. "Music collection"
3. "Music search"
4. Select the desired category.
5. To select the desired entry:
>Open "A-Z search" and enter the
desired input.
or
> Select the desired entry from the list.
6. Select additional categories if desired.
The tracks found are listed in alphabetical
order.
Not all categories need to be selected. For
example, to search for all tracks by a certain
artist, call up that artist only. All of the tracks
by that artist are then displayed.
7. "Start play"
The list of tracks is automatically repeated.
Restarting the music search
"New search"
Music search by voice
For instructions on the voice activation system,
refer to page 25.
1. Press the button on the steering wheel.
To select a track directly:
Say the voice command and the name of the
desired track in one command.
Current playback
The list of tracks that was generated last by the
music search or the album selected last.
1. "CD/Multimedia"
2. "Music collection"
3. "Current playback"
4. Select the desired track, if necessary.
Top 50
List of the 50 most frequently played tracks.
1."CD/Multimedia"
2. "Music collection"
3. "Top 50"
4. Select the desired track, if necessary.
2.{Music search }
3. Open the desired category, e.g. { Select
artist }.
4. Say the desired entry in the list.
5. Select additional categories if desired.
{ Title … }
00320051004F004C00510048000300280047004C0057004C005200510003