2013 BMW 335I check engine light
[x] Cancel search: check engine lightPage 197 of 242

Performing a detailed measurement
In order to perform a detailed measurement of
the engine oil level:1."Vehicle Info"2."Vehicle status"3. "Measure engine oil level"4."Start measurement"
The oil level is checked and displayed via a scale.
Duration: approx. 1 minute.
Adding engine oil
Filler neck
When the indicator lights up in the instrument
cluster, add 1 US quart/liter of engine oil within
the next 125 miles/200 km.
Do not add too much engine oil
When too much engine oil is added, im‐
mediately have the vehicle checked, otherwise,
this may cause engine damage.◀
Protect children
Keep oil, grease, etc., out of reach of chil‐
dren and heed the warnings on the containers
to prevent health risks.◀
Oil types for refilling
Hints No oil additives
Oil additives may lead to engine damage. ◀
Viscosity grades for engine oils
When selecting an engine oil, ensure that
the engine oil belongs to one of the viscosity
grades SAE 0W-40, SAE 0W-30, SAE 5W-40,
and SAE 5W-30 or malfunctions or engine dam‐
age may occur.◀
The engine oil quality is critical for the life of the
engine.
Some types of oils in some cases are not avail‐
able in all countries.
Approved oil typesGasoline engineBMW High Performance SAE 5W-30BMW Longlife-01BMW Longlife-01 FEDiesel engineBMW Longlife-04
Additional information about the approved
types of oils can be requested from the service
center.
Alternative oil types
If the approved engine oils are not available, up
to 1 US quart/liter of an oil with the following
specification can be added:
Gasoline engineAPI SM or superior grade specificationSeite 197Engine oilMobility197
Online Edition for Part no. 01 40 2 917 801 - II/13
Page 199 of 242

CoolantVehicle equipment
All standard, country-specific and optional
equipment that is offered in the model series is
described in this chapter. Therefore, equipment
is also described that is not available in a vehicle,
e. g., because of the selected optional equip‐
ment or country variant. This also applies for
safety-related functions and systems.
General information Danger of burns from hot engine
Do not open the cooling system while the
engine is hot; otherwise, escaping coolant may
cause burns.◀
Suitable additives
Only use suitable additives; otherwise, en‐
gine damage may occur. The additives are
harmful to your health.◀
Coolant consists of water and additives.
Not all commercially available additives are suit‐
able for your vehicle. Ask your service center for
suitable additives.
Coolant level
Checking
Marks are provided on the side of the coolant
reservoir.SymbolMeaningMaximumMinimum1.Let the engine cool.2.The coolant level is correct when it is be‐
tween these two marks.Adding engine oil1.Let the engine cool.2.Turn the cap of the coolant reservoir slightly
counterclockwise to allow any excess pres‐
sure to dissipate, and then open it.3.If the coolant is low, slowly add coolant up to
the specified level; do not overfill.4.Turn the cap until there is an audible click.
The arrows on the coolant reservoir and the
cap must point towards one another.5.Have the cause of the coolant loss elimi‐
nated as soon as possible.
Disposal
Comply with the relevant environmental
protection regulations when disposing
of coolant and coolant additives.
Seite 199CoolantMobility199
Online Edition for Part no. 01 40 2 917 801 - II/13
Page 201 of 242

Socket for OBD Onboard
Diagnosis
Position
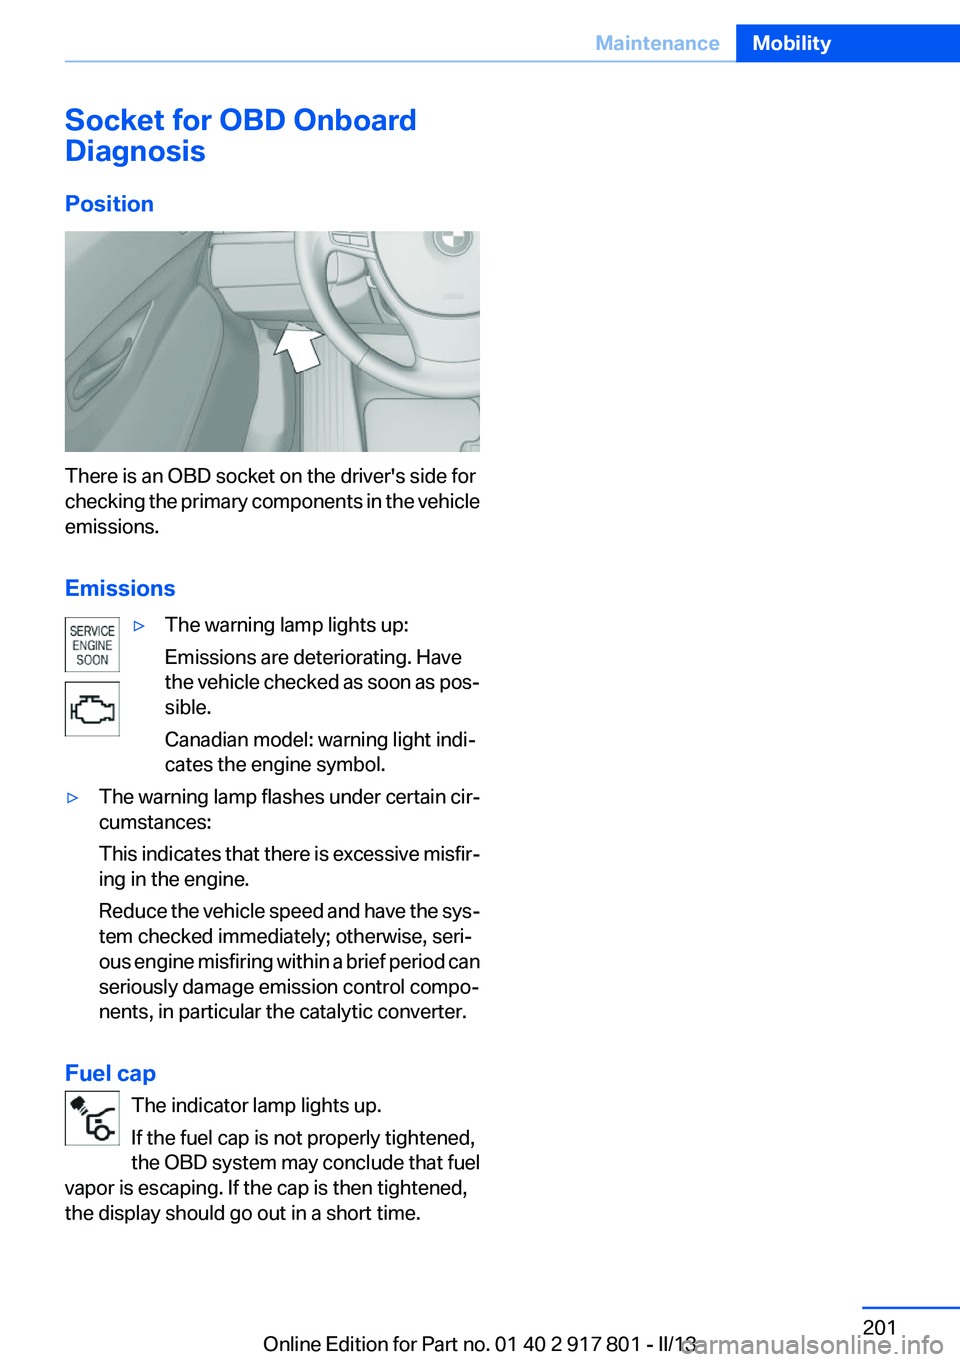
There is an OBD socket on the driver's side for
checking the primary components in the vehicle
emissions.
Emissions
▷The warning lamp lights up:
Emissions are deteriorating. Have
the vehicle checked as soon as pos‐
sible.
Canadian model: warning light indi‐
cates the engine symbol.▷The warning lamp flashes under certain cir‐
cumstances:
This indicates that there is excessive misfir‐
ing in the engine.
Reduce the vehicle speed and have the sys‐
tem checked immediately; otherwise, seri‐
ous engine misfiring within a brief period can
seriously damage emission control compo‐
nents, in particular the catalytic converter.
Fuel cap
The indicator lamp lights up.
If the fuel cap is not properly tightened,
the OBD system may conclude that fuel
vapor is escaping. If the cap is then tightened,
the display should go out in a short time.
Seite 201MaintenanceMobility201
Online Edition for Part no. 01 40 2 917 801 - II/13
Page 216 of 242

If the first starting attempt is not successful,
wait a few minutes before making another
attempt in order to allow the discharged bat‐
tery to recharge.3.Let both engines run for several minutes.4.Disconnect the jumper cables in the reverse
order.
Check the battery and recharge if necessary.
Tow-starting and towing
Automatic transmission: transporting
your vehicle
Note
Your vehicle is not permitted to be towed.
Therefore, contact a service center in the event
of a breakdown.
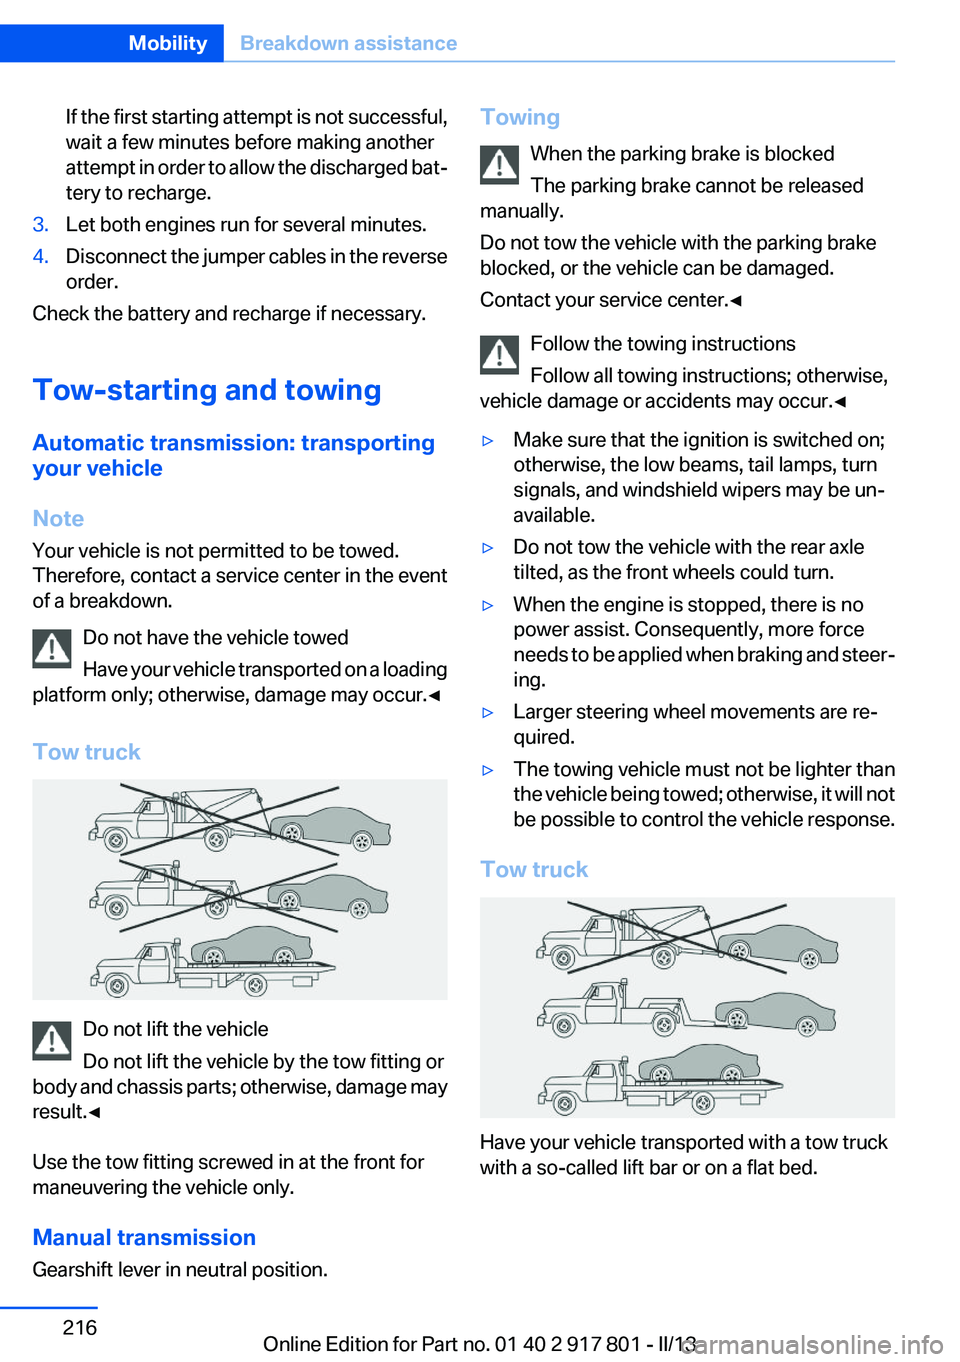
Do not have the vehicle towed
Have your vehicle transported on a loading
platform only; otherwise, damage may occur.◀
Tow truck
Do not lift the vehicle
Do not lift the vehicle by the tow fitting or
body and chassis parts; otherwise, damage may
result.◀
Use the tow fitting screwed in at the front for
maneuvering the vehicle only.
Manual transmission
Gearshift lever in neutral position.
Towing
When the parking brake is blocked
The parking brake cannot be released
manually.
Do not tow the vehicle with the parking brake
blocked, or the vehicle can be damaged.
Contact your service center.◀
Follow the towing instructions
Follow all towing instructions; otherwise,
vehicle damage or accidents may occur.◀▷Make sure that the ignition is switched on;
otherwise, the low beams, tail lamps, turn
signals, and windshield wipers may be un‐
available.▷Do not tow the vehicle with the rear axle
tilted, as the front wheels could turn.▷When the engine is stopped, there is no
power assist. Consequently, more force
needs to be applied when braking and steer‐
ing.▷Larger steering wheel movements are re‐
quired.▷The towing vehicle must not be lighter than
the vehicle being towed; otherwise, it will not
be possible to control the vehicle response.
Tow truck
Have your vehicle transported with a tow truck
with a so-called lift bar or on a flat bed.
Seite 216MobilityBreakdown assistance216
Online Edition for Part no. 01 40 2 917 801 - II/13
Page 233 of 242

Brake assistant 110
Brake discs, breaking in 158
Brake force display 107
Brake lamps, brake force dis‐ play 107
Brake lights, adaptive 107
Brake pads, breaking in 158
Braking, notes 159
Breakdown assis‐ tance 213, 214
Breaking in 158
Brightness of Control Dis‐ play 85
Bulb replacement 202
Bulb replacement, front 203
Bulb replacement, halogen headlamps 203
Bulb replacement, rear 208
Bulb replacement, xenon headlamps 206
Bulbs and lamps 202
Button, RES 117
Button, Start/Stop 59
Bypassing, refer to Jump- starting 214
C
California Proposition 65 Warning 7
Camera, backup camera 126
Camera, care 222
Camera, Side View 130
Camera, Top View 128
Can holder, refer to Cu‐ pholder 154
Car battery 210
Car care products 220
Care, displays 222
Care, vehicle 220
Cargo 161
Cargo area, enlarging 150
Cargo area lid 37
Cargo area, storage compart‐ ments 155 Cargo straps, securing
cargo 162
Car key, refer to Remote con‐ trol 30
Carpet, care 221
Car wash 219
Catalytic converter, refer to Hot exhaust system 159
CBS Condition Based Serv‐ ice 200
CD/Multimedia, see user's manual for Navigation, Enter‐
tainment and Communica‐
tion
Center armrest 153
Center console 14
Central locking system 33
Central screen, refer to Control Display 16
Changes, technical, refer to Safety 7
Changing parts 202
Changing wheels 210
Changing wheels/tires 191
Check Control 73
Children, seating position 55
Children, transporting safely 55
Child restraint fixing sys‐ tem 55
Child restraint fixing system LATCH 56
Child restraint fixing systems, mounting 55
Child safety locks 58
Child seat, mounting 55
Child seats 55
Chrome parts, care 221
Cigarette lighter 148
Cleaning, displays 222
Climate control 137, 139
Clock 76
Closing/opening from in‐ side 36
Closing/opening via door lock 36 Closing/opening with remote
control 34
Clothes hooks 154
Cold starting, refer to Starting the engine 60
Collision warning 100, 102
Combination switch, refer to Turn signals 64
Combination switch, refer to Wiper system 64
Comfort Access 38
COMFORT program, Dynamic Driving Control 113
Compartments in the doors 153
Compass 146
Computer 81
Condensation on win‐ dows 141
Condensation under the vehi‐ cle 160
Condition Based Service CBS 200
Configure driving mode 113
Confirmation signal 35
ConnectedDrive, see user's manual for Navigation, Enter‐
tainment and Communica‐
tion
Control Display 16
Control Display, settings 84
Controller 16, 17
Control systems, driving sta‐ bility 110
Convenient opening 34
Coolant 199
Coolant temperature 76
Cooling function 138, 140
Cooling, maximum 140
Cooling system 199
Corrosion on brake discs 160
Cruise control 121
Cruise control, active with Stop & Go 115
Cruising range 77
Cupholder 154 Seite 233Everything from A to ZReference233
Online Edition for Part no. 01 40 2 917 801 - II/13