Page 145 of 242

rearview mirror. The required distance de‐
pends on the manual transmitter.4.Simultaneously press and hold the button of
the desired function on the hand-held trans‐
mitter and the button to be programmed on
the interior rearview mirror. The LED on the
interior rearview mirror will begin flashing
slowly.5.Release both buttons as soon as the LED
flashes more rapidly. When the LED is flash‐
ing faster, this indicates that the button on
the interior rearview mirror has been pro‐
grammed.
If the LED does not flash faster after at least
60 seconds, change the distance between
the interior rearview mirror and the hand-
held transmitter and repeat the step. Several
more attempts at different distances may be
necessary. Wait at least 15 seconds be‐
tween attempts.
Canada: if programming with the hand-held
transmitter was interrupted, hold down the
interior rearview mirror button and repeat‐
edly press and release the hand-held trans‐
mitter button for 2 seconds.6.To program other functions on other but‐
tons, repeat steps 3 to 5.
The systems can be controlled using the interior
rearview mirror buttons.
Special feature of the alternating-code
wireless system
If you are unable to operate the system after re‐
peated programming, please check if the sys‐
tem to be controlled features an alternating-
code system.
Read the system's operating manual, or press
the programmed button on the interior rearview
mirror longer. If the LED on the interior rearview
mirror starts flashing rapidly and then stays lit
constantly for 2 seconds, the system features
an alternating-code system. Flashing and con‐
tinuous illumination of the LED will repeat for
approximately 20 seconds.
For systems with an alternating-code system,
the integrated universal remote control and the
system also have to be synchronized.
Please read the operating manual of the system
being set up for information on how to syn‐
chronize the system.
Synchronizing is easier with the aid of a second
person.
To synchronize:1.Park the vehicle within range of the remote-
controlled system.2.Program the relevant button on the interior
rearview mirror as described.3.Locate and press the synchronizing button
on the system being programmed. You have
approx. 30 seconds for the next step.4.Hold down the programmed button on the
interior rearview mirror for approximately
3 seconds and then release it. If necessary,
repeat this work step up to three times in or‐
der to finish synchronization. Once synchro‐
nization is complete, the programmed func‐
tion will be carried out.
Reprogramming individual buttons
1.Switch on the ignition.2.Press and hold the interior rearview mirror
button to be programmed.3.As soon as the interior rearview mirror LED
starts flashing slowly, hold the hand-held
transmitter for the system to be controlled
approx. 1 to 3 in/2.5 to 8 cm away from the
buttons on the interior rearview mirror. The
required distance depends on the manual
transmitter.4.Likewise, press and hold the button of the
desired function on the hand-held transmit‐
ter.5.Release both buttons as soon as the interior
rearview mirror LED flashes more rapidly.
When the LED is flashing faster, this indi‐
cates that the button on the interior rearview
mirror has been programmed. The systemSeite 145Interior equipmentControls145
Online Edition for Part no. 01 40 2 917 801 - II/13
Page 146 of 242

can then be controlled by the button on the
interior rearview mirror.
If the LED does not flash faster after at least
60 seconds, change the distance and repeat
the step. Several more attempts at different
distances may be necessary. Wait at least
15 seconds between attempts.
Canada: if programming with the hand-held
transmitter was interrupted, hold down the
interior rearview mirror button and repeat‐
edly press and release the hand-held trans‐
mitter button for 2 seconds.
Controls
Before operation
Before operating a system using the
integrated universal remote control, ensure that
there are no people, animals, or objects within
the range of movement of the remote-controlled
system; otherwise, there is a risk of injury or
damage.
Also follow the safety instructions of the hand-
held transmitter.◀
The system, such as the garage door, can be
operated using the button on the interior rear‐
view mirror while the engine is running or when
the ignition is started. To do this, hold down the
button within receiving range of the system until
the function is activated. The interior rearview
mirror LED stays lit while the wireless signal is
being transmitted.
Deleting stored functions
Press and hold the left and right button on the
interior rearview mirror simultaneously for ap‐
proximately 20 seconds until the LED flashes
rapidly. All stored functions are deleted. The
functions cannot be deleted individually.
Digital compass
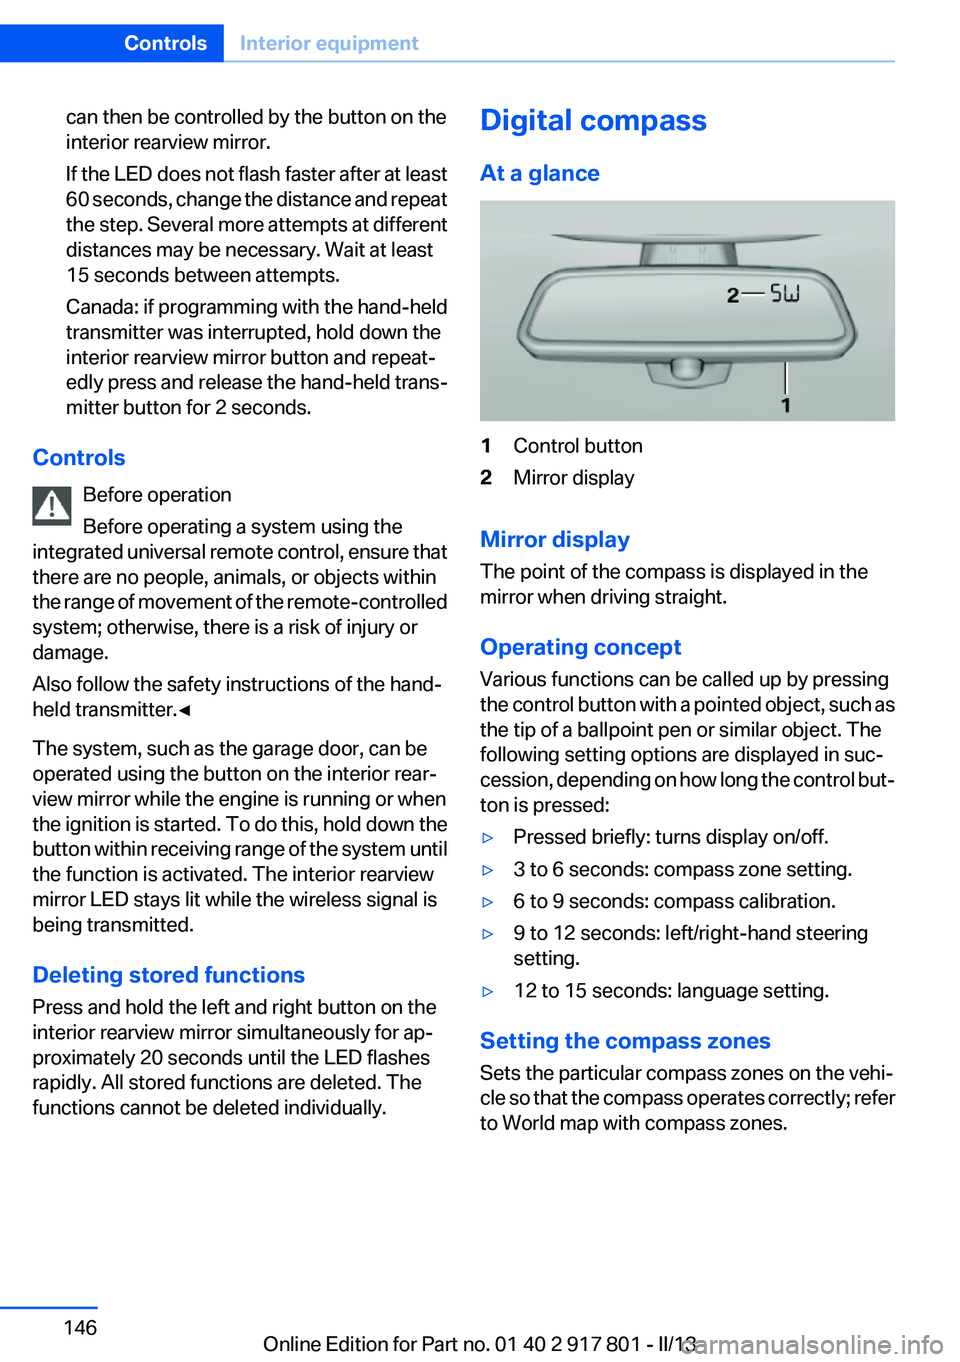
At a glance1Control button2Mirror display
Mirror display
The point of the compass is displayed in the
mirror when driving straight.
Operating concept
Various functions can be called up by pressing
the control button with a pointed object, such as
the tip of a ballpoint pen or similar object. The
following setting options are displayed in suc‐
cession, depending on how long the control but‐
ton is pressed:
▷Pressed briefly: turns display on/off.▷3 to 6 seconds: compass zone setting.▷6 to 9 seconds: compass calibration.▷9 to 12 seconds: left/right-hand steering
setting.▷12 to 15 seconds: language setting.
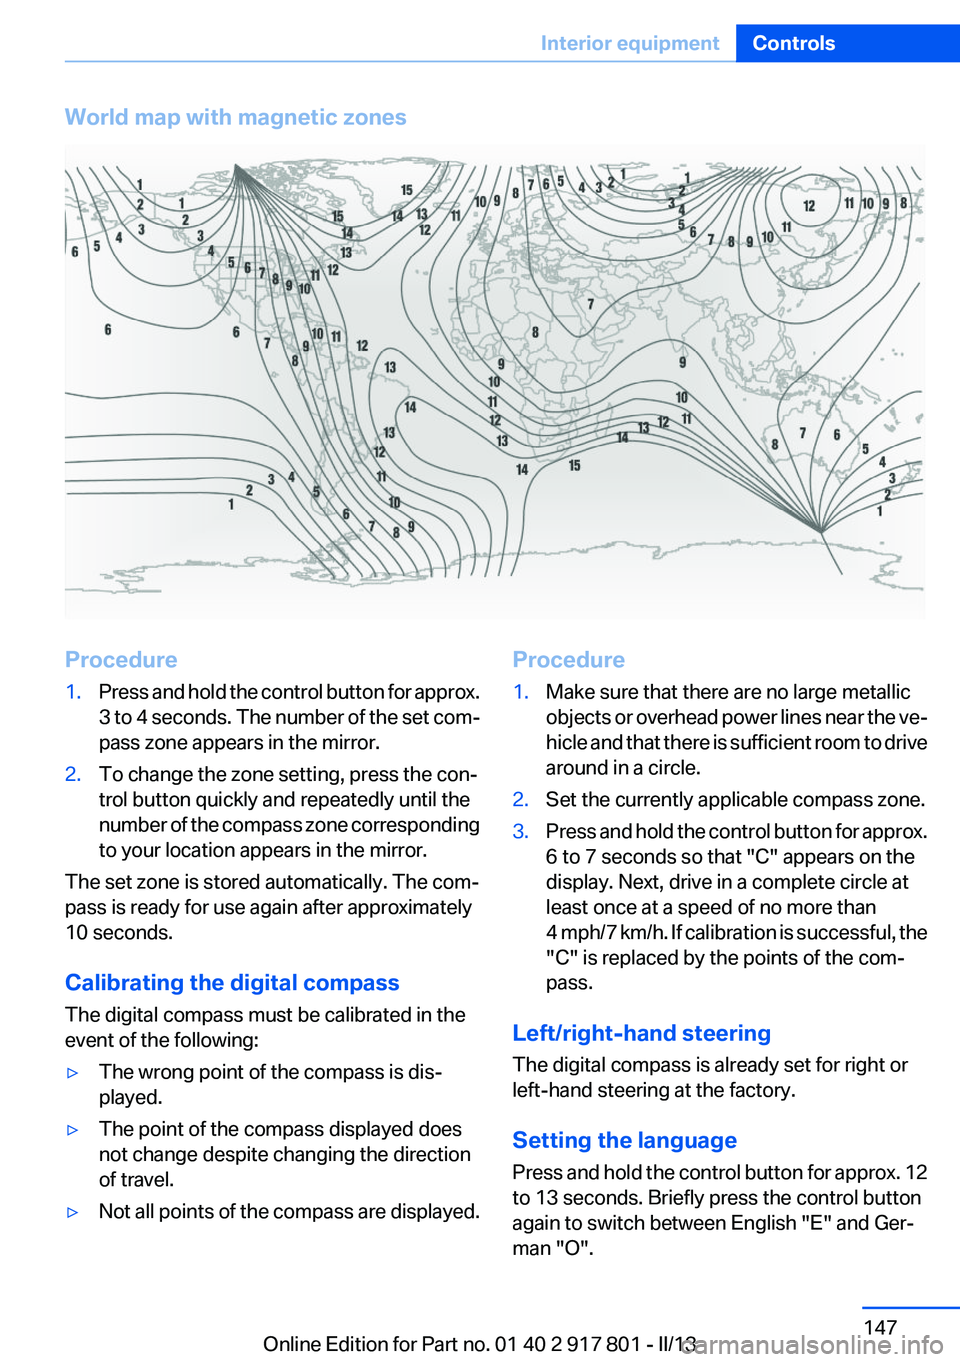
Setting the compass zones
Sets the particular compass zones on the vehi‐
cle so that the compass operates correctly; refer
to World map with compass zones.
Seite 146ControlsInterior equipment146
Online Edition for Part no. 01 40 2 917 801 - II/13
Page 147 of 242

World map with magnetic zonesProcedure1.Press and hold the control button for approx.
3 to 4 seconds. The number of the set com‐
pass zone appears in the mirror.2.To change the zone setting, press the con‐
trol button quickly and repeatedly until the
number of the compass zone corresponding
to your location appears in the mirror.
The set zone is stored automatically. The com‐
pass is ready for use again after approximately
10 seconds.
Calibrating the digital compass
The digital compass must be calibrated in the
event of the following:
▷The wrong point of the compass is dis‐
played.▷The point of the compass displayed does
not change despite changing the direction
of travel.▷Not all points of the compass are displayed.Procedure1.Make sure that there are no large metallic
objects or overhead power lines near the ve‐
hicle and that there is sufficient room to drive
around in a circle.2.Set the currently applicable compass zone.3.Press and hold the control button for approx.
6 to 7 seconds so that "C" appears on the
display. Next, drive in a complete circle at
least once at a speed of no more than
4 mph/7 km/h. If calibration is successful, the
"C" is replaced by the points of the com‐
pass.
Left/right-hand steering
The digital compass is already set for right or
left-hand steering at the factory.
Setting the language
Press and hold the control button for approx. 12
to 13 seconds. Briefly press the control button
again to switch between English "E" and Ger‐
man "O".
Seite 147Interior equipmentControls147
Online Edition for Part no. 01 40 2 917 801 - II/13
Page 148 of 242

The setting is stored automatically after approx‐
imately 10 seconds.
Ashtray/cigarette lighter
Ashtray
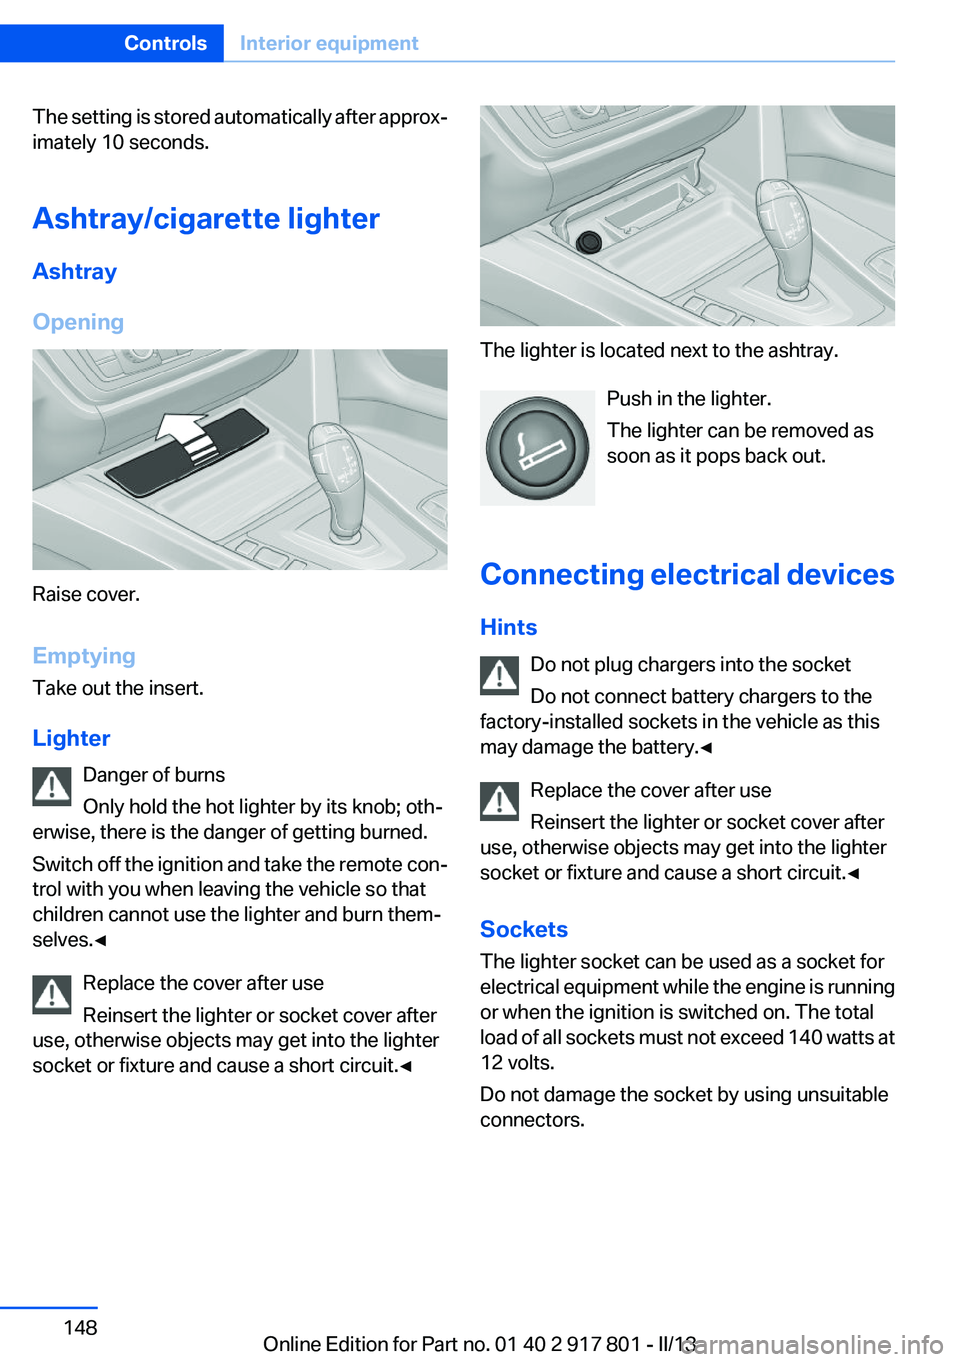
Opening
Raise cover.
Emptying
Take out the insert.
Lighter Danger of burns
Only hold the hot lighter by its knob; oth‐
erwise, there is the danger of getting burned.
Switch off the ignition and take the remote con‐
trol with you when leaving the vehicle so that
children cannot use the lighter and burn them‐
selves.◀
Replace the cover after use
Reinsert the lighter or socket cover after
use, otherwise objects may get into the lighter
socket or fixture and cause a short circuit.◀
The lighter is located next to the ashtray.
Push in the lighter.
The lighter can be removed as
soon as it pops back out.
Connecting electrical devices
Hints Do not plug chargers into the socket
Do not connect battery chargers to the
factory-installed sockets in the vehicle as this
may damage the battery.◀
Replace the cover after use
Reinsert the lighter or socket cover after
use, otherwise objects may get into the lighter
socket or fixture and cause a short circuit.◀
Sockets
The lighter socket can be used as a socket for
electrical equipment while the engine is running
or when the ignition is switched on. The total
load of all sockets must not exceed 140 watts at
12 volts.
Do not damage the socket by using unsuitable
connectors.
Seite 148ControlsInterior equipment148
Online Edition for Part no. 01 40 2 917 801 - II/13
Page 149 of 242
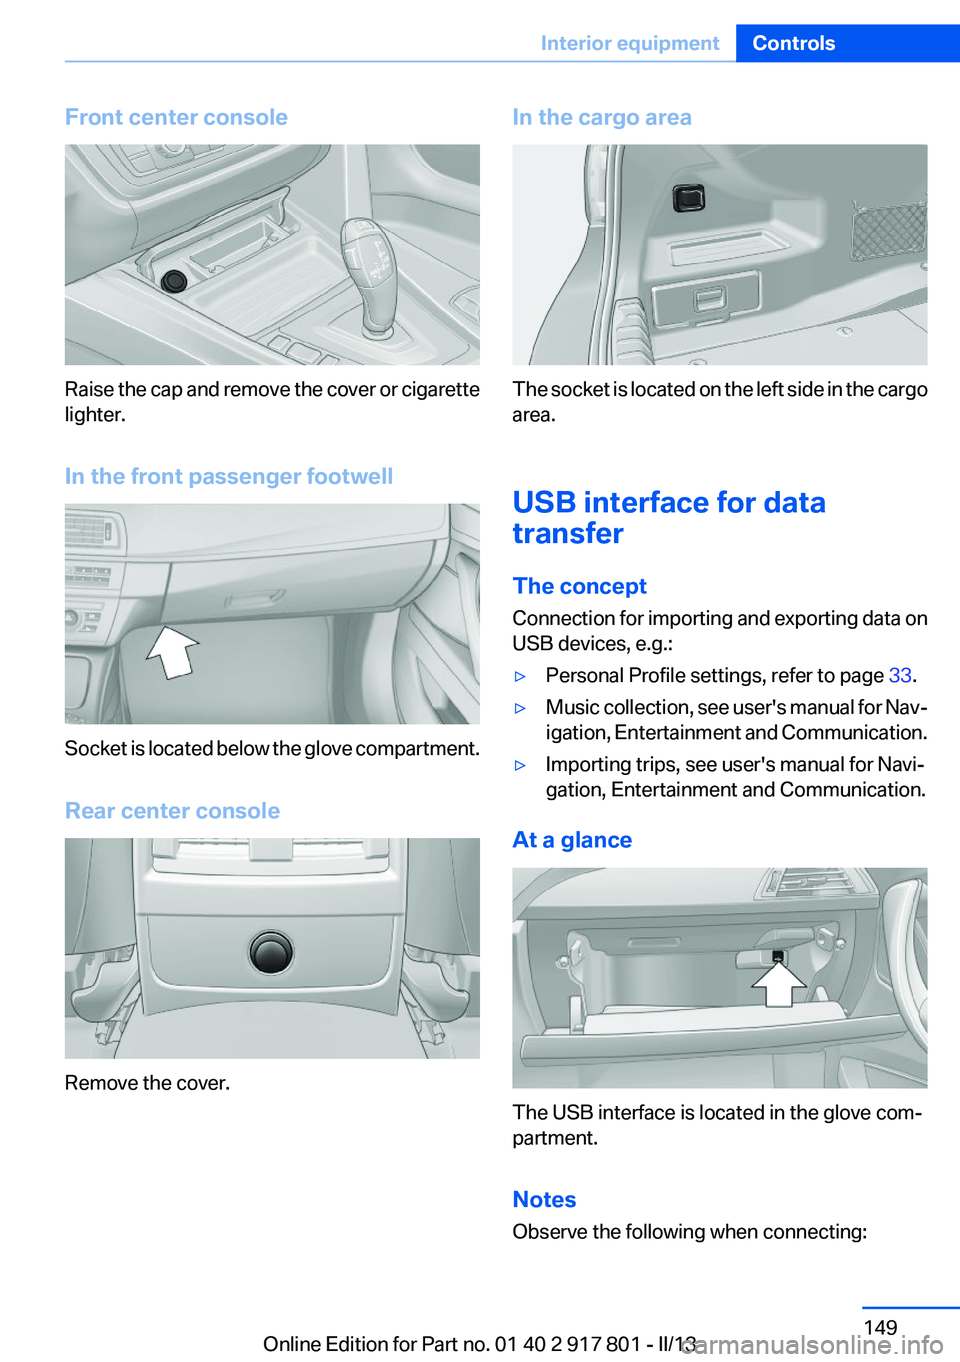
Front center console
Raise the cap and remove the cover or cigarette
lighter.
In the front passenger footwell
Socket is located below the glove compartment.
Rear center console
Remove the cover.
In the cargo area
The socket is located on the left side in the cargo
area.
USB interface for data
transfer
The concept
Connection for importing and exporting data on
USB devices, e.g.:
▷Personal Profile settings, refer to page 33.▷Music collection, see user's manual for Nav‐
igation, Entertainment and Communication.▷Importing trips, see user's manual for Navi‐
gation, Entertainment and Communication.
At a glance
The USB interface is located in the glove com‐
partment.
Notes
Observe the following when connecting:
Seite 149Interior equipmentControls149
Online Edition for Part no. 01 40 2 917 801 - II/13
Page 150 of 242

▷Do not use force when plugging the con‐
nector into the USB interface.▷Do not connect devices such as fans or
lamps to the USB interface.▷Do not connect USB hard drives.▷Do not use the USB interface to recharge
external devices.
Through-loading system
The concept
The cargo area can be enlarged by folding down
the rear seat backrest.
The rear seat backrest is divided at a ratio of 40–
20–40.
The sides can be folded down separately or to‐
gether.
Hints Danger of pinching
Before folding down the rear seat back‐
rests, ensure that the area of movement of the
backrests is clear. In particular, ensure that no
one is located in or reaches into the area of
movement of the rear seat backrests when the
middle section is folded down. Otherwise, injury
or damage may result.◀
Lock the rear seat backrests in position
Before mounting child restraint fixing sys‐
tems, place the seat backrest as far as possible
at an angle at which the child seat is resting
firmly against the backrest and all backrests can
be locked securely in place. Otherwise, the child
seat will not be as stable as it should be, and
there is increased danger of injury due to unex‐
pected movement of the seat backrest.◀
Retract the head restraint if necessary be‐
fore backrest is folded down
With folding head restraints, fold in the head re‐
straints before folding down the backrests, or
damage may result.◀
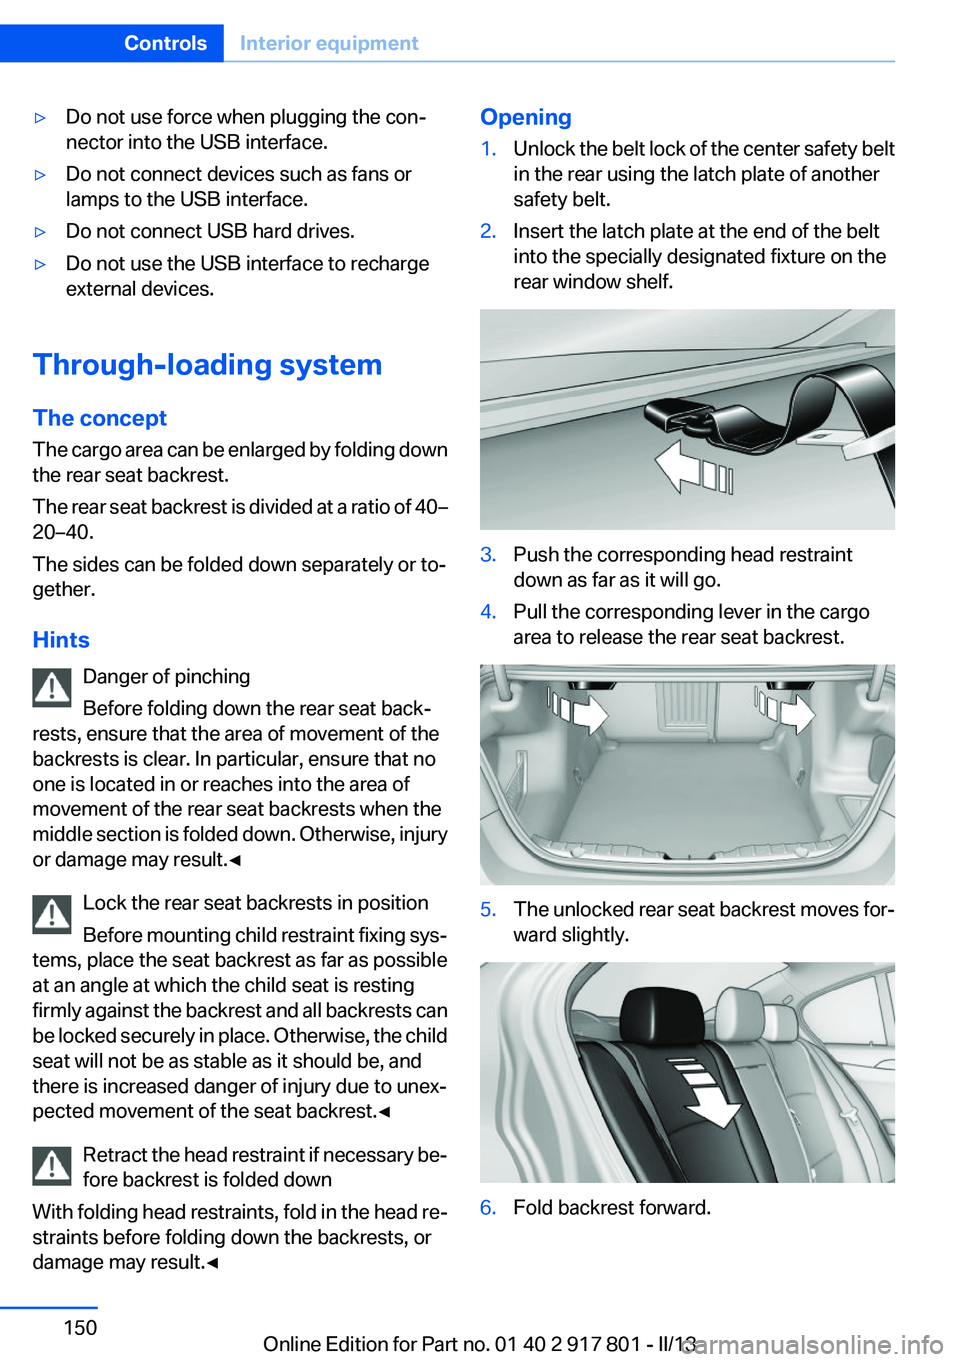
Opening1.Unlock the belt lock of the center safety belt
in the rear using the latch plate of another
safety belt.2.Insert the latch plate at the end of the belt
into the specially designated fixture on the
rear window shelf.3.Push the corresponding head restraint
down as far as it will go.4.Pull the corresponding lever in the cargo
area to release the rear seat backrest.5.The unlocked rear seat backrest moves for‐
ward slightly.6.Fold backrest forward.Seite 150ControlsInterior equipment150
Online Edition for Part no. 01 40 2 917 801 - II/13
Page 151 of 242
Closing1.Return the rear seat backrest to the upright
seating position and engage it.
Ensure that the lock is securely en‐
gaged
Make sure that the lock engages properly
when folding back, otherwise transported
cargo could enter the passenger compart‐
ment during braking or evasive maneuvers
and endanger the vehicle occupants.◀2.Release the belt tongue from the fixture on
the rear window shelf.3.Insert the belt tongue in the belt lock of the
center safety belt. Make sure you hear the
latch plate engage.
To secure cargo, refer to page 162, with nets or
draw straps, the cargo area is fitted with lashing
eyes.
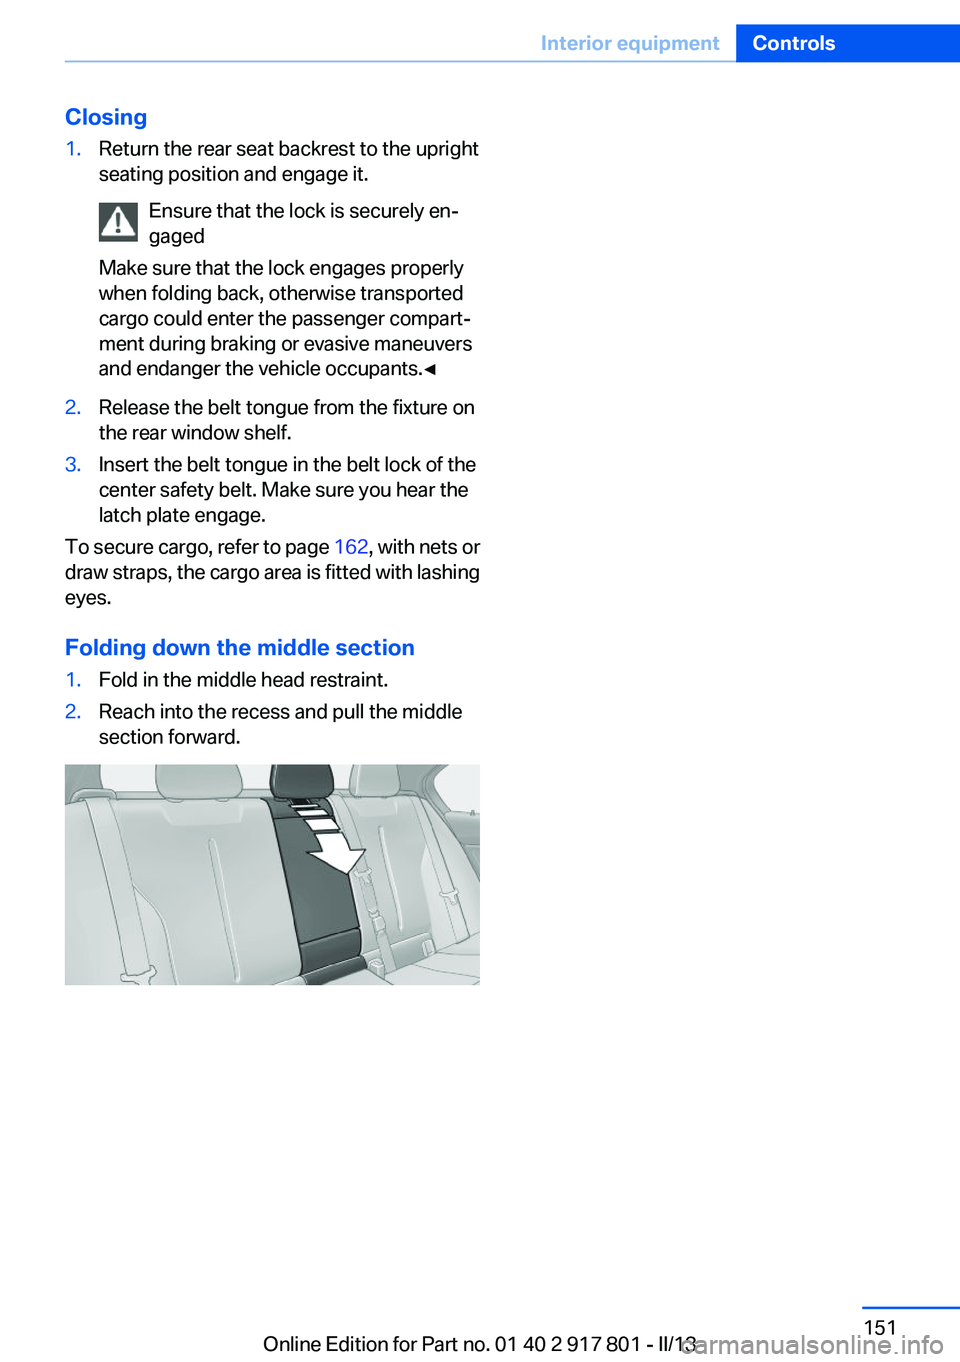
Folding down the middle section
1.Fold in the middle head restraint.2.Reach into the recess and pull the middle
section forward.Seite 151Interior equipmentControls151
Online Edition for Part no. 01 40 2 917 801 - II/13
Page 152 of 242

Storage compartmentsVehicle equipment
All standard, country-specific and optional
equipment that is offered in the model series is
described in this chapter. Therefore, equipment
is also described that is not available in a vehicle,
e. g., because of the selected optional equip‐
ment or country variant. This also applies for
safety-related functions and systems.
Notes No loose objects in the passenger com‐
partment
Do not stow any objects in the passenger com‐
partment without securing them; otherwise,
they may present a danger to occupants for in‐
stance during braking and avoidance maneu‐
vers.◀
Do not place anti-slip mats on the dash‐
board
Do not place anti-slip mats on the dashboard.
The mat materials could damage the dash‐
board.◀
Storage compartments
The following storage compartments are avail‐
able in the vehicle interior:▷Glove compartment on the driver's side, re‐
fer to page 152.▷Glove compartment on the front passenger
side, refer to page 153.▷Without Smoker's package: Front storage
compartment, in front of the cupholders, re‐
fer to page 153.▷Storage compartment in the front center
armrest, refer to page 153.▷Compartments in the doors, refer to
page 153.▷Nets on the backrests of the front seats.▷Storage compartment in the rear center
console, refer to page 154.
Glove compartment
Driver's side
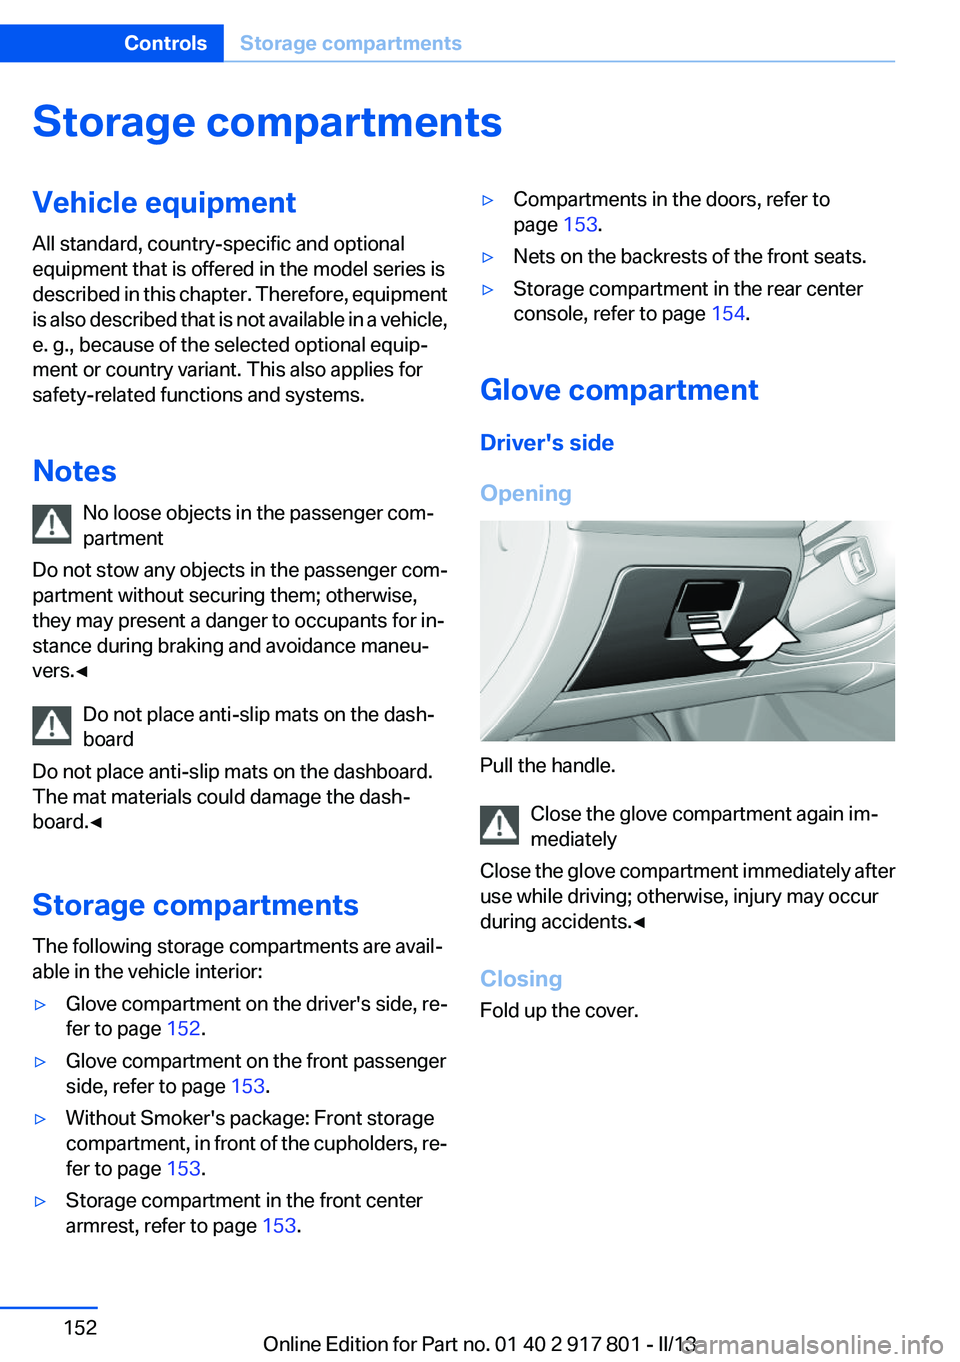
Opening
Pull the handle. Close the glove compartment again im‐
mediately
Close the glove compartment immediately after
use while driving; otherwise, injury may occur
during accidents.◀
Closing
Fold up the cover.
Seite 152ControlsStorage compartments152
Online Edition for Part no. 01 40 2 917 801 - II/13