2013 BMW 328I instrument cluster
[x] Cancel search: instrument clusterPage 112 of 242
Variable sport steering
The variable sport steering increases the steer‐
ing angle of the front wheels at large steering
wheel angles, e.g., in tight curves or when park‐
ing. Steering becomes more direct.
It also varies the force required to turn the
wheels in accordance with the vehicle speed.
This results in a sporty steering response. In ad‐
dition, it becomes easier to steer during parking
and maneuvering.
Driving Dynamics Control
The concept
The Driving Dynamics Control can be used to
adjust the certain characteristics of the vehicle.
Various programs can be selected for this pur‐
pose. The Driving Dynamics Control and the
DSC OFF buttons can each be used to activate
a program.
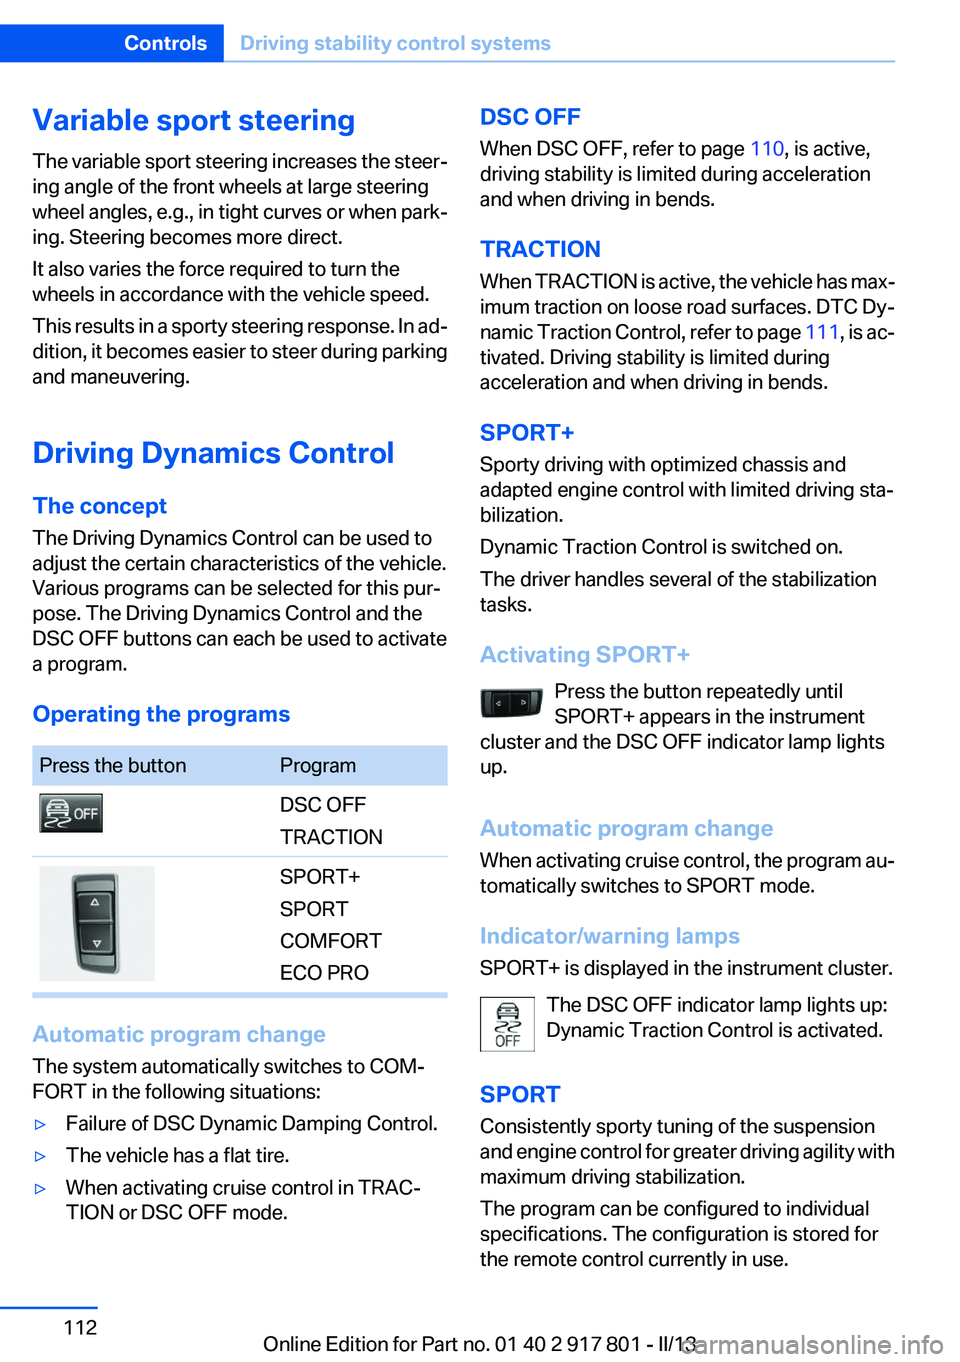
Operating the programsPress the buttonProgramDSC OFF
TRACTIONSPORT+
SPORT
COMFORT
ECO PRO
Automatic program change
The system automatically switches to COM‐
FORT in the following situations:
▷Failure of DSC Dynamic Damping Control.▷The vehicle has a flat tire.▷When activating cruise control in TRAC‐
TION or DSC OFF mode.DSC OFF
When DSC OFF, refer to page 110, is active,
driving stability is limited during acceleration
and when driving in bends.
TRACTION
When TRACTION is active, the vehicle has max‐
imum traction on loose road surfaces. DTC Dy‐
namic Traction Control, refer to page 111, is ac‐
tivated. Driving stability is limited during
acceleration and when driving in bends.
SPORT+
Sporty driving with optimized chassis and
adapted engine control with limited driving sta‐
bilization.
Dynamic Traction Control is switched on.
The driver handles several of the stabilization
tasks.
Activating SPORT+ Press the button repeatedly until
SPORT+ appears in the instrument
cluster and the DSC OFF indicator lamp lights
up.
Automatic program change
When activating cruise control, the program au‐
tomatically switches to SPORT mode.
Indicator/warning lamps
SPORT+ is displayed in the instrument cluster.
The DSC OFF indicator lamp lights up:
Dynamic Traction Control is activated.
SPORT
Consistently sporty tuning of the suspension
and engine control for greater driving agility with
maximum driving stabilization.
The program can be configured to individual
specifications. The configuration is stored for
the remote control currently in use.Seite 112ControlsDriving stability control systems112
Online Edition for Part no. 01 40 2 917 801 - II/13
Page 113 of 242
Activating SPORTPress button repeatedly until SPORT is
displayed in the instrument cluster.
Configuring SPORT
When the display is activated on the Control
Display, refer to page 114, the SPORT driving
mode can be set to individual specifications.▷Activating SPORT.▷"Configure SPORT"▷Configuring the SPORT driving mode.
SPORT can also be configured before it is acti‐
vated:
1."Settings"2."Driving mode"3."Configure SPORT"4.Configure driving mode.
This configuration is retrieved when the SPORT
driving mode is activated.
COMFORT
For a balanced tuning with maximum driving sta‐
bilization.
Activating COMFORT Press button repeatedly until COM‐
FORT is displayed in the instrument
cluster.
In certain situations, the system automatically
changes to the NORMAL program, automatic
program change, refer to page 112.
ECO PRO
ECO PRO, refer to page 165, provides consis‐
tent tuning to minimize fuel consumption for
maximum range with maximum driving stabili‐
zation.
Comfort functions and the engine controller are
adjusted.
The program can be configured to individual
specifications.
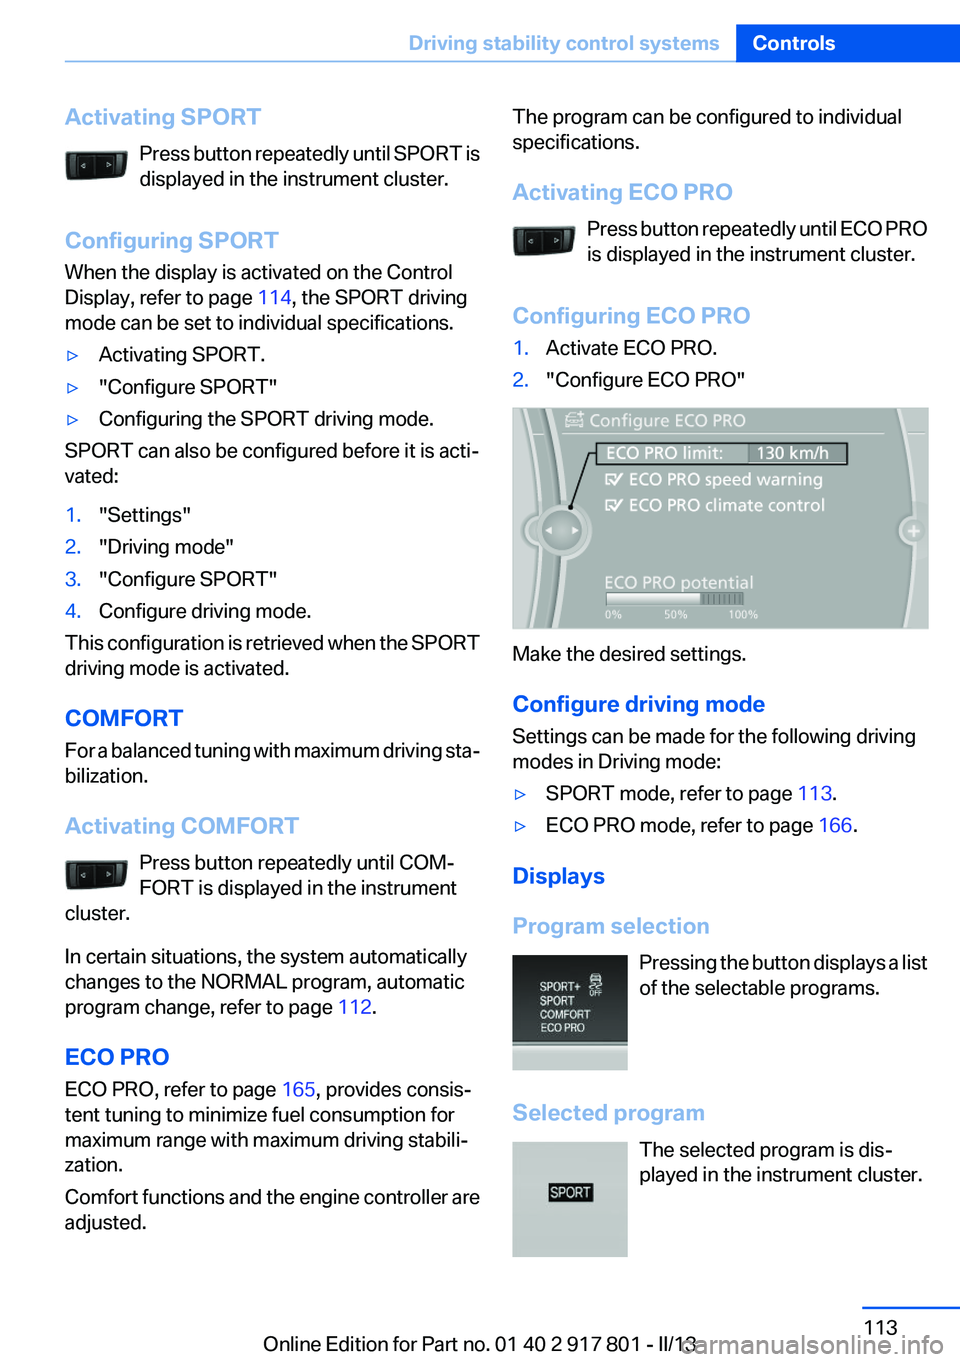
Activating ECO PRO Press button repeatedly until ECO PRO
is displayed in the instrument cluster.
Configuring ECO PRO1.Activate ECO PRO.2."Configure ECO PRO"
Make the desired settings.
Configure driving mode
Settings can be made for the following driving
modes in Driving mode:
▷SPORT mode, refer to page 113.▷ECO PRO mode, refer to page 166.
Displays
Program selection Pressing the button displays a list
of the selectable programs.
Selected program The selected program is dis‐
played in the instrument cluster.
Seite 113Driving stability control systemsControls113
Online Edition for Part no. 01 40 2 917 801 - II/13
Page 116 of 242
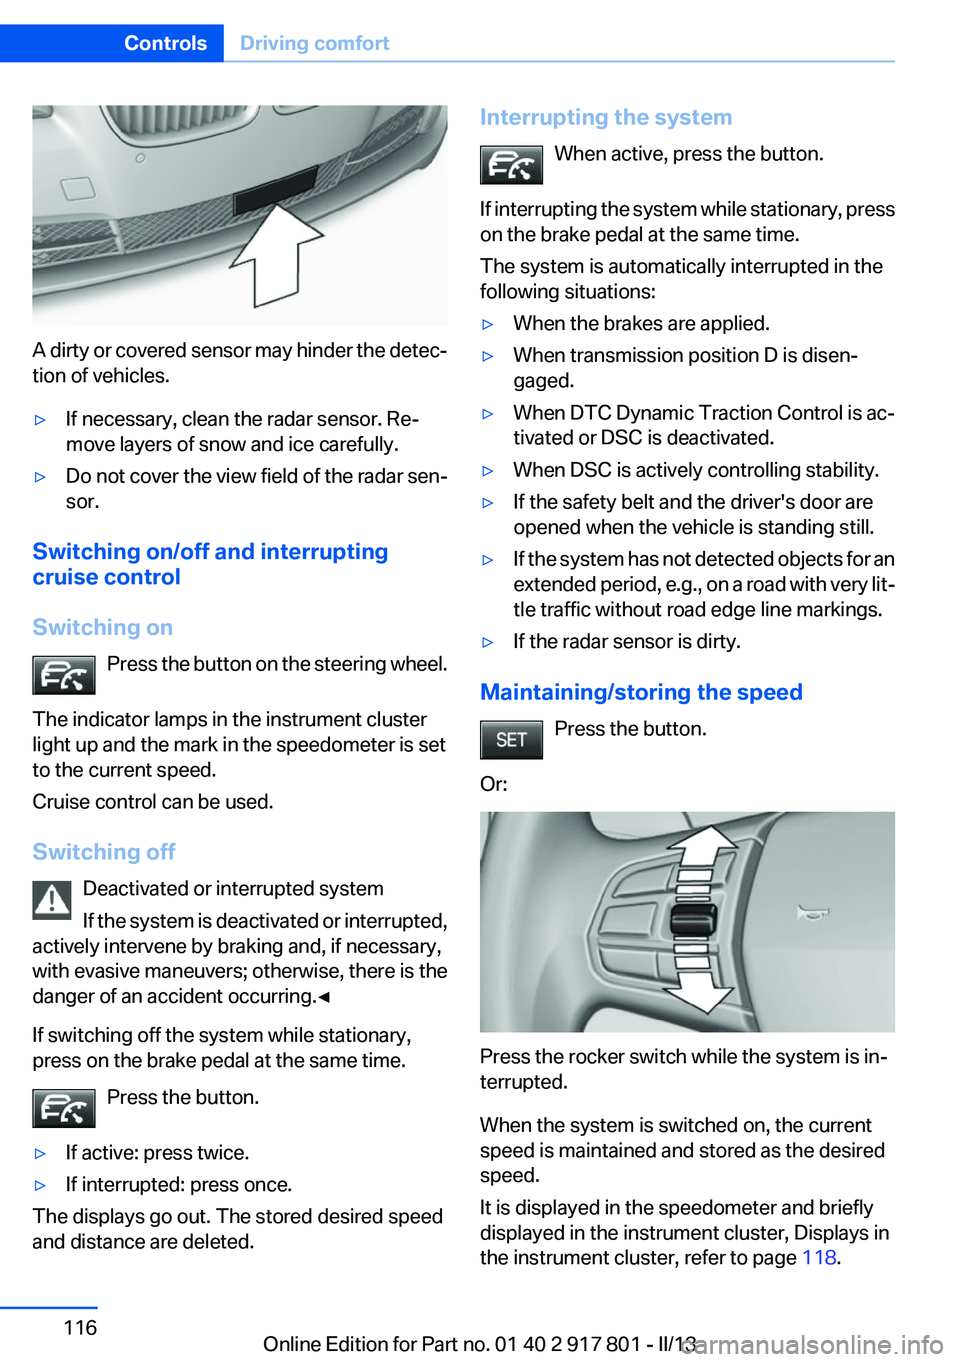
A dirty or covered sensor may hinder the detec‐
tion of vehicles.
▷If necessary, clean the radar sensor. Re‐
move layers of snow and ice carefully.▷Do not cover the view field of the radar sen‐
sor.
Switching on/off and interrupting
cruise control
Switching on Press the button on the steering wheel.
The indicator lamps in the instrument cluster
light up and the mark in the speedometer is set
to the current speed.
Cruise control can be used.
Switching off Deactivated or interrupted system
If the system is deactivated or interrupted,
actively intervene by braking and, if necessary,
with evasive maneuvers; otherwise, there is the
danger of an accident occurring.◀
If switching off the system while stationary,
press on the brake pedal at the same time.
Press the button.
▷If active: press twice.▷If interrupted: press once.
The displays go out. The stored desired speed
and distance are deleted.
Interrupting the system
When active, press the button.
If interrupting the system while stationary, press
on the brake pedal at the same time.
The system is automatically interrupted in the
following situations:▷When the brakes are applied.▷When transmission position D is disen‐
gaged.▷When DTC Dynamic Traction Control is ac‐
tivated or DSC is deactivated.▷When DSC is actively controlling stability.▷If the safety belt and the driver's door are
opened when the vehicle is standing still.▷If the system has not detected objects for an
extended period, e.g., on a road with very lit‐
tle traffic without road edge line markings.▷If the radar sensor is dirty.
Maintaining/storing the speed
Press the button.
Or:
Press the rocker switch while the system is in‐
terrupted.
When the system is switched on, the current
speed is maintained and stored as the desired
speed.
It is displayed in the speedometer and briefly
displayed in the instrument cluster, Displays in
the instrument cluster, refer to page 118.
Seite 116ControlsDriving comfort116
Online Edition for Part no. 01 40 2 917 801 - II/13
Page 117 of 242
When cruise control is maintained or stored,
DSC Dynamic Stability Control is switched on, if
necessary.
Changing, maintaining, and storing the
speed
The rocker switch can be pressed while the sys‐
tem is interrupted to maintain and store the cur‐
rent speed. DSC Dynamic Stability Control is
switched on, if necessary.
Adapting the desired speed
Adapt the desired speed to the road con‐
ditions and be ready to brake at all times; other‐
wise, there is the danger of an accident occur‐
ring.◀
Speed differences
Large differences in speed relative to ve‐
hicles ahead of the vehicle cannot be compen‐
sated by the system for example in the following
situations:▷When catching up rapidly with a truck.▷When another vehicle suddenly swerves
into the wrong lane.◀
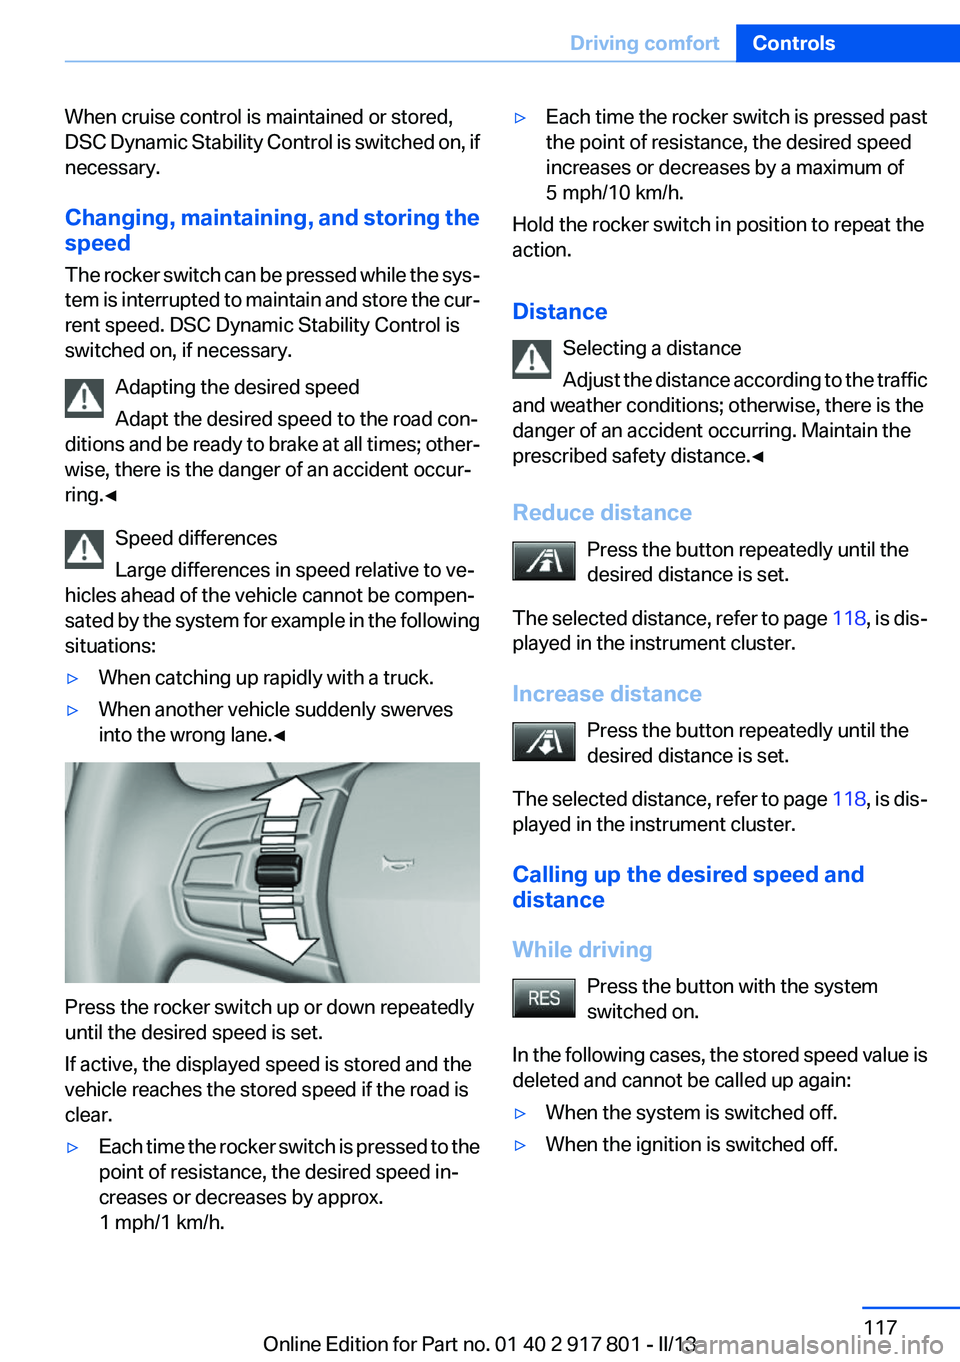
Press the rocker switch up or down repeatedly
until the desired speed is set.
If active, the displayed speed is stored and the
vehicle reaches the stored speed if the road is
clear.
▷Each time the rocker switch is pressed to the
point of resistance, the desired speed in‐
creases or decreases by approx.
1 mph/1 km/h.▷Each time the rocker switch is pressed past
the point of resistance, the desired speed
increases or decreases by a maximum of
5 mph/10 km/h.
Hold the rocker switch in position to repeat the
action.
Distance Selecting a distance
Adjust the distance according to the traffic
and weather conditions; otherwise, there is the
danger of an accident occurring. Maintain the
prescribed safety distance.◀
Reduce distance Press the button repeatedly until the
desired distance is set.
The selected distance, refer to page 118, is dis‐
played in the instrument cluster.
Increase distance Press the button repeatedly until the
desired distance is set.
The selected distance, refer to page 118, is dis‐
played in the instrument cluster.
Calling up the desired speed and
distance
While driving Press the button with the system
switched on.
In the following cases, the stored speed value is
deleted and cannot be called up again:
▷When the system is switched off.▷When the ignition is switched off.Seite 117Driving comfortControls117
Online Edition for Part no. 01 40 2 917 801 - II/13
Page 118 of 242
While standingBefore leaving the vehicle, secure it
against rolling.
Before leaving the vehicle with the engine run‐
ning, engage position P of the automatic trans‐
mission and apply the parking brake. Otherwise,
the vehicle may begin to roll.◀
The system brought the vehicle to a complete
standstill:▷Green marking in the speedometer:
Your vehicle accelerates automatically as
soon as the vehicle in the range of the radar
sensor moves off.▷Marking in the speedometer turns orange:
no automatic driving away.
To accelerate to the desired speed auto‐
matically, press the accelerator briefly or
press the RES or SET button.
Rolling bars in the distance display indicate that
the vehicle in the radar sensor detection range
has moved off.
Your vehicle was braked to a halt by pressing on
the brake pedal and it is standing behind another
vehicle:
1. Press the button to call up a stored
desired speed.2.Release the brake pedal.3.Press on the accelerator briefly, or press the
RES button or the rocker switch when the
vehicle ahead of you drives away.
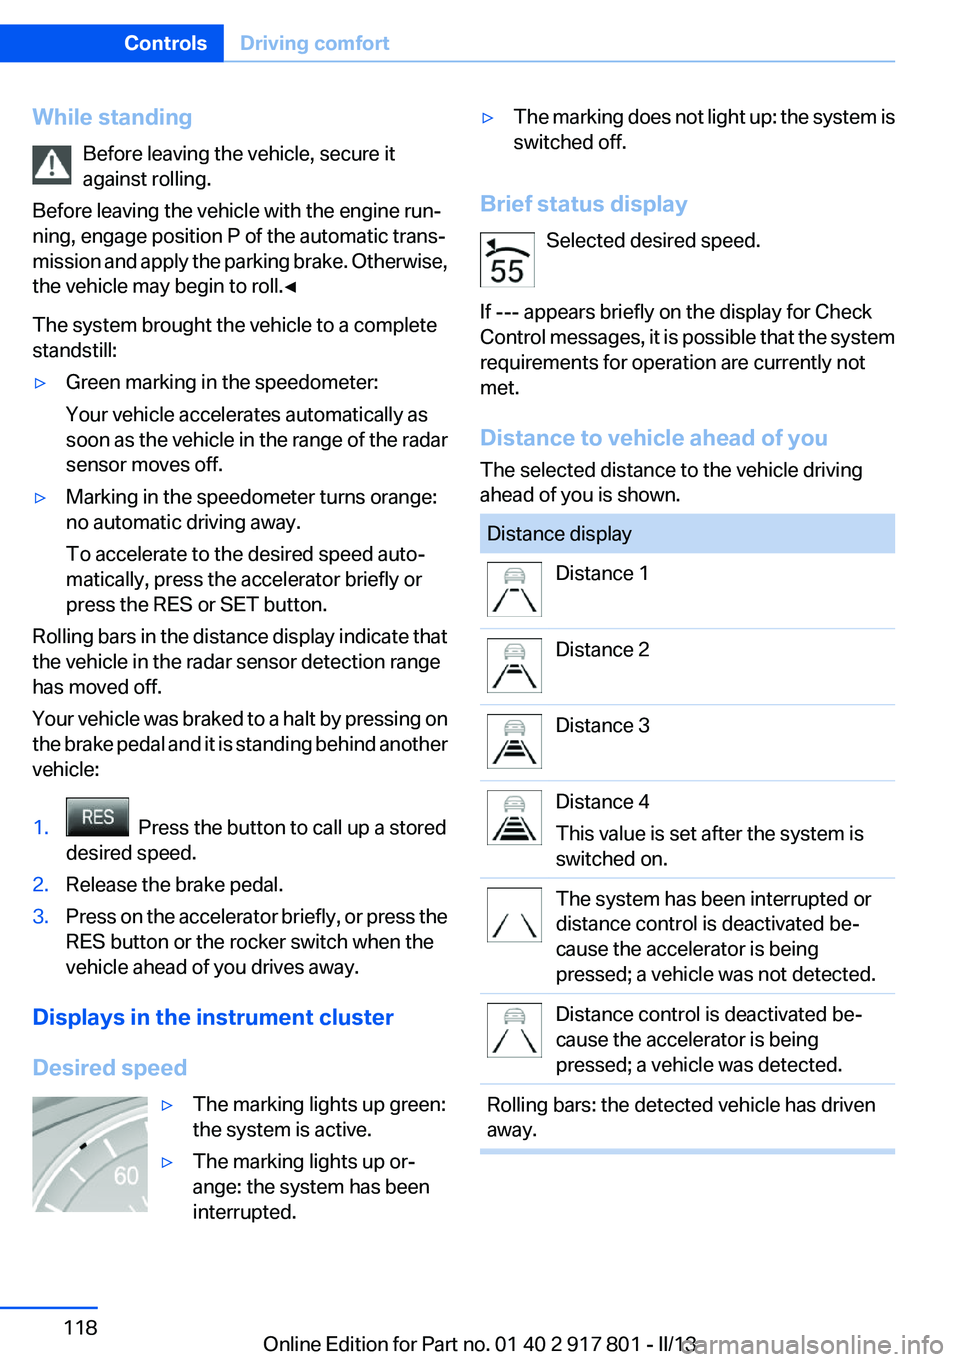
Displays in the instrument cluster
Desired speed
▷The marking lights up green:
the system is active.▷The marking lights up or‐
ange: the system has been
interrupted.▷The marking does not light up: the system is
switched off.
Brief status display
Selected desired speed.
If --- appears briefly on the display for Check
Control messages, it is possible that the system
requirements for operation are currently not
met.
Distance to vehicle ahead of you
The selected distance to the vehicle driving
ahead of you is shown.
Distance displayDistance 1Distance 2Distance 3Distance 4
This value is set after the system is
switched on.The system has been interrupted or
distance control is deactivated be‐
cause the accelerator is being
pressed; a vehicle was not detected.Distance control is deactivated be‐
cause the accelerator is being
pressed; a vehicle was detected.Rolling bars: the detected vehicle has driven
away.Seite 118ControlsDriving comfort118
Online Edition for Part no. 01 40 2 917 801 - II/13
Page 122 of 242
Press the button.▷If active: press twice.▷If interrupted: press once.
The displays go out. The stored desired speed
is deleted.
Interrupting the system When active, press the button.
The system is automatically interrupted if:
▷The brakes are applied.▷The clutch pedal is depressed for a few sec‐
onds or released while a gear is not en‐
gaged.▷The gear engaged is too high for the current
speed.▷The transmission position D is disengaged.▷DTC Dynamic Traction Control is activated
or DSC is deactivated.▷DSC is actively controlling stability.
Maintaining/storing the current speed
Press the button.
Or
Press the rocker switch while the system is in‐
terrupted.
When the system is switched on, the current
speed is maintained and stored as the desired
speed.
It is displayed in the speedometer and briefly
displayed in the instrument cluster, Displays in
the speedometer, refer to page 123.
When cruise control is maintained or stored,
DSC Dynamic Stability Control is switched on, if
necessary.
Changing/maintaining speed
The rocker switch can be pressed while the sys‐
tem is interrupted in order to maintain and store
the current speed.
Adapting the desired speed
Adapt the desired speed to the road con‐
ditions and be ready to brake at all times; other‐
wise, there is the danger of an accident occur‐
ring.◀
Press the rocker switch up or down repeatedly
until the desired speed is set.
If active, the displayed speed is stored and the
vehicle reaches the stored speed if the road is
clear.
▷Each time the rocker switch is pressed to the
point of resistance, the desired speed in‐
creases or decreases by approx.
1 mph/1 km/h.▷Each time the rocker switch is pressed past
the point of resistance, the desired speed
increases or decreases by a maximum of
5 mph/10 km/h.▷Pressing the rocker switch to the resistance
point and holding it there accelerates or de‐
celerates the vehicle without requiring pres‐
sure on the accelerator. After the rocker
switch is released, the vehicle maintains itsSeite 122ControlsDriving comfort122
Online Edition for Part no. 01 40 2 917 801 - II/13
Page 123 of 242

final speed. Pressing the switch beyond the
resistance point causes the vehicle to ac‐
celerate more rapidly.
Resuming the desired speed
Press the button.
The stored speed is reached and maintained.
Displays in the instrument cluster
Indicator lamp Depending on how the vehicle is equip‐
ped, the indicator lamp in the instrument
cluster indicates whether the system is
switched on.
Desired speed
▷The marking lights up green:
the system is active.▷The marking lights up or‐
ange: the system has been
interrupted.▷The marking does not light up: the system is
switched off.
Brief status display
Selected desired speed.
If --- appears briefly on the display for Check
Control messages, it is possible that the system
requirements for operation are currently not
met.
PDC Park Distance Control
The concept
PDC supports you when parking. Objects that
you are approaching slowly in front of or behind
your vehicle are indicated with:
▷Signal tones.▷Visual display.
General information
Measurements are made by ultrasound sensors
in the bumpers.
The range is approx. 6 ft/2 m.
An acoustic warning is first given:
▷By the front middle sensors and the two cor‐
ner sensors at approx. 24 in/60 cm.▷By the rear middle sensors at approx.
5 ft/1.50 m.
Notes
Check the traffic situation as well
PDC cannot serve as a substitute for the
driver's personal judgment of the traffic situa‐
tion. Check the traffic situation around the vehi‐
cle with your own eyes. Otherwise, an accident
could result from road users or objects located
outside of the PDC detection range.
Loud noises from outside and inside the vehicle
may prevent you from hearing the PDC's signal
tone.◀
Avoid driving quickly with PDC
Avoid approaching an object quickly.
Avoid driving away quickly while PDC is not yet
active.
For technical reasons, the system may other‐
wise be too late in issuing a warning.◀
Seite 123Driving comfortControls123
Online Edition for Part no. 01 40 2 917 801 - II/13
Page 132 of 242

▷Speed limit detection.▷Cruise control.▷Selection list from the instrument cluster.
Some of this information is only displayed briefly
as needed.
Selecting displays in the Head-up
Display
1."Settings"2."Head-up display"3."Displayed information"4.Select the desired displays in the Head-up
Display.
The settings are stored for the remote control
currently in use.
Setting the brightness
The brightness is automatically adjusted to the
ambient light.
The basic setting can be adjusted manually.
1."Settings"2."Head-up display"3."Brightness"4.Turn the controller.
When the low beams are switched on, the
brightness of the Head-up Display can be addi‐
tionally influenced using the instrument lighting.
The setting is stored for the remote control cur‐
rently in use.
Adjusting the height
1."Settings"2."Head-up display"3."Height"4.Turn the controller.
The setting is stored for the remote control cur‐
rently in use.
Setting the rotation1."Settings"2."Head-up display"3."Rotation"4.Turn the controller.
The setting is stored for the remote control cur‐
rently in use.
Special windshield
The windshield is part of the system.
The shape of the windshield makes it possible
to display a precise image.
A film in the windshield prevents double images
from being displayed.
Therefore, have the special windshield replaced
by a service center only.
Parking assistant
The concept
This system assists the driver in parking parallel
to the road.
Ultrasound sensors measure parking spaces on
both sides of the vehicle.
The parking assistant calculates the best pos‐
sible parking line and takes control of steering
during the parking procedure.
When parking, also take note of the visual and
acoustic information issued by the PDC and the
parking assistant and accelerate or brake ac‐
cordingly.
Seite 132ControlsDriving comfort132
Online Edition for Part no. 01 40 2 917 801 - II/13