2013 BMW 328I CONVERTIBLE ABS
[x] Cancel search: ABSPage 74 of 308
73
Driving
Controls
Accelerating using the lever
Accelerating slightly:
Press the lever to the resistance point, arrow 1
,
until the desired speed is reached.
Accelerating significantly:
Press the lever beyond the resistance point,
arrow 1, until the desired speed is reached.
The vehicle accelerates without pressure on
the accelerator pedal. The system stores and
maintains the speed.
Decreasing speed
Repeatedly pull the lever to the resistance point
or beyond, arrow 2, until the desired speed is
displayed.
> Each time the lever is pulled to the resis-
tance point, the desired speed is decreased
by approx. 1 mph or 1 km/h.
> Each time the lever is pulled beyond the
resistance point, the desired speed is
reduced by up to 5 mph or 10 km/h until the
minimum speed of 20 mph or 30 km/h is
achieved.
The system stores and maintains the speed.
Deactivating cruise control
Briefly press the lever upwards or downwards,
arrow 3.
The displays on the speedometer disappear.
In addition, the system is automatically deacti-
vated:
> when the brakes are applied.
> when the manual transmission is shifted
very slowly or shifted into neutral.
> when the automatic transmission selector
lever is moved into the neutral position.
> when the selector lever of the sport auto-
matic transmission with double clutch is
moved into the neutral position.
> when DTC is activated or DSC is deacti-
vated.
> when DSC or ABS is intervening. Cruise control is not deactivated by depressing
the accelerator pedal. Once the accelerator
pedal is released, the stored speed is achieved
again and maintained.
Warning lamp
The warning lamp lights up when
cruise control is deactivated due to
control intervention by the DSC, for
example. A message appears on the Control
Display.
Resuming a previously stored speed
Press the button, arrow 4.
The last stored speed is resumed and main-
tained.
In the following instances, the stored speed is
deleted and can no longer be resumed:
> When driving stability control systems are
intervening.
> In ca rs with manual transmiss ion: when you
shift gears very slowly or shift to neutral.
> In cars with automatic transmission: when
you engage selector lever position N.
> In cars with Sport automatic transmission
with double clutch: when you engage selec-
tor lever position N.
> When the ignition is switched off
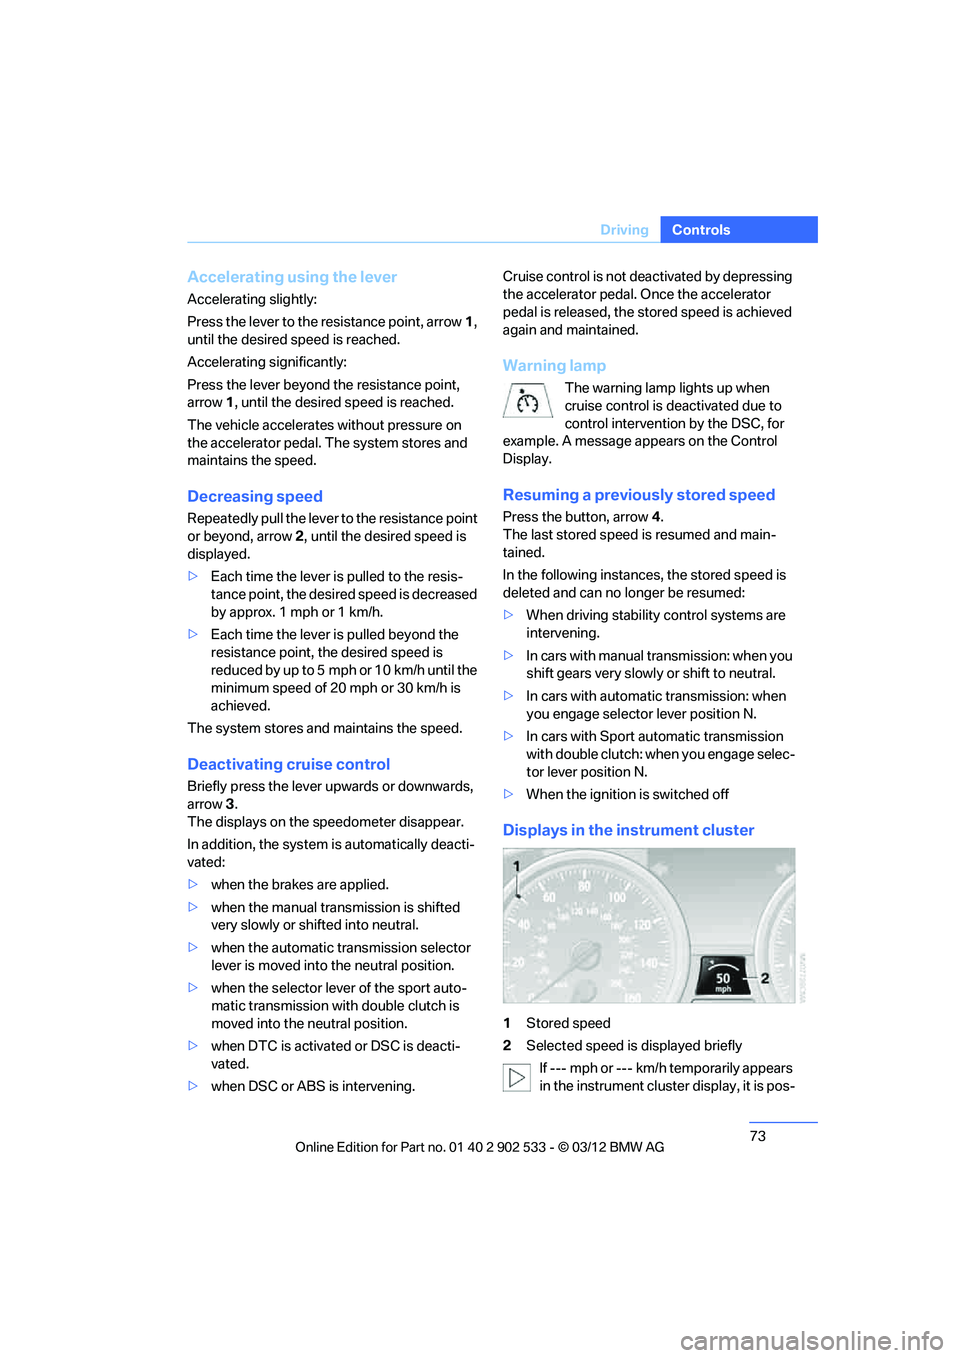
Displays in the instrument cluster
1Stored speed
2 Selected speed is displayed briefly
If --- mph or --- km/h temporarily appears
in the instrument cluster display, it is pos-
00320051004F004C00510048000300280047004C0057004C005200510003
Page 77 of 308

76
ControlsDriving
The selected distance is displayed in the instru-
ment cluster.
Use good judgment to select the appro-
priate following distance given road con-
ditions, traffic, applicable laws and driving rec-
ommendations for safe following distance.
Otherwise, an accident risk could result. <
Deactivating cruise control
Press the lever upward or downward, arrow 3.
The displays on the speedometer disappear.
In addition, the system is automatically deacti-
vated:
> when the brakes are applied.
> when the speed is reduced to below
20 mph or 30 km/h due to a traffic situation. >
when the manual transmission is shifted
very slowly or shifted into neutral.
> when the automatic transmission selector
lever is moved into the neutral position.
> when the selector lever of the sport auto-
matic transmission with double clutch is
moved into the neutral position.
> when Dynamic Traction Control DTC is
activated.
> when Dynamic Stability Control DSC is
deactivated.
> when DSC or ABS is intervening.
> when the system does not recognize any
objects for a longer time, e. g. on infre-
quently traveled roads without a shoulder or
guard rails, or if the radar sensor is covered
with dirt, refer to page 77.
> when the parking brake is engaged.
When the system is deactivated, you
must brake the vehicle yourself and/or
maneuver as necessary; otherwise, there is a
risk of accidents.<
Warning lamp
The warning lamp lights up when
Active Cruise Control has been auto-
matically deactivated, for example
due to a driving speed below 20 mph or
30 km/h or a DSC intervention. A message
appears on the Control Display.
Resuming stored desired speed and
distance
Briefly press the button, arrow 4.
The stored speed and distance are regained
and maintained.
In the following instances, the stored speed is
deleted and can no longer be resumed:
> When driving stability control systems are
intervening.
> In cars with manual transmission: when you
shift gears very slowly or shift to neutral.
Distance 1
Distance 2
Distance 3
Distance 4
This is always the preset dis-
tance when you use the system
for the first time after starting the
engine.
00320051004F004C00510048000300280047004C0057004C005200510003
Page 78 of 308

77
Driving
Controls
>
In cars with automatic transmission: when
you engage selector lever position N.
> In cars with Sport automatic transmission
with double clutch: when you engage selec-
tor lever position N.
> When the ignition is switched off.
Displays in the instrument cluster
1Stored desired speed
2 Shows yellow: vehicle detected ahead
Flashes in red: system cannot maintain dis-
tance; driver must brake the vehicle
Flashes in yellow: driving stability control
systems are intervening; cruise control is
deactivated
3 Selected distance to vehicle ahead
The indicator lights up as soon as the sys-
tem is activated.
4 Selected desired speed is temporarily dis-
played
If --- mph or --- km/h temporarily appears
in the instrument cluster display, it is pos-
sible that the system prerequisites for operation
are currently not met. Ca lling up Check Control
messages, refer to page 91.<
Warning lamps
The indicator 2 flashes in red; a
signal sounds.
The system indicates that you
must brake and/or maneuver the
vehicle yourself. Active Cruise
Control cannot automatically restore the dis-
tance to the vehicle ahead. This indicator does not release you from your
responsibility to adapt your desired speed and
driving style to prevailing driving conditions.
The indicator 2 flashes in yellow.
The prerequisites for operating
Active Cruise Control are not met,
e.g. as a result of ABS or DSC
interventions. Active Cruise Con-
trol is deactivated. You can reactivate the sys-
tem, if desired, by briefly pressing or pulling the
lever when road and traffic conditions permit. It
is not possible to resume a stored speed.
Radar sensor
The sensor's ability to detect vehicles ahead
may be restricted as a result of heavy rain, dirt,
snow or ice. If necessary, clean the radar sensor
located in the front bumper, see arrow. Be sure
t o u s e p a rt i c ul a r c a r e w h e n r em o v in g a n y l a y e rs
of snow or ice from the sensor.
The system cannot be activated if the sensor is
incorrectly aligned.
For US owners only
The transmitter and receiver units comply with
part 15 of the FCC/Federal Communications
Commission regulations. Operation is gov-
erned by the following:
FCC ID:
NF3 ACC2SCU 003YK04001 0000
Compliance statement:
This device complies with part 15 of the FCC
Rules. Operation is subject to the following two
conditions:
00320051004F004C00510048000300280047004C0057004C005200510003
Page 96 of 308

95
Technology for driving comfort and safety
Controls
Malfunction
The warning lamp lights up. A mes-
sage appears on the Control Display.
PDC is malfunctioning. Have the sys-
tem checked.
To avoid this problem, keep the sensors clean
and free of ice or snow in order to ensure that
they will continue to operate effectively. When
using a high-pressure cleaner, do not spray the
sensors for extended periods of time and only
from a distance of at least 1 ft/30 cm.
Manual operation
The LED above the button also flashes.
PDC with visual warning
The approach of the vehicle to an object is
shown on the Control Display. Objects that are
farther away are displayed on the Control Dis-
play before a signal tone sounds. The display
appears on the Control Display as soon as PDC
is activated.
System limitations
Even with PDC, final responsibility for
estimating the distance between the
vehicle and any obstructions always remains
with the driver. Even when sensors are pro-
vided, there is a blind spot in which objects can
no longer be detected. The system is also sub-
ject to the physical limits that apply to all forms
of ultrasonic measurement, such as those
encountered with trailer towbars and hitches,
thin or wedge-shaped objects, etc. Low objects
that have already been displayed, e.g. curbs,
can disappear again from the detection area of
the sensors before or after a continuous tone
sounds. Higher, protruding objects, e.g. ledges,
cannot be detected. Therefore, always drive
cautiously; otherwise, there is a risk of personal
injury or property damage.
Loud sound sources outside or inside the car
can drown out the PDC signal. Therefore,
always drive cautiously; otherwise, there is a
risk of personal injury or property damage. <
Driving stability control
systems
Your BMW has a number of systems that help
to maintain the vehicle's stability even in
adverse driving conditions.
ABS Antilock Brake System
ABS prevents locking of the wheels during
braking. Safe steering response is maintained
even during full braking. Active safety is thus
increased.
The ABS is operational every time you start the
engine. Braking safely, refer to page138.
Electronic brake-force distribution
EBV
The system controls the brake pressure in the
rear wheels to ensure stable braking behavior.
Dynamic Brake Control DBC
When you apply the brakes rapidly, this system
automatically produces the maximum braking
force boost and thus helps to achieve the short-
est possible braking distance during full brak-
ing. This system exploits all of the benefits pro-
vided by ABS.
Do not reduce the pressure on the brake for the
duration of the full braking application.
Dynamic Stability Control DSC
DSC prevents the driving wheels from losing
traction when you pull away from rest or accel-
erate. The system also recognizes unstable
driving conditions, for example if the rear of the
car is about to swerve or if momentum is acting
at an angle past the front wheels. In these
cases, DSC helps the vehicle maintain a safe
course within physical limits by reducing engine
output and through braking actions at the indi-
vidual wheels.
The laws of physics cannot be repealed,
even with DSC. An appropriate driving
style always remains the responsibility of the
driver. Therefore, do not reduce the additional
00320051004F004C00510048000300280047004C0057004C005200510003
Page 138 of 308
137
Things to remember when driving
Driving tips
Check tire inflation pressure regularly
Check the tire inflation pressure at least twice a
month and before embarkin
g on a long journey,
and correct it if necessary.
Low tire inflation pressure causes higher rolling
resistance and thus increases fuel consumption
and tire wear.
Set off immediately
Do not let the engine warm up while the car is
still standing, but set off immediately at moder-
ate engine speed. This is the fastest way for the
cold engine to reach its operating temperature.
Drive defensively
Avoid unnecessary acceleration and braking
maneuvers. To do so, keep an adequate dis-
tance between you and the vehicle in front of
you. A defensive and smooth driving style
keeps fuel consumption down.
Avoid high engine speeds
Only use first gear when setting off. In second
and higher gears, accelerate without hesitation
or pauses. When accelerating, shift up before
reaching high engine speeds.
When you reach the desired speed, shift into
the highest applicable gear and drive with the
engine speed as low as possible and at a con-
stant speed.
As a rule: driving at low engine speeds lowers
fuel consumption and reduces wear.
Coasting
When approaching a red light, take your foot off
the accelerator and coast to a stop in the high-
est applicable gear.
On a downhill slope, take your foot off the accel-
erator and coast in a suitable gear.
The fuel supply is interrupted when coasting.
Switch off the engine during lengthy
stops
Switch off the engine when stopping for lengthy
periods, e.g. at traffic lights, railroad crossings
or in traffic congestions.
Switch off functions you do not need at
the moment
Functions such as the air conditioner, seat
heating or rear window defroster draw large
amounts of power and consume additional fuel.
Especially in city traffic and in stop-and-go driv-
ing they have a considerable impact. Therefore,
switch these functions off when they are not
really needed.
Have the vehicle serviced
Have the vehicle serviced regularly to achieve
good economy and a long vehicle life. BMW
recommends having the vehicle serviced at
your BMW center. Also note the BMW Mainte-
nance System, refer to page 260.
General driving notes
Close the trunk lid
Only drive with the trunk closed. Failure to
do so may endanger passengers or other
road users or may damage the vehicle in the
event of an accident or a braking and evasive
maneuver. In addition, exhaust gas may flow
into the passenger compartment. <
If special circumstances make it absolutely nec-
essary to drive with the trunk open:
1. Close all windows and the glass roof.
2. Greatly increase the air volume of the auto-
matic climate control system, refer to
page 116.
3. Drive cautiously.
Hot exhaust system
In all vehicles, extremely high tempera-
tures are generated in the exhaust sys-
00320051004F004C00510048000300280047004C0057004C005200510003
Page 139 of 308
138
Driving tipsThings to remember when driving
tem. Do not remove the heat shields installed
adjacent to various sections of the exhaust sys-
tem, and never apply undercoating to them.
When driving, standing at idle and while park-
ing, take care to avoid possible contact
between the hot exhaust system and any highly
flammable materials such as hay, leaves, grass,
etc. Such contact could lead to a fire, with the
risk of serious personal injuries and property
damage. Do not touch hot exhaust tail pipes.
Otherwise, there is a risk of burns. <
Mobile phones in the vehicle
It is not advisable to use wireless devices
such as mobile phones inside the vehicle
without a direct connection to an external aerial.
Otherwise, it is not possible to exclude the pos-
sibility of a reciprocal interference occurring
between the vehicle electronics and the wire-
less device. Otherwise, there is no assurance
that the radiation generated by the radio trans-
mission will be conveyed out of the passenger
compartment. <
Hydroplaning
When driving on wet or slushy roads,
reduce road speed. If you do not, a wedge
of water can form between tires and road sur-
face. This situation, known as hydroplaning,
means that the tire can completely lose contact
with the road surface, so that neither the car can
be steered nor the brake be properly applied. <
The risk of hydroplaning increases with declin-
ing tread depth on the tires, refer also to Mini-
mum tread depth on page 252.
Driving through water
Drive through water on the road only if it is
not deeper than 1 ft/30 cm, and then only
at walking speed at the most. Otherwise, the
vehicle's engine, the electrical systems and the
transmission may be damaged.<
Use the parking brake on inclines
On inclines, do not hold the vehicle for a
lengthy period using the clutch; use the
parking brake instead. Otherwise, greater
clutch wear will result. <
For more information about the drive-off assis-
tant, refer to page 98.
Braking safely
Your BMW is equipped with ABS as a standard
feature. Applying the brakes fully is the most
effective way of braking in situations in which
this is necessary. Since the vehicle maintains
steering responsiveness, you can still avoid
possible obstacles with a minimum of steering
effort.
Pulsation of the brake pedal, combined with
sounds from the hydraulic circuits, indicate that
ABS is in its active mode.
Objects in the movement range of the
pedals
Keep floor mats, carpet, and other objects
out of the movement range of the pedals;
otherwise, they may inhibit the function of the
pedals during driving.
Do not place additional floor mats onto an exist-
ing one or onto other objects.
Only use floor mats that have been approved for
the vehicle and can be appropriately fastened.
Make sure that the floor mats are securely fas-
tened again after they have been removed, e.g.
for cleaning. <
Driving in wet conditions
When roads are wet or there is heavy rain,
briefly exert gentle pressure on the brake pedal
every few miles. Monitor traffic conditions to
ensure that this maneuver does not endanger
other road users. The heat generated in this
process helps dry the pads and rotors to ensure
that full braking efficiency will then be available
when you need it.
00320051004F004C00510048000300280047004C0057004C005200510003
Page 254 of 308
253
Wheels and tires
Mobility
In these cases, reduce speed immedi-
ately and have wheels and tires thor-
oughly checked. To do so, drive carefully to the
nearest BMW center or tire dealer. If necessary,
have the vehicle towed there.
Otherwise, tire damage can pose a lethal hazard
to vehicle occupants and other road users. <
Tire age
For various reasons, such as the development
of brittleness, BMW recommends tire replace-
ment after no more than 6 years, regardless of
the actual wear of the tires.
The manufacturing date of tires is contained in
the tire coding:
DOT... 1012 means that the tire was manufac-
tured in week 10 of 2012.
New wheels and tires
Have new wheels and tires mounted only
by your BMW center or by a tire dealer. If
this work is not carried out properly, there is a
danger of subsequent damage and related
safety hazards. Make sure that the new wheels
are balanced. <
Retreaded tires
BMW recommends that you do not use
retreaded tires, since driving safety may
be impaired. The causes for this include poten-
tially different tire casing structures and often
wide variations in tire age, which can result in a
limited service life. <
Correct wheels and tires
When mounting new tires or changing over
from summer to winter tires and vice versa,
mount run-flat tires for your own safety. In the
event of a flat, no spare wheel is available. Your
BMW center will be glad to advise you.
BMW recommends that you use only
wheel and tire combinations that BMW
has tested and approved for your particular
vehicle. Variations in factors such as manufac- turing tolerances mean that even wheels and
tires with identical official size ratings could
actually have different dimensions, which could
lead to body contact and thus to severe acci-
dents. If non-approved wheels and tires are
used, BMW cannot evaluate their suitability,
and therefore cannot guarantee their driving
safety.<
You can inquire about the right wheel/tire com-
bination at your BMW center.
The correct combination of wheels and tires is
also necessary to ensure reliable operation of
various vehicle systems such as ABS, DSC or
FTM.
To maintain good handling and vehicle
response, use only tires of a single brand and
tread configuration. After a tire has been dam-
aged, mount the previous wheel and tire combi-
nation again as soon as possible.
Wheels with Tire Pressure Monitor
TPM electronics
When mounting new tires or changing over
from summer to winter tire
s, or vice versa, only
use wheels with TPM electronics; otherwise,
the Tire Pressure Monitor may not be able to
detect a puncture, refer to page 100. Your
BMW center will be glad to advise you.
Recommended tire brands
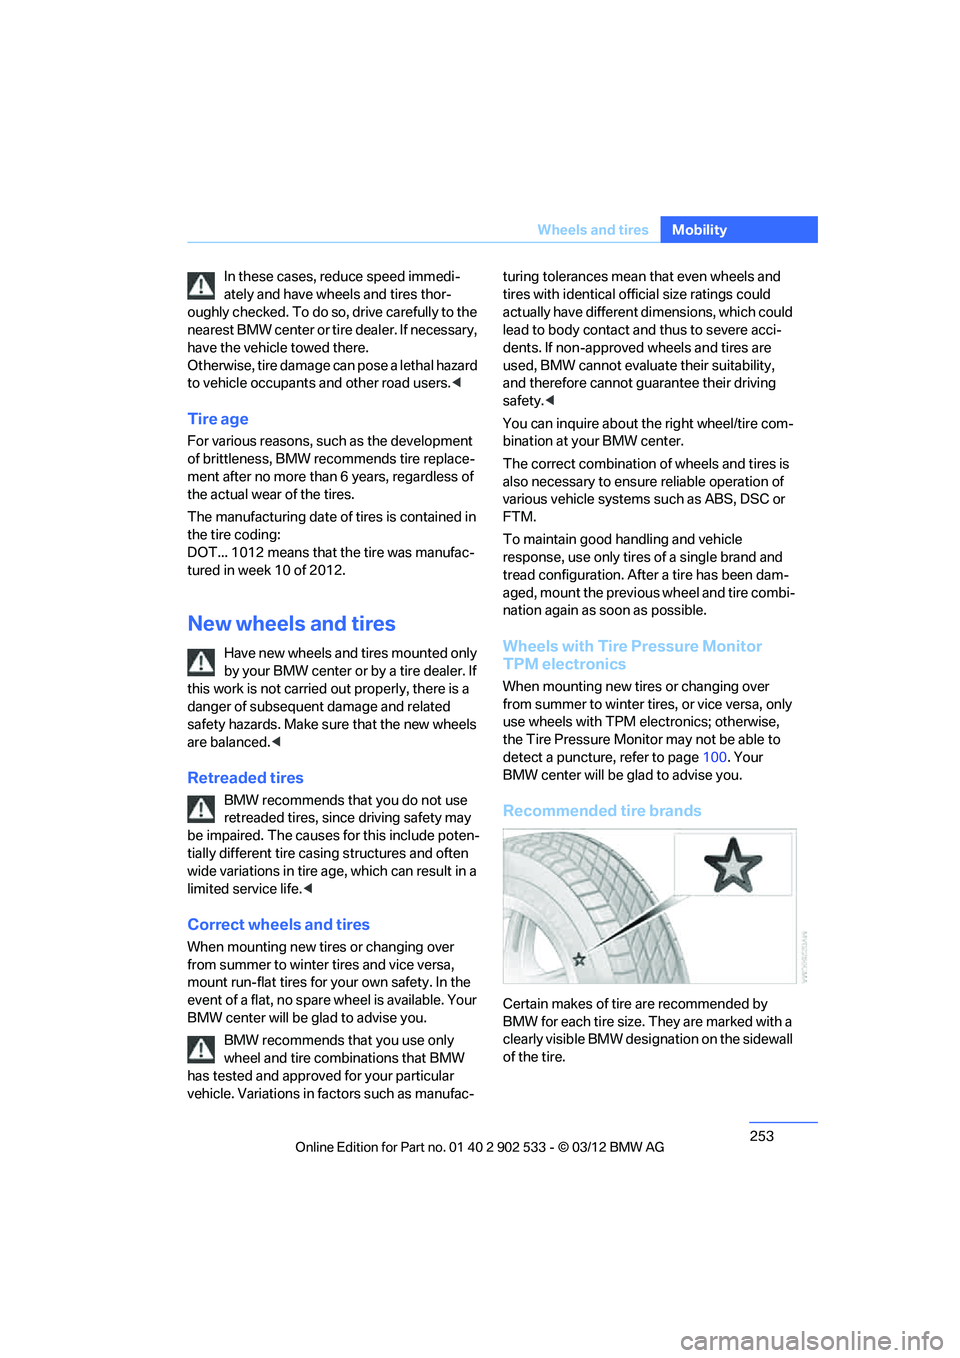
Certain makes of tire are recommended by
BMW for each tire size. They are marked with a
clearly visible BMW designation on the sidewall
of the tire.
00320051004F004C00510048000300280047004C0057004C005200510003
Page 275 of 308
274
MobilityGiving and receiving assistance
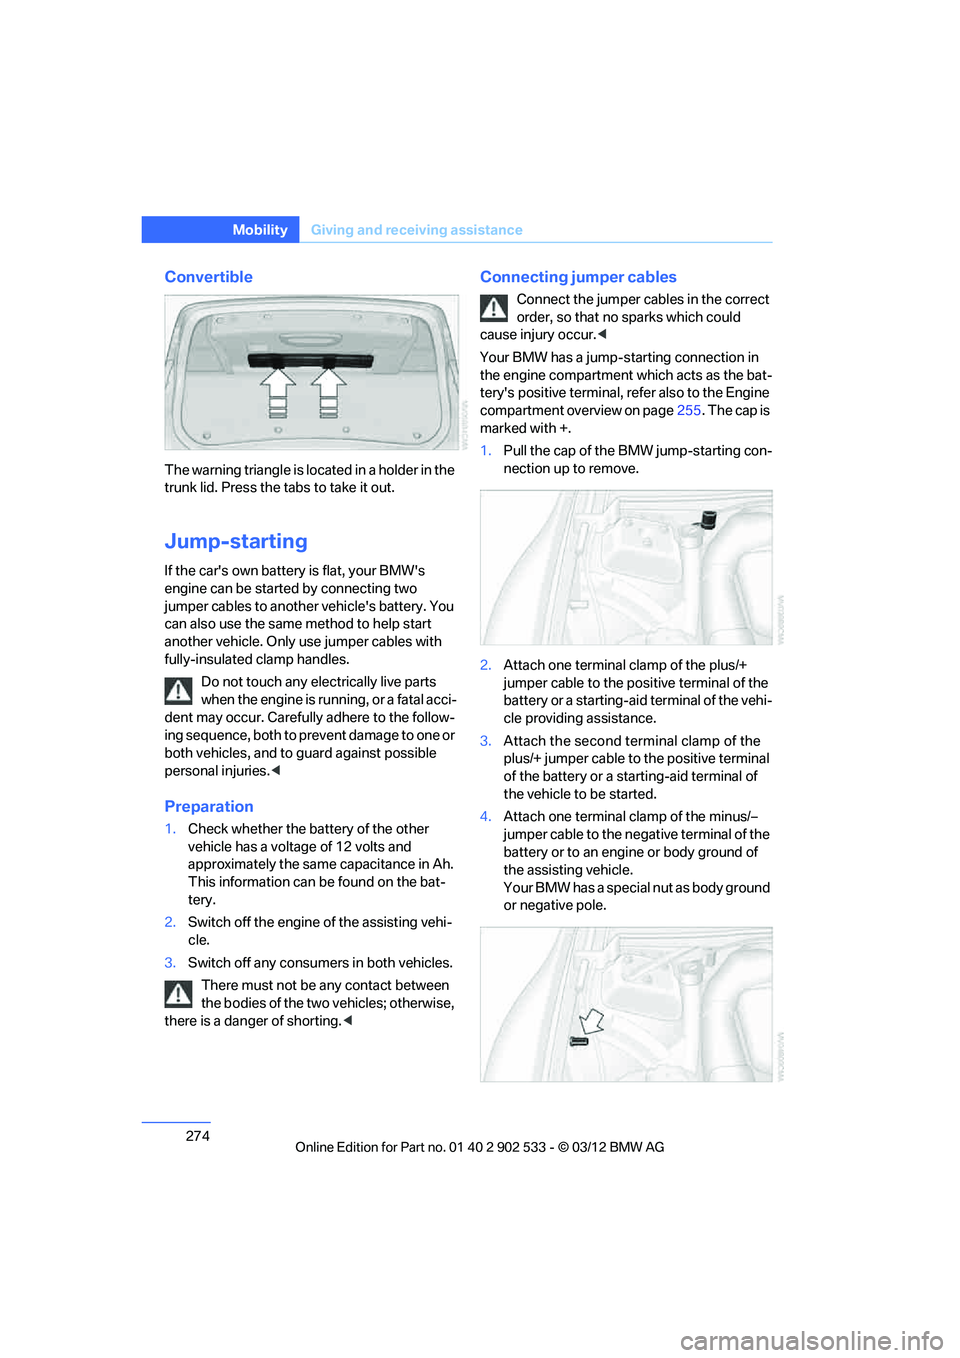
Convertible
The warning triangle is located in a holder in the
trunk lid. Press the tabs to take it out.
Jump-starting
If the car's own battery is flat, your BMW's
engine can be started by connecting two
jumper cables to another vehicle's battery. You
can also use the same method to help start
another vehicle. Only use jumper cables with
fully-insulated clamp handles.
Do not touch any electrically live parts
when the engine is running, or a fatal acci-
dent may occur. Carefully adhere to the follow-
ing sequence, both to prevent damage to one or
both vehicles, and to guard against possible
personal injuries. <
Preparation
1.Check whether the battery of the other
vehicle has a voltage of 12 volts and
approximately the same capacitance in Ah.
This information can be found on the bat-
tery.
2. Switch off the engine of the assisting vehi-
cle.
3. Switch off any consumers in both vehicles.
There must not be any contact between
the bodies of the two vehicles; otherwise,
there is a danger of shorting. <
Connecting jumper cables
Connect the jumper cables in the correct
order, so that no sparks which could
cause injury occur. <
Your BMW has a jump-s tarting connection in
the engine compartment which acts as the bat-
tery's positive terminal, refer also to the Engine
compartment overview on page 255. The cap is
marked with +.
1. Pull the cap of the BMW jump-starting con-
nection up to remove.
2. Attach one terminal clamp of the plus/+
jumper cable to the positive terminal of the
battery or a starting-aid terminal of the vehi-
cle providing assistance.
3. Attach the second terminal clamp of the
plus/+ jumper cable to the positive terminal
of the battery or a starting-aid terminal of
the vehicle to be started.
4. Attach one terminal clamp of the minus/–
jumper cable to the negative terminal of the
battery or to an engine or body ground of
the assisting vehicle.
Your BMW has a special nut as body ground
or negative pole.
00320051004F004C00510048000300280047004C0057004C005200510003