2013 BMW 328I CONVERTIBLE mirror
[x] Cancel search: mirrorPage 12 of 308
11
Dashboard
At a glance
4
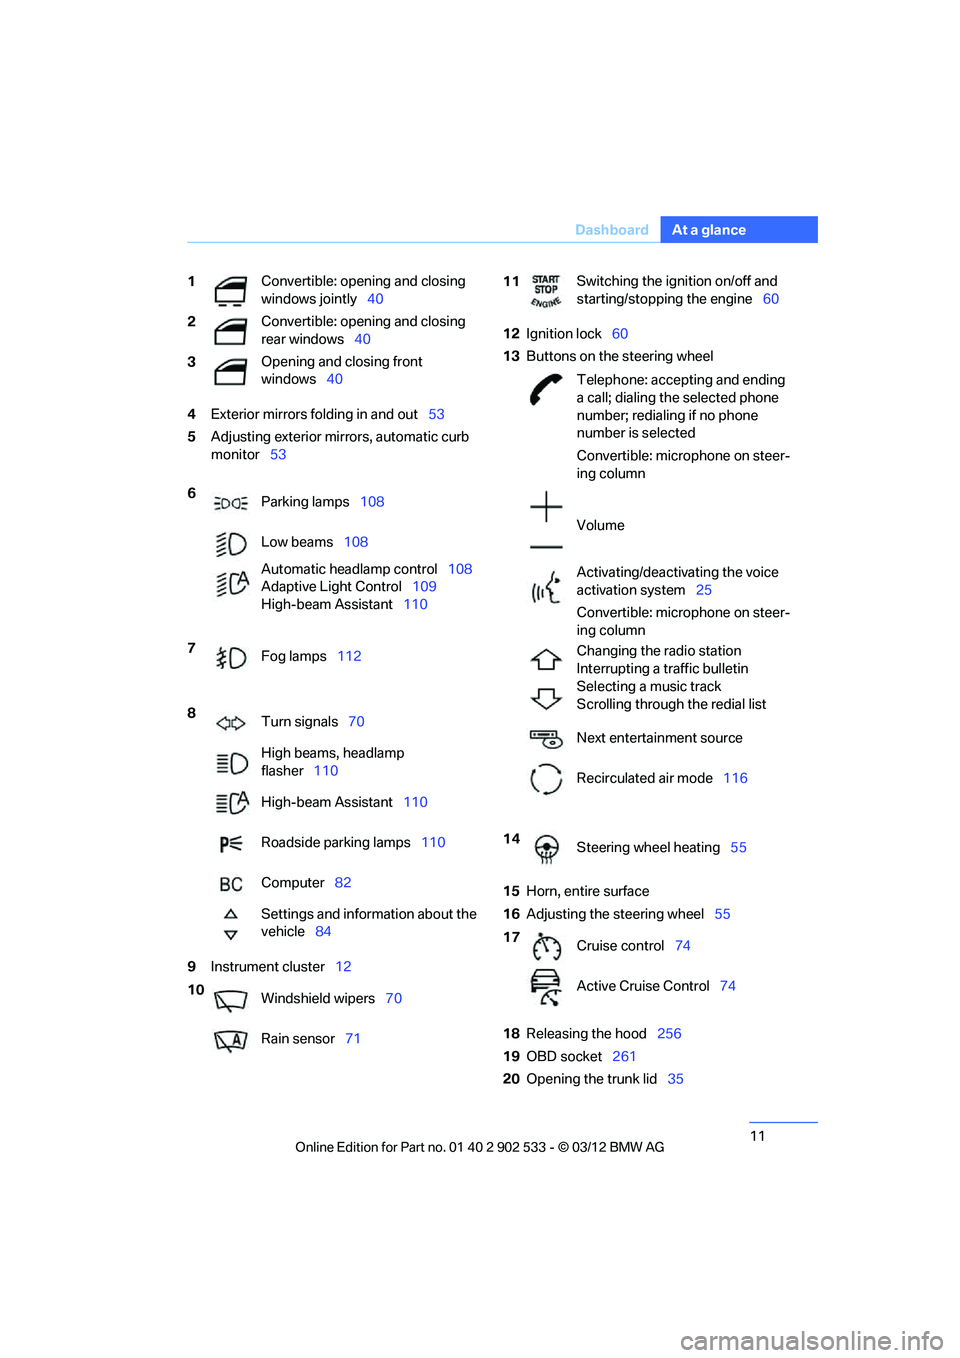
Exterior mirrors folding in and out 53
5 Adjusting exterior mirrors, automatic curb
monitor 53
9 Instrument cluster 12 12
Ignition lock 60
13 Buttons on the steering wheel
15 Horn, entire surface
16 Adjusting the steering wheel 55
18 Releasing the hood 256
19 OBD socket 261
20 Opening the trunk lid 35
1
Convertible: opening and closing
windows jointly
40
2 Convertible: opening and closing
rear windows
40
3 Opening and closing front
windows
40
6 Parking lamps 108
Low beams 108
Automatic headlamp control 108
Adaptive Light Control 109
High-beam Assistant 110
7 Fog lamps 112
8 Turn signals 70
High beams, headlamp
flasher 110
High-beam Assistant 110
Roadside parking lamps 110
Computer 82
Settings and information about the
vehicle 84
10 Windshield wipers 70
Rain sensor 71
11Switching the ignition on/off and
starting/stopping the engine
60
Telephone: accepting and ending
a call; dialing the selected phone
number; redialing if no phone
number is selected
Convertible: microphone on steer-
ing column
Volume
Activating/deactivating the voice
activation system 25
Convertible: microphone on steer-
ing column
Changing the radio station
Interrupting a traffic bulletin
Selecting a music track
Scrolling through the redial list
Next entertainment source
Recirculated air mode 116
14 Steering wheel heating 55
17 Cruise control 74
Active Cruise Control 74
00320051004F004C00510048000300280047004C0057004C005200510003
Page 27 of 308

26
At a glanceVoice activation system
For example, if the "Settings" menu is dis-
played, the commands relating to settings are
read aloud.
Performing functions using short
commands
Functions from the main menu can be per-
formed directly by means of short commands,
essentially regardless of which menu item is
selected, e.g. {Vehicle status }.
List of short command of the voice activation
system, refer to page 285.
Help dialog for voice activation system
Accessing help:
Other commands for the help dialog:
>{Help with examples }: information about
the current control options and the most
important commands relating to them are
read aloud.
> {Help with voice activation }: information
about the principle operation of the voice
activation system is read aloud.
Example: playing back a CD
1. If necessary, switch on entertainment audio
output.
2. Press the button on the steering wheel.
Setting the voice dialog
You can set whether the system uses the stan-
dard dialog or a short version.
In the short version of the voice dialog, the
responses from the system are given in abbre-
viated form. On the Control Display:
1.
"Settings"
2. "Language/Units"
3. "Speech mode:"
4. Select a setting.
Adjusting volume
Turn the volume knob during the spoken
instruction to select the desired volume.
>The volume remains the same, even if the
volume of other audio sources is changed.
> The volume is stored for the remote control
currently in use.
Notes on Emergency
Requests
Do not use the voice activation system to ini-
tiate an Emergency Request. In stressful situa-
tions, the voice and vocal pitch can change.
This can unnecessarily delay the establishment
of a telephone connection.
Instead, use the SOS button, refer to page 272,
in the vicinity of the interior rearview mirror.
Ambient conditions
> Say the commands, numbers and letters
smoothly and with normal volume, empha-
sis and speed.
> Always speak the commands in the lan-
guage of the voice activation system.
{
Help }
3. {C D and multimedia }
The system plays the last media played.
4. {C D track … } e.g. CD track 4.
00320051004F004C00510048000300280047004C0057004C005200510003
Page 38 of 308
37
Opening and closing
Controls
>
When there has been an interruption of
power supply from the battery
The alarm system signals unauthorized entry
attempts for a short time by means of:
> An acoustic alarm
> Switching on the hazard warning flashers
> Flashing the high beams
Arming and disarming
General information
When you lock or unlock the vehicle, either with
the remote control or at the door lock, the alarm
system is armed or disarmed at the same time.
Door lock with armed alarm system
In some national-market versions, unlocking via
the door lock triggers the alarm.
To switch off this alarm, unlock the vehicle with
the remote control or switch on the ignition.
Trunk lid with the alarm system armed
The trunk lid can be opened via the remote con-
trol even when the alarm system is armed.
Press the button on the remote control for
approx. 1 second.
The trunk lid is locked and monitored again as
soon as it is closed.
Panic mode
You can trigger the alarm system if you find
yourself in a dangerous situation:
Press the button for at least three seconds.
To switch off the alarm: press any button.
Switching off an alarm
>Unlock the car with the remote control, refer
to page 32.
> Insert the remote control all the way into the
ignition lock.
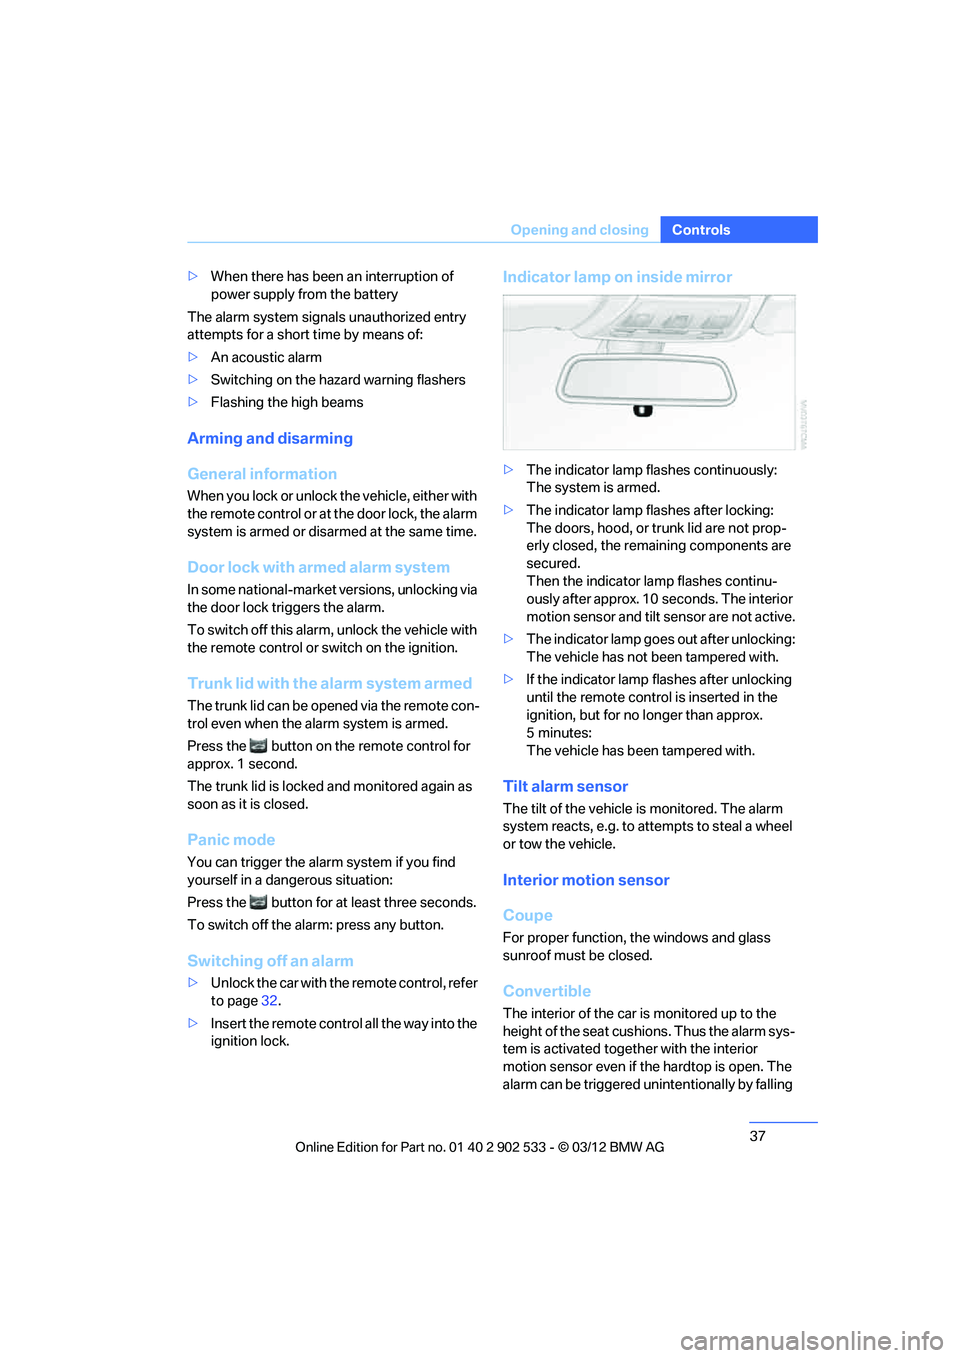
Indicator lamp on inside mirror
>The indicator lamp flashes continuously:
The system is armed.
> The indicator lamp flashes after locking:
The doors, hood, or trunk lid are not prop-
erly closed, the remaining components are
secured.
Then the indicator lamp flashes continu-
ously after approx. 10 seconds. The interior
motion sensor and tilt sensor are not active.
> The indicator lamp goes out after unlocking:
The vehicle has not been tampered with.
> If the indicator lamp flashes after unlocking
until the remote control is inserted in the
ignition, but for no longer than approx.
5minutes:
The vehicle has been tampered with.
Tilt alarm sensor
The tilt of the vehicle is monitored. The alarm
system reacts, e.g. to attempts to steal a wheel
or tow the vehicle.
Interior motion sensor
Coupe
For proper function, the windows and glass
sunroof must be closed.
Convertible
The interior of the car is monitored up to the
height of the seat cushions. Thus the alarm sys-
tem is activated together with the interior
motion sensor even if the hardtop is open. The
alarm can be triggered unintentionally by falling
00320051004F004C00510048000300280047004C0057004C005200510003
Page 53 of 308
52
ControlsAdjustments
Seat and mirror memory
You can store and call up two different combi-
nations of driver's seat and exterior mirror posi-
tions.
Settings for the backrest width and lumbar sup-
port are not stored in memory.
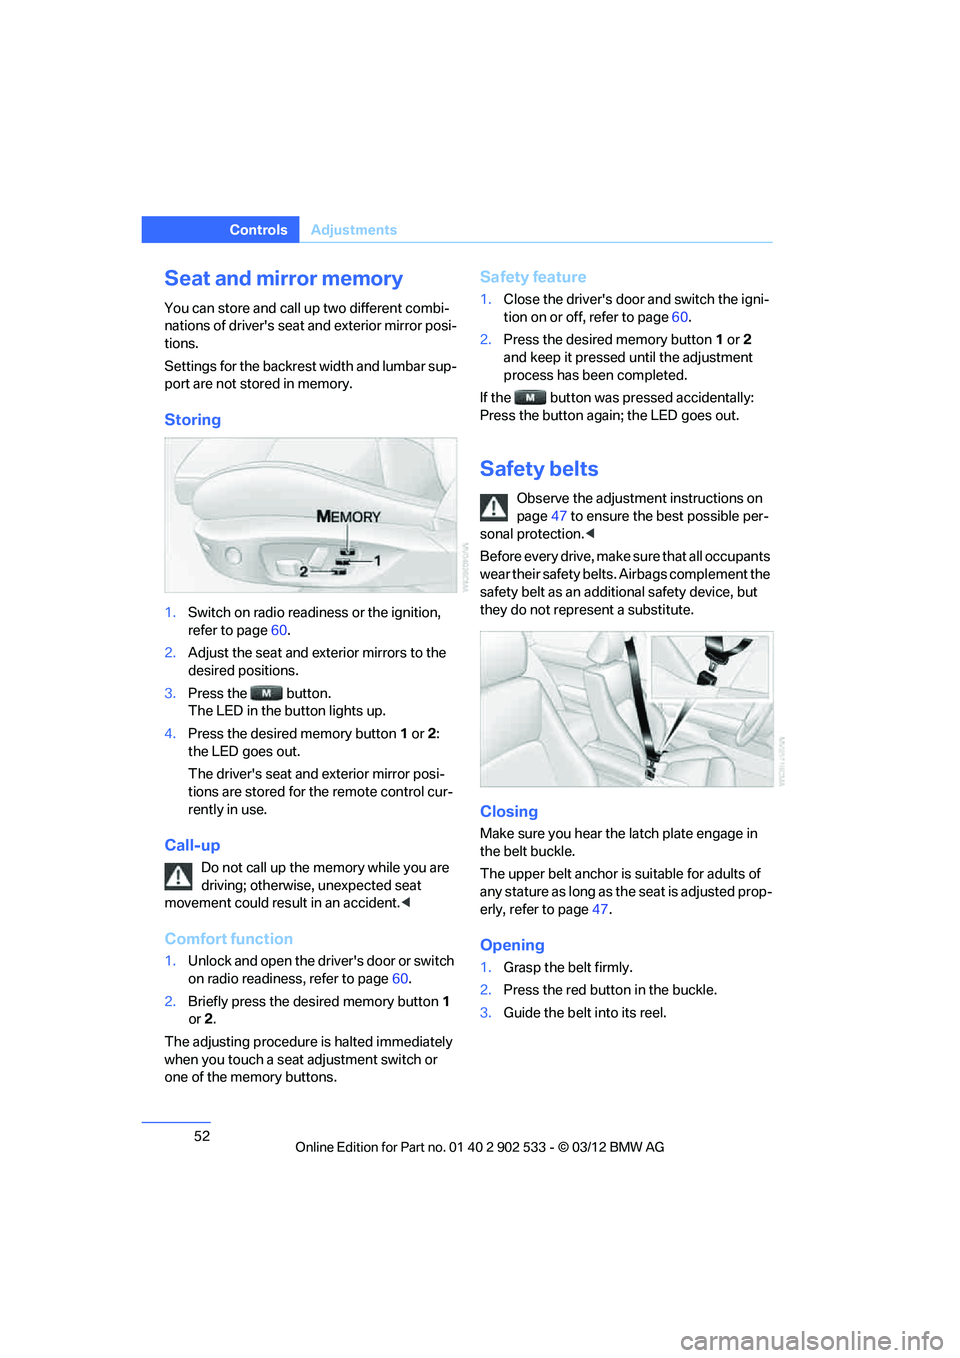
Storing
1.Switch on radio readiness or the ignition,
refer to page 60.
2. Adjust the seat and exterior mirrors to the
desired positions.
3. Press the button.
The LED in the button lights up.
4. Press the desired memory button 1 or 2:
the LED goes out.
The driver's seat and exterior mirror posi-
tions are stored for the remote control cur-
rently in use.
Call-up
Do not call up the memory while you are
driving; otherwise, unexpected seat
movement could result in an accident. <
Comfort function
1.Unlock and open the driver's door or switch
on radio readiness, refer to page 60.
2. Briefly press the desired memory button 1
or 2.
The adjusting procedure is halted immediately
when you touch a seat adjustment switch or
one of the memory buttons.
Safety feature
1. Close the driver's door and switch the igni-
tion on or off, refer to page 60.
2. Press the desired memory button 1 or 2
and keep it pressed until the adjustment
process has been completed.
If the button was pressed accidentally:
Press the button again; the LED goes out.
Safety belts
Observe the adjustment instructions on
page 47 to ensure the best possible per-
sonal protection. <
Before every drive, make sure that all occupants
wear their safety belts. Airbags complement the
safety belt as an additional safety device, but
they do not represent a substitute.
Closing
Make sure you hear the latch plate engage in
the belt buckle.
The upper belt anchor is suitable for adults of
any stature as long as the seat is adjusted prop-
erly, refer to page 47.
Opening
1. Grasp the belt firmly.
2. Press the red button in the buckle.
3. Guide the belt into its reel.
00320051004F004C00510048000300280047004C0057004C005200510003
Page 54 of 308
53
Adjustments
Controls
"Fasten safety belts" reminder for
driver's and front passenger seat
The indicator lamps light up and an
acoustic signal sounds. In addition, a
message appears on the Control Dis-
play. Check whether the safety belt
has been fastened correctly.
The 'Fasten safety belts' reminder is issued as
long as the driver's safety belt has not been fas-
tened. The "Fasten safety belts" reminder is
also activated at road speeds above approx.
5 mph or 8 km/h if the front passenger safety
belt is not fastened, if objects are placed on the
front passenger seat, or if driver or front pas-
senger unfasten their safety belts.
Damage to safety belts
If the safety belts are damaged or
stressed in an accident: have the belt sys-
tem, including any belt tensioners or child
restraint systems, replaced and the belt
anchors checked. Have this work carried out
only at your BMW center. Otherwise correct
operation of this safety equipment is not guar-
anteed. <
Coupe: belt hand-over
The concept
The belt hand-over makes it easier for you to
fasten your safety belt. When you close the
door and switch on radio readiness or the igni-
tion, the belt hand-over extends automatically
and presents the in a position that is convenient
for fastening it around you. After you have fas-
tened your safety belt, the belt hand-over
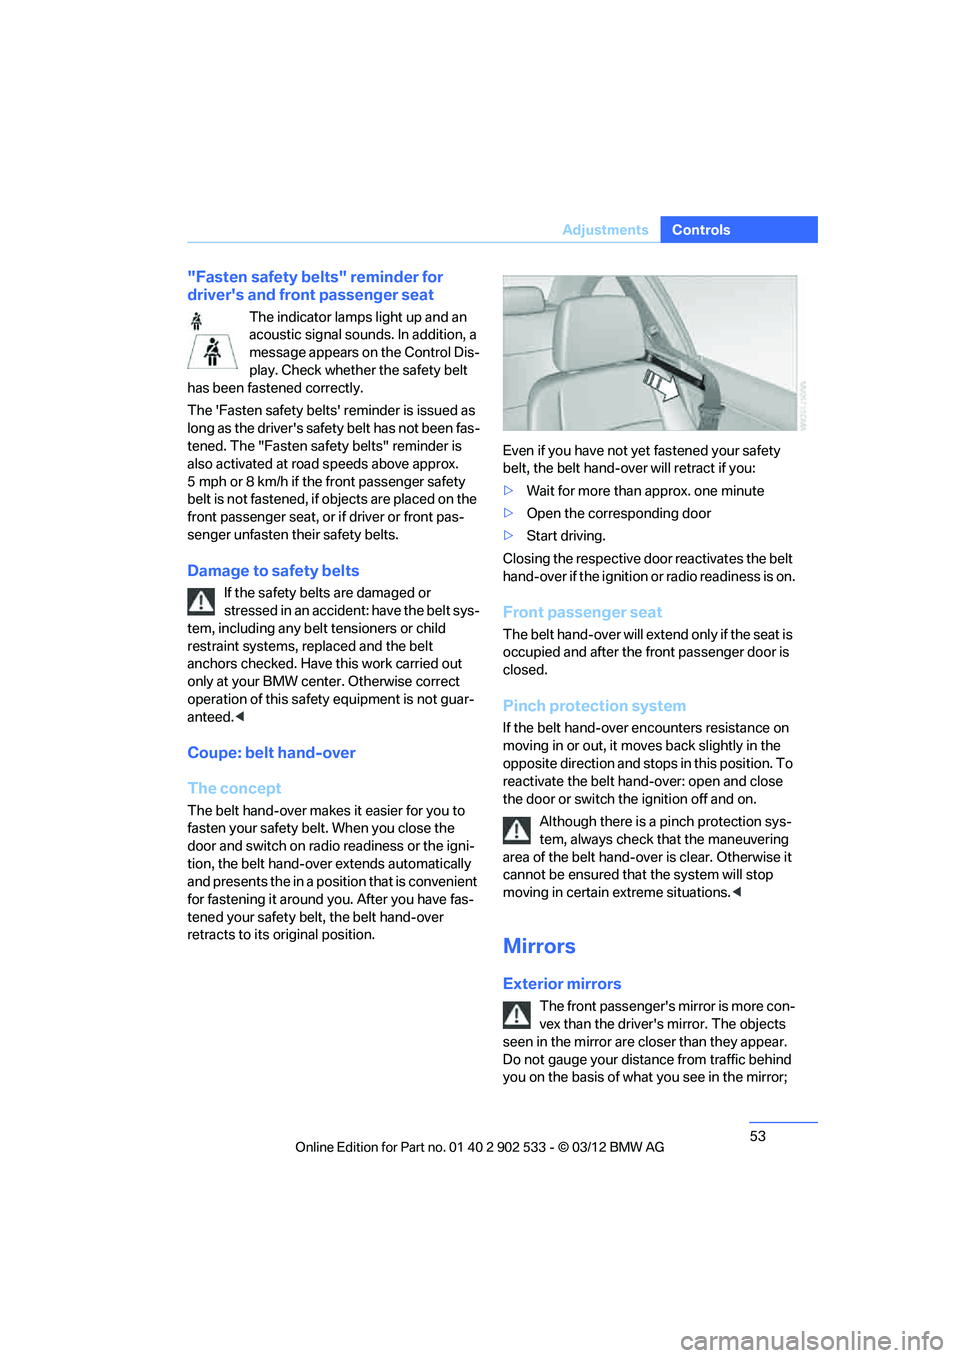
retracts to its original position. Even if you have not yet fastened your safety
belt, the belt hand-over will retract if you:
>
Wait for more than approx. one minute
> Open the corresponding door
> Start driving.
Closing the respective door reactivates the belt
hand-over if the ignition or radio readiness is on.
Front passenger seat
The belt hand-over will extend only if the seat is
occupied and after the front passenger door is
closed.
Pinch protection system
If the belt hand-over encounters resistance on
moving in or out, it moves back slightly in the
opposite direction and stops in this position. To
reactivate the belt hand-over: open and close
the door or switch the ignition off and on. Although there is a pinch protection sys-
tem, always check that the maneuvering
area of the belt hand-over is clear. Otherwise it
cannot be ensured that the system will stop
moving in certain extreme situations. <
Mirrors
Exterior mirrors
The front passenger's mirror is more con-
vex than the driver's mirror. The objects
seen in the mirror are closer than they appear.
Do not gauge your distance from traffic behind
you on the basis of what you see in the mirror;
00320051004F004C00510048000300280047004C0057004C005200510003
Page 55 of 308
54
ControlsAdjustments
otherwise, there is an increased risk of an acci-
dent.<
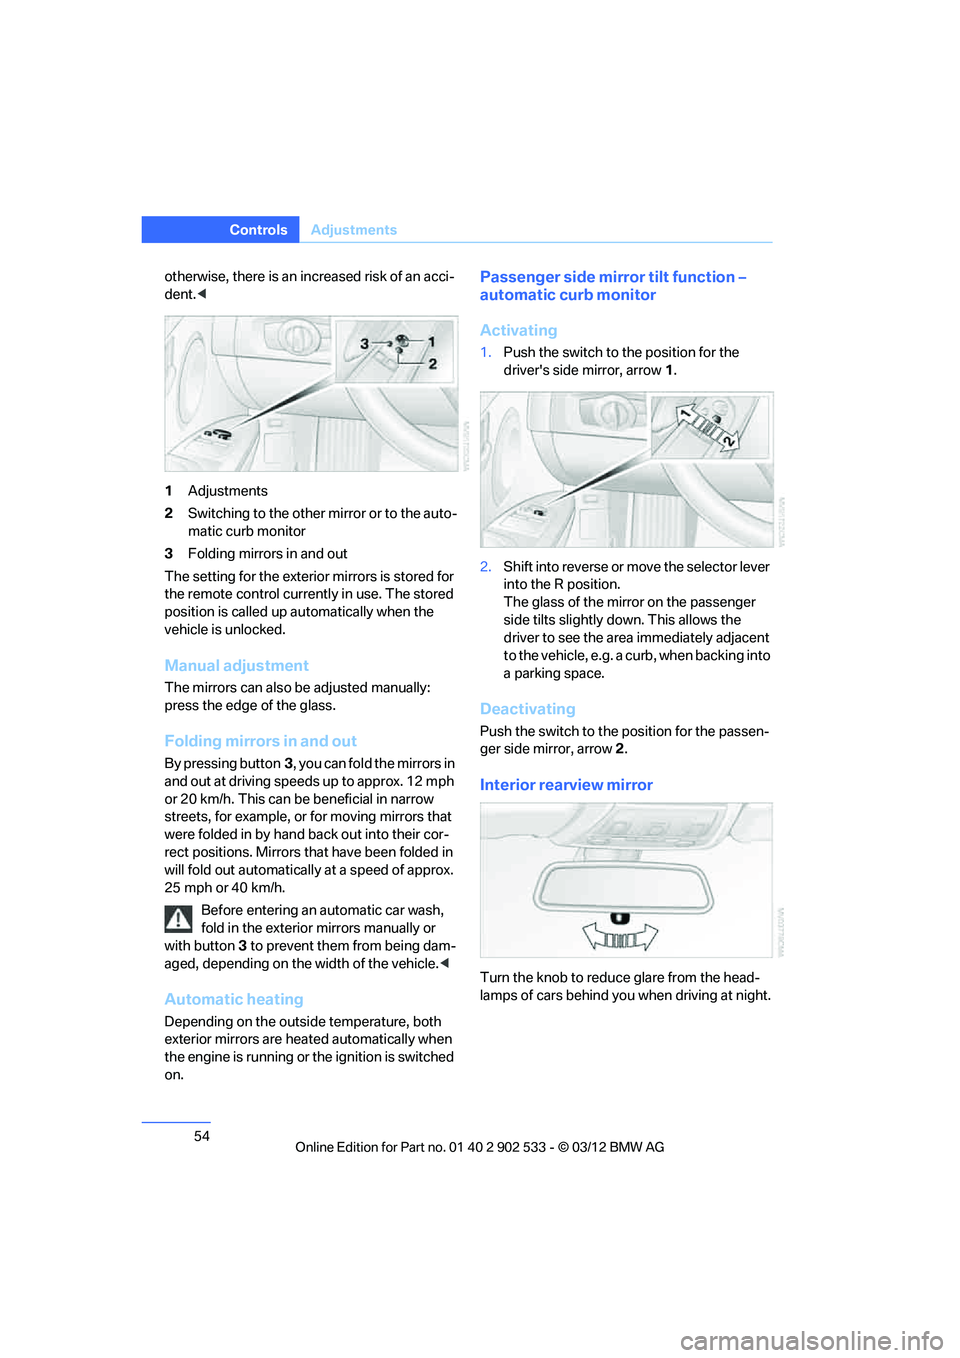
1 Adjustments
2 Switching to the other mirror or to the auto-
matic curb monitor
3 Folding mirrors in and out
The setting for the exterior mirrors is stored for
the remote control currently in use. The stored
position is called up automatically when the
vehicle is unlocked.
Manual adjustment
The mirrors can also be adjusted manually:
press the edge of the glass.
Folding mirrors in and out
By pressing button 3, you can fold the mirrors in
and out at driving speeds up to approx. 12 mph
or 20 km/h. This can be beneficial in narrow
streets, for example, or for moving mirrors that
were folded in by hand back out into their cor-
rect positions. Mirrors that have been folded in
will fold out automatically at a speed of approx.
25 mph or 40 km/h.
Before entering an automatic car wash,
fold in the exterior mirrors manually or
with button 3 to prevent them from being dam-
aged, depending on the width of the vehicle. <
Automatic heating
Depending on the outside temperature, both
exterior mirrors are heated automatically when
the engine is running or the ignition is switched
on.
Passenger side mirror tilt function –
automatic curb monitor
Activating
1. Push the switch to the position for the
driver's side mirror, arrow 1.
2. Shift into reverse or move the selector lever
into the R position.
The glass of the mirror on the passenger
side tilts slightly down. This allows the
driver to see the area immediately adjacent
to the vehicle, e.g. a curb, when backing into
a parking space.
Deactivating
Push the switch to the position for the passen-
ger side mirror, arrow 2.
Interior rearview mirror
Turn the knob to reduce glare from the head-
lamps of cars behind you when driving at night.
00320051004F004C00510048000300280047004C0057004C005200510003
Page 56 of 308
55
Adjustments
Controls
Interior and exterior mirrors,
automatic dimming feature
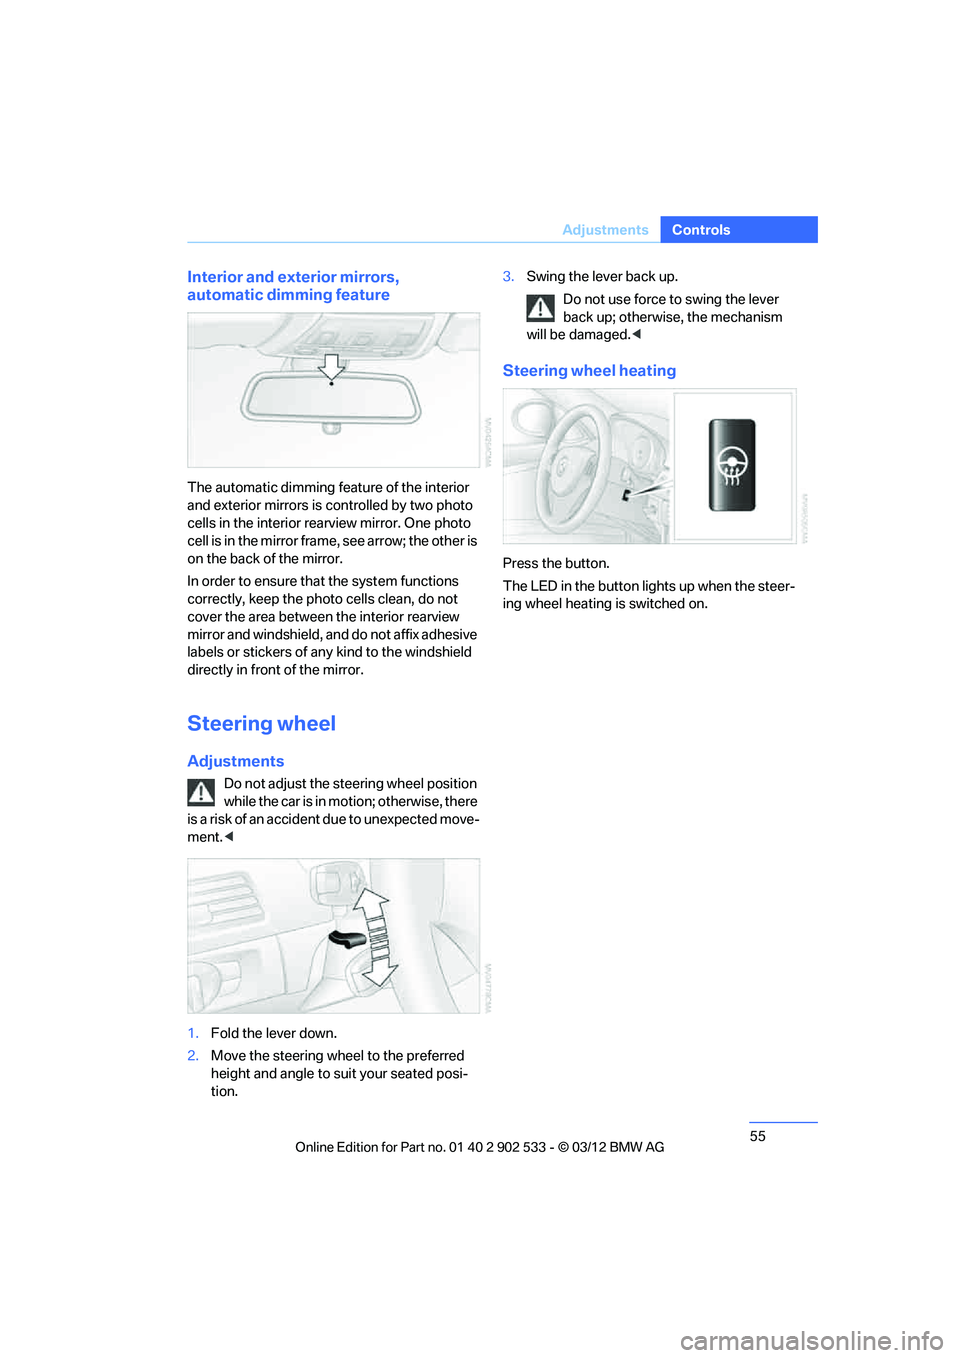
The automatic dimming feature of the interior
and exterior mirrors is controlled by two photo
cells in the interior rearview mirror. One photo
cell is in the mirror frame, see arrow; the other is
on the back of the mirror.
In order to ensure that the system functions
correctly, keep the photo cells clean, do not
cover the area between the interior rearview
mirror and windshield, and do not affix adhesive
labels or stickers of any kind to the windshield
directly in front of the mirror.
Steering wheel
Adjustments
Do not adjust the steering wheel position
while the car is in motion; otherwise, there
is a risk of an accident due to unexpected move-
ment. <
1. Fold the lever down.
2. Move the steering wheel to the preferred
height and angle to suit your seated posi-
tion. 3.
Swing the lever back up.
Do not use force to swing the lever
back up; otherwise, the mechanism
will be damaged. <
Steering wheel heating
Press the button.
The LED in the button lights up when the steer-
ing wheel heating is switched on.
00320051004F004C00510048000300280047004C0057004C005200510003
Page 72 of 308
71
Driving
Controls
Normal wiper speed
Press once.
The system switches to operation in the inter-
mittent mode when the vehicle is stationary.
Fast wiper speed
Press twice or press beyond the resistance
point.
The system switches to normal speed when the
vehicle is stationary.
Intermittent wipe or rain sensor
If the car is not equipped with a rain sensor, the
intermittent-wipe time is a preset.
If the car is equipped with a rain sensor, the time
between wipes is controlled automatically and
depends on the intensity of the rainfall. The rain
sensor is mounted on the windshield, directly in
front of the interior rearview mirror.
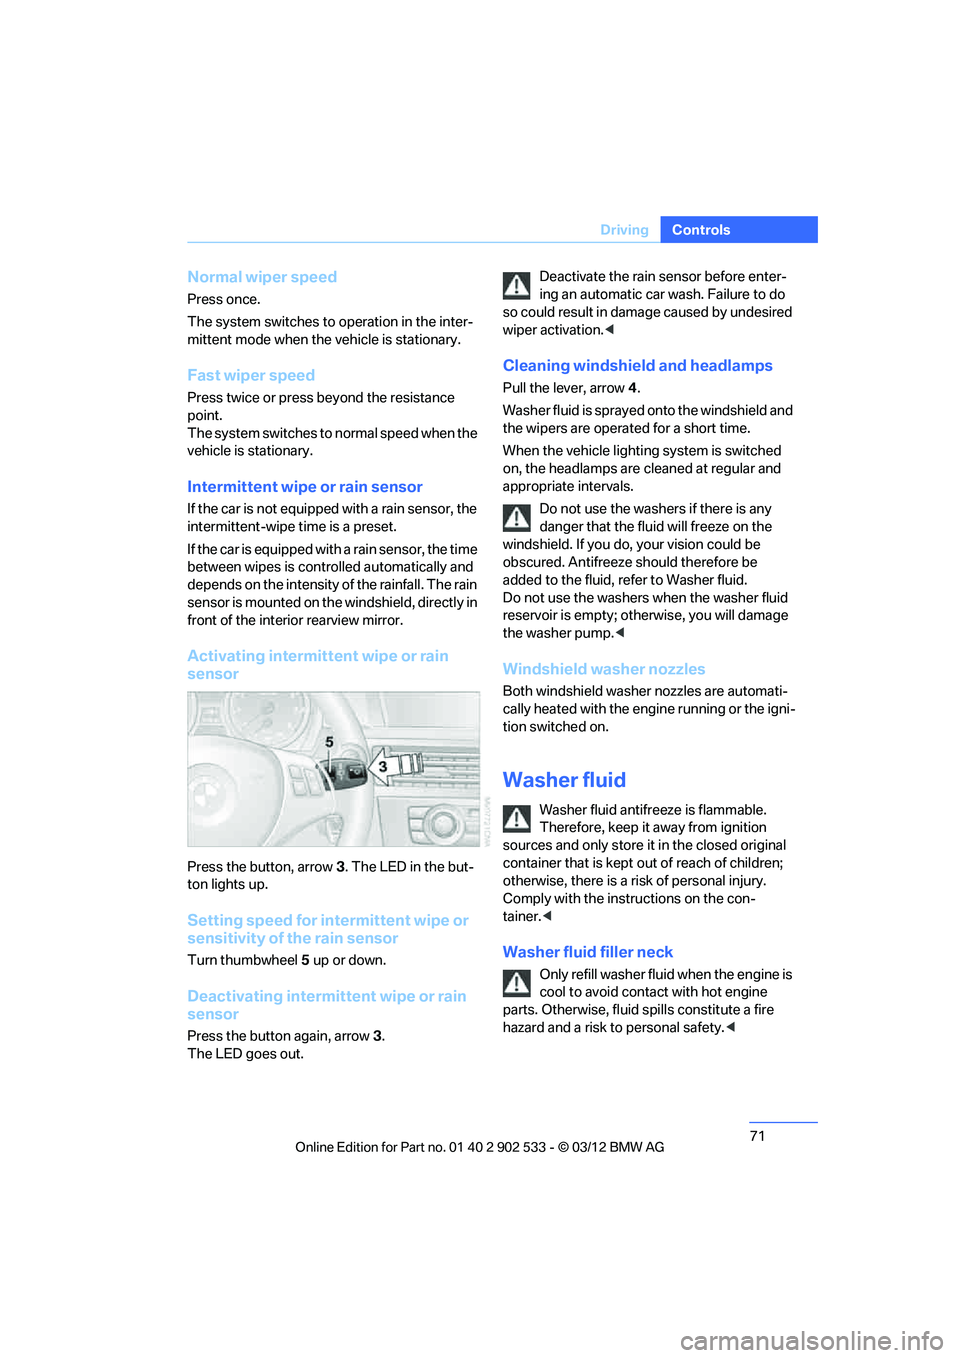
Activating intermittent wipe or rain
sensor
Press the button, arrow
3. The LED in the but-
ton lights up.
Setting speed for intermittent wipe or
sensitivity of the rain sensor
Turn thumbwheel 5 up or down.
Deactivating intermittent wipe or rain
sensor
Press the button again, arrow 3.
The LED goes out. Deactivate the rain sensor before enter-
ing an automatic car wash. Failure to do
so could result in damage caused by undesired
wiper activation. <
Cleaning windshield and headlamps
Pull the lever, arrow 4.
Washer fluid is sprayed onto the windshield and
the wipers are operated for a short time.
When the vehicle lighting system is switched
on, the headlamps are cleaned at regular and
appropriate intervals. Do not use the washers if there is any
danger that the fluid will freeze on the
windshield. If you do, your vision could be
obscured. Antifreeze should therefore be
added to the fluid, refer to Washer fluid.
Do not use the washers when the washer fluid
reservoir is empty; otherwise, you will damage
the washer pump. <
Windshield washer nozzles
Both windshield washer nozzles are automati-
cally heated with the engine running or the igni-
tion switched on.
Washer fluid
Washer fluid antifreeze is flammable.
Therefore, keep it away from ignition
sources and only store it in the closed original
container that is kept out of reach of children;
otherwise, there is a risk of personal injury.
Comply with the instructions on the con-
tainer.<
Washer fluid filler neck
Only refill washer fluid when the engine is
cool to avoid contact with hot engine
parts. Otherwise, fluid spills constitute a fire
hazard and a risk to personal safety. <
00320051004F004C00510048000300280047004C0057004C005200510003