2013 BMW 328I CONVERTIBLE seat memory
[x] Cancel search: seat memoryPage 16 of 308
15
Dashboard
At a glance
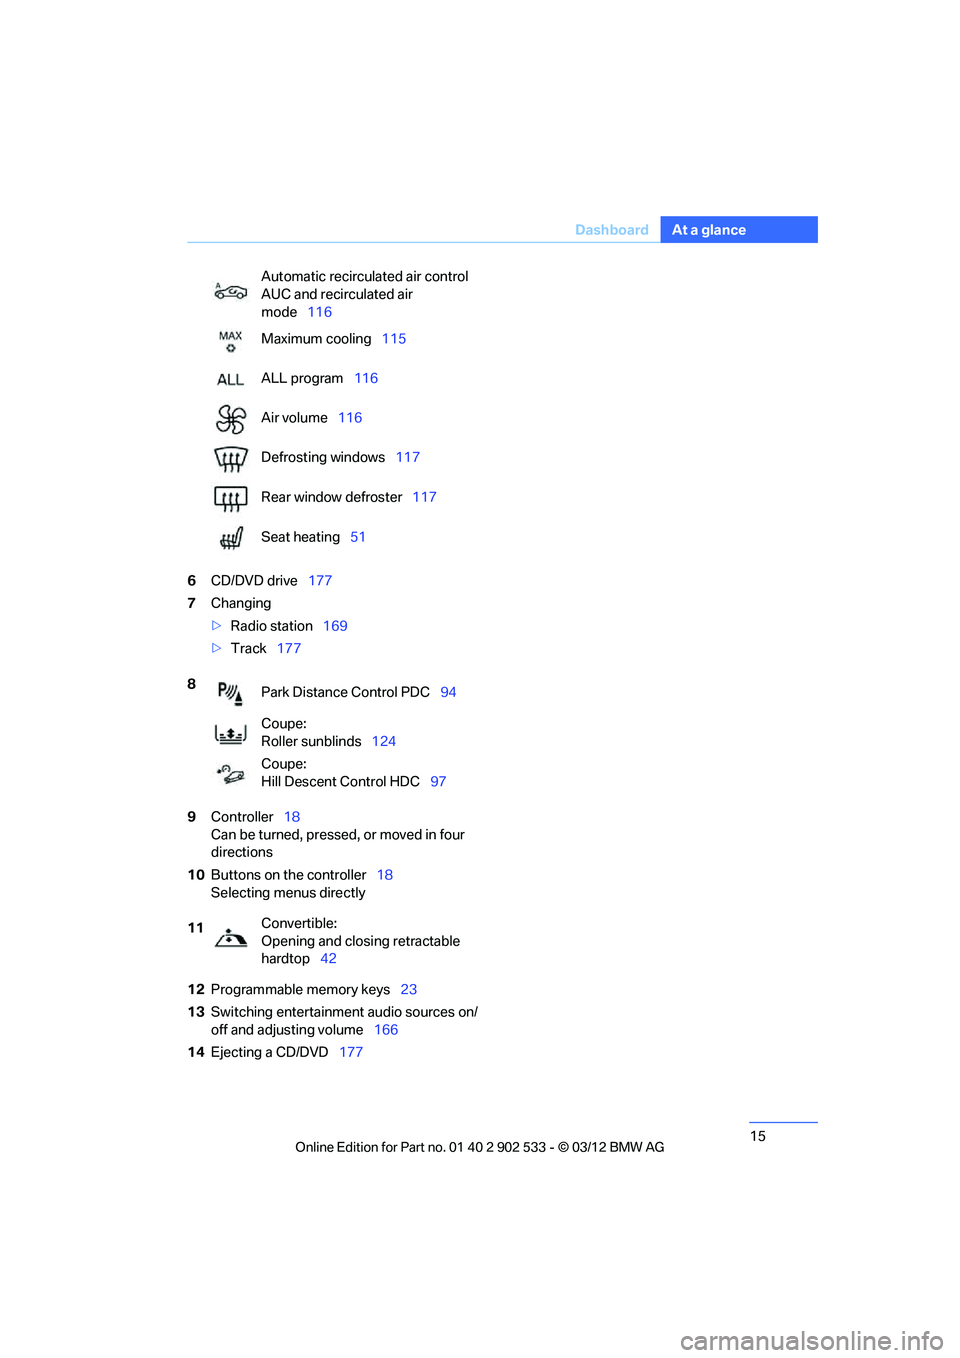
6
CD/DVD drive 177
7 Changing
>Radio station 169
> Track 177
9 Controller 18
Can be turned, pressed, or moved in four
directions
10 Buttons on the controller 18
Selecting menus directly
12 Programmable memory keys 23
13 Switching entertainment audio sources on/
off and adjusting volume 166
14 Ejecting a CD/DVD 177
Automatic recirculated air control
AUC and recirculated air
mode
116
Maximum cooling 115
ALL program 116
Air volume 116
Defrosting windows 117
Rear window defroster 117
Seat heating 51
8 Park Distance Control PDC 94
Coupe:
Roller sunblinds 124
Coupe:
Hill Descent Control HDC 97
11 Convertible:
Opening and closing retractable
hardtop
42
00320051004F004C00510048000300280047004C0057004C005200510003
Page 32 of 308
31
Opening and closing
Controls
for two remote controls if Comfort Access is in
use.
Personal Profile settings
For more information on specific settings, refer
to the specified pages.
>
Assignment of programmable memory
keys, refer to page 23
> Response of the central locking system
when the car is unlocked, refer to page 32
> Automatic locking of the vehicle, refer to
page 34
> Automatic call-up of the driver's seat posi-
tion, refer to page 52
> Triple turn signal activation, refer to
page 70
> Settings for the display on the Control Dis-
play and in the instrument cluster:
>12h/24h format of the clock, refer to
page 88
> Date format, refer to page 89
> Brightness of the Co ntrol Display, refer
to page 92
> Language on the Control Display, refer
to page 92
> Units of measure, refer to page 85
> Show visual warning for Park Distance Con-
trol PDC, refer to page 95
> Light settings:
>Welcome lamps, refer to page 109
> Pathway lighting, refer to page 109
> Daytime running lights, refer to
page 109
> High-beam Assistant, refer to page 110
> Automatic climate control: activating/deac-
tivating AUTO program, cooling function
and automatic recirculated air control, set-
ting temperature, air volume and distribu-
tion, refer to page 115 ff >
Entertainment:
>Setting tone controls, refer to page 167
> Speed-dependent volume control, refer
to page 168
Central locking system
The concept
The central locking system functions when the
driver's door is closed.
The system simultaneously engages and
releases the locks on the following:
>Doors
> Trunk lid
> Fuel filler flap
> Convertible: glove compartment
Operating from outside
>Via the remote control
> Using the door lock
> In cars with Comfort Access, via the handles
on the driver's door and the front passenger
door
At the same time as locking and unlocking via
the remote control:
> Welcome lights, the interior light, and the
courtesy lighting are switched on and off.
> Alarm system, refer to page 36, is armed or
disarmed.
Operating from inside
By means of the button for central locking, refer
to page 34.
In the event of a sufficiently severe accident, the
central locking system un locks automatically. In
addition, the hazard warning flashers and inte-
rior lamps come on.
00320051004F004C00510048000300280047004C0057004C005200510003
Page 34 of 308
33
Opening and closing
Controls
You can also use this function to locate your
vehicle in parking garages etc.
Unlocking the trunk lid
Press the button for about 1 second and
then release it.
The trunk lid opens a short distance, regardless
of whether it was locked or unlocked.
The trunk lid swings back and up when
opened. Ensure that there is sufficient
clearance. To avoid locking yourself out by
accident, do not place the remote control in the
trunk. A previously locked trunk lid is locked
again after closing.
Before and after each trip, check that the trunk
lid has not been inadvertently unlocked. <
Convertible: Convenient loading
When you are close to the vehicle, the remote
control for Comfort Access can be used to par-
tially raise the open hardtop for more conve-
nient loading of the trunk.
1.Briefly press the button and, within one
second, press again and hold until the
retractable hardtop stops in an intermediate
position. The trunk lid opens slightly.
2. Open the trunk lid, press the trunk partition
upward and stow the cargo in the trunk.
3. Press down the trunk partition until it
engages on both sides and close the trunk
lid.
4. Press the button for a longer period to
fold the retractable hardtop back in.
Confirmation signals
You can activate or deactivate the confirmation
signals.
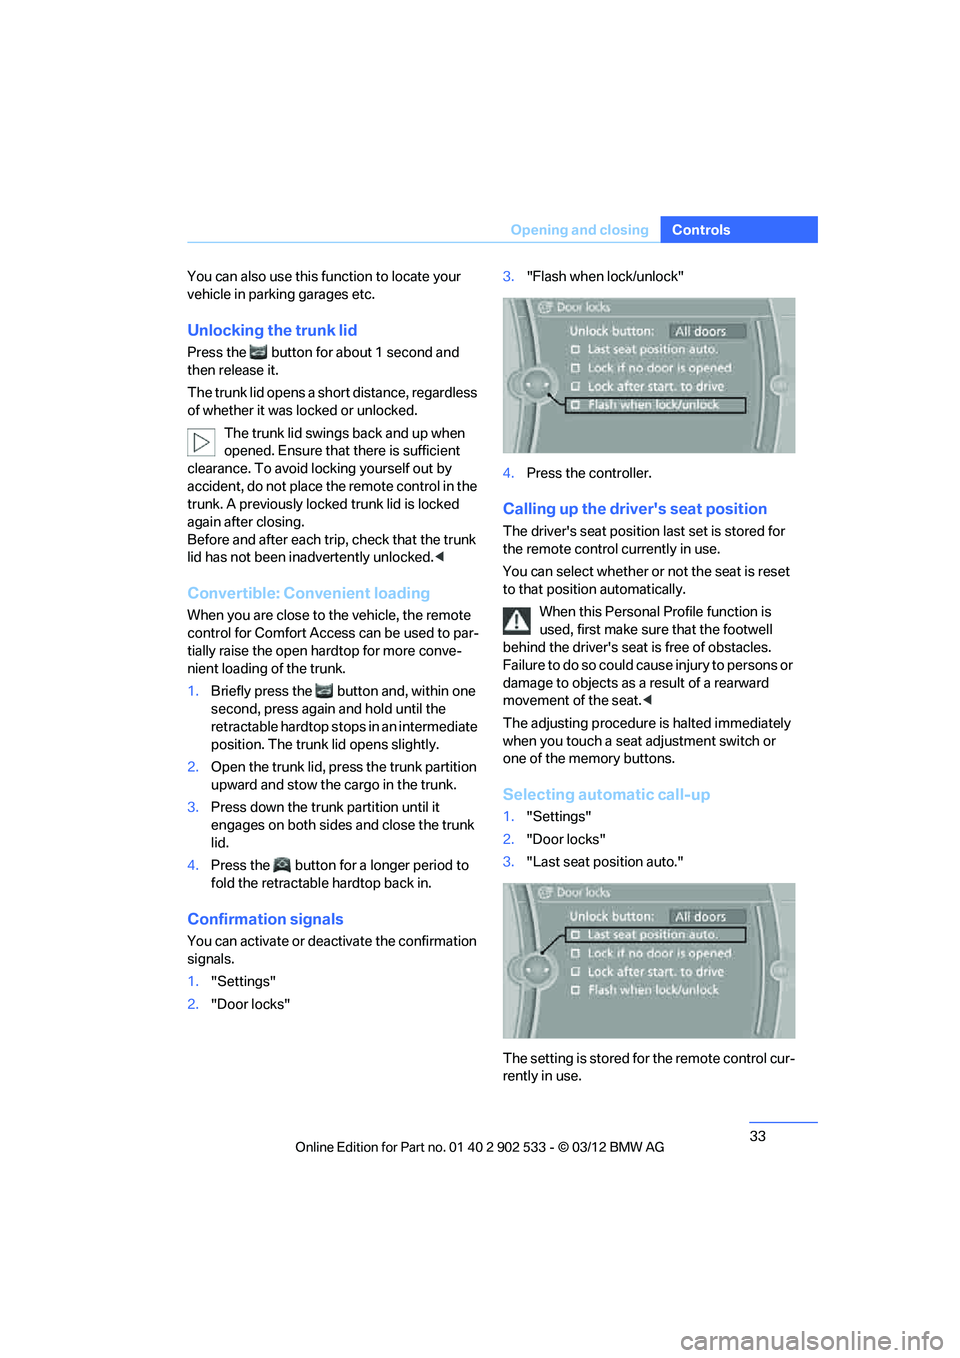
1."Settings"
2. "Door locks" 3.
"Flash when lock/unlock"
4. Press the controller.
Calling up the driver's seat position
The driver's seat position last set is stored for
the remote control currently in use.
You can select whether or not the seat is reset
to that position automatically.
When this Personal Profile function is
used, first make sure that the footwell
behind the driver's seat is free of obstacles.
Failure to do so could cause injury to persons or
damage to objects as a result of a rearward
movement of the seat. <
The adjusting procedure is halted immediately
when you touch a seat adjustment switch or
one of the memory buttons.
Selecting automatic call-up
1. "Settings"
2. "Door locks"
3. "Last seat position auto."
The setting is stored for the remote control cur-
rently in use.
00320051004F004C00510048000300280047004C0057004C005200510003
Page 51 of 308
50
ControlsAdjustments
Convertible: front seats
Height adjustment
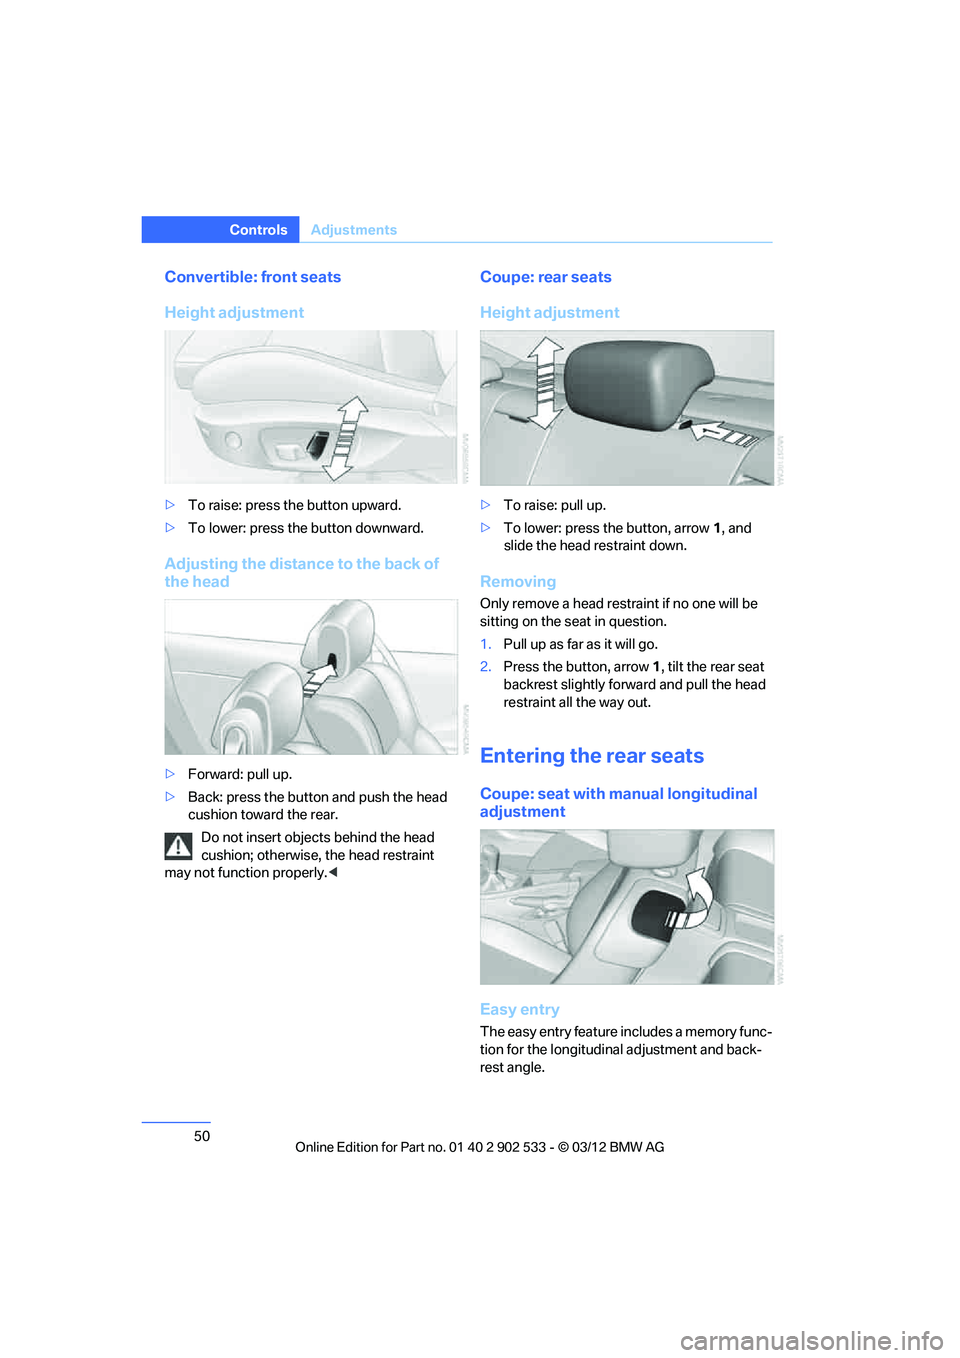
>To raise: press the button upward.
> To lower: press the button downward.
Adjusting the distance to the back of
the head
>Forward: pull up.
> Back: press the button and push the head
cushion toward the rear.
Do not insert objects behind the head
cushion; otherwise, the head restraint
may not function properly. <
Coupe: rear seats
Height adjustment
>To raise: pull up.
> To lower: press the button, arrow 1, and
slide the head restraint down.
Removing
Only remove a head restraint if no one will be
sitting on the seat in question.
1. Pull up as far as it will go.
2. Press the button, arrow 1 , tilt the rear seat
backrest slightly forward and pull the head
restraint all the way out.
Entering the rear seats
Coupe: seat with manual longitudinal
adjustment
Easy entry
The easy entry feature includes a memory func-
tion for the longitudinal adjustment and back-
rest angle.
00320051004F004C00510048000300280047004C0057004C005200510003
Page 52 of 308
51
Adjustments
Controls
1.
Pull the lever and swing the backrest for-
ward.
2. Push the seat forward.
Previous position
Push the seat backward and swing the backrest
back.
When pushing the seat into its rearmost
position, make sure that no one is injured
and that no objects are damaged.
Before driving off, engage both seats and back-
rests so that they are locked in place. Other-
wise, there is a risk of an accident due to unex-
pected movement. <
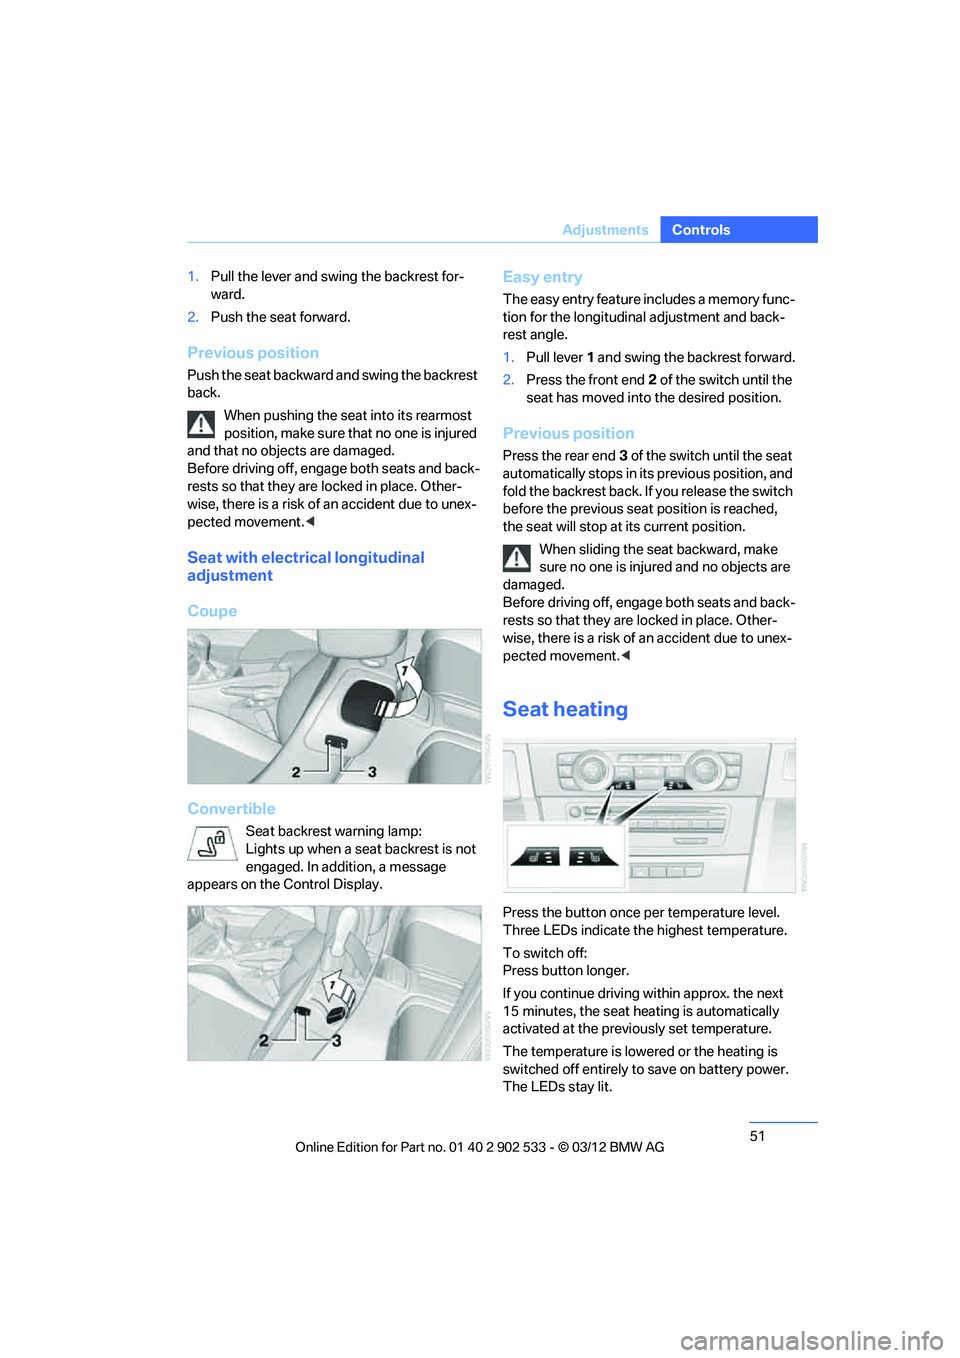
Seat with electrical longitudinal
adjustment
Coupe
Convertible
Seat backrest warning lamp:
Lights up when a seat backrest is not
engaged. In addition, a message
appears on the Control Display.
Easy entry
The easy entry feature includes a memory func-
tion for the longitudinal adjustment and back-
rest angle.
1. Pull lever 1 and swing the backrest forward.
2. Press the front end 2 of the switch until the
seat has moved into the desired position.
Previous position
Press the rear end 3 of the switch until the seat
automatically stops in its previous position, and
fold the backrest back. If you release the switch
before the previous seat position is reached,
the seat will stop at its current position.
When sliding the seat backward, make
sure no one is injured and no objects are
damaged.
Before driving off, engage both seats and back-
rests so that they are locked in place. Other-
wise, there is a risk of an accident due to unex-
pected movement. <
Seat heating
Press the button once per temperature level.
Three LEDs indicate the highest temperature.
To switch off:
Press button longer.
If you continue driving within approx. the next
15 minutes, the seat heating is automatically
activated at the previously set temperature.
The temperature is lowered or the heating is
switched off entirely to save on battery power.
The LEDs stay lit.
00320051004F004C00510048000300280047004C0057004C005200510003
Page 53 of 308
52
ControlsAdjustments
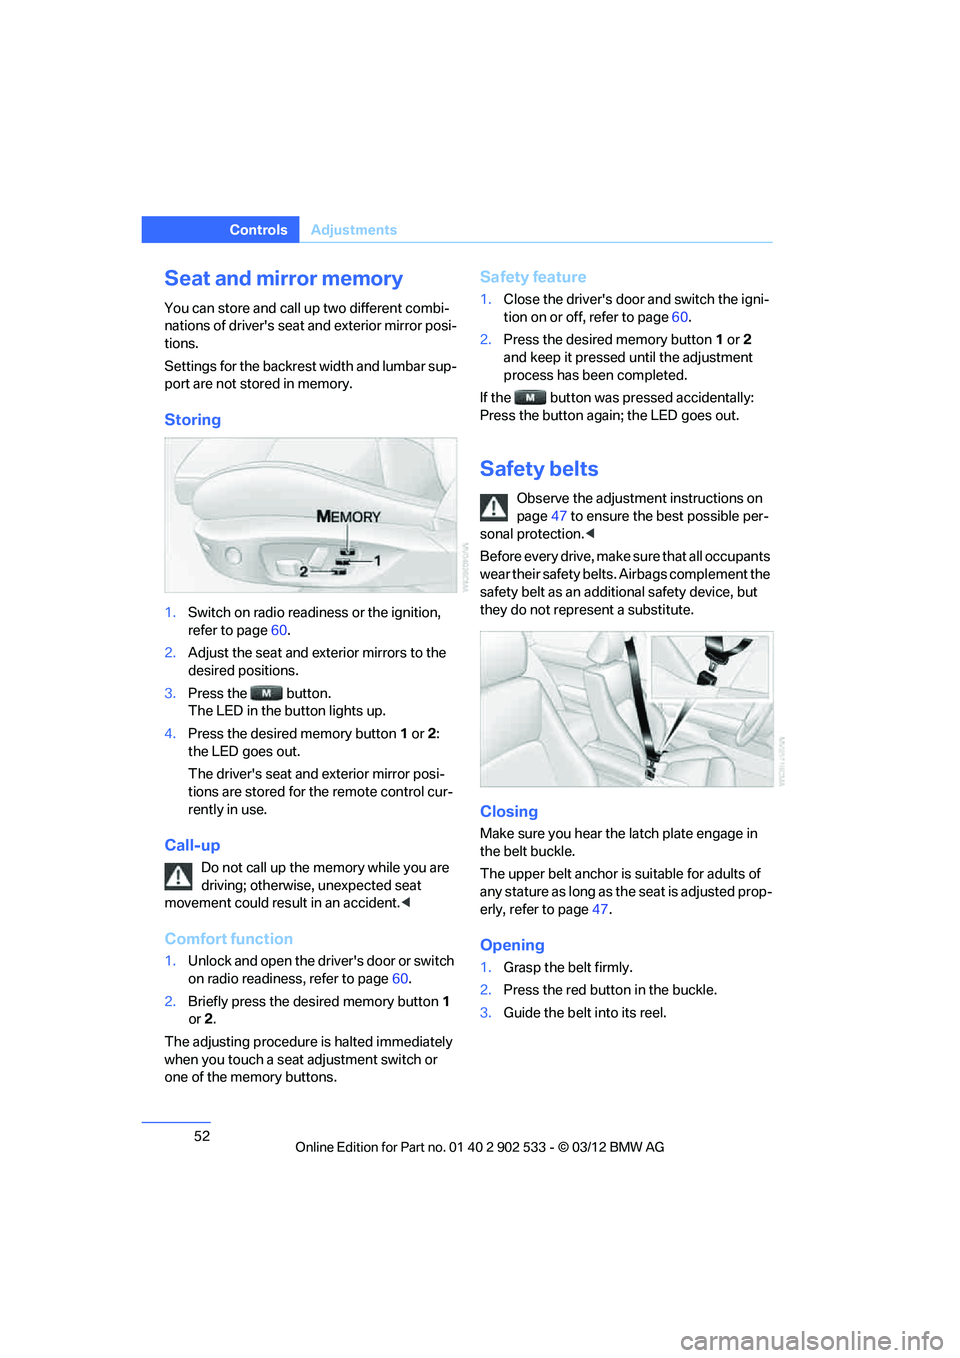
Seat and mirror memory
You can store and call up two different combi-
nations of driver's seat and exterior mirror posi-
tions.
Settings for the backrest width and lumbar sup-
port are not stored in memory.
Storing
1.Switch on radio readiness or the ignition,
refer to page 60.
2. Adjust the seat and exterior mirrors to the
desired positions.
3. Press the button.
The LED in the button lights up.
4. Press the desired memory button 1 or 2:
the LED goes out.
The driver's seat and exterior mirror posi-
tions are stored for the remote control cur-
rently in use.
Call-up
Do not call up the memory while you are
driving; otherwise, unexpected seat
movement could result in an accident. <
Comfort function
1.Unlock and open the driver's door or switch
on radio readiness, refer to page 60.
2. Briefly press the desired memory button 1
or 2.
The adjusting procedure is halted immediately
when you touch a seat adjustment switch or
one of the memory buttons.
Safety feature
1. Close the driver's door and switch the igni-
tion on or off, refer to page 60.
2. Press the desired memory button 1 or 2
and keep it pressed until the adjustment
process has been completed.
If the button was pressed accidentally:
Press the button again; the LED goes out.
Safety belts
Observe the adjustment instructions on
page 47 to ensure the best possible per-
sonal protection. <
Before every drive, make sure that all occupants
wear their safety belts. Airbags complement the
safety belt as an additional safety device, but
they do not represent a substitute.
Closing
Make sure you hear the latch plate engage in
the belt buckle.
The upper belt anchor is suitable for adults of
any stature as long as the seat is adjusted prop-
erly, refer to page 47.
Opening
1. Grasp the belt firmly.
2. Press the red button in the buckle.
3. Guide the belt into its reel.
00320051004F004C00510048000300280047004C0057004C005200510003
Page 271 of 308
270
MobilityReplacin g compon ents
event of a flat, no spare wheel is available. Your
BMW center will be glad to advise you. Refer
also to New wheels and tires, page 253.
The tools for changing wheels are avail-
able as optional accessories from your
BMW center. <
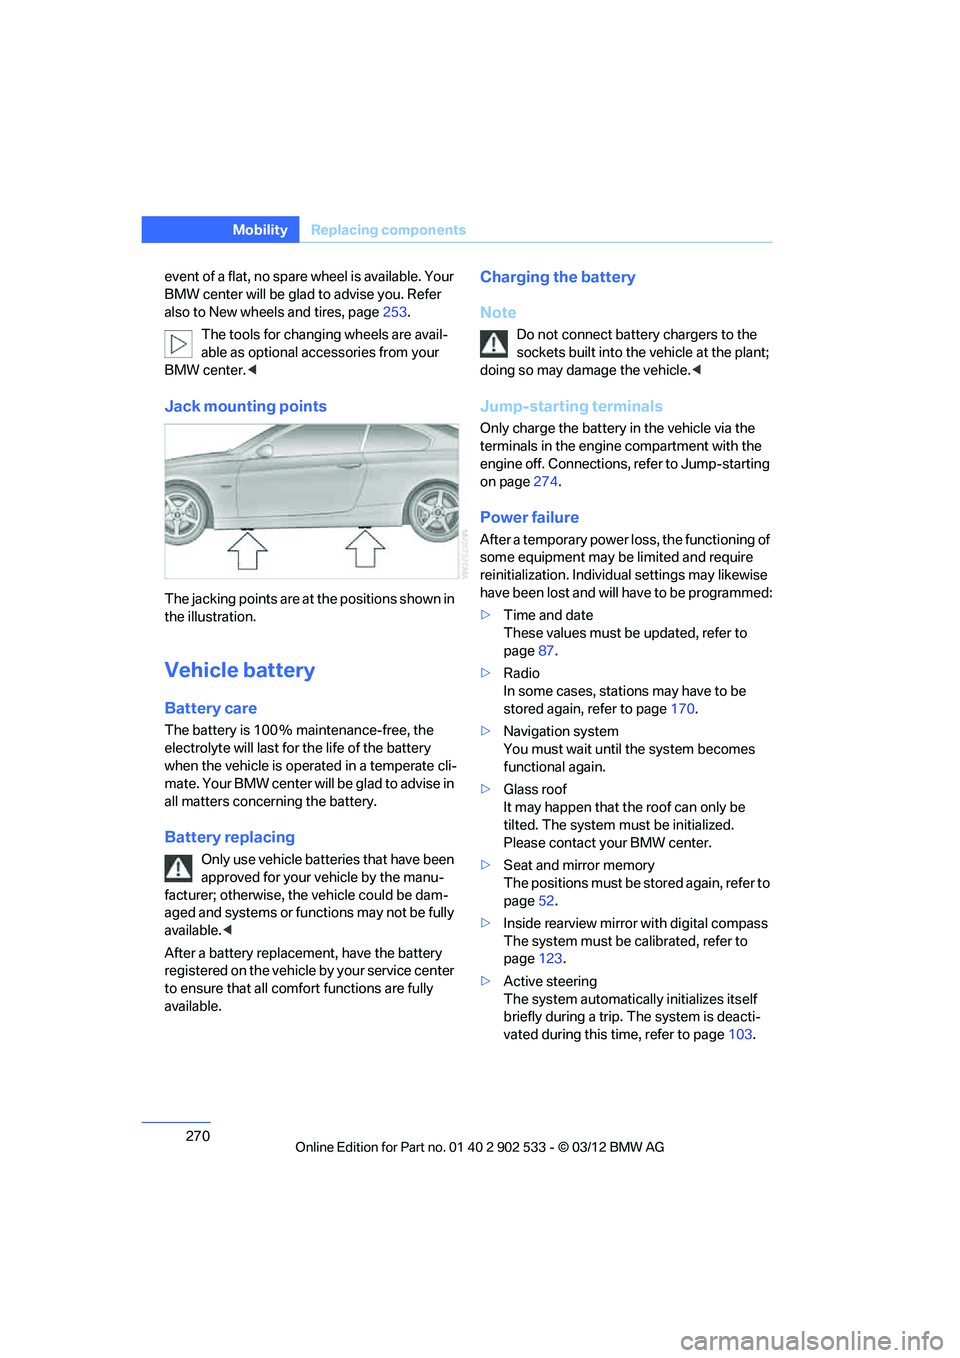
Jack mounting points
The jacking points are at the positions shown in
the illustration.
Vehicle battery
Battery care
The battery is 100 % maintenance-free, the
electrolyte will last for the life of the battery
when the vehicle is operated in a temperate cli-
mate. Your BMW center will be glad to advis e in
all matters concerning the battery.
Battery replacing
Only use vehicle batteries that have been
approved for your vehicle by the manu-
facturer; otherwise, the vehicle could be dam-
aged and systems or functions may not be fully
available. <
After a battery replacement, have the battery
registered on the vehicle by your service center
to ensure that all comf ort functions are fully
available.
Charging the battery
Note
Do not connect battery chargers to the
sockets built into the vehicle at the plant;
doing so may damage the vehicle. <
Jump-starting terminals
Only charge the battery in the vehicle via the
terminals in the engine compartment with the
engine off. Connections, refer to Jump-starting
on page274.
Power failure
After a temporary power loss, the functioning of
some equipment may be limited and require
reinitialization. Individual settings may likewise
have been lost and will have to be programmed:
>Time and date
These values must be updated, refer to
page 87.
> Radio
In some cases, stations may have to be
stored again, refer to page 170.
> Navigation system
You must wait until the system becomes
functional again.
> Glass roof
It may happen that the roof can only be
tilted. The system must be initialized.
Please contact your BMW center.
> Seat and mirror memory
The positions must be stored again, refer to
page 52.
> Inside rearview mirror with digital compass
The system must be calibrated, refer to
page 123.
> Active steering
The system automatically initializes itself
briefly during a trip. The system is deacti-
vated during this time, refer to page 103.
00320051004F004C00510048000300280047004C0057004C005200510003
Page 300 of 308
299
Everything from A to Z
Reference
Key Memory, refer to Personal
Profile 30
Keypad dialing 207
Kickdown 64
– automatic transmission with Steptronic 64
Knock control 233
L
Lamps
– automatic headlamp
control 108
– parking lamps/low beams 108
Lamps and bulbs, replacing
bulbs 266
Lap-and-shoulder belt, refer to Safety belts 52
Lashing eyes, refer to Securing cargo 140
Last destinations 149
LATCH child restraint fixing system 57
Launch Control 69
Leather care 264
LED Light-emitting diodes 267
Length, refer to Dimensions 281
License plate lamp, replacing
bulb 269
Light
– High-beam Assistant 110
Light-alloy wheels 264
Light-emitting diodes LED 267
Lighter 127
– connecting electrical appliances 127
Lighting
– instruments 112
– lamps and bulbs 266
– vehicle, refer to Lamps 108
Light switch 108
Limit, refer to Speed limit 91Load
140
Load securing equipment, refer to Securing cargo 140
Lock buttons, doors, refer to
Locking 35
Locking
– adjusting confirmation signal 33
– from inside 35
– from outside 32
– without remote control, refer to Comfort Access 38
Locking and unlocking doors
– confirmation signals 33
– from inside 34
– from outside 32
Low beam control, refer to High-beam Assistant 110
Low-beam headlamps 108
– automatic 108
Lower back support, refer to Lumbar support 48
Luggage rack, refer to Roof- mounted luggage rack 141
Lumbar support 48
M
M+S tires, refer to Winter
tires 254
Maintenance, refer to Service
and Warranty Information
Booklet for US models or in
the Warranty and Service
Guide Booklet for Canadian
models
Maintenance system 260
Malfunction
– automatic transmission with Steptronic 65
– tires 99
Malfunction warnings, refer to Check Control 89
Manual car wash 263
Manually unlocking parking lock 68 Manual mode, automatic
transmission with
Steptronic 64
Manual operation
– door lock 34
– driver's door 34
– fuel filler flap 232
– parking lock 68
– parking lock, automatic transmission 65
Manual transmission 63
Map for navigation
– changing scale 158
– entering destination 151
Map view 157
Master key, refer to Remote
control with integrated
key 30
Maximum cooling 115
Maximum speed
– with winter tires 254
Measurements, refer to
Dimensions 281
Memory, refer to Seat and mirror memory 52
MENU button 18
Menus, refer to iDrive 18
Messages 216
Messages from the Concierge service 217
Microfilter
– BMW Maintenance
System 260
– for automatic climate
control 118
Microfilter/activated-charcoal filter
– BMW Maintenance System 260
Microphone
– telephone 14
– voice commands 14
Mirror dimming feature 55
00320051004F004C00510048000300280047004C0057004C005200510003