2013 BMW 135IS CONVERTIBLE ignition
[x] Cancel search: ignitionPage 43 of 284
42
ControlsOpening and closing
3.Insert the new battery with the plus side
facing up.
4. Press the cover on to close.
Dispose of the old battery at a recycling
center or at your BMW center. <
Windows
To prevent injuries, watch the windows
while closing them.
Take the remote contro l out of the ignition
when you leave the car; otherwise, children
could operate the electric windows and possi-
bly injure themselves. <
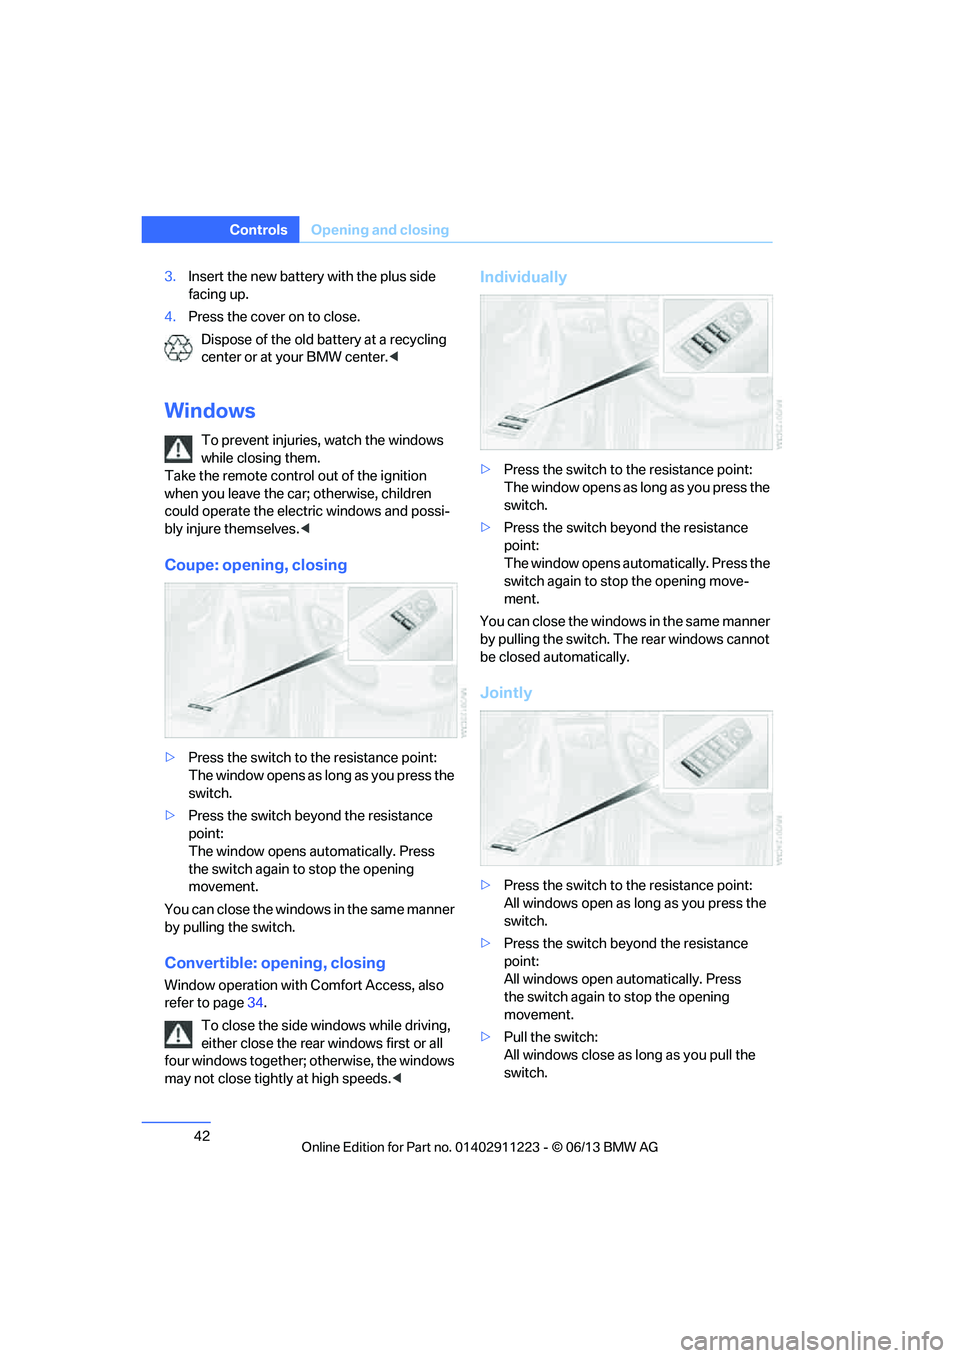
Coupe: opening, closing
>Press the switch to the resistance point:
The window opens as long as you press the
switch.
> Press the switch beyond the resistance
point:
The window opens automatically. Press
the switch again to stop the opening
movement.
You can close the windows in the same manner
by pulling the switch.
Convertible: opening, closing
Window operation with Comfort Access, also
refer to page 34.
To close the side windows while driving,
either close the rear windows first or all
four windows together; otherwise, the windows
may not close tightly at high speeds. <
Individually
>Press the switch to the resistance point:
The window opens as long as you press the
switch.
> Press the switch beyond the resistance
point:
The window opens automatically. Press the
switch again to stop the opening move-
ment.
You can close the windows in the same manner
by pulling the switch. Th e rear windows cannot
be closed automatically.
Jointly
> Press the switch to the resistance point:
All windows open as lo ng as you press the
switch.
> Press the switch beyond the resistance
point:
All windows open automatically. Press
the switch again to stop the opening
movement.
> Pull the switch:
All windows close as long as you pull the
switch.
00320051004F004C00510048000300280047004C0057004C005200510003
Page 44 of 284
43
Opening and closing
Controls
After switching off the ignition
When the remote control
is removed or the igni-
tion is switched off, you can still operate the
windows for approx. 1 minute as long as no
door has been opened.
Convenient opening and closing
For Convenient opening and closing using the
remote control, refer to page 34. For Conve-
nient closing using Comfort Access, refer to
Locking on page 40.
Pinch protection system
If the closing force exceeds a specific value as a
power window closes, the closing action is
interrupted and the window reopens slightly.
Despite the pinch protection system
check and clear the window's travel path
prior to closing it; otherwise, the safety system
might fail to detect certain kinds of obstruc-
tions, such as thin objects, and the window
would continue closing.
Do not install any accessories that might inter-
fere with window movement. Otherwise, the
pinch protection system could be impaired.
Convertible: the rear windows are not equipped
with pinch protection. Therefore, watch them
closely when closing to avoid personal injury. <
Closing without pinch protection
If there is an external danger, or if ice on the
windows, etc., prevents you from closing the
windows normally, proceed as follows:
1.Pull the switch past the resistance point and
hold it there. Pinch protection is limited and
the window reopens slightly if the closing
force exceeds a certain value.
2. Pull the switch again past the resistance
point within approx. 4 seconds and hold it
there. The window closes without pinch
protection.
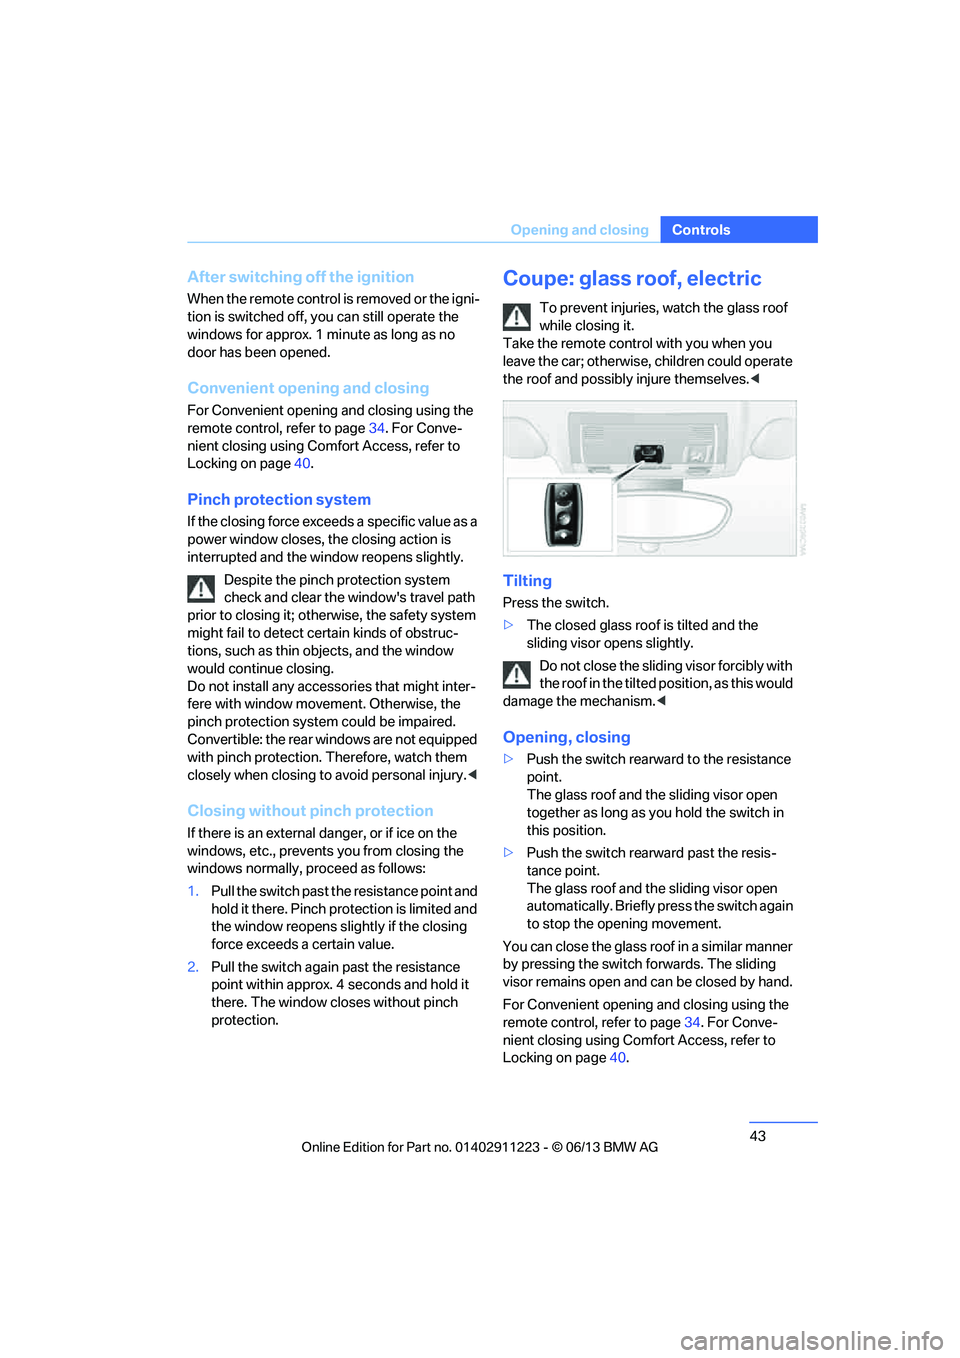
Coupe: glass roof, electric
To prevent injuries, watch the glass roof
while closing it.
Take the remote contro l with you when you
leave the car; otherwise, children could operate
the roof and possibly injure themselves. <
Tilting
Press the switch.
>The closed glass roof is tilted and the
sliding visor opens slightly.
Do not close the sliding visor forcibly with
the roof in the tilted position, as this would
damage the mechanism. <
Opening, closing
>Push the switch rearward to the resistance
point.
The glass roof and the sliding visor open
together as long as you hold the switch in
this position.
> Push the switch rearward past the resis-
tance point.
The glass roof and the sliding visor open
automatically. Briefly press the switch again
to stop the opening movement.
You can close the glass roof in a similar manner
by pressing the switch forwards. The sliding
visor remains open and can be closed by hand.
For Convenient opening and closing using the
remote control, refer to page 34. For Conve-
nient closing using Comfort Access, refer to
Locking on page 40.
00320051004F004C00510048000300280047004C0057004C005200510003
Page 45 of 284
44
ControlsOpening and closing
After switching off the ignition
When the remote control is removed or the igni-
tion is switched off, you can still operate the roof
for approx. 1 minute as long as no door has
been opened.
Pinch protection system
If the glass roof encounters an obstruction dur-
ing closing from approximately the middle of
the opening in the roof, or during closing from
the tilted position, the closing movement is
interrupted and the glass roof is opened again
slightly.
Despite the pinch protection system
check and clear the roof's travel path prior
to closing it; otherwise, the safety system might
fail to detect certain kinds of obstructions, such
as very thin objects, and the roof would con-
tinue closing. <
Closing without pinch protection
If there is an external danger, press the switch
forward past the resistan ce point and hold it
there. The roof closes without pinch protection.
Following interruptions in electrical
power supply
After a power failure, there is a possibility that
the glass roof can only be tilted. The system
must be initialized. BMW recommends having
this work performed at your BMW center.
Convertible: convertible top
The fully automatic top combines reliable
weather protection with simple and easy-to-
use operation.
The following tips will enhance your driving
pleasure in your Convertible:
> It is recommended that you close the con-
vertible top whenever the vehicle is parked.
The closed convertible top not only pro-
tects the vehicle interior from damage due
to unforeseen bad we ather, but also pro- vides a certain degree of protection against
theft. However, even when the top is
closed, valuables should
only be stored in
the locked trunk.
> Do not mount any roof rack systems on the
convertible top.
> If the top is opened while it is wet, e.g. after
driving in the rain, water may drip into the
trunk. If necessary, remove items from the
trunk beforehand to av oid water stains or
soiling.
At temperatures below +14 7/–10 6, do
not move the convertible top as this could
result in damage.
Do not keep the convertible top in the convert-
ible top box for longer than one day if it is wet;
otherwise, the moistu re may cause damage.
Do not place objects on the convertible top, as
otherwise they may fall off when you operate
the convertible top and cause damage or injury.
Never move the converti ble top when the roll-
over protection system is in the activated
position.
Always completely finish the operation of the
convertible top. Driving with the convertible top
incompletely opened or closed can result in
damage or injury.
Do not reach into the mechanism during the
opening or closing procedure. Keep children
away from the opening/closing path of the
convertible top.
For safety reasons, only operate the convertible
top while the vehicle is standing. <
While opening and closing, the convert-
ible top pivots upward. When operating
the convertible top in a garage, under a bridge,
etc., ensure that there are at least 6.5 ft/2 m of
headroom; otherwise, the vehicle may be
damaged. <
00320051004F004C00510048000300280047004C0057004C005200510003
Page 47 of 284

46
ControlsOpening and closing
If the opening or closing procedure is inter-
rupted for an extended period, the convertible
top remains in the raised position for approx.
10 minutes and then slowly moves to a stable
position.
A convertible top which is not completely
open or closed is hazardous. <
If the convertible top is not fully opened or
closed, the trunk lid cannot be opened
and the windows cannot be moved. <
Convenient opening and closing using
the remote control
Refer to page 34.
Closing manually
Only close the convertible top manually if
it is absolutely nece ssary. Never open it
manually. The convertible top box cover cannot
be locked if there is an electrical defect and
would then open while the vehicle is in motion.
Incorrect handling can result in damage. <
Closing the convertible top manually should be
performed by two people. The rear seats must
not be occupied.
Only move the converti ble top and the convert-
ible top box cover when th e ignition is switched
off.
Before closing
1. Open the trunk lid.
2. Take the screwdriver out of the onboard
vehicle tool kit, refer to page 243.3.
If the convertible top box cover is locked,
release the two buttons in the trunk,
arrows 1, using the screwdriver and pull
forcefully all the way out. The convertible
top box cover is unlocked.
After unlocking, do not push the
buttons back into the luggage
compartment trim panel.<
4. When the top is closed manually, it is no
longer possible to open the trunk lid. Take
urgently needed items out of the luggage
compartment and close the trunk lid.
5. Switch off ignition.
Closing
1.Slide the protective cap, arrow 2, forward.
2. Slowly and smoothly open the convertible
top box cover all the way, arrow 3.
3. The locking pins must have engaged com-
pletely. If they are still visible: close the con-
vertible top box cover as far as necessary
until the locking bolts engage audibly, then
slowly open the cover. During this process,
do not close the convertible top box cover
completely.
00320051004F004C00510048000300280047004C0057004C005200510003
Page 50 of 284
49
Adjustments
Controls
Adjustments
Vehicle equipment
In this chapter, all production, country, and
optional equipment that is offered in the model
range is described. As a result, some equip-
ment described may not be
available in a partic-
ular vehicle, for example due to the options or
national-market version selected. This also
applies to safety related functions and systems.
Sitting safely
The ideal sitting position can make a vital
contribution to relaxed, fatigue-free driving. In
conjunction with the sa fety belts, the head
restraints and the airbags, the seated position
has a major influence on your safety in the event
of an accident. To ensu re that the safety sys-
tems operate with optimal efficiency, we
strongly urge you to observe the instructions
contained in the following section.
For additional information on transporting
children safely, refer to page 58.
Airbags
Always maintain an adequate distance
between yourself and the airbags. Always
grip the steering wheel on the rim, with your
hands in the 3 o'clock and 9 o'clock positions,
to minimize the risk of injury to the hands or
arms in the event of the airbag being triggered
off.
No one and nothing should come between the
airbags and the seat occupant.
Do not use the cover of the front airbag on the
front passenger side as a storage area. Make
sure that the front passeng er is sitting correctly,
i.e. not resting feet or legs on the dashboard;
otherwise, leg injuries ca n occur if the front air-
bag deploys.
Make sure that passen gers keep their heads
away from the side airbag and do not lean against the cover of the
head airbag; otherwise,
serious injuries can result if the airbag
deploys. <
Even if you follow all the instructions, injuries
resulting from contact with airbags cannot be
fully excluded, depending on the circum-
stances. The ignition and inflation noise may
provoke a mild hearing loss in extremely
sensitive individuals. This effect is usually only
temporary.
For airbag locations and additional information
on airbags, refer to page 97.
Head restraint
A correctly adjusted head restraint reduces the
risk of neck injury in the event of an accident.
Adjust the head restraint in such a way
that its center is at approx. ear level.
Otherwise, there is an incr eased risk of injury in
the event of an accident. <
Head restraints, refer to page 52.
Safety belt
Before every drive, make sure that all occupants
wear their safety belts. Airbags complement the
safety belt as an additi onal safety device, but
they do not represent a substitute.
Your vehicle has four se ats, each of which is
equipped with a safety belt.
Never allow more than one person to
wear a single safety belt. Never allow
infants or small children to ride in a passenger's
lap. Make sure that the be lt in the lap area sits
low across the hips and does not press against
the abdomen.
The safety belt must not rest against the throat,
run across sharp edges, pass over hard or frag-
ile objects or be pinched. Fasten the safety belt
so that it sits as snugly as possible against the
lap and shoulder without being twisted. Other-
wise, the belt could slide over your hips and
00320051004F004C00510048000300280047004C0057004C005200510003
Page 55 of 284
54
ControlsAdjustments
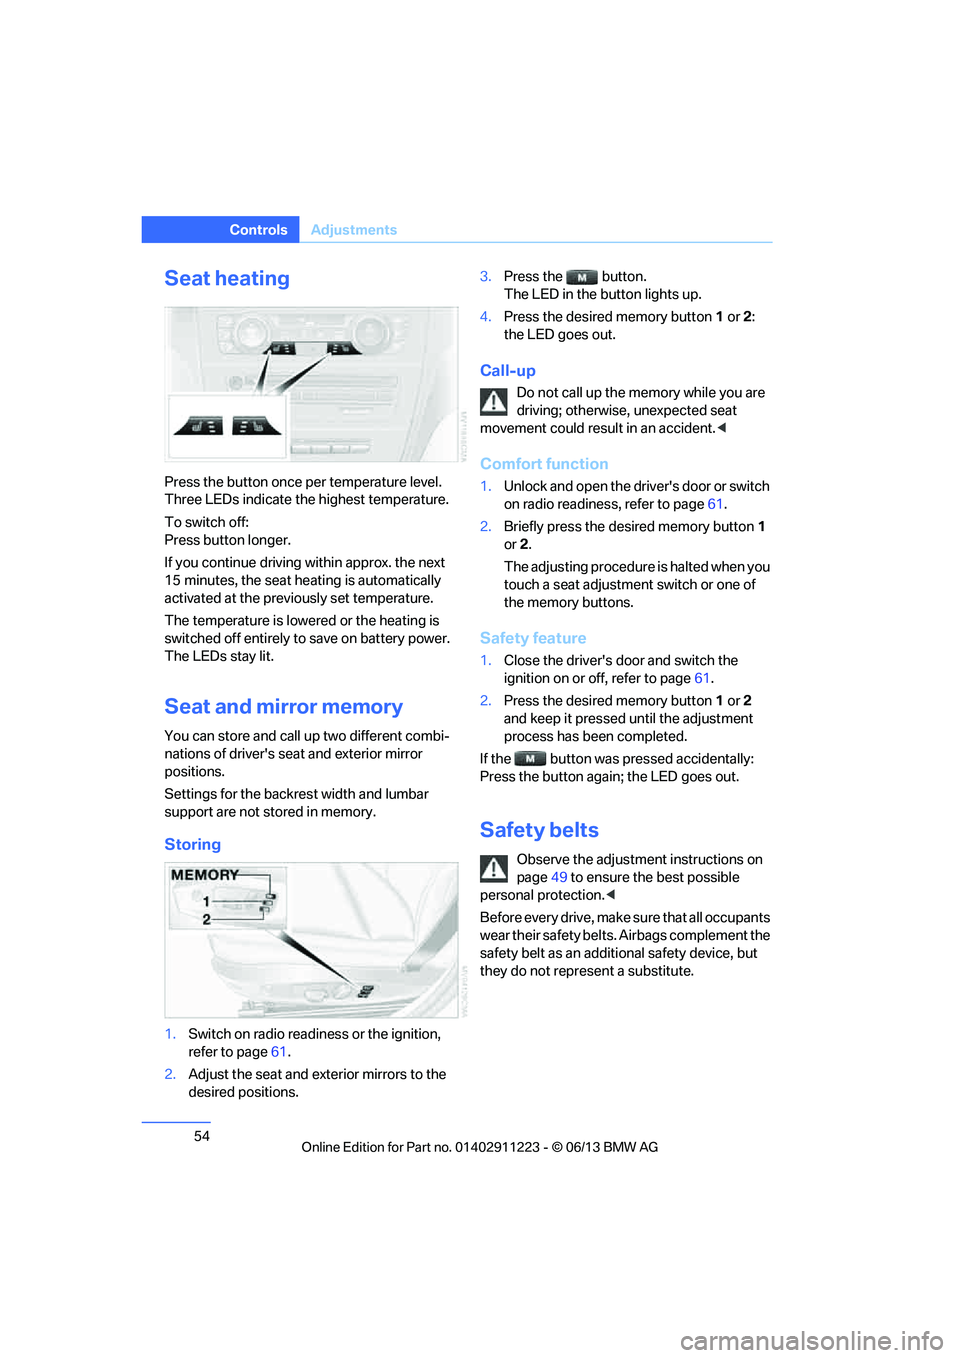
Seat heating
Press the button once per temperature level.
Three LEDs indicate the highest temperature.
To switch off:
Press button longer.
If you continue driving within approx. the next
15 minutes, the seat he ating is automatically
activated at the previously set temperature.
The temperature is lowered or the heating is
switched off entirely to save on battery power.
The LEDs stay lit.
Seat and mirror memory
You can store and call up two different combi-
nations of driver's seat and exterior mirror
positions.
Settings for the backrest width and lumbar
support are not stored in memory.
Storing
1. Switch on radio readin ess or the ignition,
refer to page 61.
2. Adjust the seat and exterior mirrors to the
desired positions. 3.
Press the button.
The LED in the button lights up.
4. Press the desired memory button 1 or 2:
the LED goes out.
Call-up
Do not call up the me mory while you are
driving; otherwise, unexpected seat
movement could result in an accident. <
Comfort function
1.Unlock and open the driver's door or switch
on radio readiness, refer to page 61.
2. Briefly press the desired memory button 1
or 2.
The adjusting procedure is halted when you
touch a seat adjustment switch or one of
the memory buttons.
Safety feature
1. Close the driver's door and switch the
ignition on or off, refer to page 61.
2. Press the desired memory button 1 or 2
and keep it pressed until the adjustment
process has been completed.
If the button was pr essed accidentally:
Press the button again; the LED goes out.
Safety belts
Observe the adjustment instructions on
page 49 to ensure the best possible
personal protection. <
Before every drive, make sure that all occupants
wear their safety belts. Airbags complement the
safety belt as an additi onal safety device, but
they do not repres ent a substitute.
00320051004F004C00510048000300280047004C0057004C005200510003
Page 57 of 284
56
ControlsAdjustments
Automatic heating
Depending on the outside temperature, both
exterior mirrors are heated automatically when
the engine is running or the ignition is switched
on.
Passenger side mirro r tilt function –
automatic curb monitor
Activating
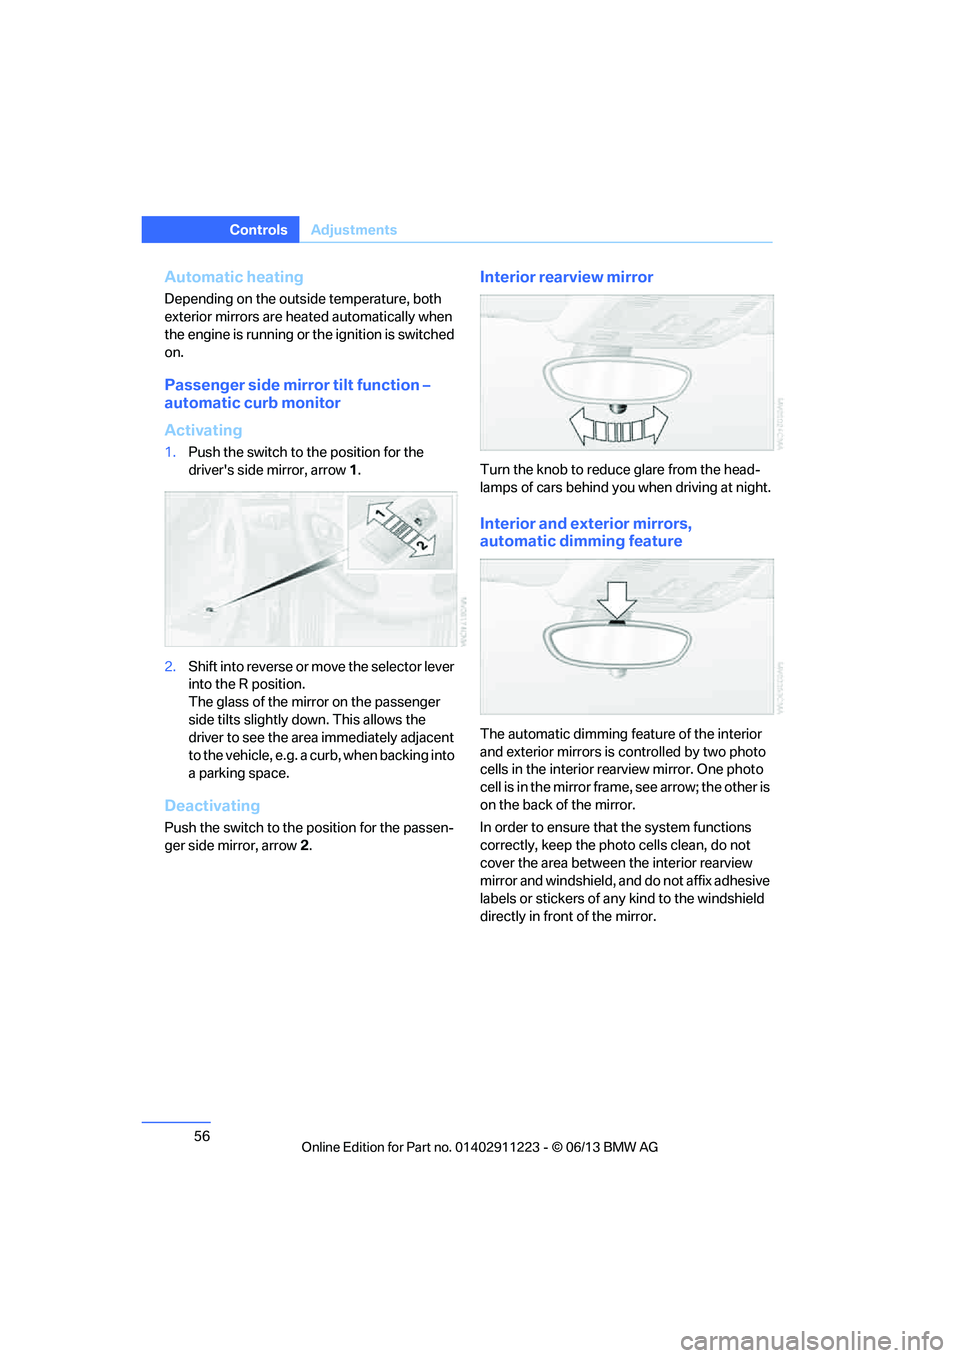
1. Push the switch to the position for the
driver's side mirror, arrow 1.
2. Shift into reverse or mo ve the selector lever
into the R position.
The glass of the mirror on the passenger
side tilts slightly down. This allows the
driver to see the area immediately adjacent
to the vehicle, e.g. a curb, when backing into
a parking space.
Deactivating
Push the switch to the position for the passen-
ger side mirror, arrow 2.
Interior rearview mirror
Turn the knob to reduce glare from the head-
lamps of cars behind yo u when driving at night.
Interior and exterior mirrors,
automatic dimming feature
The automatic dimming feature of the interior
and exterior mirrors is controlled by two photo
cells in the interior re arview mirror. One photo
cell is in the mirror frame, see arrow; the other is
on the back of the mirror.
In order to ensure that the system functions
correctly, keep the photo cells clean, do not
cover the area between the interior rearview
mirror and windshield, and do not affix adhesive
labels or stickers of an y kind to the windshield
directly in front of the mirror.
00320051004F004C00510048000300280047004C0057004C005200510003
Page 62 of 284
61
Driving
Controls
Driving
Vehicle equipment
In this chapter, all production, country, and
optional equipment that is offered in the model
range is described. For this reason, descrip-
tions will be given of some equipment that may
not be available in a vehi
cle, for example due to
the special options or national-market version
selected. This also app lies to safety related
functions and systems.
Ignition lock
Insert the remote control into the
ignition lock
Insert the remote contro l all the way into the
ignition lock.
> Radio readiness is switched on.
Individual electrical consumers can operate.
Comfort Access
If the car is equipped with Comfort Access, only
insert the remote control into the ignition lock
under special circumstances, refer to page 40.
Removing the remote control from the
ignition lock
Do not forcibly pull the remote control out
of the ignition lock as this may cause
damage. < Before removing the remote control, push it all
the way in to release
the locking mechanism.
> The ignition is switched off if it was on.
Automatic transmission
You cannot take out the remote control unless
the selector lever is in the P position: interlock.
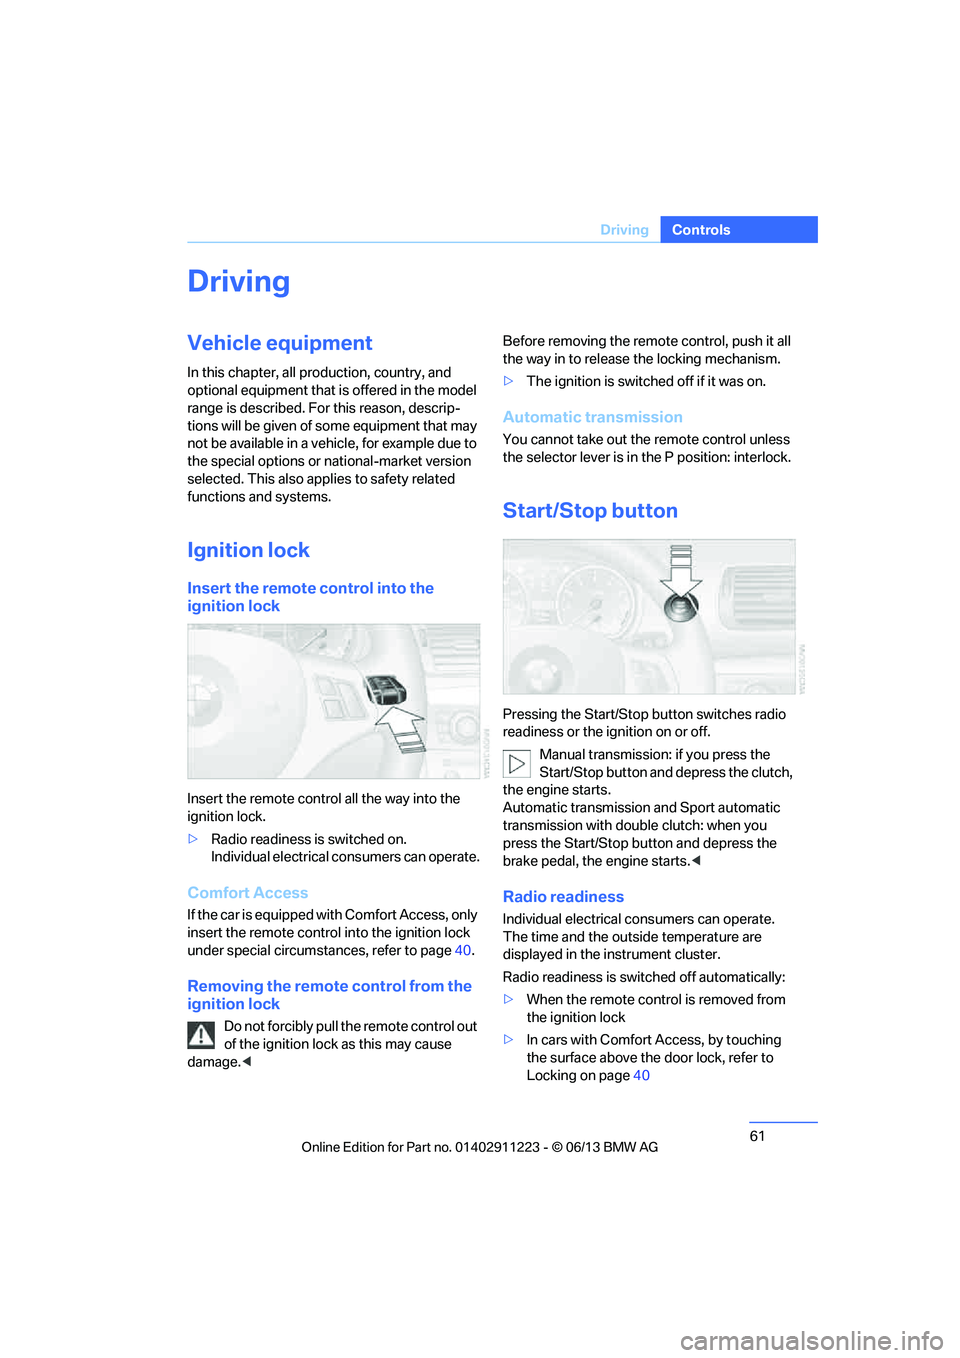
Start/Stop button
Pressing the Start/Stop button switches radio
readiness or the ignition on or off.
Manual transmission: if you press the
Start/Stop button and depress the clutch,
the engine starts.
Automatic transmission and Sport automatic
transmission with doub le clutch: when you
press the Start/Stop button and depress the
brake pedal, the engine starts. <
Radio readiness
Individual electrical consumers can operate.
The time and the outside temperature are
displayed in the instrument cluster.
Radio readiness is switched off automatically:
> When the remote control is removed from
the ignition lock
> In cars with Comfort Access, by touching
the surface above the door lock, refer to
Locking on page 40
00320051004F004C00510048000300280047004C0057004C005200510003