2013 AUDI RS5 CABRIOLET windshield
[x] Cancel search: windshieldPage 5 of 286
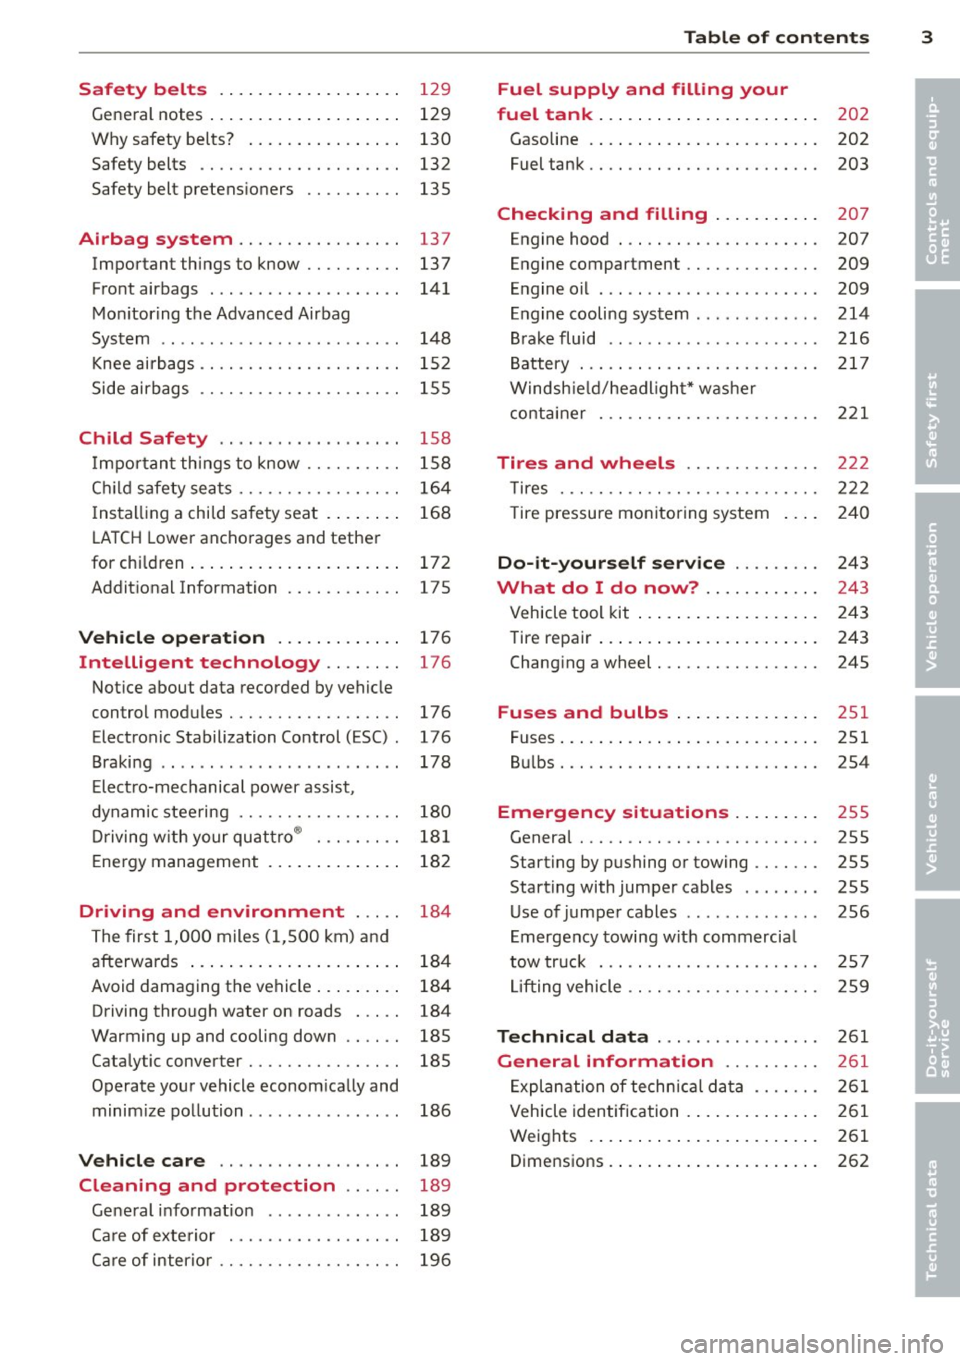
Safety belts . . . . . . . . . . . . . . . . . . . 129
General notes . . . . . . . . . . . . . . . . . . . . 129
Why safety be lts? . . . . . . . . . . . . . . . . 130
Safety belts . . . . . . . . . . . . . . . . . . . . . 132
Safety belt pretens ioners . . . . . . . . . . 13S
Airbag system ............. .. .. 137
Important things to know . . . . . . . . . . 137
Front airbags . . . . . . . . . . . . . . . . . . . . 141
Monitoring the Advanced Airbag
System . . . . . . . . . . . . . . . . . . . . . . . . . 148
Knee airba gs. . . . . . . . . . . . . . . . . . . . . 152
Side airbags . . . . . . . . . . . . . . . . . . . . . 155
Child Safety . . . . . . . . . . . . . . . . . . . 158
Import ant things to know .... .. .. . .
C hild safety sea ts ......... .. .. .. . .
I ns tall ing a chi ld safety seat . ... .. . .
L A T CH Lower anchorages and tether
for chi ldren ... ........... .. .. .. . .
Addit ional Information
Vehicle operation ............ .
Intelligent technology .. .. .. . .
Notice about data recorded by vehicle
control modules .......... .... .. . .
Electronic Stabilization Control (ESC) .
Braking .. ... ...... ......... .... .
E lect ro-mechanical power assist,
dynamic steering ............. .. . .
Driving with your qu attro ® ... .. .. . .
E nergy management ............. .
Driving and environment ... ..
The first 1,000 miles (1,500 km) and
afterwards ... ........... .. .. .. . .
Avoid damaging the vehicle ... .. .. . .
Driving through water on roads ... . .
Warming up and cooling down .. .. . .
Cataly tic converter ........ .... .. . .
Operate your vehicle econom ically and
minim ize pollution ......... ... ... .
Vehicle care .............. .. .. .
158
164
16 8
172
175
176
176
176
176
178
180
18 1
182
184
184
184
184
185
18S
186
189
Cleaning and protection . . . . . . 189
Gene ral i nfo rmation . . . . . . . . . . . . . . 189
Ca re of exte rior . . . . . . . . . . . . . . . . . . 189
Ca re of inter ior . . . . . . . . . . . . . . . . . . . 196
Table of contents 3
Fuel supply and filling your
fuel tank . . . . . . . . . . . . . . . . . . . . . . .
202
Gasoline . . . . . . . . . . . . . . . . . . . . . . . . 202
Fuel tank. . . . . . . . . . . . . . . . . . . . . . . . 203
Checking and filling . . . . . . . . . . . 207
Engine hood . . . . . . . . . . . . . . . . . . . . . 207
Engine compartment . . . . . . . . . . . . . . 209
Engine oil . . . . . . . . . . . . . . . . . . . . . . . 209
Engine cooling system . . . . . . . . . . . . . 214
Brake fluid ....... ............... 216
Battery . . . . . . . . . . . . . . . . . . . . . . . . . 217
Windshield/headlight* washer
container . . . . . . . . . . . . . . . . . . . . . . . 221
Tires and wheels ............. .
T ires ... .. .. .. .. .. . ............ .
T ire pressu re mon itoring system
Do-it-yourself service ........ .
What do I do now? ........... .
Vehicle tool kit ... .. . .. .......... .
Tire repair ... .. .... . ............ .
Chang ing a wheel ..... ........... .
Fuses and bulbs .. .. ... .... ... .
Fuses ..... .. .. .... .. ........... .
Bul bs ....... .. ...... ........... .
Emergency situations ........ .
General ... .. .. .. ............... .
Starting by pushing or towing ...... .
Starting with jumper cables ..... .. .
U se of jumper cables ... .. .. ... ... .
Emergency towing with commercia l
tow truck ... .. .. .. . ............ .
Lift ing vehicle .. .. .... ........... .
Technical data ... . .. .. ..... ... .
General information ......... .
Exp lanation of techn ic al data ...... .
Vehicle identification ........... .. .
Weights .. .. .... ... .. .......... .
Dimensions . ....... . .. .......... . 222
222
240
24
3
243
243
243
245
251
251
2S4
255
255
255
255
256
2 57
259
261
261
26 1
261
261
262
•
•
Page 16 of 286

14 Instrum ent s and w arn ing /indic ato r light s
Engine cooling system
r:::;,page 18
Steering column lock
r:::;, page 18
Ignition lock
r:::;,page 18
USA mod els:
Speed warning system
r:::;, page 81
Canada models :
Speed warning system
r:::;,page81
Adapt ive cru ise control./
r:::;, page 94
Yellow ind ic a tor lights
Ye llow symbols indicate a priority 2 ma lfunc
tion -Warning!
•
I
ESC OFF
m
ll!fJ
Power top operation
r:::;, page43
Electronic Stabilization Control
(ESC) ,/
r:::;, page 19
Electronic Stabilization Control ( E SC) ./
r:::;,page 19
Electronic Stabilization Control
(ESC)
r:::;,page 176
USA mod els :
Anti-lock braking system (ABS)
defective ,/
r:::;, page 19
Canada model s:
Anti-lock braking system (ABS)
defective ,/
r:::;,page 19
USA models :
Safety systems ./
r:::;,page20
Canada models :
Safety systems ,/
r:::;,page20
•
•
[I]
.,,,~,
~
•
Im
-
•
•
-
ml
II
•
m
!I
-
!!
l:J
E
II
Worn brake pads
r:::;, page20
Electromechanical parking brake
r:::;, page
79
I
Tire pressure monitoring
system./
r:::;, page 241
Tire pressure monitor ing system
r:::;, page2 41
Electronic power control./
r:::;, page 20
Malfunction indicator Lamp
(MI L),/
r:::;, page 2 0
Engine speed limitation
r:::;, page21
Engine oi l level
r:::;,page 17
Eng ine oi l sensor
r:::;, page 21
Battery
r:::;, page 17
Tank system
r:::;, page 21
Windshield washer fluid level
r:::;,page 21
Windshie ld w ipers
r:::;, page 21
Remote control key
r:::;, page
7 7
"
Battery in remote control key
r:::;, page33
Defective light bulb warning
r:::;, page 21
Rear fog light(s)*
r:::;, page 21
Headlight range control
r:::;, page 22
Page 23 of 286

Instrument s and warnin g/indic ator ligh ts 21
Contact your authorized Audi dealer and have
the ma lfunction correct ed .
An improperly closed fuel fi ller cap may also
cause the MI L light to illum inate ¢
page 204.
For more informat ion c;> page 29 .
!?) Engine speed limitation
App lies to vehicles: wit h engine speed lim itation
(II D o not exceed m ax . e ng in e s pee d of
XXXX rpm
The engine speed is automatically lim ited to
the speed disp layed in the driver information
system. This protects the engine from over h eat ing.
The engine speed limitation deactivates once
the eng ine is no longer in the cr it ica l tempera
ture range and you have released the acce lera
tor peda l on ce.
If the engine speed lim itation was act ivated
by an eng ine control malfunction , the ind ica
tor light
(3B also turns on . Make sure that the
speed does not go above the speed displayed .
Drive to yo ur authorized Audi dea ler immedi
ately to have the malfunction corrected .
~. Engine oil level
Ill A dd oil , m ax XXXX l. You ma y cont. d riv.
When the symbo l Ill and driver message ap
pea r, add the amount of oi l appearing in the
disp lay at the next opportunity
c;> page 212.
~ ;,,. Engine oil sensor
II Oil le vel! Se nsor defecti ve
If the symbol illuminates, contact your au
thorized Audi dealer and have the oil sensor inspected . Until you have this done, check the
oil leve l each time you refuel just to be on the
sa fe side
c;> page 212 .
Bil Tank system
J.ll Please r efu el
If the indicator light turns on for the first
time and the message appears, there are
about 2. 1 -2.4 gallons (7 -9 liters) of fuel left
in the tank . T ime to refue l¢
page 203.
Ii] Fuel tank sy stem malfunction! Co ntact
dealer
If the indica tor l ight turns on and this mes
sage appears, there is a malf unct ion in the
tank system.
D rive to your authorized Audi dealer immed i
ate ly to have the ma lfunction corrected.
<:::> Windshield washer fluid level
- Pleas e refill wa she r fluid
If the symbol illum inates, add w indshie ld
washe r flu id to t he washer sys tem and also to
the headligh t washe r system* ¢
page 2 21.
'1:> Windshield wipers
El'J Windshield wipe r defecti ve
T he re is a malfunction with the windshield
wipe rs.
Drive to your authorized Audi dealer immedi
ate ly to have the ma lfunction corrected .
~/0$ Defective light bulb warn ing
If the Fl indicator light turns on, a b ulb has
failed. The message ind icates the location of
the bu lb .
- I f the
mJ indicator light a lso turns on, then
a rear fog light has failed . T he position of
t he indicator light cor responds wi th the lo
cation on the vehicle .
T his wa rning can also occu r if the light switch
is in an unengaged posi tion between two sym
bols .
Vehicl e lights: S yste m fau lt !
If the message appears, there is a malfunc
tion in the headlights or light sw itch .
Drive to your authorized Audi d ealer immedi-
ate ly to have the malfunction corrected .
I),
Page 24 of 286

22 Instruments and warning/indicator lights
A WARNING
- light bu lbs are pressurized and could ex
plode while they are being changed caus
ing ser ious p erso na l inju ry .
- Work w ith due care when handling the
high -voltage section of gas discha rge
(xenon) lights . Fa ilu re to do so could re
sult in death or se rious injury.
(D Tips
Have the bulb replaced or the connection
re pa ired by yo ur autho rized Aud i Service
de partment.
~(D Headlight range control
El Headlight range control defective !
If the symbol El illum inates , the dynam ic
h eadl ight range cont rol is no long er wo rking
p rope rly . Have the system checked and re
pa ired a t your author ized Audi dealer.
§0
Adaptive Light
Appl ies to vehicles: with adaptive ligh t
m;J Audi adaptive light: defective
If the indicator lig ht turns on and t his mes
sage appears, the re is a ma lfu nction in the
a d apt ive light sys tem . Th e headlights s till
f u nc tion.
Go to an a utho rized dea le rship to have the
h eadlights or the cont ro l unit fo r the adapt ive
light rep aired.
@.D Light/rain sensor
App lies to vehicles: with light/rain senso r
t'£;I Automatic headlight s/ automatic wipers
defective
I f t he in di cator lig ht tu rns on and t his mes
s a ge appears, the lig ht/r ain se nsor is no t
function ing cor rectly.
For safety reasons the low beams are tu rned
on permanent ly w ith the swi tch in
AUTO .
However, you can con tinue to tu rn the ligh ts
on an d off usin g the light swi tc h. You can still control a
ll functions that are independent of
the ra in sensor through the windshield wipe r
l ever.
C o nta ct you r auth orized Aud i dea ler as soon
as possib le to have the problem co rrec ted.
H Sport differential
Appl ies to vehicles: wit h Aud i drive se lect and spo rt dif·
ferential
Sport differential : System fault!
T he re is a malfunction with t he sport d iffe ren
tia l.
Drive to y our authorized A udi dealer immedi
ate ly to have the malfu nction corrected .
Sport differential : Overheating
T he transm iss ion tempera ture ha s in cr eased
s ignificantly due to the sporty d riving manner .
Drive in a less sporty ma nner until the tem
perature returns to the normal range and the
indicator light switches of.
A WARNING
Contact your author ized Audi dealer or a
q ualified wor kshop if the spo rt differential
i s faul ty or malfunct io ning . T he repair
must be perfor med by t rain ed perso nnel
usi ng the co rrect oil in order to ensure
s a fety .
~ Ignition lock
I!) Ignition lo ck defe ctive
-
The re is a malfunction in the e lect ronic igni
t io n lock . P lease go to a n author ized Audi
de aler or o ther qua lifie d wo rkshop to have t he
malfu nction rep aire d.
¢¢ Turn signals
Whenever yo u use the left H or the right B
turn s ignal , the indicato r light blin ks. When
you use the emergency f lashe rs, both indica -
tor lights flash . .,.
Page 28 of 286

26 Driver in formation d isplay
appears in the display . If a fJ is shown, then
the data from the total-trip memory is being
d isp layed (memory leve l 2) .
Single-t rip memory (Trip computer 1 )
The single-t rip memory s tores the trip infor
mat ion from the time the ignition is turned on
unti l it is tu rned off. If the trip is continued
within 2 hours from the time the ignition was
tu rned off, the new data will be included in
the calculation of the current trip informa
tion . If the trip is interrupted for
more than 2
hours
the memory is reset automatically .
Total-tr ip memory (Trip computer 2 )
Unlike the sing le-trip memory, the tota l-trip
memory is not reset automatically. Th is per
mits you to evaluate your driving data for the
entire period between manual resets.
Operation
The trip computer is controlled by two
switches on the windshield wiper lever.
F ig. 11 Windsh ie ld wipe r leve r: co ntro ls for t he tri p
co mpute r
M
"' 0 N
><
"' a,
.. To display the trip computer memory leve ls,
press the
I RESE T I button @c:> fig. 11 re
peatedly unt il the desired memory leve l is
shown in the d isplay.
.. To d isplay trip information w ithi n a memory
level, press the top or bottom part of the
function selectio n switch
@ .
The trip computer w ill not operate unless the
ignit io n is on . When you turn on the ignition,
the function t hat was in use when you last
turned t he ignit io n off will be d isp layed. In add
ition to info rmation on the trip comput
er (trip com puter 1 and 2) , the digita l spee d
ometer and information regarding the nav iga
t ion system* can also be disp layed. To sw itch
the d isplay between the d ifferent i nforma
t io n, tap the
I RESE T I button @ briefly .
Setting value s to ze ro
T o de lete one cur rent va lue from the trip com
puter, se lect the des ired funct ion and press
the
I RESE T I button @for at least one second.
The following values can be set to zero
indi
vidually :
-Average fue l mi leage
- Average spee d
- Elapsed time
- Dis tance
All the values in the sing le -tr ip or the total
t rip memo ry can b e deleted s imultaneously
c:> page 26 .
(D Tips
All stored va lues w ill be lost if the veh icle
battery is disconnected.
Basic Settings for the trip computer
The radio or MMI* operating unit is used for
setting the trip computer's basic settings .
.. Select: Function button ICAR ! > Instrument
cluster > On-board computer
1 or On-board
computer 2 .
The values in the sing le-tr ip or the total-trip
memory can all be reset to zero at the same
time under
Reset in the menu .
In add ition, yo u can determine what info rma
tion from the trip computer should be shown in the instrument cluster disp lay. If one of the
pieces of driver information is turned
Off, t h at
drive r information will not be s hown in the
display . Th e info rmation w ill continue to be
ca lcula ted by t he tr ip comp ute r and can be
tu rned back
On at any time.
Page 51 of 286
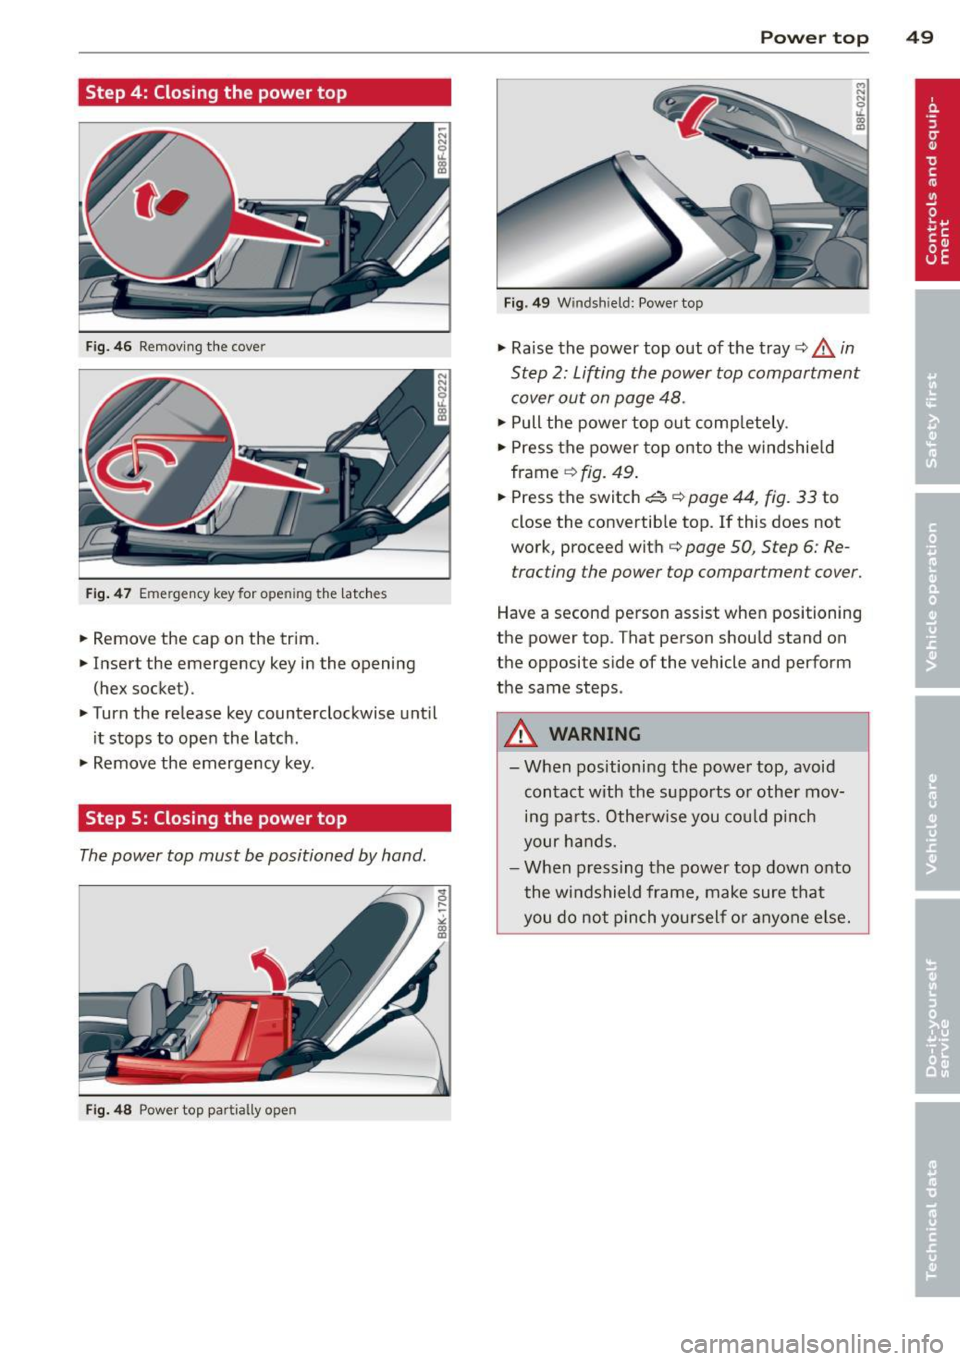
Step 4: Closing the power top
Fig. 46 Removing the cover
Fig. 47 Emergency key for ope ning the latches
.. Remove the cap on the trim.
.. Insert the emergency key in the opening
(hex socket) .
.. Turn the release key counterclockwise until
it stops to open the latch .
.. Remove the emergency key .
Step S: Closing the power top
The power top must be positioned by hand .
Fig. 48 Power top partially open
Power top 49
Fig. 49 W ind shield: Power top
.. Raise the power top out of the tray¢.&. in
Step 2: Lifting the power top compartment
cover out on page 48 .
.. Pull the power top out completely .
.. Press the power top onto the windshield
frame
q fig . 49 .
.. Press the switch~ ¢ page 44, fig. 33 to
close the convertible top. If this does not
work, proceed with
q page 50, Step 6: Re
tracting the power top compartment cover.
Have a second person assist when positioning
the power top . That person should stand on
the opposite side of the vehicle and perform
the same steps.
A WARNING
-
- When positioning the power top, avoid
contact with the supports or other mov
ing parts. Otherwise you could pinch
your hands.
- When pressing the power top down onto
the windshield frame, make sure that
you do not pinch yourself or anyone else.
Page 59 of 286

-If swallowed and person is conscious,
rinse mouth with water for at least 15
minutes . Do not induce vomiting unless
instructed to do so by medical professio
nal. Get medical attention immediately.
(D Note
Liquid electrolyte leaking from broken mir
ror glass will damage any plastic surfaces
it comes in contact with . Clean up spilled
electrolyte immediately with clean water
and a sponge.
@ Tips
- Switching off the dimming function of
the inside rear view mirror also deacti
vates the automatic dimm ing function of
the exterior mirrors .
-Automatic dimming for the mirror only
operates properly if the light striking the
inside mirror is not hindered by other ob
jects.
- The automatic dimming mirrors do not
dim when the interior lighting is turned
on or the reverse gear is selected .
Sun visors
._[ _ __,!
Fig. 63 Driver's s ide: s un visor
The sun visors for the driver and passenger
can be pulled out of their brackets in the cen
ter of the vehicle and turned towards the
doors
(D .
The mirror light switches on when the cover
over the vanity mirror @opens .
Clear vision 5 7
Wiper and washer
system
Switching the windshield wipers on
Fig. 64 Win dshi eld w ipe r leve r
Move the windshield wiper lever to the corre
sponding position:
@-Windshield wiper off
CD-Interval mode . To extend/shorten the
wiper intervals, move the switch @to the
left/right. In vehicles with a rain sensor* the
wipers turn on in the rain once the vehicle
speed exceeds approximately 2 mph (4 km/h) .
The higher the sensitivity of the rain sensor* is
set (switch @to the right), the earlier the
windshield wipers react to moisture on the
windshield. In some models, you can switch
rain sensor mode off and switch intermittent
mode on in the MMI* . Select:
!CAR I function
button
> Car systems* control button > Driver
assist
> Rain sensor. In intermittent mode,
you can adjust the interval time using the@
switch.
@ -Slow wiping
® -Fast wiping
©-Single wipe
® -Clean the windshield. To eliminate water
droplets, the windshield wiper performs one
afterwipe operation after several seconds
while driving . You can switch this function off
by moving the lever to position ® within 10
seconds of the afterwipe operation. The after
wipe function is reactivated the next time the
ignition is switched on.
...
Page 60 of 286

58 Clear vis ion
Cleanin g the headlights* . The headlight wash
er system* op erates on ly when the headlights
a re on. If you move the lever to pos ition
® ·
the head lights are washed in intervals.
A WARNING
- The ra in sensor is only intended to assist
the driver . The dr iver is still responsible
for manually sw itching the w ipers on ac
co rding to the vis ibility conditions .
- The windshie ld may not be treated w it h
water-repe lling windshie ld coat ing
age nts. Unfavorable conditions, such as
wetness , darkness, low sun, can res ult in
incre ase d gla re. Wiper b lade ch atter is
also possible .
- P roperly fu nctioning windshie ld w iper
blades are required for a clear view and
sa fe dr iving
¢ page 58, Replacing
windshield wiper blades.
(D Note
- In the c ase of fro st, check whether the
winds hield wiper blad es are frozen to
the windshie ld. Switching on the wind
s h ield wipers can damage the wiper
blades!
- Prior to using a car wash, the win dshield
wipe r system must be switched
off (lever
i n position @). This helps to prevent un
i ntent ional sw itchi ng on and damage to
t h e windshie ld w iper system .
- The w indshield wipers are switched
off
when the ignition is turned off . Activate
the windshie ld w ipers afte r the ignit ion
i s sw itched back on by mov ing t he wind
s h ield wiper leve r to any pos it io n.
- Worn or dirty windsh ie ld w iper blades
r esult in streaking . T h is can affect the
r ain senso r* function . Ch eck your wind
s h ield wiper blades regularly.
- The was her fluid nozzles of the wind
s h ield washer system are heated at low
temper atures w hen the ignit ion i s on.
- When stop ping temporarily , (e.g. at a
traff ic light) the se t speed of the wi nd- shield wipers is automatically
reduced by
one s peed.
Replacing windshield wiper blades
Wiper blad es in good condition help k eep th e
windshield clear.
Fi g. 6 5 Re mov ing w indsh ie ld wipe r bl ade
Wiper service posit ion /blade replacement
position
.. Switch the windshie ld w ipers off (position
@ ¢page 57, fig.
64) .
.. Select: !CARI function button> Windshi eld
wiper s> Service po sition > on .
Or
.. Select: !CARI function butto n> Car syst em s*
contro l button > Servicing & checks > Wiper
service po sition > On.
The windshield wipers
move into the service pos ition .
Removing the wiper blade
.,. Lift the windsh ie ld wiper arm up from the
w indshie ld.
.. Press the locking knob
(D ¢ fig. 65 on the
wiper blade . Ho ld the wipe r blade firmly .
.. Remove the wipe r blade in the direction of
the arrow .
Attaching the wiper blade
.. Insta ll the new w iper blade in the ret ainer
on t he wiper a rm @ unt il yo u hear i t click in
to p lace on the wiper arm.
.. Place the wiper arm back on the windshield.
.. To bring the w ipers back into the or igina l
position, press the windshield wiper lever .
Or
.. Select : !CARI function button> Windshield
wipers > Service position > off .
Or