Page 94 of 325
93
uuLocking and Unlocking the Doors uLocking/Unlocking the Doors from the Inside
Controls
Locking/Unlocking the Doors from the Inside
■
Locking a door
Pull the lock tab rearward.
■
Unlocking a door
Push the lock tab forward.
Press the master door lock switch in as shown
to lock or unlock all doors.
■
Using the Lock Tab
1 Using the Lock Tab
When you lock the door using the lock tab on the
driver’s door, all the other doors, trunk, and fuel fill
door lock at the same time.
When you unlock the door using the lock tab on the
driver’s door, only the driver’s door will unlock.
To Unlock
Lock Tab
To Lock■
Using the Master Door Lock Switch
1Using the Master Door Lock Switch
When you lock/unlock the driver’s door using the
master lock switch, all the other doors, trunk, and
fuel fill door lock/unlock at the same time.
Master Door
Lock SwitchTo Unlock
To Lock
Page 182 of 325

181
Driving
This chapter discusses driving, refueling, and information on items such as accessories.
Before DrivingDriving Preparation .......................... 182
Maximum Load Limit........................ 185
Towing a Trailer Towing Preparation .......................... 187
Driving Safely with a Trailer .............. 189
Towing Your Vehicle ........................ 190
When Driving Starting the Engine .......................... 191
Precautions While Driving................. 193
Automatic Transmission ................... 194 Shifting ............................................ 195
Shifting ............................................ 199
Cruise Control ................................. 201
VSA
® (Vehicle Stability Assist), aka ESC
(Electronic Stability Control), System ...... 204
TPMS (Tire Pressure Monitoring System) ... 206
Tire Pressure Monitoring System (TPMS) - Required Federal Explanation ........... 208
Braking
Brake System ................................... 210
ABS (Anti-lock Brake System) ........... 212Automatic transmissionManual transmission
Brake Assist System ......................... 213
Parking Your Vehicle When Stopped ................................ 214
Refueling Fuel Information .............................. 215
How to Refuel ................................. 216
Fuel Economy .................................... 218
Improving Fuel Economy .................. 218
Accessories and Modifications Accessories ...................................... 219
Modifications................................... 219
Page 192 of 325

191
Continued
Driving
When DrivingStarting the Engine
1.Make sure the parking brake is applied.
2. Check that the shift lever is in
(P
, then
depress the brake pedal.
u Although it is possible to start the vehicle
in
(N
, it is safer to start it in
(P
.
2. Check that the shift lever is in
(N
. Then
depress the brake pedal with your right
foot, and the clutch pedal with your left
foot.
u The clutch pedal must be fully depressed
to start the engine.
1Starting the Engine
Keep your foot firmly on the brake pedal when
starting the engine.
The engine is harder to start in cold weather and in
thinner air found at altitudes above 8,000 feet (2,400
meters).
When starting the engine in cold weather, turn off all
electrical accessories such as the lights, climate
control system, and rear defogger in order to reduce
battery drain.
If you live in a region where winter is extremely cold,
an engine block heater will improve starting and
warming of the engine. If temperatures consistently
below -22°F (-30°C) are expected, the coolant
mixture should be changed to a higher concentration
to prevent freezing. Consult a dealer for details.
If exhaust sounds abnormal or you can smell exhaust
gas inside the vehicle, have your vehicle checked by a
dealer. There may be a problem with the engine or
exhaust system.
The immobilizer system protects your vehicle from
theft.
If an improperly coded device is used, the engine’s
fuel system is disabled.
2 Immobilizer System P. 98
Brake Pedal
Automatic transmission models
Brake Pedal
Clutch Pedal
Manual transmission models
Page 193 of 325

uuWhen Driving uStarting the Engine
192Driving
3. Turn the ignition switch to START
(e
without depressing the accelerator pedal.
1. Keeping your right foot on the brake pedal, release the parking brake. Check that
the parking brake indicator has gone off.
2 Parking Brake P. 210
2.Put the shift lever in
(D
. Select
(R
when reversing.
3. Gradually release the brake pedal and gently depress the accelerator pedal to pull
away.
1Starting the Engine
Do not hold the key in START
(e
for more than 15
seconds.
•If the engine does not start right away, wait for at
least 10 seconds before trying again.•If the engine starts, but then immediately stops,
wait at least 10 seconds before repeating step 3
while gently depressing the acce lerator pedal.
Release the accelerator pedal once the engine
starts.
The immobilizer system protects your vehicle from
theft. If an improperly coded key (or other device) is
used, the engine’s fuel system is disabled. 2 Immobilizer System P. 98
■
Starting to Drive
Automatic transmission models
Page 197 of 325

uuWhen Driving uShifting
196Driving
■
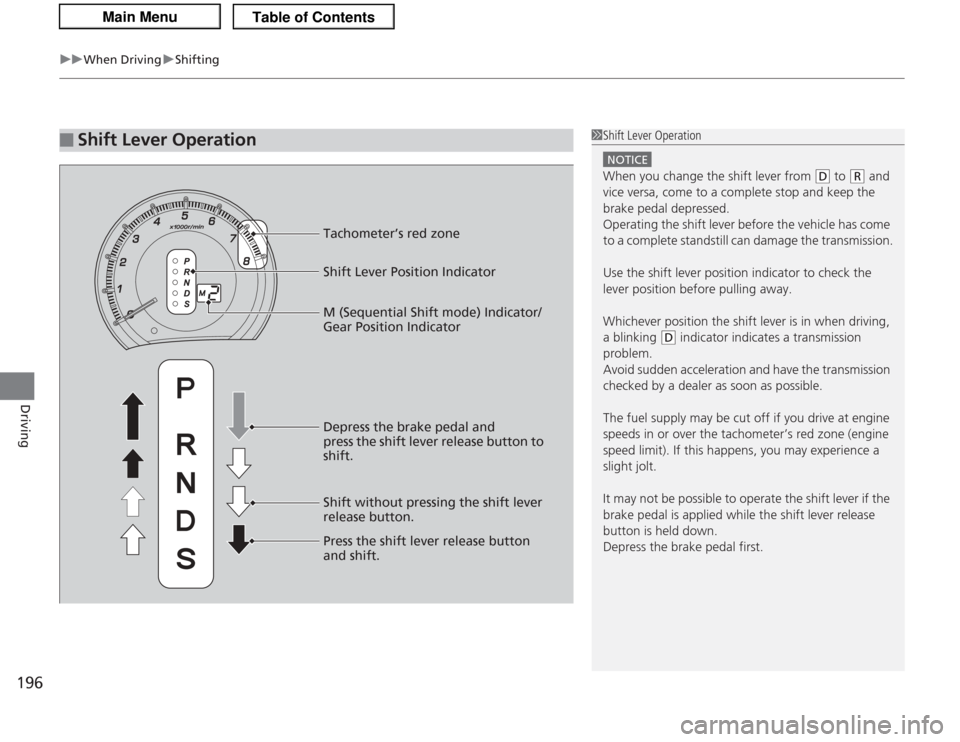
Shift Lever Operation
1Shift Lever Operation
NOTICEWhen you change the shift lever from
(D
to
(R
and
vice versa, come to a complete stop and keep the
brake pedal depressed.
Operating the shift lever before the vehicle has come
to a complete standstill can damage the transmission.
Use the shift lever position indicator to check the
lever position before pulling away.
Whichever position the shift lever is in when driving,
a blinking
( D
indicator indicates a transmission
problem.
Avoid sudden acceleration and have the transmission
checked by a dealer as soon as possible.
The fuel supply may be cut off if you drive at engine
speeds in or over the tachometer’s red zone (engine
speed limit). If this happens, you may experience a
slight jolt.
It may not be possible to operate the shift lever if the
brake pedal is applied while the shift lever release
button is held down.
Depress the brake pedal first.
Tachometer’s red zone
Shift Lever Position Indicator
Depress the brake pedal and
press the shift lever release button to
shift.
Shift without pressing the shift lever
release button.
Press the shift lever release button
and shift.M (Sequential Shift mode) Indicator/
Gear Position Indicator
Page 199 of 325

uuWhen Driving uShifting
198Driving
■
Second gear lock mode
If you pull the
(+
paddle shifter while stopped or driving at 6 mph (10 km/h) or less,
the gear position will be locked in 2nd gear. This makes it easier to pull away on
slippery surfaces such as snow covered roads.
To cancel the 2nd gear lock mode, pull the
(-
paddle shifter, or move the shift lever
from
(S
to
(D
.
■
Sequential Shift Mode Operation
1 Sequential Shift Mode Operation
Each paddle shift operation makes a single gear
change.
To change gears continuously, release the paddle
shifter before pulling it again for the next gear.
Recommended Shift Points
Use this table as a guideline for efficient fuel
economy and effective emission control.
If the gear posit ion indicator blinks when you try to
shift up or down, this means your vehicle speed is not
in its allowa ble gear shifting range.
Slightly accelerate to shift up and decelerate to shift
down while the indicator is blinking. Shift Up Normal Acceleration
1st to 2nd
15 mph (24 km/h)
2nd to 3rd 25 mph (40 km/h)
3rd to 4th
40 mph (64 km/h)
4th to 5th 45 mph (72 km/h)
( -
Paddle Shifter
(Shift down)
( +
Paddle Shifter
(Shift up)
Downshifting when pulling
the
( -
paddle shifter.
(Changes to a lower gear) Upshifting when pulling
the
(
+
paddle shifter
(Changes to a higher gear)
Page 200 of 325

199
uuWhen Driving uShifting
Continued
Driving
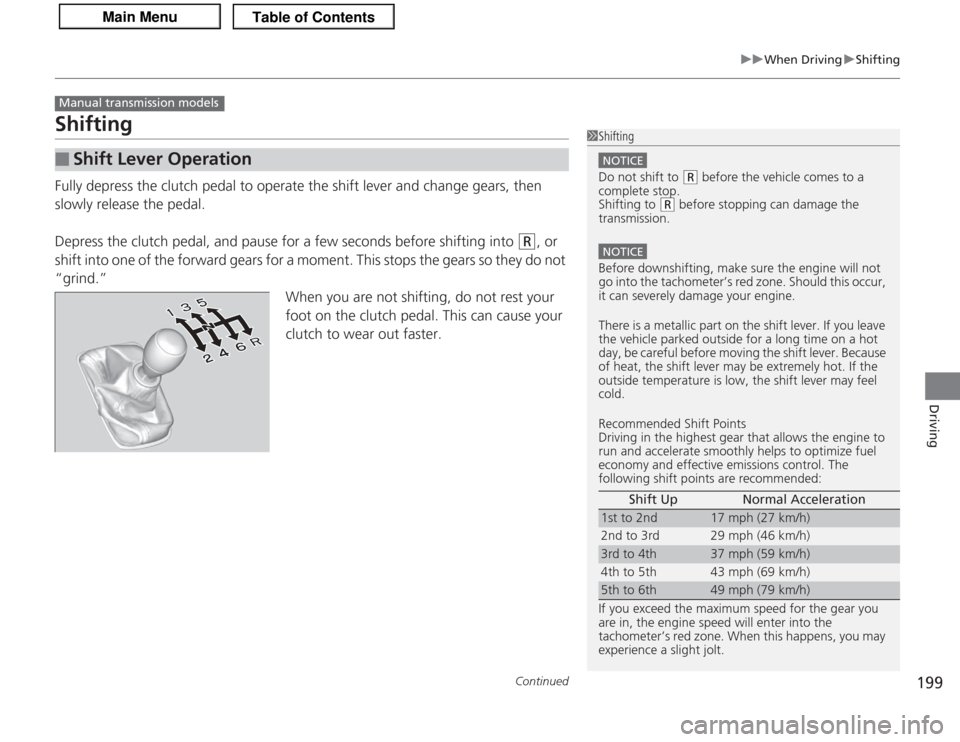
ShiftingFully depress the clutch pedal to operate the shift lever and change gears, then
slowly release the pedal.
Depress the clutch pedal, and pause for a few seconds before shifting into
(R
, or
shift into one of the forward gears for a moment. This stops the gears so they do not
“grind.” When you are not shifting, do not rest your
foot on the clutch pedal. This can cause your
clutch to wear out faster.
■
Shift Lever Operation
Manual transmission models
1Shifting
NOTICEDo not shift to
(R
before the vehicle comes to a
complete stop.
Shifting to
( R
before stopping can damage the
transmission.
NOTICEBefore downshifting, make sure the engine will not
go into the tachometer’s red zone. Should this occur,
it can severely damage your engine.
There is a metallic part on the shift lever. If you leave
the vehicle park ed outside for a long time on a hot
day, be careful before moving the shift lever. Because
of heat, the shift lever ma y be extremely hot. If the
outside temperature is low, the shift lever may feel
cold.
Recommended Shift Points
Driving in the highest gear that allows the engine to
run and accelerate smoothly helps to optimize fuel
economy and effective emissions control. The
following shift points are recommended:
If you exceed the maximum speed for the gear you
are in, the engine speed will enter into the
tachometer’s red zone. When this happens, you may
experience a slight jolt. Shift Up Normal Acceleration1st to 2nd
17 mph (27 km/h)
2nd to 3rd 29 mph (46 km/h)
3rd to 4th
37 mph (59 km/h)
4th to 5th 43 mph (69 km/h)
5th to 6th
49 mph (79 km/h)
Page 209 of 325

208
uuWhen Driving uTire Pressure Monitoring System (TPMS) - Required Federal Explanation
Driving
Tire Pressure Monitoring System (TPMS) - Required Federal ExplanationEach tire, including the spare (if provided), should be checked
monthly when cold and inflated to the inflation pressure
recommended by the vehicle manufa cturer on the vehicle placard
or tire inflation pressure label.
(If your vehicle has tires of a different size than the size indicated
on the vehicle placard or tire inflation pressure label, you should
determine the proper tire inflation pressure for those tires.)
As an added safety feature, your vehicle has been equipped with
a tire pressure monitoring system (TPMS) that illuminates a low
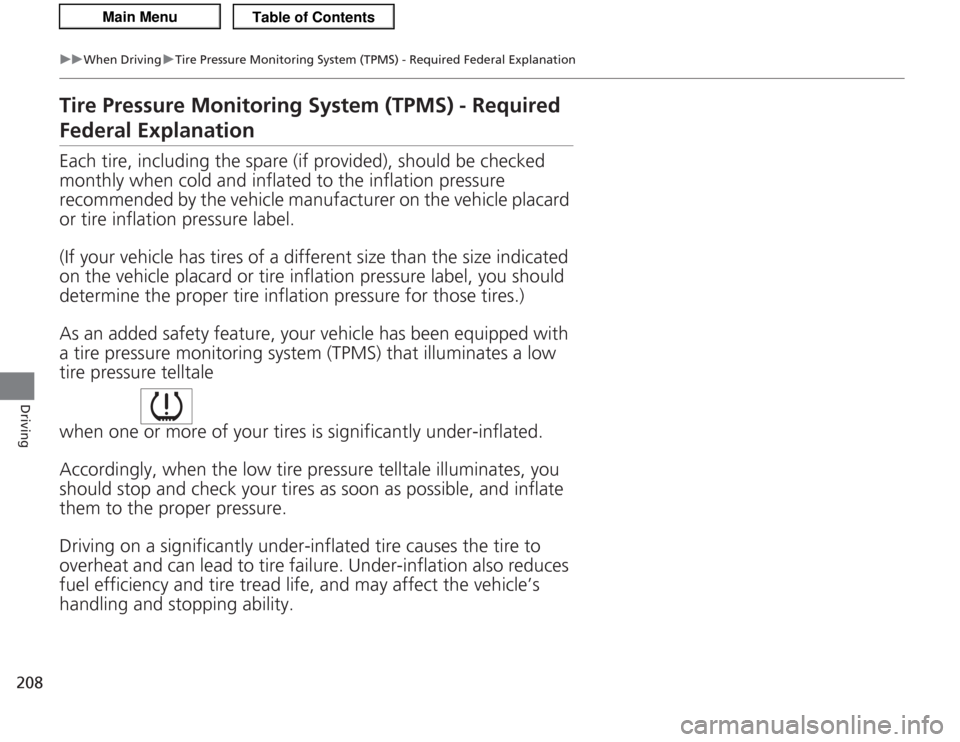
tire pressure telltale
when one or more of your tires is significantly under-inflated.
Accordingly, when the low tire pressure telltale illuminates, you
should stop and check your tires as soon as possible, and inflate
them to the proper pressure.
Driving on a significantly under-inflated tire causes the tire to
overheat and can lead to tire failure. Under-inflation also reduces
fuel efficiency and tire tread life, and may affect the vehicle’s
handling and stopping ability.