Page 235 of 351
234
uuWhen DrivinguTPMS (Tire Pressure Monitoring System)
Driving
TPMS (Tire Pressure Monitoring System)
Monitors the tire pressure while you are
driving. If your vehicle's tire pressure becomes
significantly low, the low tire pressure/TPMS
indicator comes on and a message appears on
the multi-information display.
CHECK TIRE PRESSURE is displayed when a
tire has significantly low pressure.
U.S. models only
1TPMS (Tire Pressure Monitoring System)
Conditions such as low ambient temperature and
altitude change directly affect tire pressure and can
trigger the low tire pressure/TPMS indicator to come
on.
2If the Low Tire Pressure/TPMS Indicator
Comes On or Blinks P. 323
Tire pressure checked and inflated in:•Warm weather can become under-inflated in
colder weather.•Cold weather can become over-inflated in warmer
weather.
The low tire pressure/TPMS indicator will not come
on as a result of over inflation.
Page 236 of 351

235
uuWhen DrivinguTire Pressure Monitoring System (TPMS) - Required Federal Explanation
Continued
Driving
Tire Pressure Monitoring System (TPMS) - Required Federal ExplanationEach tire, including the spare (if provided), should be checked
monthly when cold and inflated to the inflation pressure
recommended by the vehicle manufacturer on the vehicle placard
or tire inflation pressure label.
(If your vehicle has tires of a different size than the size indicated
on the vehicle placard or tire inflation pressure label, you should
determine the proper tire inflation pressure for those tires.)
As an added safety feature, your vehicle has been equipped with
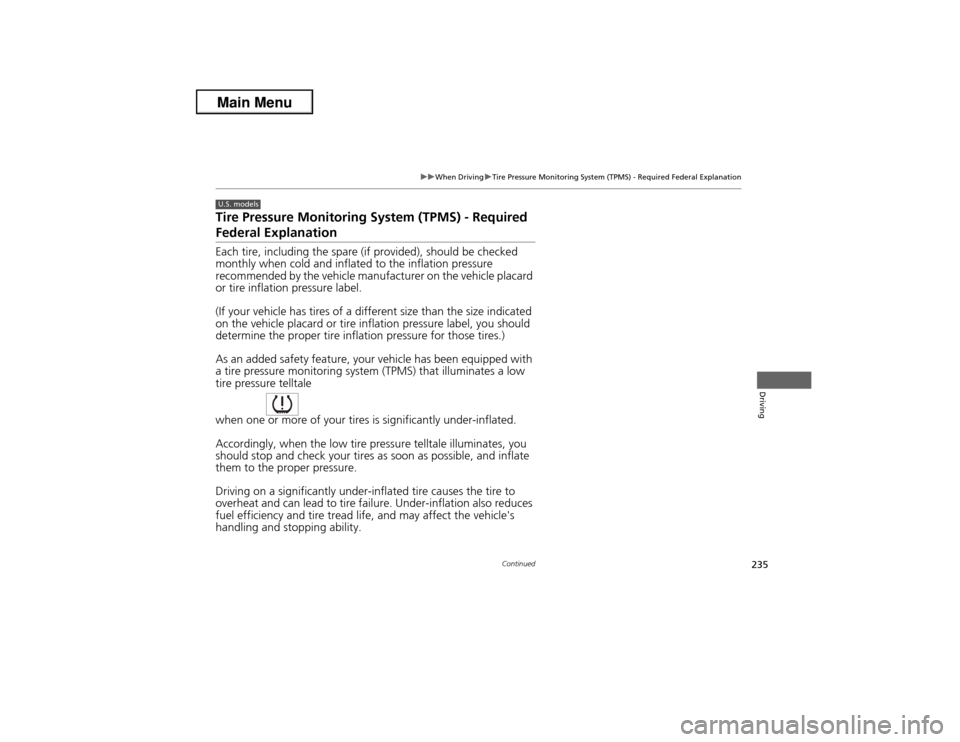
a tire pressure monitoring system (TPMS) that illuminates a low
tire pressure telltale
when one or more of your tires is significantly under-inflated.
Accordingly, when the low tire pressure telltale illuminates, you
should stop and check your tires as soon as possible, and inflate
them to the proper pressure.
Driving on a significantly under-inflated tire causes the tire to
overheat and can lead to tire failure. Under-inflation also reduces
fuel efficiency and tire tread life, and may affect the vehicle's
handling and stopping ability.U.S. models
Page 249 of 351

248Maintenance
Before Performing MaintenanceInspection and MaintenanceFor your safety, perform all listed inspections and maintenance to keep your vehicle
in good condition. If you become aware of any abnormality (noise, smell, insufficient
brake fluid, oil residue on the ground, etc.), have your vehicle inspected by a dealer.
(Note, however, that service at a dealer is not mandatory to keep your warranties in
effect.) Refer to the separate maintenance booklet for detailed maintenance and
inspection information.■Daily inspections
Perform inspections before long distance trips, when washing the vehicle, or when
refueling.■Periodic inspections
•Check the automatic transmission fluid level monthly.2Automatic Transmission Fluid P. 270
•Check the brake fluid level monthly.
2Brake/Clutch Fluid P. 272
•Check the tire pressure monthly. Examine the tread for wear and foreign objects.
2Checking and Maintaining Tires P. 286
•Check the operation of the exterior lights monthly.
2Replacing Light Bulbs P. 274
•Check the condition of the wiper blades at least every six months.
2Checking and Maintaining Wiper Blades P. 284
■Types of Inspection and Maintenance
1Inspection and Maintenance
Maintenance, replacement, or repair of
emissions control devices and systems may be
done by any automotive repair establishment or
individuals using parts that are “certified” to
EPA standards.
According to state and federal regulations, failure to
perform maintenance on the maintenance main
items marked with # will not void your emissions
warranties. However, all maintenance services should
be performed in accordance with the intervals
indicated by the multi-information display.
2Maintenance Service Items P. 254
If you want to perform complex maintenance tasks
that require more skills and tools, you can purchase a
subscription to the Service Express website at
www.techinfo.honda.com.
2Authorized Manuals P. 341
If you want to perform maintenance yourself, make
sure that you have the necessary tools and skills first.
After performing maintenance, update the records in
the separate maintenance booklet.U.S. models
Page 263 of 351
262
uuMaintenance Under the HooduOil Check
Maintenance
Oil CheckWe recommend that you check the engine oil level every time you refuel.
Park the vehicle on level ground.
Wait approximately three minutes after turning the engine off before you check the
oil.
1.Remove the dipstick (orange handle).
2.Wipe the dipstick with a clean cloth or
paper towel.
3.Insert the dipstick back all the way into its
hole.
1Oil Check
If the oil level is near or below the lower mark, slowly
add oil being careful not to overfill.
2.0 ℓ engine models2.4 ℓ engine models
Page 268 of 351

267
uuMaintenance Under the HooduChanging the Engine Oil and Oil Filter
Maintenance
5.Remove the oil filter and dispose of the
remaining oil.
6.Check that the filter gasket is not stuck to
the engine contact surface.
uIf it is stuck, you must detach it.
7.Wipe away dirt and dust adhering to the
contact surface of the engine block, and
install a new oil filter.
uApply a light coat of new engine oil to
the oil filter rubber seal.
8.Put a new washer on the drain bolt, then
reinstall the drain bolt.
uTightening torque:
30 lbf∙ft (40 N∙m, 4.0 kgf∙m)9.Pour the recommended engine oil into the engine.uEngine oil change capacity (including
filter):
3.9 US qt (3.7 L)
4.4 US qt (4.2 L)
10.Reinstall the engine oil fill cap securely and
start the engine.
11.Run the engine for a few minutes, and
then check that there is no leak from the
drain bolt or oil filter.
12.Stop the engine, wait for three minutes,
and then check the oil level on the dipstick.
uIf necessary, add more engine oil.
1Changing the Engine Oil and Oil Filter
You will need a special wrench to replace the oil
filter. You can buy this wrench from a dealer.
When installing the new oil filter, follow the
instructions supplied with the oil filter.
Reinstall the engine oil fill cap. Start the engine. The
low oil pressure indicator should go off within five
seconds. If it does not, turn off the engine, and check
your work.
2.0 ℓ engine models
Oil Filter
2.4 ℓ engine models
Oil Filter
2.0 ℓ engine models2.4 ℓ engine models
Page 292 of 351

291
uuChecking and Maintaining TiresuWear Indicators
Maintenance
Wear Indicators
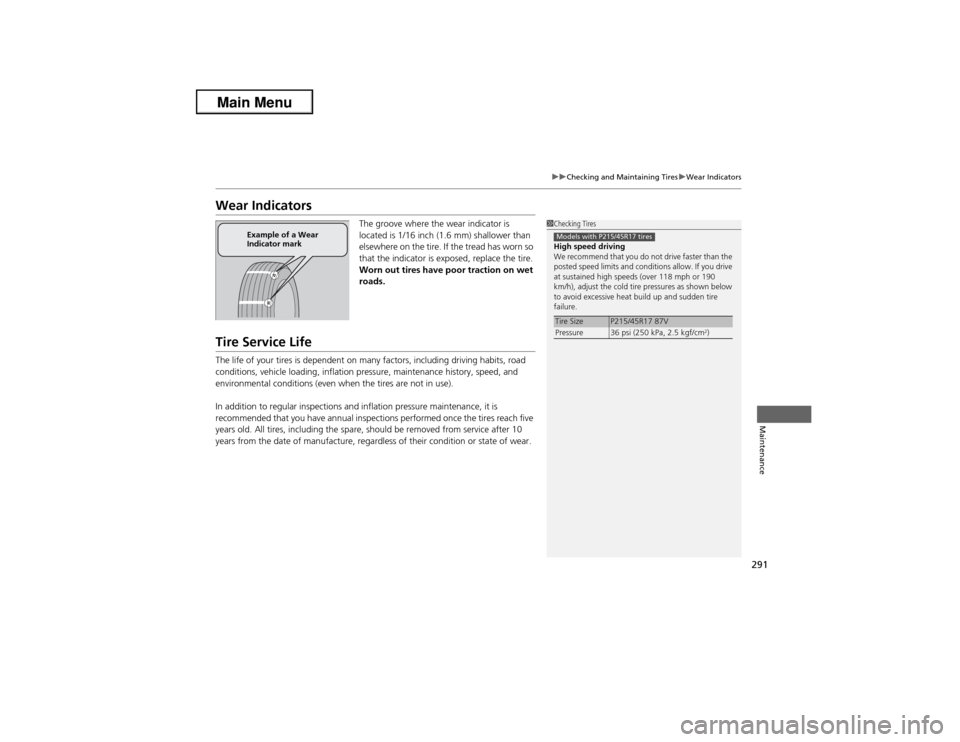
The groove where the wear indicator is
located is 1/16 inch (1.6 mm) shallower than
elsewhere on the tire. If the tread has worn so
that the indicator is exposed, replace the tire.
Worn out tires have poor traction on wet
roads.
Tire Service LifeThe life of your tires is dependent on many factors, including driving habits, road
conditions, vehicle loading, inflation pressure, maintenance history, speed, and
environmental conditions (even when the tires are not in use).
In addition to regular inspections and inflation pressure maintenance, it is
recommended that you have annual inspections performed once the tires reach five
years old. All tires, including the spare, should be removed from service after 10
years from the date of manufacture, regardless of their condition or state of wear.
1Checking Tires
High speed driving
We recommend that you do not drive faster than the
posted speed limits and conditions allow. If you drive
at sustained high speeds (over 118 mph or 190
km/h), adjust the cold tire pressures as shown below
to avoid excessive heat build up and sudden tire
failure.Tire Size
P215/45R17 87V
Pressure 36 psi (250 kPa, 2.5 kgf/cm
2)
Models with P215/45R17 tires
Example of a Wear
Indicator mark
Page 293 of 351
292
uuChecking and Maintaining TiresuTire and Wheel Replacement
Maintenance
Tire and Wheel ReplacementReplace your tires with radials of the same size, load range, speed rating, and
maximum cold tire pressure rating (as shown on the tire’s sidewall). Using tires of a
different size or construction can cause the ABS and VSA® (vehicle stability assist)
system to work incorrectly.
It is best to replace all four tires at the same time. If that isn’t possible, replace the
front or rear tires in pairs.
Make sure that the wheel’s specifications match those of the original wheels.
If you replace a wheel, only use TPMS specified wheels approved for your vehicle.
1Tire and Wheel Replacement
3
WARNING
Installing improper tires on your vehicle can
affect handling and stability. This can cause
a crash in which you can be seriously hurt or
killed.
Always use the size and type of tires
recommended in this owner’s manual.
U.S. models only
Page 296 of 351

295Maintenance
BatteryChecking the Battery
Check the battery condition monthly. Look at
the test indicator window and check the
terminals for corrosion.
The battery condition is being monitored by
the sensor on the negative terminal. If there is
a problem with the sensor, the warning
message on multi-information display will let
you know. Have your vehicle checked by a
dealer.
If your vehicle's battery is disconnected or goes dead:
•The audio system is disabled.
2Reactivating the audio system P. 144
•The clock resets.
2Setting the Clock P. 92
•The navigation system
* is disabled.
2Refer to the navigation system manual
Charging the BatteryDisconnect both battery cables to prevent damaging your vehicle's electrical system.
Always disconnect the negative (–) cable first, and reconnect it last.
1BatteryWARNING: Battery post, terminals,
and related accessories contain lead
and lead compounds.
Wash your hands after handling.The test indicator's color information is on the
battery.
When you find corrosion, clean the battery terminals
by applying a baking powder and water solution.
Rinse the terminals with water. Cloth/towel dry the
battery. Coat the terminals with grease to help
prevent future corrosion.
3
WARNING
The battery gives off explosive hydrogen
gas during normal operation.
A spark or flame can cause the battery to
explode with enough force to kill or
seriously hurt you.
When conducting any battery
maintenance, wear protective clothing and
a face shield, or have a skilled technician do
it.
Test Indicator Window
* Not available on all models