Page 109 of 404

5
Visibility107
Manual adjustment of halogen headlamps
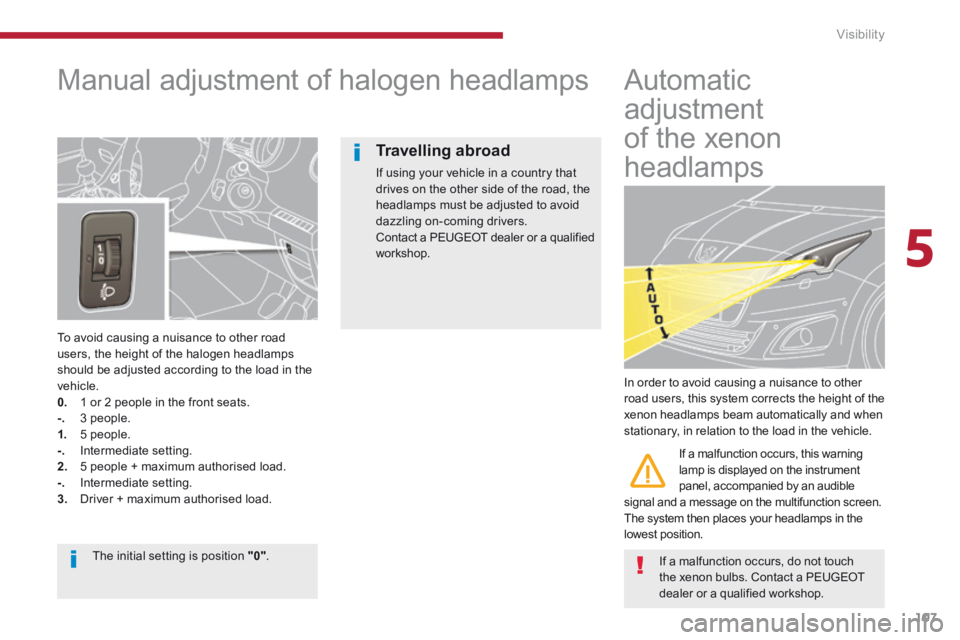
To avoid causing a nuisance to other road users, the height of the halogen headlamps should be adjusted according to the load in the vehicle. 0. 1 or 2 people in the front seats. -. 3 people. 1. 5 people. -. Intermediate setting. 2. 5 people + maximum authorised load. -. Intermediate setting. 3. Driver + maximum authorised load.
Automatic
adjustment
of the xenon
headlamps
In order to avoid causing a nuisance to other road users, this system corrects the height of the xenon headlamps beam automatically and when stationary, in relation to the load in the vehicle.
If a malfunction occurs, this warning lamp is displayed on the instrument panel, accompanied by an audible signal and a message on the multifunction screen. The system then places your headlamps in the
lowest position.
If a malfunction occurs, do not touch the xenon bulbs. Contact a PEUGEOT
dealer or a qualified workshop.
Travelling abroad
If using your vehicle in a country that drives on the other side of the road, the headlamps must be adjusted to avoid dazzling on-coming drivers. Contact a PEUGEOT dealer or a qualified workshop.
The initial setting is position "0" .
Page 142 of 404
Child safety
140
Installing child seats using the seat belt
In accordance with European regulations, this table indicates the options for installing child seats secured using a seat belt and universally approved (a)in accordance with the weight of the child and the seat in the vehicle.
Weight of the child and indicative age
Seat
Under 13 kg
(groups 0 ( b ) and 0+) Up to approx 1 year
From 9 to 18 kg
(group 1) 1 to 3 years approx
From 15 to 25 kg
(group 2) 3 to 6 years approx
From 22 to 36 kg
(group 3) 6 to 10 years approx
Front passenger seat ( c ) with height c ) with height cadjuster
U (R)U (R)U (R)U (R)
Front passenger seat (c) without height adjuster XXXX
5 seats (2 rows)
Outer rear seats (d)(e)U * U * U * U *
Centre rear seat (d)(e)UUUU
* Precautions are required when fitting a child seat with a support leg . Refer to the section "Installing a child seat with a support leg" for more information.
Page 144 of 404
Child safety
142
Weight of the child and indicative age
SeatUnder 13 kg (groups 0 (b) and 0+) Up to approx 1 year
From 9 to 18 kg (group 1) 1 to 3 years approx
From 15 to 25 kg (group 2) 3 to 6 years approx
From 22 to 36 kg (group 3) 6 to 10 years approx
Front passenger seat (c)with height adjuster
U (R)U (R)U (R)U (R)
Front passenger seat (c) without height adjuster XXXX
7 seats (3 rows)
Outer rear seats 2nd row (d)(e)U * U * U * U *
Centre rear seat 2nd row (d)(e)UUUU
Rear seats 3rd row UUUU
* Precautions are required when fitting a child seat with a support leg . Refer to the section "Installing a child seat with a support leg" for more information.
Page 160 of 404

Safety
158
Front seat belts not fastened /
unfastened warning lamp
Fastening
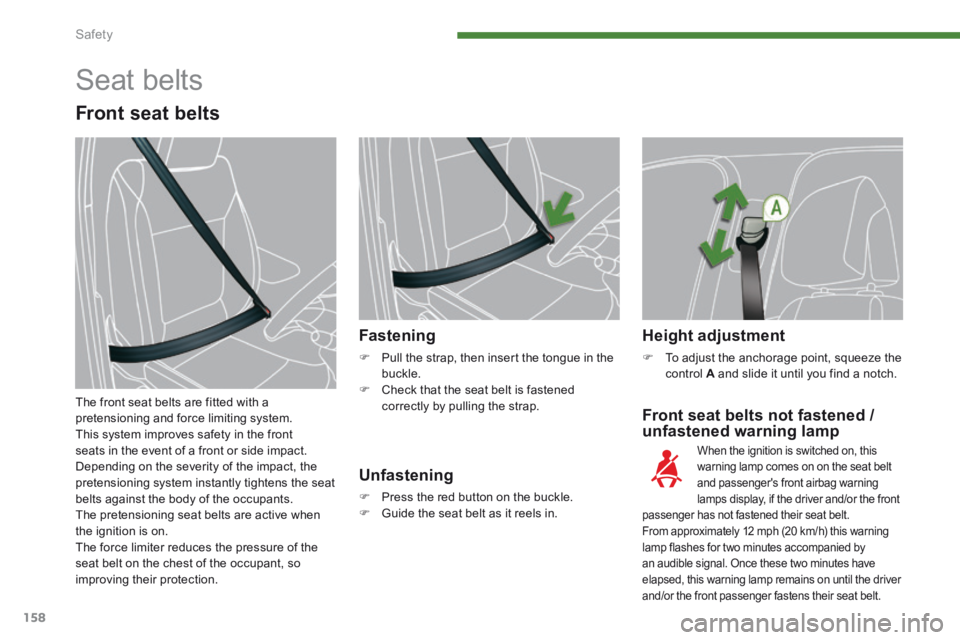
Pull the strap, then insert the tongue in the buckle. Check that the seat belt is fastened correctly by pulling the strap.
Height adjustment
To adjust the anchorage point, squeeze the control A and slide it until you find a notch.
When the ignition is switched on, this warning lamp comes on on the seat belt and passenger's front airbag warning lamps display, if the driver and/or the front passenger has not fastened their seat belt. From approximately 12 mph (20 km/h) this warning
lamp flashes for two minutes accompanied by an audible signal. Once these two minutes have elapsed, this warning lamp remains on until the driver and/or the front passenger fastens their seat belt.
Unfastening
Press the red button on the buckle. Guide the seat belt as it reels in.
Seat belts
Front seat belts
The front seat belts are fitted with a pretensioning and force limiting system. This system improves safety in the front seats in the event of a front or side impact. Depending on the severity of the impact, the pretensioning system instantly tightens the seat belts against the body of the occupants. The pretensioning seat belts are active when the ignition is on.
The force limiter reduces the pressure of the seat belt on the chest of the occupant, so improving their protection.
Page 175 of 404
9
Driving173
System which projects various information onto a transparent strip in the field of vision of the driver so that they do not have to take their eyes off the road. This system operates when the engine is running and the settings are stored when the ignition is switched off.
Head-up display
1. Head-up display on/off. 2. Brightness adjustment. 3. Display height adjustment. The strip is activated by pressing one of the buttons.
Once the system has been activated, the following information is grouped together in the head-up display: A. The speed of your vehicle. B. Cruise control/speed limiter information.
Buttons Displays during operation
C. "Distance alert" information (depending on ve r s i o n).
Page 176 of 404

Driving
174
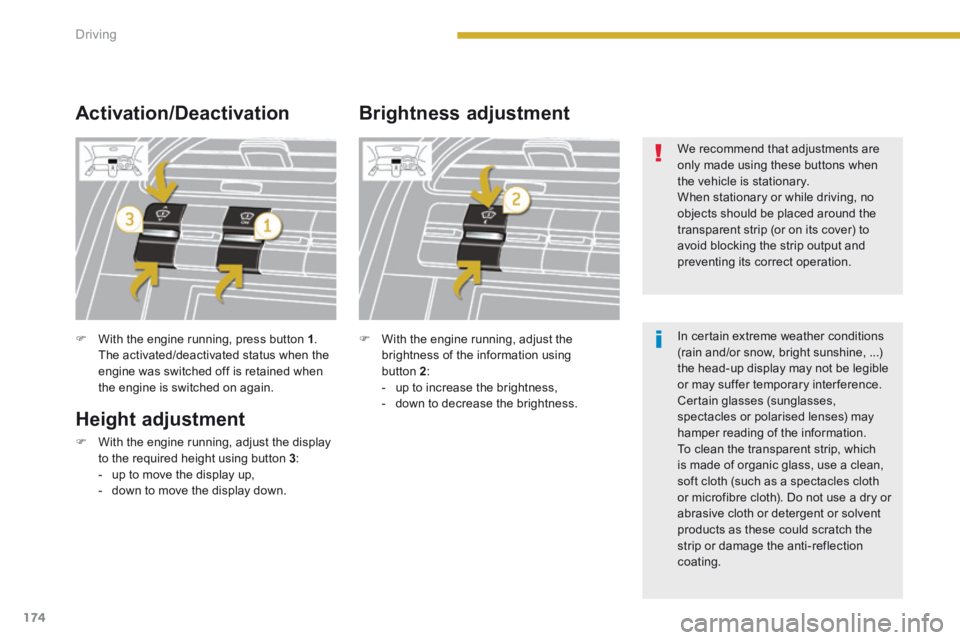
With the engine running, press button 1 . The activated/deactivated status when the engine was switched off is retained when the engine is switched on again.
Height adjustment
With the engine running, adjust the display to the required height using button 3 : - up to move the display up, - down to move the display down.
Activation/Deactivation Brightness adjustment
With the engine running, adjust the brightness of the information using button 2 : - up to increase the brightness, - down to decrease the brightness.
We recommend that adjustments are only made using these buttons when the vehicle is stationary. When stationary or while driving, no objects should be placed around the
transparent strip (or on its cover) to avoid blocking the strip output and preventing its correct operation.
In certain extreme weather conditions (rain and/or snow, bright sunshine, ...) the head-up display may not be legible or may suffer temporary interference. Certain glasses (sunglasses, spectacles or polarised lenses) may
hamper reading of the information. To clean the transparent strip, which is made of organic glass, use a clean, soft cloth (such as a spectacles cloth or microfibre cloth). Do not use a dry or abrasive cloth or detergent or solvent products as these could scratch the strip or damage the anti-reflection coating.
Page 243 of 404
11
Practical information241
Engine compartment fuses
The fusebox is placed in the engine compartment near the battery. Fuse N° Rating (A) Functions
F215 Horn.
F310 Front / rear wash-wipe.
F410 Daytime running lamps.
F515 Purge canister, turbine discharge and Turbo pressure regulation electrovalves (1.6 litre THP), oil vapour heater (1.6 litre THP), diesel heater (1.6 litre HDI).
F610 Diagnostic socket, directional headlamps, particle emission filter pump (Diesel), Distance alert, mirror adjustment control.
F710 Power steering control unit, automatic gearbox, directional headlamps height adjustment motor.
F820 Starter motor control.
F910 Clutch and brake pedal switches.
F1140 Air conditioning fan.
Access to the fuses
Unclip the cover. Change the fuse (see corresponding paragraph). When you have finished, close the cover carefully to ensure correct sealing of the fusebox.
Fuse table
Page 254 of 404
Practical information
252
Fitting roof bars
When fitting transverse roof bars, use the four quick-fit fixings provided for this purpose: lift the concealing flaps, open the fixing covers on each bar using
the key, put each fixing in place and lock them on the roof one by one, ensure that roof bars are correctly fitted (by shaking them), close the fixing covers on each bar using the key.
If your vehicle is fitted with roof finishers, do not use them for carrying loads.
Maximum authorised weight on the roof rack, for a loading height not exceeding 40 cm (with the exception of bicycle c a r r i e r s): 65 kg. If the height exceeds 40 cm, adapt the speed of the vehicle to the profile of the road to avoid damaging the roof bars and the fixings on the roof. Be sure to refer to national legislation in order to comply with the regulations for transporting objects that are longer than the vehicle.