Page 5 of 268

3
CONTENTS
Direction indicators 93Hazard warning lamps 93Horn 93Emergency or assistance call 94Braking assistance systems 94Trajectory control systems 95Front seat belts 97Airbags 100Child seats 104Deactivating the passenger's front airbag 105ISOFIX child seats 110
SAFETY 93 11 3
Parking brake 114Manual gearbox 114Gear shift indicator 115Automatic gearbox 116Stop & Start 119Tyre under-infl ation detection 122Speed limiter 124Cruise control 126Parking sensors 128
DRIVING 114 129
Bonnet 131Running out of fuel (Diesel) 132Petrol engines 133Diesel engines 134Checking levels 135Checks 138
CHECKS 130 139
Temporary puncture repair kit 140Changing a wheel 145Snow chains 149Changing a bulb 150Changing a fuse 15512 V battery 161Energy economy mode 164Changing a wiper blade 165Towing the vehicle 165Towing a trailer 167Very cold climate screen 168Accessories 168
PRACTICAL INFORMATION 140 169
Petrol engines 170Weights (petrol) 171Diesel engines 172Weights (Diesel) 173Dimensions 174Identifi cation markings 175
TECHNICAL D ATA 170 D ATA 170 D ATA 176
AUDIO EQUIPMENT and TELEMATICS 177 251
VISUAL SEARCH 252 255
ALPHABETICAL INDEX 256 260
Emergency or assistance 177PEUGEOT Connect Navigation (RT6) 179PEUGEOT Connect Sound (RD5) 233
7
8
9
10
11
Page 6 of 268
81 140
50
11 9
6
4
FAMILIARISATION
Directional lighting
This lighting automatically provides ad-
ditional visibility when cornering. Retractable roof
This equipment changes from the "coupé"
confi guration to the "cabriolet" confi gura-
tion and vice versa with a single action.
Windstop
In the "cabriolet" confi guration,
this comfort system reduces
air swirl at the front seats.
EXTERIOR
Temporary puncture repair
kit
This kit is a complete system,
comprising a compressor and
a sealant cartridge, for the
temporary repair of a tyre.
Stop & Start
This system puts the engine temporar-
ily into standby during stops in the traf-
fi c (red lights, traffi c jams, etc., ...). The
engine restarts automatically as soon
as you want to move off. The Stop &
Start system reduces fuel consumption,
exhaust emissions and the noise level
when stationary.
Page 9 of 268

!
i
!
i
!
7
FAMILIARISATION
ACCESS
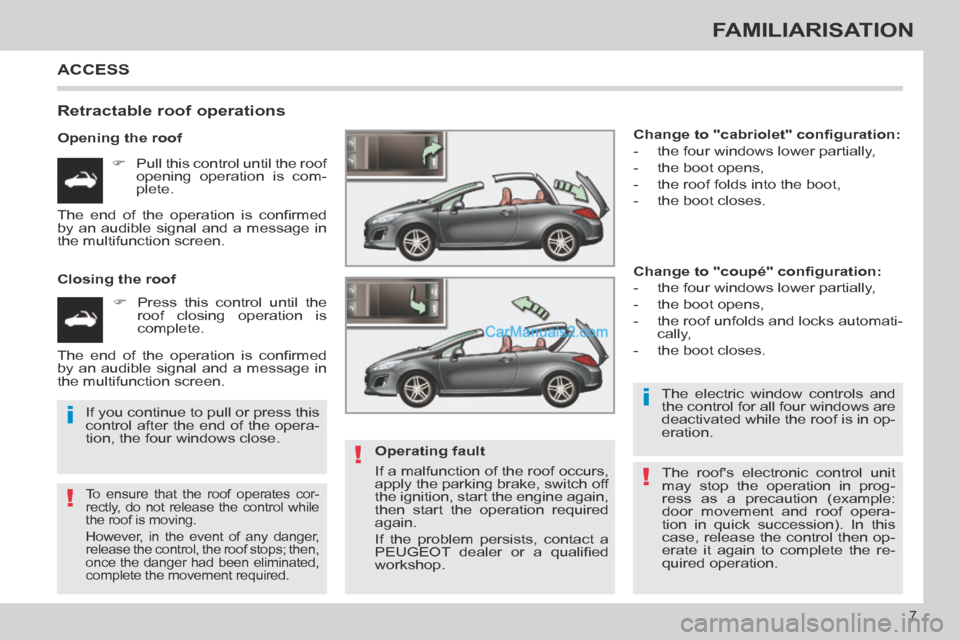
Retractable roof operations
Opening the roof Pull this control until the roof opening operation is com-
plete.
Closing the roof Press this control until the roof closing operation is
complete. Change to "cabriolet" confi guration:
- the four windows lower partially,
- the boot opens,
- the roof folds into the boot,
- the boot closes.
Change to "coupé" confi guration:
- the four windows lower partially,
- the boot opens,
- the roof unfolds and locks automati-
cally,
- the boot closes.
To ensure that the roof operates cor-
rectly, do not release the control while
the roof is moving.
However, in the event of any danger,
release the control, the roof stops; then,
once the danger had been eliminated,
complete the movement required.
Operating fault
If a malfunction of the roof occurs,
apply the parking brake, switch off
the ignition, start the engine again,
then start the operation required
again.
If the problem persists, contact a
PEUGEOT dealer or a qualifi ed
workshop. The electric window controls and
the control for all four windows are
deactivated while the roof is in op-
eration.
The end of the operation is confi rmed
by an audible signal and a message in
the multifunction screen.
The end of the operation is confi rmed
by an audible signal and a message in
the multifunction screen.
If you continue to pull or press this
control after the end of the opera-
tion, the four windows close.
The roof's electronic control unit
may stop the operation in prog-
ress as a precaution (example:
door movement and roof opera-
tion in quick succession). In this
case, release the control then op-
erate it again to complete the re-
quired operation.
Page 11 of 268
9
FAMILIARISATION
1. Steering lock and ignition.
2. Audio and telematics system steering mounted control.
3. Wipers / screenwash / trip computer control stalk.
4. Instrument panel.
5. Driver's front airbag.
Horn.
6. Gear lever.
7. Parking brake.
8. 12 V accessory socket.
9. Heated seat control.
10. Door mirror controls.
Electric window controls.
11 . Passenger's front airbag
deactivation switch.
12. Manual headlamp height adjustment.
Stop & Start button.
13. Side adjustable air vent.
14. Front side window demisting vent.
15. Speaker (tweeter).
16. Windscreen demisting vent.
INSTRUMENTS AND CONTROLS
Page 18 of 268
i
101 97, 101 63
16
FAMILIARISATION
Passenger's front airbag
STARTING
1. Insert the key.
2. Select position:
"OFF" (deactivated), with "rearward
facing" child seat,
"ON" (activated), with front passen-
ger or "forward facing" child seat.
3. Remove the key keeping the switch in the new position. 1. Stop position.
2. Ignition on (Running ) position.
3. Starting position.
A. Front and/or rear seat belts not fas-
tened / unfastened warning lamp.
B. Front left seat belt warning lamp.
C. Front right seat belt warning lamp.
D. Rear right seat belt warning lamp.
E. Rear left seat belt warning lamp.
F. Passenger's front airbag deactivated
warning lamp.
G. Passenger's front airbag activated warning lamp.
Seat belts and passenger's
front airbag
PASSENGER SAFETY
Ignition switch
Avoid attaching any heavy objects
to the key which would weigh down
on its shaft in the ignition switch;
this could cause a malfunction.
Page 19 of 268

!
i
i
11 9 120
17
FAMILIARISATION
DRIVING SAFELY
Stop & Start
The "ECO" warning lamp comes on
in the instrument panel and the en-
gine automatically goes into standby: The "ECO" warning lamp goes
off and the engine restarts auto-
matically:
You can deactivate the system at any
time by pressing the "ECO OFF" but-
ton; the warning lamp in the button
comes on. Deactivation / Reactivation
Going into engine STOP mode Going into engine START mode
- with a manual gearbox: at speeds below 12 mph (20 km/h), when you
place the gear lever into neutral,
and you release the clutch pedal.
In some circumstances, STOP mode may
not be available; the "ECO" warning lamp
fl ashes for few seconds, then goes off.
- with a manual gearbox: when you fully depress the clutch pedal.
If you engage a gear without fully
depressing the clutch pedal, the
engine will not restart automatical-
ly. An alert message is displayed
asking you to fully depress the
clutch pedal. The system is reactivated auto-
matically at every new start using
the key.
Before refuelling or doing anything
under the bonnet, you must switch
off the ignition using the key.
In some circumstances START mode
may be invoked automatically; the
"ECO" warning lamp fl ashes for a few
seconds, then goes off.
Page 30 of 268

1
28
MONITORING
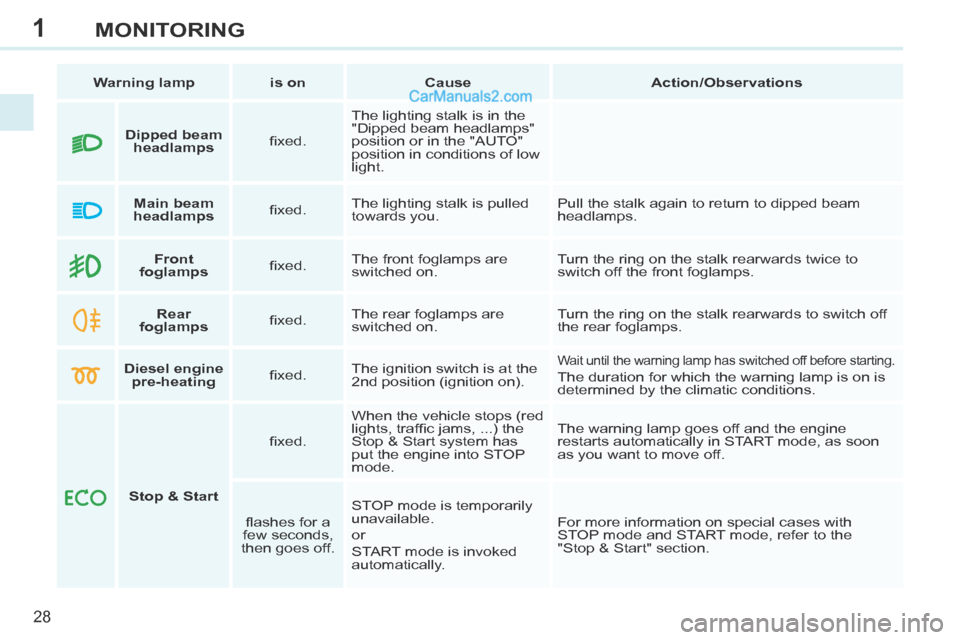
Warning lamp is on Cause Action/Observations
Front
foglamps fi xed. The front foglamps are
switched on. Turn the ring on the stalk rearwards twice to
switch off the front foglamps.
Rear
foglamps fi xed. The rear foglamps are
switched on. Turn the ring on the stalk rearwards to switch off
the rear foglamps.
Diesel engine
pre-heating fi xed. The ignition switch is at the
2nd position (ignition on).
Wait until the warning lamp has switched off before starting.
The duration for which the warning lamp is on is
determined by the climatic conditions.
Stop & Start fi xed.
When the vehicle stops (red
lights, traffi c jams, ...) the
Stop & Start system has
put the engine into STOP
mode. The warning lamp goes off and the engine
restarts automatically in START mode, as soon
as you want to move off.
fl ashes for a
few seconds,
then goes off. STOP mode is temporarily
unavailable.
or
START mode is invoked
automatically. For more information on special cases with
STOP mode and START mode, refer to the
"Stop & Start" section.
Dipped beam
headlamps fi xed. The lighting stalk is in the
"Dipped beam headlamps"
position or in the "AUTO"
position in conditions of low
light.
Main beam
headlamps fi xed. The lighting stalk is pulled
towards you. Pull the stalk again to return to dipped beam
headlamps.
Page 39 of 268

1
37
MONITORING
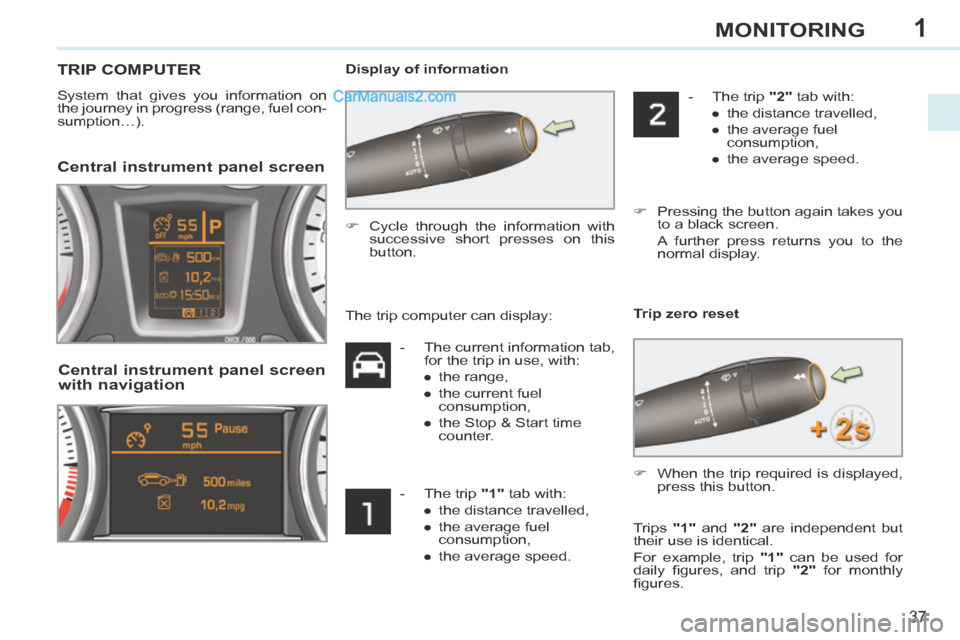
TRIP COMPUTER
System that gives you information on
the journey in progress (range, fuel con-
sumption…). Display of information
Central instrument panel screen
Cycle through the information with
successive short presses on this
button.
Central instrument panel screen
with navigation
Trip zero reset
- The current information tab, for the trip in use, with:
● the range,
● the current fuel consumption,
● the Stop & Start time counter.
- The trip "1" tab with: ● the distance travelled,
● the average fuel consumption,
● the average speed. - The trip "2" tab with:
● the distance travelled,
● the average fuel consumption,
● the average speed.
Pressing the button again takes you to a black screen.
A further press returns you to the normal display.
The trip computer can display:
When the trip required is displayed, press this button.
Trips "1" and "2" are independent but
their use is identical.
For example, trip "1" can be used for
daily fi gures, and trip "2" for monthly
fi gures.