2013.5 Peugeot 308 CC key
[x] Cancel search: keyPage 90 of 268
6
88
FITTINGS
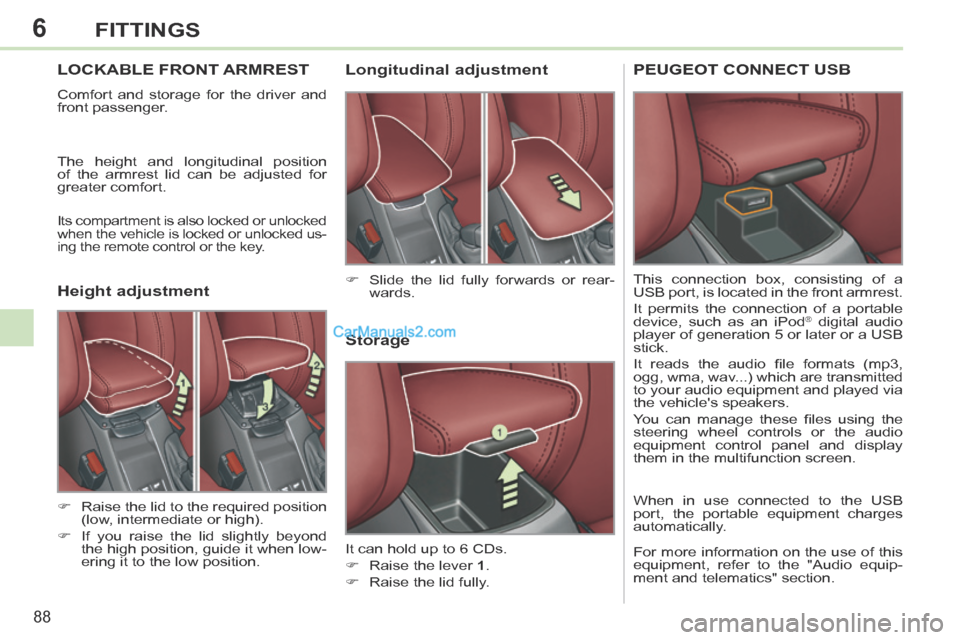
LOCKABLE FRONT ARMREST
Comfort and storage for the driver and
front passenger.
The height and longitudinal position
of the armrest lid can be adjusted for
greater comfort.
Its compartment is also locked or unlocked
when the vehicle is locked or unlocked us-
ing the remote control or the key.
Storage
It can hold up to 6 CDs.
Raise the lever 1 .
Raise the lid fully. Slide the lid fully forwards or rear- wards.
Raise the lid to the required position (low, intermediate or high).
If you raise the lid slightly beyond the high position, guide it when low-
ering it to the low position.
Longitudinal adjustment
Height adjustment PEUGEOT CONNECT USB
This connection box, consisting of a
USB port, is located in the front armrest.
It permits the connection of a portable
device, such as an iPod
® digital audio
player of generation 5 or later or a USB
stick.
It reads the audio fi le formats (mp3,
ogg, wma, wav...) which are transmitted
to your audio equipment and played via
the vehicle's speakers.
You can manage these fi les using the
steering wheel controls or the audio
equipment control panel and display
them in the multifunction screen.
When in use connected to the USB
port, the portable equipment charges
automatically.
For more information on the use of this
equipment, refer to the "Audio equip-
ment and telematics" section.
Page 103 of 268
7
!
101
SAFETY
Operating fault If this warning lamp comes on
or fl ash, accompanied by an
audible warning and a mes-
sage in the screen, contact a
PEUGEOT dealer or a qualifi ed work-
shop to have the system checked. The
airbags may no longer be deployed in
the event of a serious impact.
Reactivation
When you remove the child seat, with
the ignition off, turn the control switch
to the "ON" position to reactivate the
airbag and so assure the safety of your
front passenger in the event of an im-
pact.
On switching the ignition on,
this warning lamp comes on in
the seat belt and passenger's
front airbag warning lamps dis-
play for approximately one minute, so
as to signal the activation of the pas-
senger's front airbag. To assure the safety of your child,
the passenger's front airbag must
be deactivated when you install a
"rearward facing" child seat on the
front passenger seat.
Otherwise, the child would risk be-
ing seriously injured or killed if the
airbag were deployed.
On switching on the ignition this
warning lamp comes on in the
seat belt and passenger's front
airbag warning lamps display. It
stays on until the airbag is re-
activated.
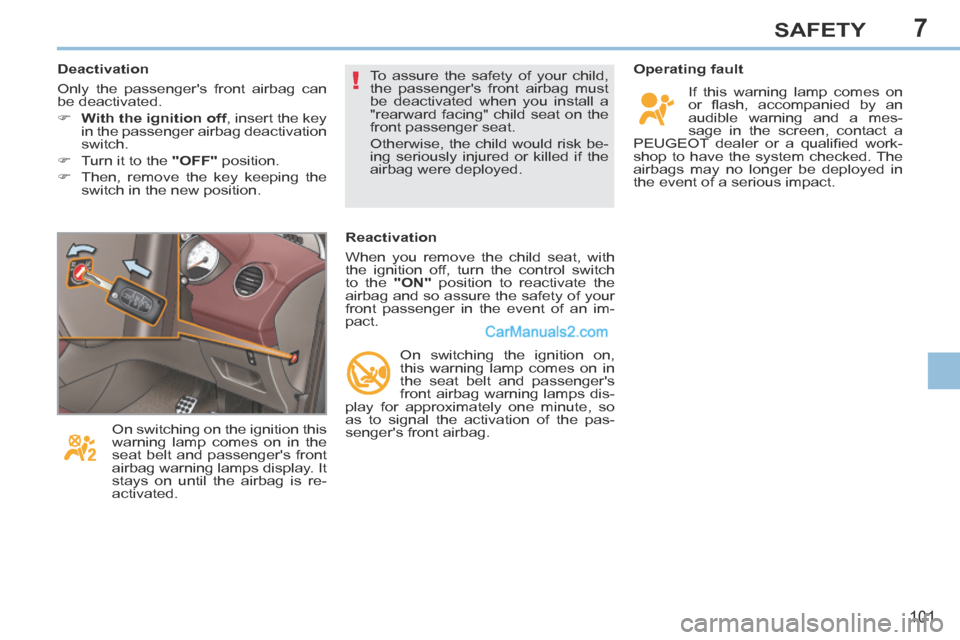
Deactivation
Only the passenger's front airbag can
be deactivated.
With the ignition off , insert the key
in the passenger airbag deactivation
switch.
Turn it to the "OFF" position.
Then, remove the key keeping the switch in the new position.
Page 112 of 268
7
!
i
11 0
SAFETY
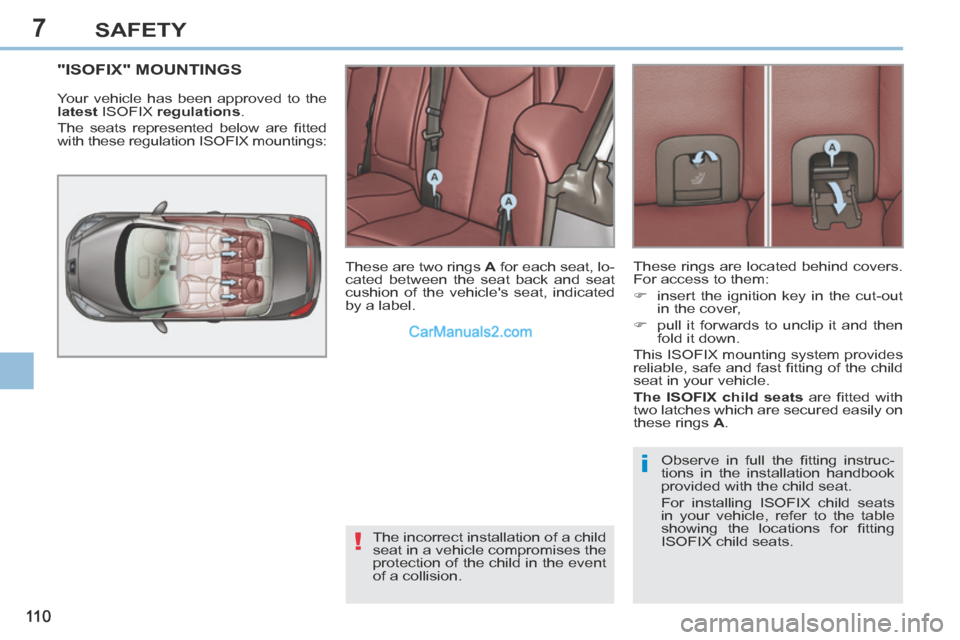
"ISOFIX" MOUNTINGS
Your vehicle has been approved to the
latest ISOFIX regulations .
The seats represented below are fi tted
with these regulation ISOFIX mountings:
These are two rings A for each seat, lo-
cated between the seat back and seat
cushion of the vehicle's seat, indicated
by a label.
The incorrect installation of a child
seat in a vehicle compromises the
protection of the child in the event
of a collision. Observe in full the fi tting instruc-
tions in the installation handbook
provided with the child seat.
For installing ISOFIX child seats
in your vehicle, refer to the table
showing the locations for fi tting
ISOFIX child seats.
These rings are located behind covers.
For access to them:
insert the ignition key in the cut-out
in the cover,
pull it forwards to unclip it and then fold it down.
This ISOFIX mounting system provides
reliable, safe and fast fi tting of the child
seat in your vehicle.
The ISOFIX child seats are fi tted with
two latches which are secured easily on
these rings A .
Page 115 of 268
7
!
11 3
SAFETY
ADVICE ON CHILD SEATS
The incorrect installation of a child
seat in a vehicle compromises the
child's protection in the event of an ac-
cident.
When installing a child seat using the
seat belt, ensure that the seat belt is
tightened correctly on the child seat
and that it secures the child seat fi rmly
on the vehicle's seat.
Remember to fasten the seat belts or
the child seat harnesses keeping the
slack in relation to the child's body to
a minimum , even for short journeys.
For optimum installation of the "for-
ward facing" child seat, ensure that
the back of the child seat is as close
as possible to the backrest of the vehi-
cle's seat, even in contact if possible. Children at the front
The legislation on carrying children on
a front passenger seat is specifi c to
each country. Refer to the legislation
in force in your country.
Deactivate the passenger airbag
when a "rearward facing" child seat is
installed on the front seat. Otherwise,
the child would risk being seriously
injured or killed if the airbag were to
infl ate.
As a safety precaution, do not leave:
- one or more children alone and
unsupervised in a vehicle,
- a child or an animal in a vehicle which is exposed to the sun, with
the windows closed,
- the keys within reach of children inside the vehicle.
Installation of a booster seat
The chest part of the seat belt must
be positioned on the child's shoulder
without touching the neck.
Ensure that the lap part of the seat
belt passes correctly over the child's
thighs.
PEUGEOT recommends the use of
a booster seat which has a back, fi t-
ted with a seat belt guide at shoulder
level.
Do not use the passenger's "AIRWAVE"
system if a child seat is installed on the
front seat.
Page 121 of 268
8
!
i
i
11 9
DRIVING
STOP & START
The Stop & Start system puts the en-
gine temporarily into standby - STOP
mode - during stops in the traffi c (red
lights, traffi c jams, etc...). The engine
restarts automatically - START mode -
as soon as you want to move off. The
restart takes place instantly, quickly and
silently.
Perfect for urban use, the Stop & Start
system reduces fuel consumption, ex-
haust emissions and the noise level
when stationary.
Operation
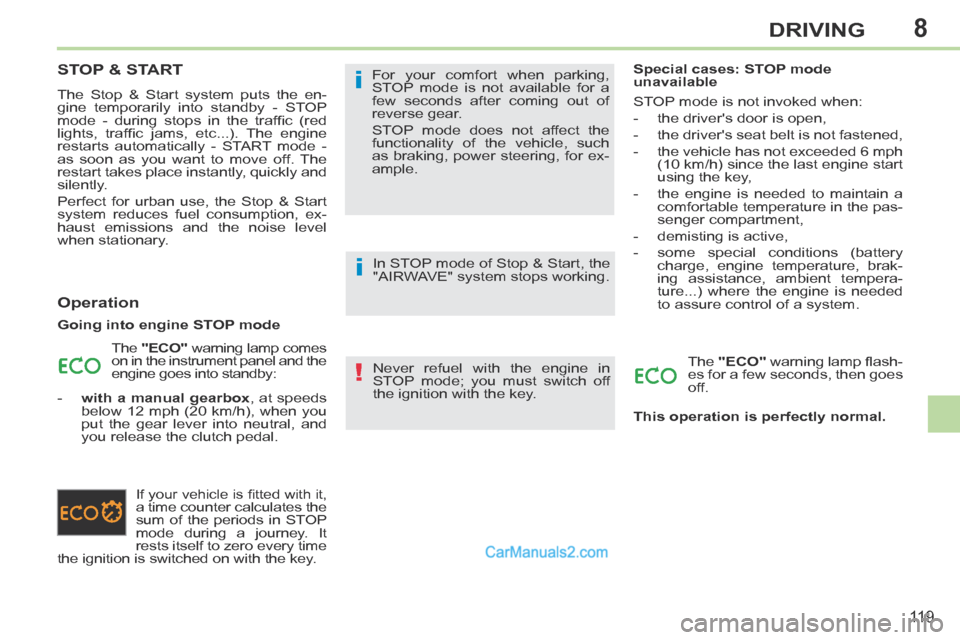
Going into engine STOP mode The "ECO" warning lamp comes
on in the instrument panel and the
engine goes into standby:
- with a manual gearbox , at speeds below 12 mph (20 km/h), when you
put the gear lever into neutral, and
you release the clutch pedal.
If your vehicle is fi tted with it, a time counter calculates the
sum of the periods in STOP
mode during a journey. It
rests itself to zero every time
the ignition is switched on with the key. For your comfort when parking,
STOP mode is not available for a
few seconds after coming out of
reverse gear.
STOP mode does not affect the
functionality of the vehicle, such
as braking, power steering, for ex-
ample.
Never refuel with the engine in
STOP mode; you must switch off
the ignition with the key. Special cases: STOP mode
unavailable
STOP mode is not invoked when:
- the driver's door is open,
- the driver's seat belt is not fastened,
- the vehicle has not exceeded 6 mph
(10 km/h) since the last engine start
using the key,
- the engine is needed to maintain a comfortable temperature in the pas-
senger compartment,
- demisting is active,
- some special conditions (battery charge, engine temperature, brak-
ing assistance, ambient tempera-
ture...) where the engine is needed
to assure control of a system.
The "ECO" warning lamp fl ash-
es for a few seconds, then goes
off.
This operation is perfectly normal.
In STOP mode of Stop & Start, the
"AIRWAVE" system stops working.
Page 122 of 268
8
i
i
!
120
DRIVING
Going into engine START mode The "ECO" warning lamp goes
off and the engine starts:
- with a manual gearbox , when you fully depress the clutch pedal. Special cases: START invoked
automatically
For your safety and comfort, START
mode is invoked automatically when:
- you open the driver's door,
- you unfasten the driver's seat belt,
- the speed of the vehicle exceeds
15 mph (25 km/h) with a manual
gearbox,
- some special conditions (battery charge, engine temperature, brak-
ing assistance, ambient tempera-
ture...) where the engine is needed
to assure control of a system.
The "ECO" warning lamp fl ash-
es, then goes off.
This operation is perfectly normal. Deactivation
If the system has been deactivated
in STOP mode, the engine restarts
immediately.
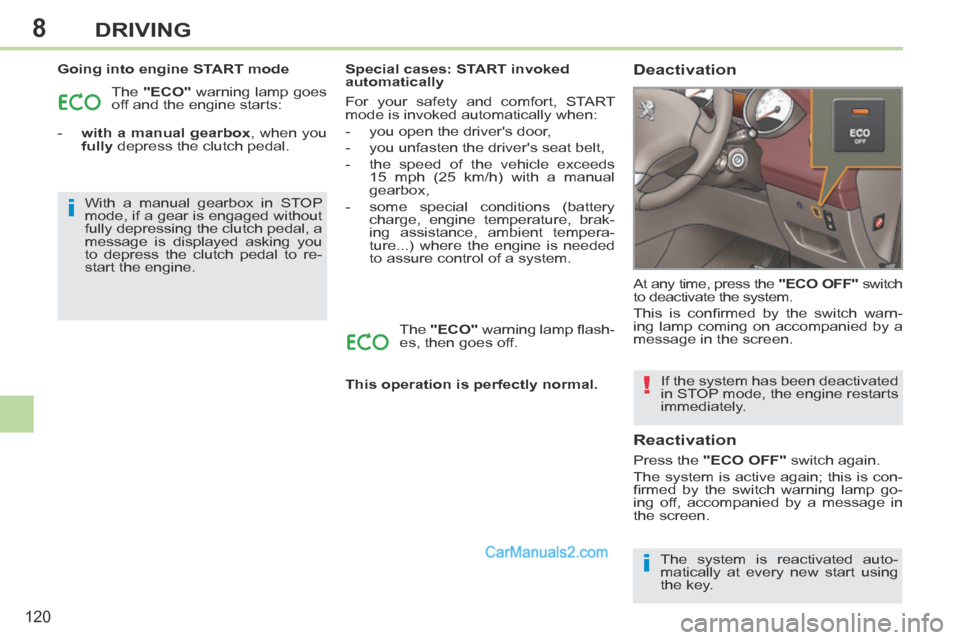
At any time, press the
"ECO OFF" switch
to deactivate the system.
This is confi rmed by the switch warn-
ing lamp coming on accompanied by a
message in the screen.
Reactivation
Press the "ECO OFF" switch again.
The system is active again; this is con-
fi rmed by the switch warning lamp go-
ing off, accompanied by a message in
the screen.
The system is reactivated auto-
matically at every new start using
the key.
With a manual gearbox in STOP
mode, if a gear is engaged without
fully depressing the clutch pedal, a
message is displayed asking you
to depress the clutch pedal to re-
start the engine.
Page 123 of 268
8
!
!
121
DRIVING
Operating fault
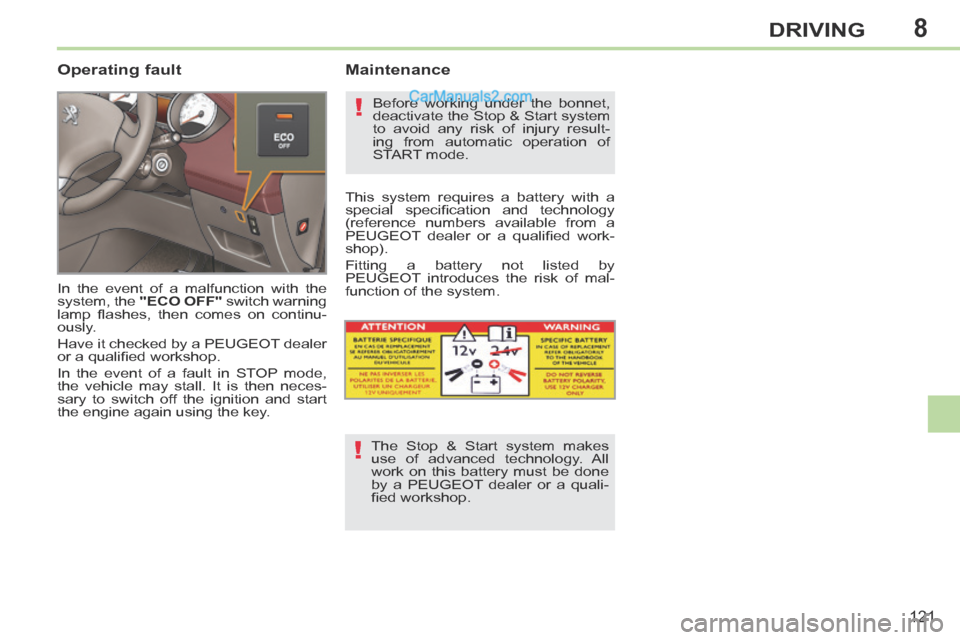
In the event of a malfunction with the
system, the "ECO OFF" switch warning
lamp fl ashes, then comes on continu-
ously.
Have it checked by a PEUGEOT dealer
or a qualifi ed workshop.
In the event of a fault in STOP mode,
the vehicle may stall. It is then neces-
sary to switch off the ignition and start
the engine again using the key.
Maintenance
Before working under the bonnet,
deactivate the Stop & Start system
to avoid any risk of injury result-
ing from automatic operation of
START mode.
This system requires a battery with a
special specifi cation and technology
(reference numbers available from a
PEUGEOT dealer or a qualifi ed work-
shop).
Fitting a battery not listed by
PEUGEOT introduces the risk of mal-
function of the system.
The Stop & Start system makes
use of advanced technology. All
work on this battery must be done
by a PEUGEOT dealer or a quali-
fi ed workshop.
Page 168 of 268
10
i
166
PRACTICAL INFORMATION
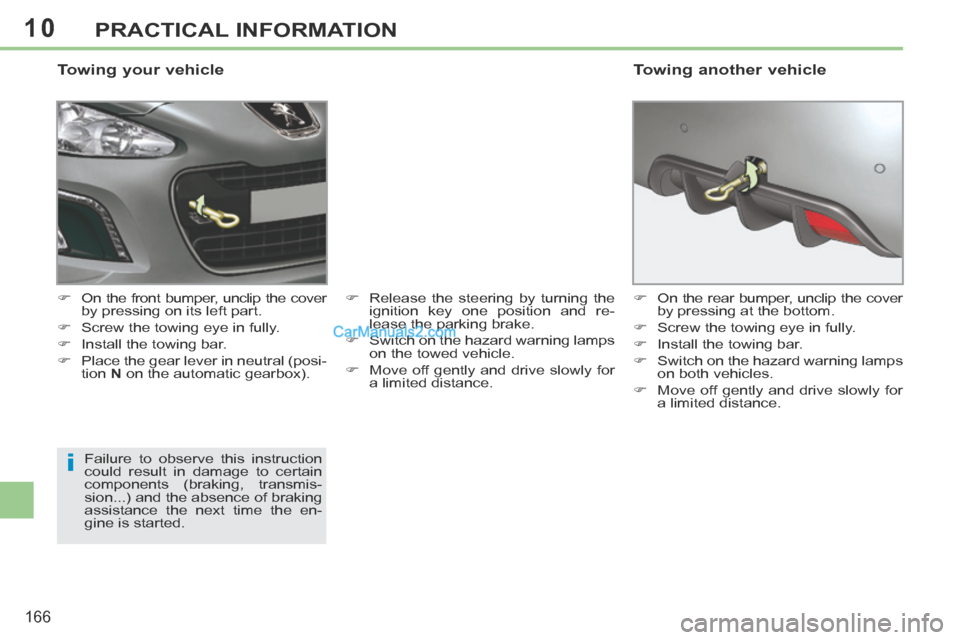
Towing your vehicle
On the front bumper, unclip the cover by pressing on its left part.
Screw the towing eye in fully.
Install the towing bar.
Place the gear lever in neutral (posi- tion N on the automatic gearbox). Release the steering by turning the
ignition key one position and re-
lease the parking brake.
Switch on the hazard warning lamps on the towed vehicle.
Move off gently and drive slowly for a limited distance.
Failure to observe this instruction
could result in damage to certain
components (braking, transmis-
sion...) and the absence of braking
assistance the next time the en-
gine is started. On the rear bumper, unclip the cover
by pressing at the bottom.
Screw the towing eye in fully.
Install the towing bar.
Switch on the hazard warning lamps on both vehicles.
Move off gently and drive slowly for a limited distance.
Towing another vehicle