2013.5 Peugeot 308 CC key
[x] Cancel search: keyPage 71 of 268
4
!
i
i
69
ACCESS
This procedure reinitialises the op-
eration of the electric windows and
the automatic partial opening of the
door windows .
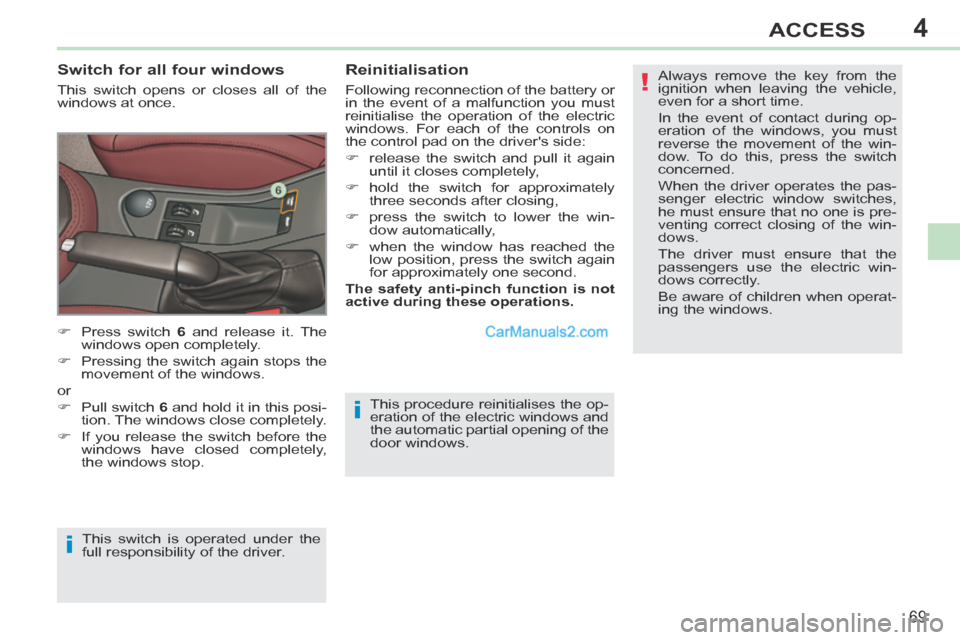
Switch for all four windows
This switch opens or closes all of the
windows at once. Always remove the key from the
ignition when leaving the vehicle,
even for a short time.
In the event of contact during op-
eration of the windows, you must
reverse the movement of the win-
dow. To do this, press the switch
concerned.
When the driver operates the pas-
senger electric window switches,
he must ensure that no one is pre-
venting correct closing of the win-
dows.
The driver must ensure that the
passengers use the electric win-
dows correctly.
Be aware of children when operat-
ing the windows.
Reinitialisation
Following reconnection of the battery or
in the event of a malfunction you must
reinitialise the operation of the electric
windows. For each of the controls on
the control pad on the driver's side:
release the switch and pull it again
until it closes completely,
hold the switch for approximately three seconds after closing,
press the switch to lower the win- dow automatically,
when the window has reached the low position, press the switch again
for approximately one second.
The safety anti-pinch function is not
active during these operations.
Press switch 6 and release it. The
windows open completely.
Pressing the switch again stops the movement of the windows.
or
Pull switch 6 and hold it in this posi-
tion. The windows close completely.
If you release the switch before the windows have closed completely,
the windows stop.
This switch is operated under the
full responsibility of the driver.
Page 72 of 268
4
!
i
i
i
i
70
ACCESS
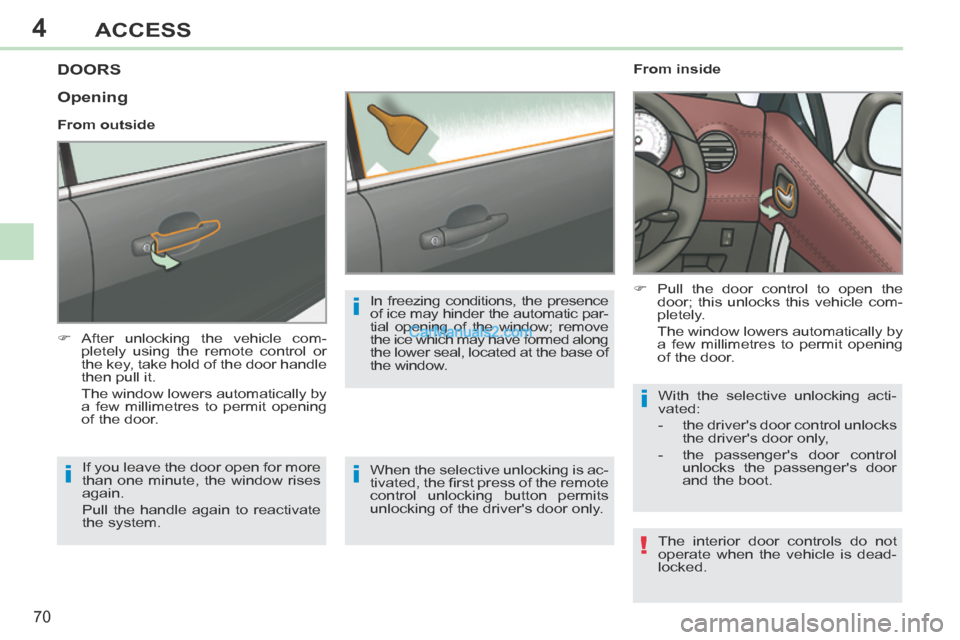
DOORS
After unlocking the vehicle com-pletely using the remote control or
the key, take hold of the door handle
then pull it.
The window lowers automatically by a few millimetres to permit opening
of the door. From inside
Pull the door control to open the
door; this unlocks this vehicle com-
pletely.
The window lowers automatically by a few millimetres to permit opening
of the door.
The interior door controls do not
operate when the vehicle is dead-
locked.
If you leave the door open for more
than one minute, the window rises
again.
Pull the handle again to reactivate
the system.
Opening
From outside
When the selective unlocking is ac-
tivated, the fi rst press of the remote
control unlocking button permits
unlocking of the driver's door only. With the selective unlocking acti-
vated:
- the driver's door control unlocks
the driver's door only,
- the passenger's door control unlocks the passenger's door
and the boot.
In freezing conditions, the presence
of ice may hinder the automatic par-
tial opening of the window; remove
the ice which may have formed along
the lower seal, located at the base of
the window.
Page 73 of 268
4
i
i!
!
!
71
ACCESS
When locking/deadlocking from
outside
When the vehicle is locked or
deadlocked from the outside, the
red indicator lamp fl ashes and the
button is inactive.
For normal locking, pull the in-terior door control to open the
vehicle.
For deadlocking, you have to use the remote control or the
key to unlock the vehicle.
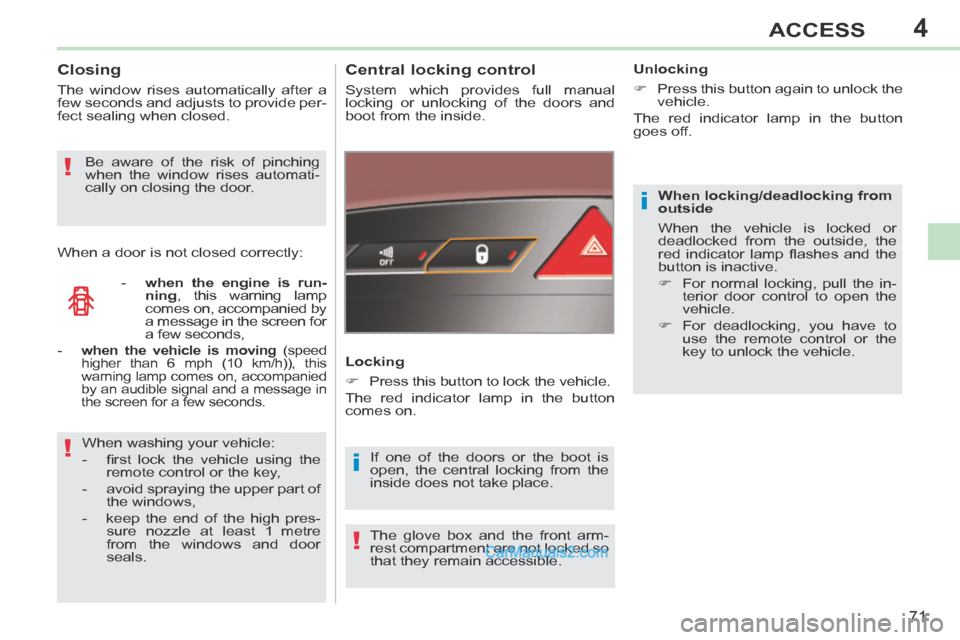
Central locking control
System which provides full manual
locking or unlocking of the doors and
boot from the inside.
Locking
Press this button to lock the vehicle.
The red indicator lamp in the button
comes on.
If one of the doors or the boot is
open, the central locking from the
inside does not take place. Unlocking
Press this button again to unlock the
vehicle.
The red indicator lamp in the button
goes off.
Closing
The window rises automatically after a
few seconds and adjusts to provide per-
fect sealing when closed.
- when the engine is run-ning , this warning lamp
comes on, accompanied by
a message in the screen for
a few seconds,
When washing your vehicle:
- fi rst lock the vehicle using the remote control or the key,
- avoid spraying the upper part of the windows,
- keep the end of the high pres- sure nozzle at least 1 metre
from the windows and door
seals.
When a door is not closed correctly:
Be aware of the risk of pinching
when the window rises automati-
cally on closing the door.
The glove box and the front arm-
rest compartment are not locked so
that they remain accessible.
-
when the vehicle is moving (speed
higher than 6 mph (10 km/h)), this
warning lamp comes on, accompanied
by an audible signal and a message in
the screen for a few seconds.
Page 74 of 268
4
!
72
ACCESS
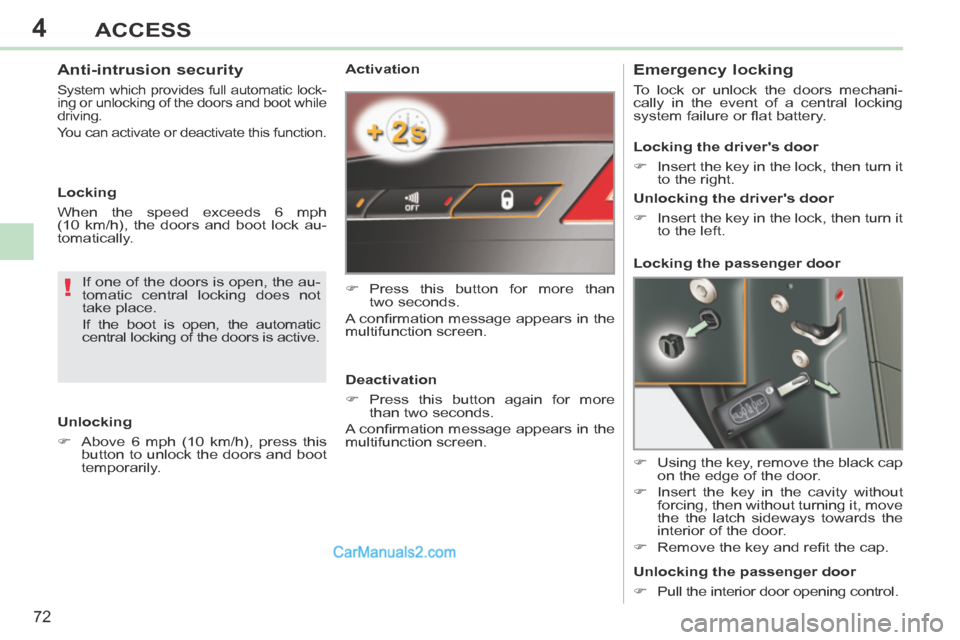
Activation
Press this button for more than two seconds.
A confi rmation message appears in the
multifunction screen.
Deactivation
Press this button again for more than two seconds.
A confi rmation message appears in the
multifunction screen. Emergency locking
To lock or unlock the doors mechani-
cally in the event of a central locking
system failure or fl at battery.
Using the key, remove the black cap on the edge of the door.
Insert the key in the cavity without forcing, then without turning it, move
the the latch sideways towards the
interior of the door.
Remove the key and refi t the cap. Locking the driver's door
Insert the key in the lock, then turn it to the right.
Unlocking the driver's door
Insert the key in the lock, then turn it to the left.
Locking the passenger door
Unlocking the passenger door
Pull the interior door opening control.
If one of the doors is open, the au-
tomatic central locking does not
take place.
If the boot is open, the automatic
central locking of the doors is active.
Anti-intrusion security
System which provides full automatic lock-
ing or unlocking of the doors and boot while
driving.
You can activate or deactivate this function.
Unlocking
Above 6 mph (10 km/h), press this
button to unlock the doors and boot
temporarily.
Locking
When the speed exceeds 6 mph
(10 km/h), the doors and boot lock au-
tomatically.
Page 75 of 268
4
i
i
73
ACCESS
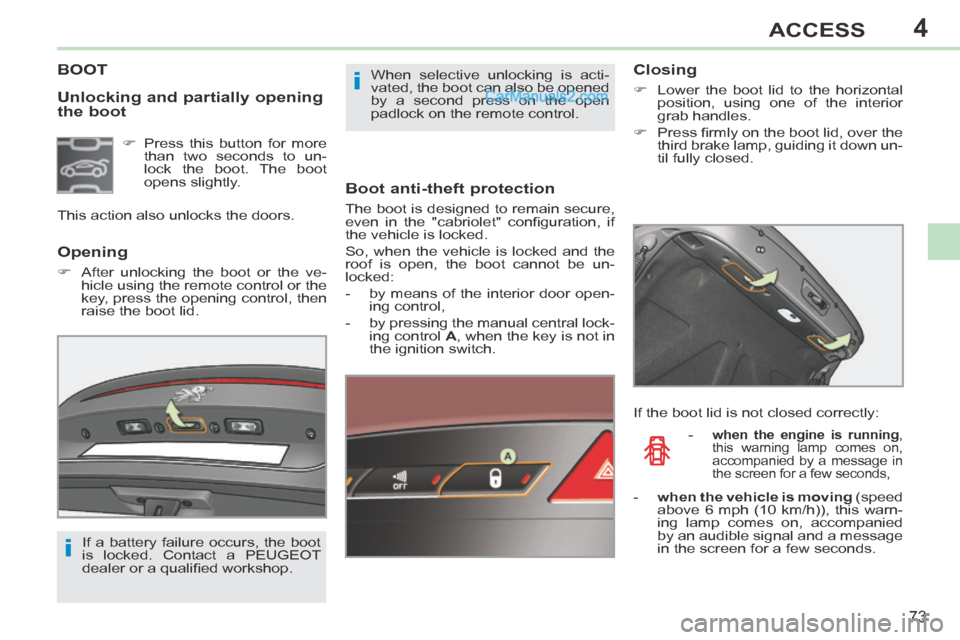
Unlocking and partially opening
the boot
BOOT
Boot anti-theft protection
The boot is designed to remain secure,
even in the "cabriolet" confi guration, if
the vehicle is locked.
So, when the vehicle is locked and the
roof is open, the boot cannot be un-
locked:
- by means of the interior door open-ing control,
- by pressing the manual central lock- ing control A , when the key is not in
the ignition switch.
Opening
After unlocking the boot or the ve- hicle using the remote control or the
key, press the opening control, then
raise the boot lid. When selective unlocking is acti-
vated, the boot can also be opened
by a second press on the open
padlock on the remote control.
Press this button for more than two seconds to un-
lock the boot. The boot
opens slightly.
This action also unlocks the doors.
If a battery failure occurs, the boot
is locked. Contact a PEUGEOT
dealer or a qualifi ed workshop.
Closing
Lower the boot lid to the horizontal position, using one of the interior
grab handles.
Press fi rmly on the boot lid, over the third brake lamp, guiding it down un-
til fully closed.
If the boot lid is not closed correctly: -
when the engine is running ,
this warning lamp comes on,
accompanied by a message in
the screen for a few seconds,
- when the vehicle is moving (speed above 6 mph (10 km/h)), this warn-
ing lamp comes on, accompanied
by an audible signal and a message
in the screen for a few seconds.
Page 76 of 268
4
i
!
74
ACCESS
The key cannot be removed from
the lock until the cap is put back on
the tank.
Opening the cap may trigger an
inrush of air. This vacuum, which
is completely normal, is caused by
the sealing of the fuel system.
FUEL TANK
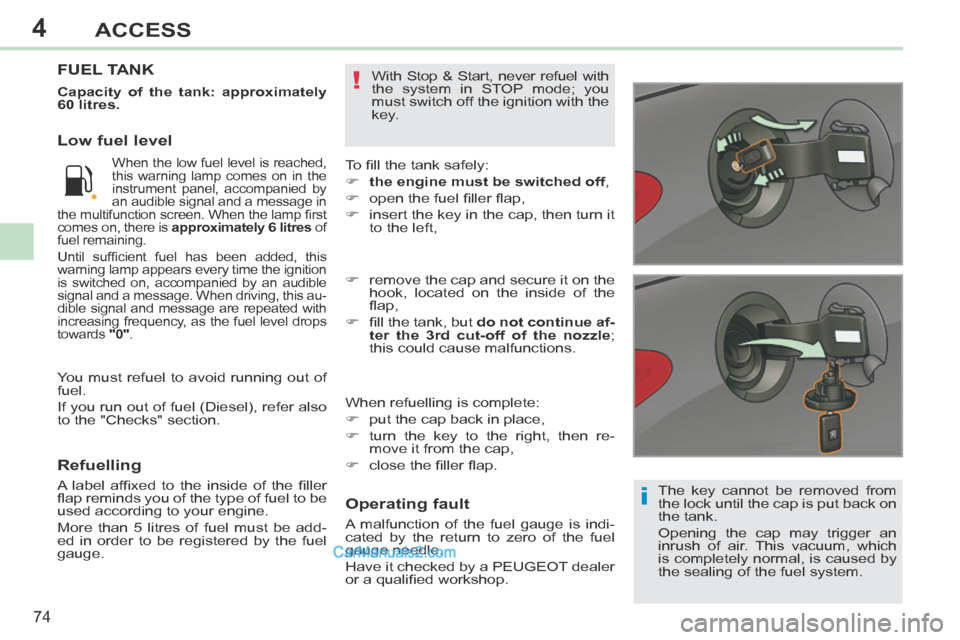
To fi ll the tank safely:
the engine must be switched off,
open the fuel fi ller fl ap,
insert the key in the cap, then turn it to the left,
When refuelling is complete:
put the cap back in place,
turn the key to the right, then re- move it from the cap,
close the fi ller fl ap. remove the cap and secure it on the hook, located on the inside of the
fl ap,
fi ll the tank, but do not continue af-
ter the 3rd cut-off of the nozzle ;
this could cause malfunctions.
Capacity of the tank: approximately
60 litres.
Refuelling
A label affi xed to the inside of the fi ller
fl ap reminds you of the type of fuel to be
used according to your engine.
More than 5 litres of fuel must be add-
ed in order to be registered by the fuel
gauge.
When the low fuel level is reached,
this warning lamp comes on in the
instrument panel, accompanied by
an audible signal and a message in
the multifunction screen. When the lamp fi rst
comes on, there is approximately 6 litres of
fuel remaining.
Until suffi cient fuel has been added, this
warning lamp appears every time the ignition
is switched on, accompanied by an audible
signal and a message. When driving, this au-
dible signal and message are repeated with
increasing frequency, as the fuel level drops
towards "0" .
Operating fault
A malfunction of the fuel gauge is indi-
cated by the return to zero of the fuel
gauge needle.
Have it checked by a PEUGEOT dealer
or a qualifi ed workshop. With Stop & Start, never refuel with
the system in STOP mode; you
must switch off the ignition with the
key.
Low fuel level
You must refuel to avoid running out of
fuel.
If you run out of fuel (Diesel), refer also
to the "Checks" section.
Page 86 of 268
5
i
i
84
VISIBILITY
Special position of the
windscreen wipers
This position permits release of the
windscreen wiper blades.
It is used for cleaning or replacement
of the blades. It can also be useful, in
winter, to detach the blades from the
windscreen. To maintain the effectiveness of the
"fl at-blade" type of wiper blades, it
is advisable to:
- handle them with care,
- clean them regularly using soapy water,
- avoid using them to retain card- board on the windscreen,
- replace them at the fi rst signs of wear.
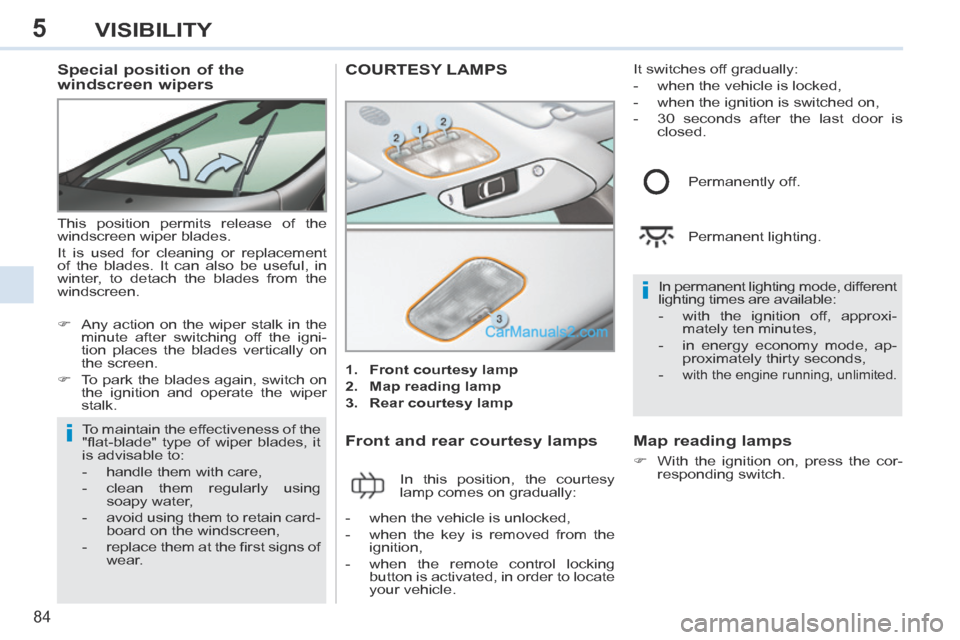
COURTESY LAMPS
1. Front courtesy lamp
2. Map reading lamp
3. Rear courtesy lamp
Front and rear courtesy lamps
In this position, the courtesy
lamp comes on gradually: In permanent lighting mode, different
lighting times are available:
- with the ignition off, approxi-
mately ten minutes,
- in energy economy mode, ap- proximately thirty seconds,
-
with the engine running, unlimited.
- when the vehicle is unlocked,
- when the key is removed from the ignition,
- when the remote control locking button is activated, in order to locate
your vehicle. Permanently off.
Permanent lighting.
Map reading lamps
With the ignition on, press the cor-
responding switch.
It switches off gradually:
- when the vehicle is locked,
- when the ignition is switched on,
- 30 seconds after the last door is
closed.
Any action on the wiper stalk in the minute after switching off the igni-
tion places the blades vertically on
the screen.
To park the blades again, switch on the ignition and operate the wiper
stalk.
Page 89 of 268
6
87
FITTINGS
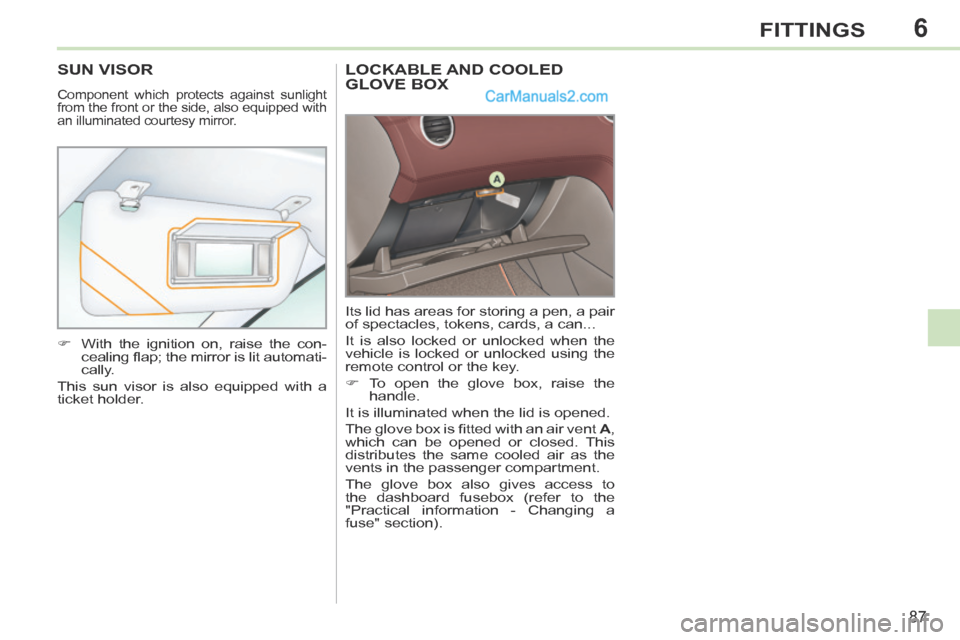
LOCKABLE AND COOLED GLOVE BOX
Its lid has areas for storing a pen, a pair
of spectacles, tokens, cards, a can...
It is also locked or unlocked when the
vehicle is locked or unlocked using the
remote control or the key.
To open the glove box, raise the handle.
It is illuminated when the lid is opened.
The glove box is fi tted with an air vent A ,
which can be opened or closed. This
distributes the same cooled air as the
vents in the passenger compartment.
The glove box also gives access to
the dashboard fusebox (refer to the
"Practical information - Changing a
fuse" section).
SUN VISOR
Component which protects against sunlight
from the front or the side, also equipped with
an illuminated courtesy mirror.
With the ignition on, raise the con- cealing fl ap; the mirror is lit automati-
cally.
This sun visor is also equipped with a
ticket holder.