2012 YAMAHA EC-03 battery
[x] Cancel search: batteryPage 6 of 78

TABLE OF CONTENTSSAFETY INFORMATION .................. 1-1
Further safe-riding points ................ 1-5
Charging the battery sa fely ............. 1-5
DESCRIPTION .................................. 2-1
Left view .......................................... 2-1
Right view ........................................ 2-2
Controls and instrument s................. 2-3
EC-03 FEATURES ............................. 3-1
Features ......................................... 3-1
Traveling distance .......................... 3-1
Effective use of the battery ............. 3-2
Battery level .................................... 3-3
INSTRUMENT AND CONTROL
FUNCTIONS ....................................... 4-1
Beeper ............................................ 4-1
Main switch/steering lock ................ 4-1
Multi-function display ...................... 4-2
Using the security lock .................... 4-7
Handlebar switches ...................... 4-11
Front brake lever .......................... 4-11
Rear brake lever ........................... 4-11
Seat .............................................. 4-12
Helmet holder ............................... 4-12
Luggage hook ............................... 4-13
Grab bar ....................................... 4-13
FOR YOUR SAFETY –
PRE-OPERATION CHECKS .............. 5-1CHARGING THE BATTERY
.............. 6-1
Battery charging locati on ................ 6-1
Charging procedure ....................... 6-3
Charging time ................................. 6-8
Display of charging progress status .......................................... 6-9
About the battery ............................ 6-9
OPERATION AND IMPORTANT
RIDING POINTS ................................. 7-1
Preparations for starting off ............ 7-1
Starting off ...................................... 7-3
Acceleration and deceleration ........ 7-4
Braking ........................................... 7-5
Parking ........................................... 7-5
PERIODIC MAINTENANCE AND
ADJUSTMENT ................................... 8-1
General maintenance and lubrication chart .......................... 8-2
Checking for irregular motor sounds ........................................ 8-4
Checking the accelerato r grip ........ 8-4
Tires ............................................... 8-5
Cast wheels .................................... 8-6
Adjusting the front and rear brake lever free play ............................. 8-6
Checking the front and rear brake
shoes .......................................... 8-8
Checking and lubricating the cables ......................................... 8-8 Lubricating the front and rear
brake levers ................................. 8-9
Checking and lubricating the centerstand .................................. 8-9
Checking the front fork .................. 8-10
Checking the steering ................... 8-10
Checking the wheel bearings ........ 8-11
Replacing the headlight bulb ........ 8-11
Replacing the tail/brake light bulb ............................................ 8-12
Replacing a turn signal light
bulb ............................................ 8-13
Checking the charging cord and charging plug ............................. 8-14
Troubleshooting .......... .................. 8-15
SCOOTER CARE AND STORAGE .... 9-1
Matte color caution ......................... 9-1
Care ................................................ 9-1
Storage ........................................... 9-3
SPECIFICATIONS ........................... 10-1
CONSUMER INFORMATION ........... 11-1
Identification numbers .. ................. 11-11CB-9-EA.book 1 ページ 2012年4月11日 水曜日 午前9時34分
Page 11 of 78

1-5
1
SAFETY INFORMATION
EAUT2031
Further safe-riding points
Make sure to signal clearly when
making turns.
Braking can be extremely difficult
on a wet road. Avoid hard braking,
because the scooter could slide.
Apply the brakes slowly when
stopping on a wet surface.
Slow down as you approach a cor-
ner or turn. Once you have com-
pleted a turn, accelerate slowly.
Be careful when passing parked
cars. A driver might not see you
and open a door in your path.
Railroad crossings, streetcar rails,
iron plates on road construction
sites, and manhole covers be-
come extremely slippery when
wet. Slow down and cross them
with caution. Keep the scooter up-
right, otherwise it could slide out
from under you.
The brake lining could get wet
when you wash the scooter. After
washing the scooter, check the
brakes before riding.
Always wear a helmet, gloves,
trousers (tapered around the cuffand ankle so they do not flap), and
a bright colored jacket.
Do not carry too much luggage on
the scooter. An overloaded scoot-
er is unstable.
EAU50823
Charging the battery safely
Do not charge the battery in areas
potentially exposed to rain or wa-
ter. This could cause an electric
shock or short circuit.
Be sure to plug the charging plug
only directly to a grounded electri-
cal outlet with residual-current de-
vice (RCD) protection to charge
the battery. If incorrectly grounded,
this could cause an electric shock
or short circuit.
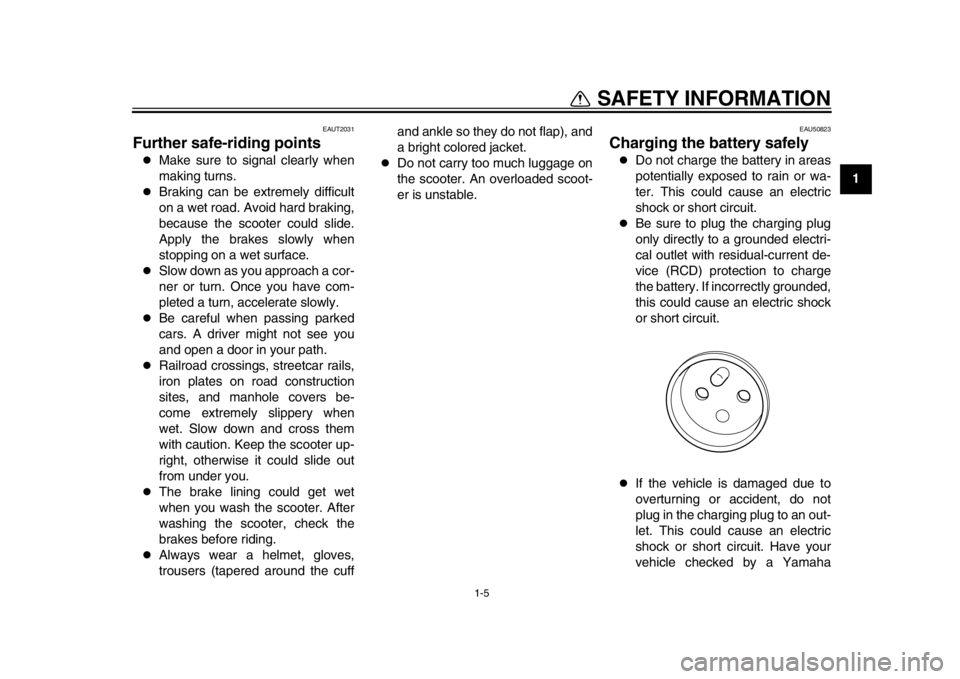
If the vehicle is damaged due to
overturning or accident, do not
plug in the charging plug to an out-
let. This could cause an electric
shock or short circuit. Have your
vehicle checked by a Yamaha
1CB-9-EA.book 5 ページ 2012年4月11日 水曜日 午前9時34分
Page 16 of 78

3-1
1
23
4
5
6
7
8
9
EC-03 FEATURES
EAU50470
Features The features of the EC-03 are follow-
ing:
The driving power source is only
electricity and there is no need for
fuel supply or engine oil change.
High performance motor with
greatly reduced noise and vibra-
tion providing a pleasant ride.
Charging the vehicle can be done
via a grounded electrical outlet
with residual-current device (RCD)
protection.
EAU53920
Traveling distance TIPThe distance that can be traveled on a
single charge varies according to the
riding and road conditions.
These conditions include the number of
starts and stops, vehicle load, the
steepness of slopes, road conditions,
wind direction and velocity, ambient
temperature, charging status, de-
creased battery performance, and lowtire air pressure.
Distance traveled on a single
charge
The data in the following chart was
measured at Yamaha Motor Co., Ltd. It
was measured when traveling with a
new battery at an ambient temperature
and vehicle load (total weight of rider
and luggage) as shown below on a dry
road surface in the absence of wind.
TIPThe maximum slope ascending capac-
ity is a gradient of approximately 16%(about 9 degrees).
Because of the battery character,
the riding distance might be re-
1CB-9-EA.book 1 ページ 2012年4月11日 水曜日 午前9時34分
Page 17 of 78

EC-03 FEATURES
3-2
234
5
6
7
8
9
duced according to the ambient
temperature due to changes of the
battery temperature.
The distance that can be traveled
becomes 5–10% shorter when the
vehicle load is increased 10 kg.
EAU50344
Effective use of
the battery If the battery is left nearly fully charged
(4–5 segments shown on the battery
charge indicator) and exposed to high
temperature for an extended period, it
will rapidly deplete. To extend the bat-
tery life, handle as follows:
Choose a cool place with no direct
sunlight when charging the bat-
tery.
Do not store the battery with a
charge less than 20% (below the
last segment of the battery level in-
dicator) for an extended period of
time.
Choose a cool and well-ventilated
place without direct sunlight for
storing the vehicle.
When not used for a long period of
time, charge the battery until the
2–3 segments of the battery
charge indicator are shown and
then store the vehicle in a cool
place (optimum temperature 15 C
– 25 C). Check the battery level
while the vehicle is in storage. If
the battery level drops to the last
segment, recharge the battery until 2–3 segments of the battery
charge indicator are shown.
NOTICE
ECA17072
If the battery is discharged until the
battery is depleted, recharging will
not be possible and the battery willnot be usable.
Depleting battery image
Period of use
Using at high
temperature
Battery
capacity
(%)
Using at normal
temperature
1CB-9-EA.book 2 ページ 2012年4月11日 水曜日 午前9時34分
Page 18 of 78

EC-03 FEATURES
3-3
1
23
4
5
6
7
8
9
EAU50352
Battery level TIPBe sure to check the battery level be-fore each ride.
Checking the battery level
Check the number of segments dis-
played in the battery level indicator.TIPWhile charging the battery, the indica-
tor shows the progress status of charg-
ing. This differs from the indication of
remaining charge when the vehicle is inuse. See page 6-9.
Battery level indicator
When the key is turned to “ON”, all seg-
ments of the battery level indicator
come on for a few seconds, and then
show a general indication of the re-
maining battery charge corresponding
to the amount of the electric output.
1. Battery level indicator
1
1CB-9-EA.book 3 ページ 2012年4月11日 水曜日 午前9時34分
Page 19 of 78

EC-03 FEATURES
3-4
234
5
6
7
8
9
Battery level reference table
Lit
Flashing
Battery level
(%) Battery level indicator
in the display
What to do
OK. Go ahead with riding.
OK. Go ahead with riding.
The 4th segment flashes to indicate that the remaining battery charge is now above
half level.
OK. Go ahead with riding.
Decreased ability to ascend slopes.
Charge the battery. The last segment flashes and the beeper sounds to indicate that the rema\
ining battery
charge is now about 10%.
Stop riding immediately and charge the battery.
There is no battery charge left and it is impossible to ride.
Charge the battery immediately.
This symbol may not be displayed depending on the battery condition.
1CB-9-EA.book 4 ページ 2012年4月11日 水曜日 午前9時34分
Page 20 of 78

4-1
1
2
34
5
6
7
8
9
INSTRUMENT AND CONTROL FUNCTIONS
EAU49983
Beeper The EC-03 informs you of the following
operations and status of the vehicle us-
ing the beeper.
Key in “ON” position
Standby mode (See page 7-2.)
A control button is pushed
Security lock unlocked
Security lock unlock failed
Enters the riding mode (see page
4-6).
Turn signals in use
Battery level is approx. 10% (See
page 3-4.)
Battery charging started
EAU10461
Main switch/steering lock The main switch/steering lock controls
the ignition and lighting systems, and is
used to lock the steering. The various
positions are described below.
EAU50000
ON
All electrical systems are supplied with
power, and the headlight, meter lighting
and taillight come on. The key cannot
be removed.TIPTo protect the battery, the EC-03 is
equipped with an auto-off function. The
power stops automatically if the vehicle
is stopped for more than five minutes.
To cancel the auto-off function, turn the key to “OFF” and then back to “ON”
again.
EAU10661
OFF
All electrical systems are off. The key
can be removed.
WARNING
EWA10061
Never turn the key to “OFF” or
“LOCK” while the vehicle is moving.
Otherwise the electrical systems will
be switched off, which may result inloss of control or an accident.
EAU10684
LOCK
The steering is locked, and all electrical
systems are off. The key can be re-
moved.
ON
OFF
LOCK
1CB-9-EA.book 1 ページ 2012年4月11日 水曜日 午前9時34分
Page 22 of 78

INSTRUMENT AND CONTROL FUNCTIONS
4-3
1
2
34
5
6
7
8
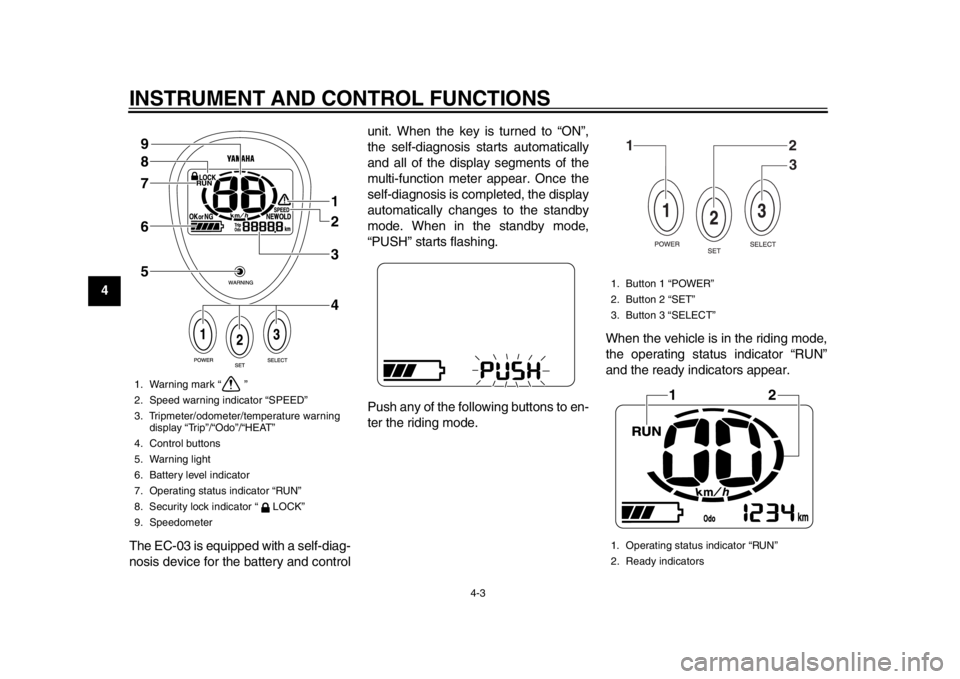
9The EC-03 is equipped with a self-diag-
nosis device for the battery and control unit. When the key is turned to “ON”,
the self-diagnosis starts automatically
and all of the display segments of the
multi-function meter appear. Once the
self-diagnosis is completed, the display
automatically changes to the standby
mode. When in the standby mode,
“PUSH” starts flashing.
Push any of the following buttons to en-
ter the riding mode.
When the vehicle is in the riding mode,
the operating status indicator “RUN”
and the ready indicators appear.
1. Warning mark “ ”
2. Speed warning indicator “SPEED”
3. Tripmeter/odometer/temperature warning
display “Trip”/“Odo”/“HEAT”
4. Control buttons
5. Warning light
6. Battery level indicator
7. Operating status indicator “RUN”
8. Security lock indicator “ LOCK”
9. Speedometer
1
2
3
4
5 6 7 8 9
1. Button 1 “POWER”
2. Button 2 “SET”
3. Button 3 “SELECT”
1. Operating status indicator “RUN”
2. Ready indicators
12
3
12
1CB-9-EA.book 3 ページ 2012年4月11日 水曜日 午前9時34分