2012 VOLKSWAGEN TRANSPORTER ignition
[x] Cancel search: ignitionPage 174 of 486
.--m First read and observe the introductory information given on page 173.
Switching on and off
• Turn the volume control on the powered radio or radio/navigation system Radio, provi-sion for mobile telephone, infotainment system, navigation system.
• Tap the function button with the digital voice en-hancement icon 135 CD in the top right cor-ner of the screen to open the menu for "setting the volume" directly.
• To switch off the digital voice enhancement se-lect the ICC menu item (In Car Communication) 136, and set the volume slider to the left-most position.
• To switch on the digital voice enhancement set the slide control from the leftmost position towards right to the desired volume.
• This setting is retained even after the ignition has been switched off and on.
174 I Before tho journey
Setting the volume
• Turn the volume control on the powered radio or radio/navigation system Radio, provi-sion for mobile telephone, infotainment system, navigation system.
• Tap the function button with the digital voice en-hancement icon 135 CD in the top right cor-ner of the screen to open the menu for "setting the volume" directly.
• Select the ICC menu item (In Car Communica-tion) 136, and set the slide control to the de-sired volume.
• This setting is retained even after the ignition has been switched off and on.
Page 183 of 486
A WARNING (Continued)
• Never use child seats In the groups 0 or 0+ on single seats that face the rear of the vehicle.
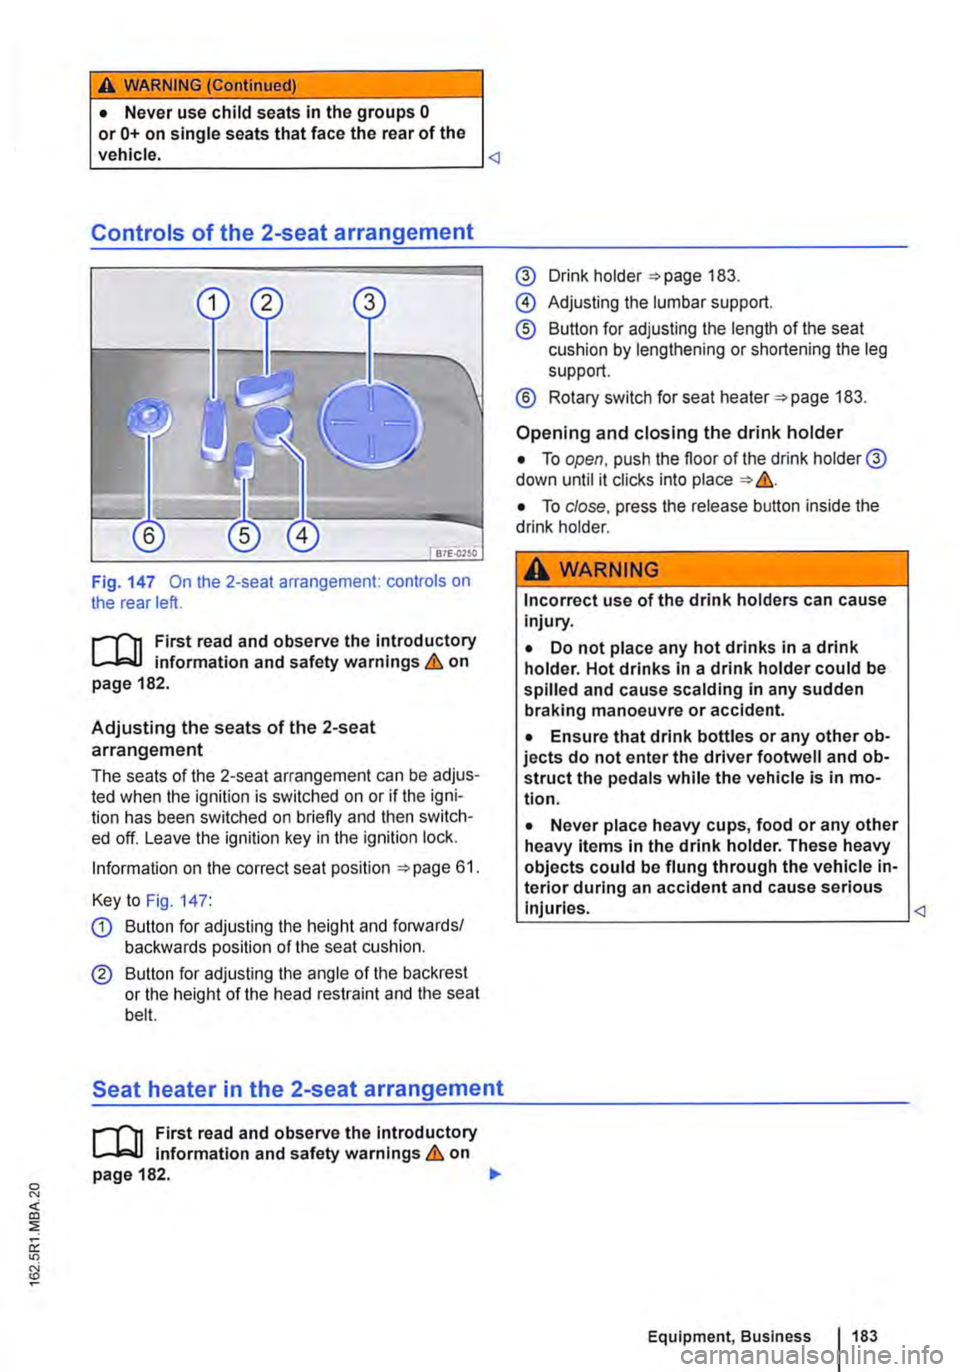
Fig. 147 On the 2-seat arrangement: controls on the rear left.
1"'1'11 First read and observe the Introductory L-J.:.U information and safety warnings & on page 182.
Adjusting the seats of the 2-seat
arrangement
The seats of the 2-seat arrangement can be adjus-ted when the ignition is switched on or if the igni-tion has been switched on briefly and then switch-ed off. Leave the ignition key in the ignition lock.
Information on the correct seat position 61.
Key to Fig. 147:
Q) Button for adjusting the height and forwards/ backwards position of the seat cushion.
® Button for adjusting the angle of the backrest or the height of the head restraint and the seat bell.
Seat heater in the 2-seat arrangement
1"'1'11 First read and observe the Introductory L-J.:.U Information and safety warnings & on page 182. .,..
@ Drink holder 183.
@ Adjusting the lumbar support.
® Button for adjusting the length of the seat cushion by lengthening or shortening the leg support.
® Rotary switch for seat heater 183.
Opening and closing the drink holder
• To open, push the floor of the drink holder@ down until it clicks into place &.
• To close. press the release button inside the drink holder.
A WARNING
Incorrect use of the drink holders can cause Injury.
• Do not place any hot drinks in a drink holder. Hot drinks In a drink holder could be spilled and cause scalding in any sudden braking manoeuvre or accident.
• Ensure that drink bottles or any other ob-jects do not enter the driver footwell and ob-struct the pedals while the vehicle is in mo-tion.
• Never place heavy cups, food or any other heavy items in the drink holder. These heavy objects could be flung through the vehicle in-terior during an accident and cause serious Injuries.
Page 186 of 486
Opening and closing the stowage compartment on the centre console
• To open the storage compartment@, slide the cover open.
• To close, push the cover shut, making sure that the storage compartment is closed completely
Ash tray
• Press the storage compartment@ in until it opens automatically. The ashtray is now accessible
• To empty the ashtray, press the button (8 in the storage compartment. The ashtray pops out of its holder. After emptying the ashtray, re-insert it.
Cigarette lighter
• Press the storage compartment@ in until it opens automatically.
• With the ignition switched on, press in the knob on the cigarette lighter.
• Wait for the lighter to pop out.
• Pull out the cigarette lighter and light the tobac-co product on the glowing spiral &.
• Insert the cigarette lighter back into the socket.
Opening and closing the stowage compartment at the front of the centre console
• To open, press the storage compartment@ in until it opens automatically.
• To close, push the storage compartment shut, making sure that it closes completely &.
Refrigerator box
fBiU>,.,
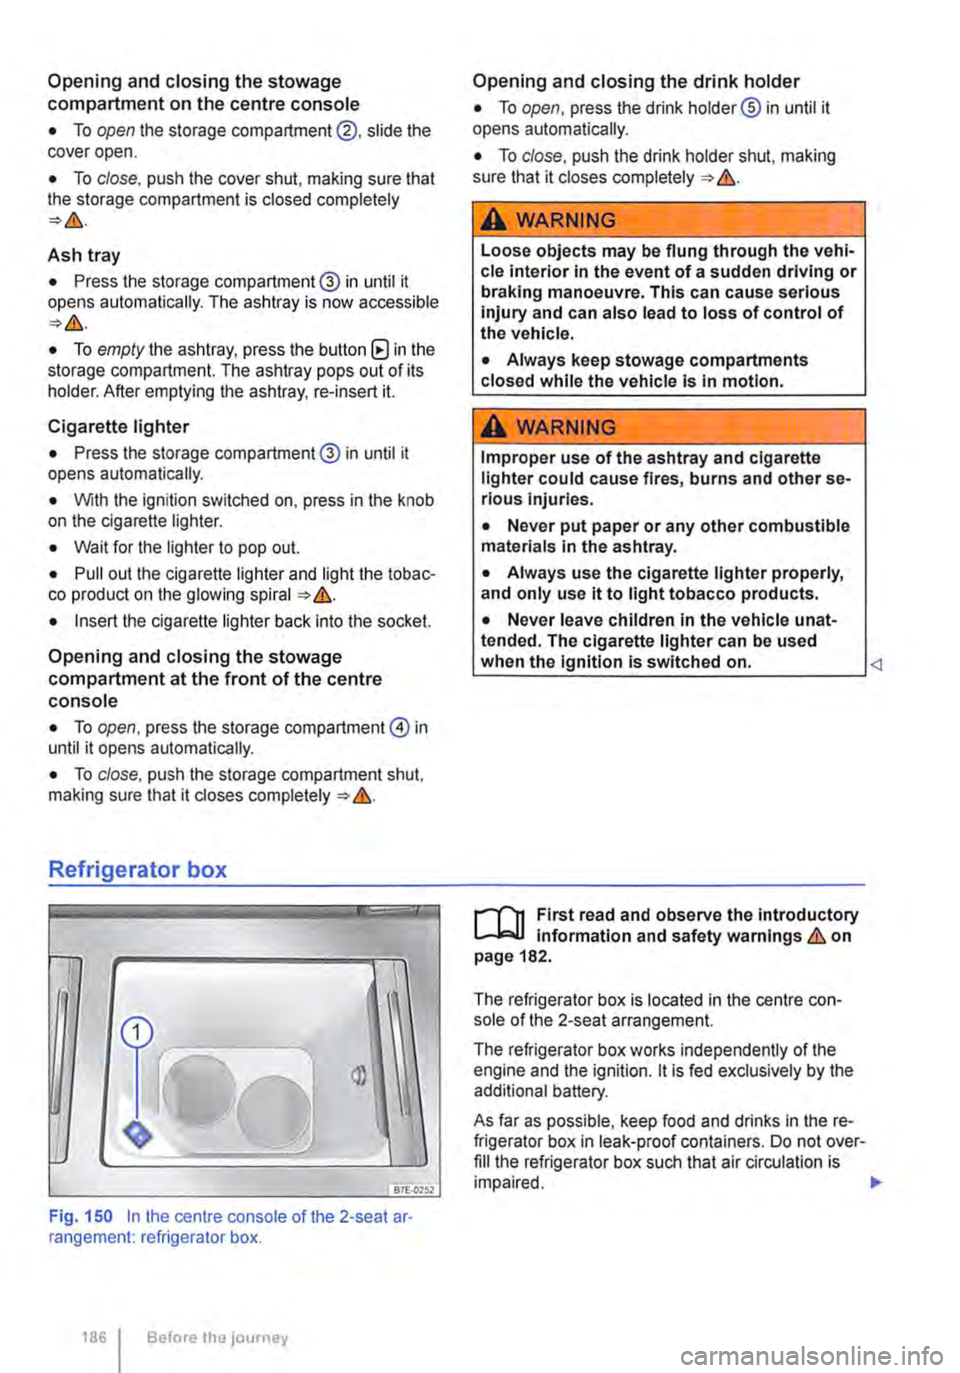
Fig. 150 In the centre console of the 2-seat ar· rangement: refrigerator box.
1861 Before the journey
Opening and closing the drink holder
• To open, press the drink holder® in until it opens automatically.
• To close, push the drink holder shut, making sure that it closes completely &.
A WARNING
Loose objects may be flung through the vehi-cle interior In the event of a sudden driving or braking manoeuvre. This can cause serious injury and can also lead to loss of control of the vehicle.
• Always keep stowage compartments closed while the vehicle is in motion.
A WARNING
Improper use of the ashtray and cigarette lighter could cause fires, burns and other se-rious Injuries.
• Never put paper or any other combustible materials in the ashtray.
• Always use the cigarette lighter properly, and only use it to light tobacco products.
• Never leave children in the vehicle unat-tended. The cigarette lighter can be used when the Ignition is switched on.
The refrigerator box is located in the centre con-sole of the 2-seat arrangement.
The refrigerator box works independently of the engine and the ignition. lt is fed exclusively by the additional battery.
As far as possible, keep food and drinks in the re-frigerator box in leak-proof containers. Do not over-fill the refrigerator box such that air circulation is impaired. .,.
Page 188 of 486
menus provided by way of the instrument cluster nor the factory-installed radio or navigation system can be used to make rear-seat telephony settings.
lfv'hen pairing a mobile telephone with the rear-seat telephony system using the hands-free profile (HFP) and when the mobile telephone is not in the charging base, observe the information on use of a mobile telephone in the vehicle without connection to the external aerial =>page 399.
Follow the operating manual for your mobile tele· phone and the instructions provided by the acces-sory manufacturer.
You may experience poor reception or may be cut off in areas where the signal is weak.
Most electronic devices are shielded against high-frequency signals. In rare cases, however, it Is pos-sible that electronic devices will not be shielded against high-frequency signals emitted by the rear-seat telephony system. This can cause Interfer-ence.
Bluetooth
Bluetooth technology is used to connect a mobile telephone to the hands-free system fitted In a vehi· cle. Pairing needs to be carried out once only in or-der to use the rear-seat telephony system with a Bluetooth mobile telephone.
Use compatible Bluetooth devices only. Information on compatible Bluetooth products Is available from your Volkswagen Commercial Vehicles dealer or on the Internet.
Some Bluetooth mobile telephones are detected and connected automatically when the ignition is switched on. For this to happen, the mobile tele-phone and the Bluetooth function in the telephone must be switched on, and all active Bluetooth con-nections to other units must be disconnected.
The Bluetooth connection is free of charge.
Bluetooth® is a registered trademark of Blue-tooth® SIG, Inc.
Declaration of conformity
BURY Sp. z o.o. herewith declares that this system complies with the basic requirements and the rele· van! stipulations of directive 1999/5/EG. This sys-tem has been classified as belonging to Device Class 1. A manufacturer's declaration of conformity for this system can be requested from the following e-mail address: [email protected]. Please formulate all enquiries either In English or German.
((
166 I Before the journey
Additional information and warnings:
• Digital voice enhancement =>page 173
• Accessories, modifications, repairs and renewal of parts =>page 394
• Radio or navigation system =>Booklet Radio, provision for mobile telephone, infotainment sys-tem, navigation system
A wARNING
Accidents and Injuries can occur If the driver Is distracted. Using the telephone or the rear· seat telephony system can distract you from what Is happening on the road.
• Select volume settings that allow signals from outside the vehicle (such as emergency services sirens) to be easily heard at all times. Comply with legal regulations.
• Your call may be cut off or you may be un-able to make calls If you are In an area with no mobile telephone network coverage, an area where the network Is very weak or, In some cases, In a tunnel, garage or under-pass. This also means that no emergency calls can be made.
• In some countries, lt Is only possible to make an emergency call from the rear-seat telephony system if it is connected to a mo-bile telephone containing a SIM card that is "unlocked" and has sufficient credit.
A WARNING
Any mobile telephone that is not secured or Is incorrectly secured in the vehicle could be flung though the interior during a sudden driving or braking manoeuvre, or In the event of an accident. This could cause Injuries.
• You should never position or attach a mo-bile telephone on a door, on the windscreen or above or near to the areas marked "AIR-BAG" on the steering wheel, the dash panel and the seat backrests, or between these areas and the vehicle occupants. The mobile telephone could cause serious Injury In an accident, especially when the alrbags Inflate.
A WARNING
Always switch off the mobile telephone when filling the tank and in areas with a risk of ex-plosion. Electromagnetic radiation can gener-ate sparks which can In turn start a fire.
• The mobile telephone can automatically log Itself Into the mobile telephone network again If the Bluetooth connection to the rear-seat telephony system has been Interrupted. I>
Page 190 of 486
Key to Fig. 151:
G) Make the rear-seat telephony system visible to Bluetooth devices.
@ Increase call volume.
@ Press briefly: call volume is lowered. Press and hold down for approx. 10 seconds: the list of all devices is deleted from the rear-seat tel-ephony system.
il""'n First read and observe the introductory L--i=J.I information and safety warnings & on page 187.
Each mobile telephone must be paired with the rear-seat telephony system via Bluetooth once.
The pairing process takes a few minutes.
For pairing, you do not need to place the mobile telephone in the charging base (telephone holder).
Step 1: Preparations on the mobile telephone
• Read the operating manual for the mobile telephone.
• Switch on the mobile telephone.
• Deactivate the keypad lock.
• Switch off the screen saver.
• Deactivate the warning and service tones, e.g. key tones.
• Close all active Bluetooth connections on the mobile telephone.
Step 2: Making the rear-seat telephony system visible for Bluetooth
• With the ignition switched on, press the 151 G) button.
Step 3: Pairing the mobile telephone
• Activate the Bluetooth function on the mobile telephone.
• Start the Bluetooth device search on the mobile telephone. it will display a list of the devices found.
Functional description
il""'n First read and observe the introductory L--i=J.I information and safety warnings & on page 187.
190 I Before the journey
• Select CC9045 ... device.
• Confirm the selection on the mobile telephone to set up a Bluetooth connection.
• A message on the mobile telephone prompts you to enter a password for authorisation.
• Enter the password 1234. If an incorrect pass-word is entered, the pairing process will be abor-ted. Start again from step 2.
• If you would like this Bluetooth connection to be made in future without password entry, select Yes if offered this option by the mobile telephone.
• An acoustic signal will be emitted to confirm that the pairing process has been successful.
m Up to six devices can be stored as known in L!.J the rear-seat telephony system. If an addi-tional device is then paired with the rear-seat tel-ephony system, the authentication for the device that has remained unused for the longest time will be deleted automatically.
m Mobile telephones and other Bluetooth devi-L!.J ces can be set in such a way that they auto-matically connect themselves to the rear-seat tel-ephony system. Volkswagen Commercial Vehicles recommends that automatic pairing be deactiva-ted, especially in case an additional provision for mobile telephone in the vehicle is used at another time.
Page 191 of 486
When the mobile telephone has been paired with the rear-seat telephony system via Bluetooth, the following applies:
• There is a connection between the mobile tele-phone and the microphone at the rear on the right in the passenger compartment headliner.
• Incoming calls are output over the vehicle loud-speaker in the rear right side trim paneL
• The digital voice enhancement (DVE) is switch-ed off during a telephone calL
When a paired mobile telephone is in the charging base (telephone holder), the following applies:
• The mobile telephone is connected to the exter-nal aerial via the charging base.
• If the vehicle key is in the ignition lock. the bat-tery in the mobile telephone will be charged, if nec-essary.
Using the telephone handset
Active telephone calls can also be conducted by means of the telephone handset 152.
• Open the storage compartment in the armrest of the 2-seat arrangement.
• Pick up the handset during an active telephone calL
The microphone and the vehicle loudspeaker in the side trim panel will then be switched off. The telephone call will only be audible via the tele-phone handset ("Private Mode").
If the handset is replaced in its holder, the micro-phone and the vehicle loudspeaker in the side trim panel will be switched on again and the telephone call will not be ended.
• To end the telephone call, press the corre-sponding button on the mobile telephone.
Deleting the list of all devices from the rear-seat telephony system
• Close the existing Bluetooth connection on the mobile telephone.
• Press and hold button 151@ for longer than 10 seconds.
• A signal will sound to confirm that the data has been deleted.
m All other functions must be carried out direct-L!J ly from the mobile telephone.
Page 206 of 486
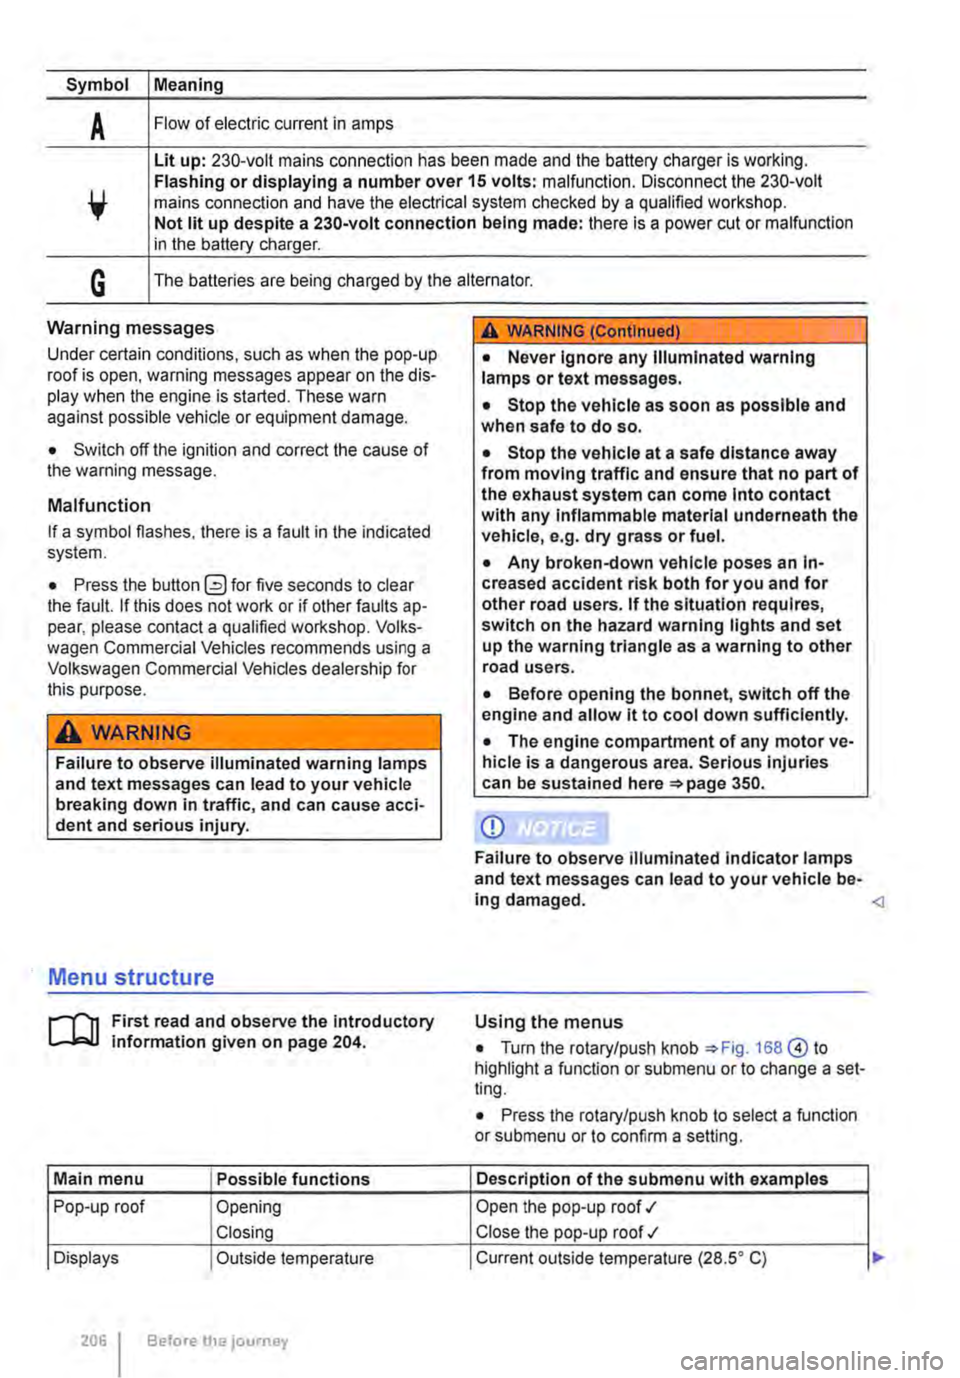
Symbol Meaning
A Flow of electric current in amps
Lit up: 230-volt mains connection has been made and the battery charger is working. Flashing or displaying a number over 15 volts: malfunction. Disconnect the 230-volt mains connection and have the electrical system checked by a qualified workshop. Not lit up despite a 230-volt connection being made: there is a power cut or malfunction in the battery charger.
G The batteries are being charged by the alternator.
Warning messages
Under certain conditions, such as when the pop-up roof is open, warning messages appear on the dis-play when the engine is started. These warn against possible vehicle or equipment damage.
• Switch off the ignition and correct the cause of the warning message.
Malfunction
If a symbol flashes, there is a fault in the indicated system.
• Press the button G?) for five seconds to clear the fault. If this does not work or if other faults ap-pear, please contact a qualified workshop. Volks-wagen Commercial Vehicles recommends using a Volkswagen Commercial Vehicles dealership for this purpose.
A WARNING
Failure to observe illuminated warning lamps and text messages can lead to your vehicle breaking down in traffic, and can cause acci-dent and serious injury.
A WARNING (Continued)
• Never Ignore any Illuminated warning lamps or text messages.
• Stop the vehicle as soon as possible and when safe to do so.
• Stop the vehicle at a safe distance away from moving traffic and ensure that no part of the exhaust system can come Into contact with any Inflammable material underneath the vehicle, e.g. dry grass or fuel.
• Any broken-down vehicle poses an In-creased accident risk both for you and for other road users. If the situation requires, switch on the hazard warning lights and set up the warning triangle as a warning to other road users.
• Before opening the bonnet, switch off the engine and allow it to cool down sufficiently.
• The engine compartment of any motor ve-hicle is a dangerous area. Serious injuries can be sustained here 350.
CD
Failure to observe illuminated indicator lamps and text messages can lead to your vehicle be-ing damaged.
J'"'""'('n First read and observe the introductory L-J,:.IJ information given on page 204.
Main menu Possible functions
Pop-up roof Opening
Closing
Displays Outside temperature
206 Before the journey
Using the menus
• Turn the rotary/push knob 168@ to highlight a function or submenu or to change a set-ting.
• Press the rotary/push knob to select a function or submenu or to confirm a setting.
Description of the submenu with examples
Open the pop-up roof .,1
Close the pop-up roof .,t
Current outside temperature (28.SO C) ...
Page 209 of 486
Interior lights in the living area
OSG.OI12
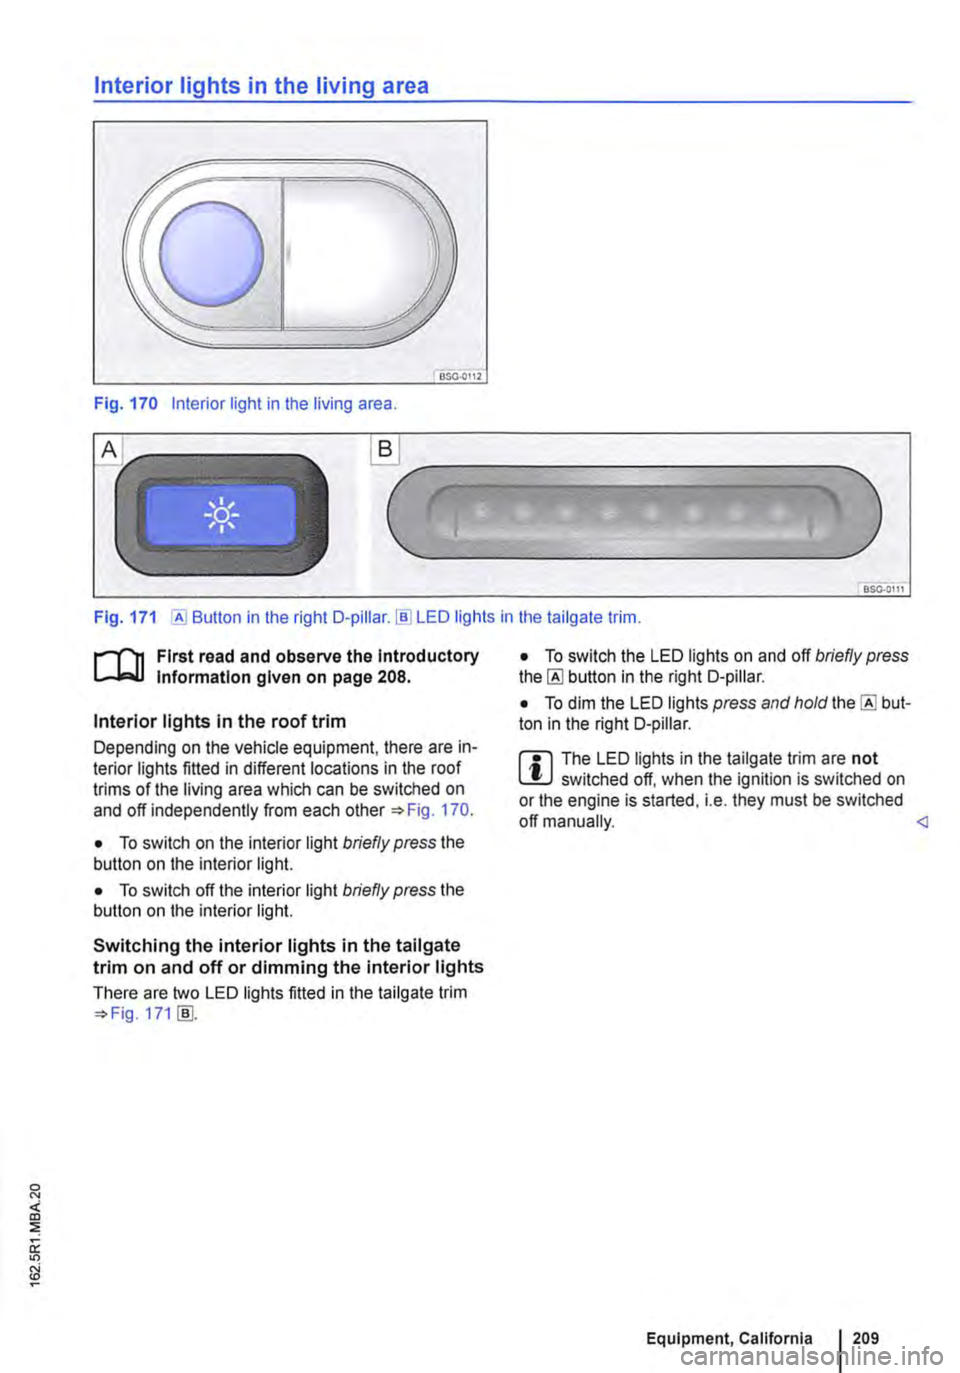
Fig. 170 Interior light in the living area .
.._______)
Fig. 171 [AI Button in the right D-pillar.!ID LED lights in the tailgate trim.
r-1'11 First read and observe the Introductory t.....J,..,lJ Information given on page 208.
Interior lights in the roof trim
Depending on the vehicle equipment, there are in-terior lights fitted in different locations in the roof trims of the living area which can be switched on and off independently from each other 170.
• To switch on the interior light briefly press the button on the interior light.
• To switch off the interior light briefly press the button on the interior light.
Switching the interior lights in the tailgate trim on and off or dimming the interior lights
There are two LED lights fitted in the tailgate trim 171 [ID.
• To switch the LED lights on and off briefly press the [AI button in the right D-pillar.
• To dim the LED lights press and hold the [AI but-ton in the right D-pillar.
m The LED lights in the tailgate trim are not W switched off, when the ignition is switched on or the engine is started, i.e. they must be switched off manually.