2012 VOLKSWAGEN TRANSPORTER buttons
[x] Cancel search: buttonsPage 56 of 486
A WARNING
Always take care when using the mechanical or electric windows otherwise you could cause serious accidents or injuries.
• Windows should only be opened or closed when you are sure that nobody is In their op-erating area.
• Never leave children or people requiring assistance alone in the vehicle when the ve-hicle is locked. Electric windows can no lon-ger be opened in an emergency.
A WARNING (Continued)
• Always take all vehicle keys with you ev-ery time you leave the vehicle. The electric windows can still be operated using the but-tons several minutes after the ignition has been switched off, provided the driver door and the front passenger door are not opened.
CD
During sudden rain showers, water can enter the vehicle interior via open windows and cause damage to the vehicle.
'----------------: BSG-0031
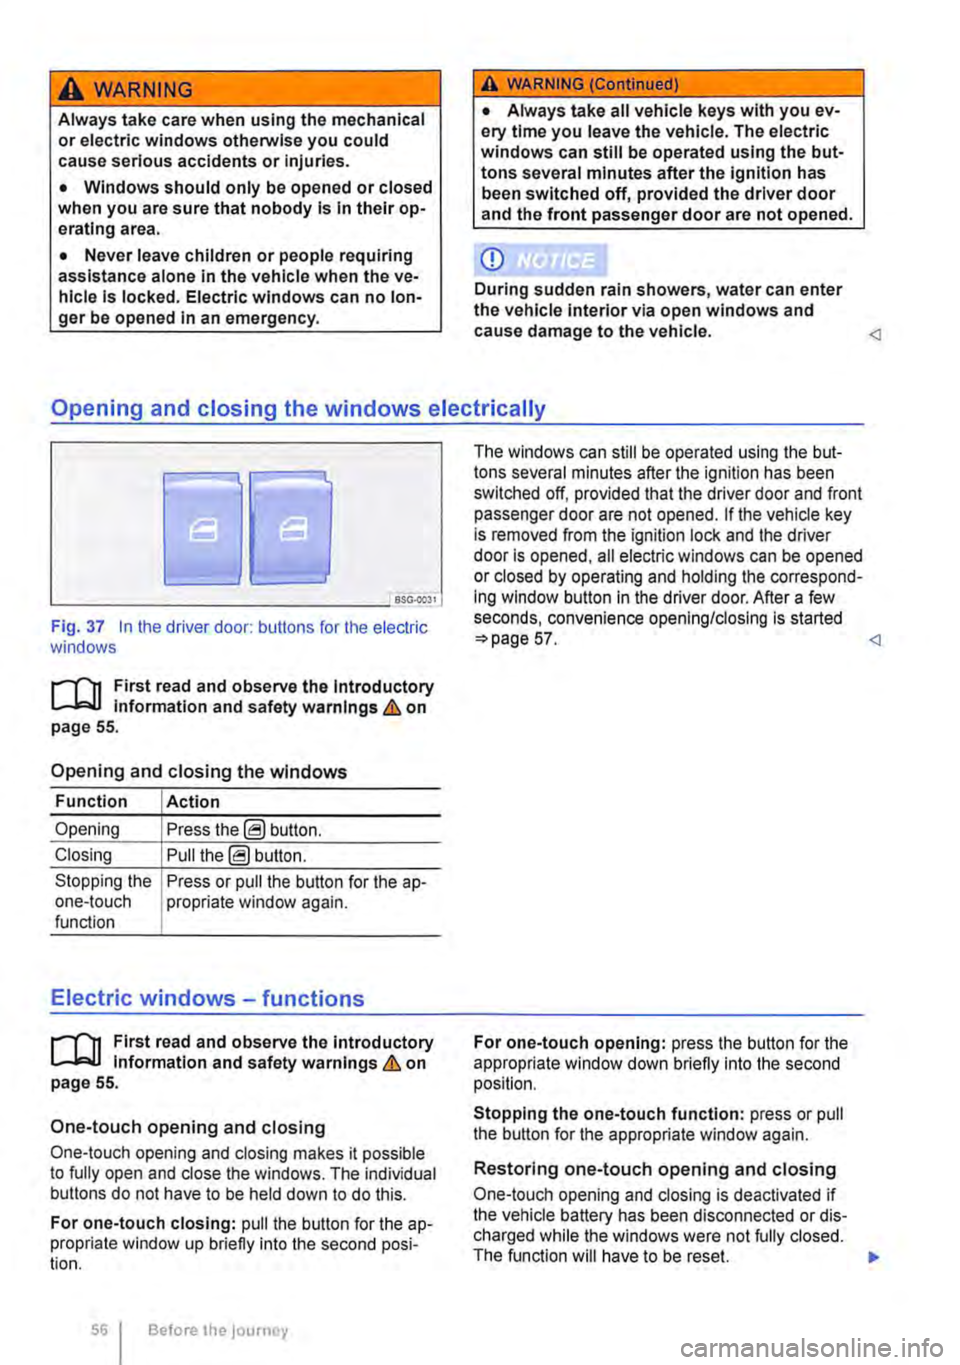
Fig. 37 In the driver door: butlons for the electric windows
r-111 First read and observe the Introductory L-J,::.JJ information and safety warnings & on page 55.
Opening and closing the windows
Function Action
Opening Press the@ button.
Closing Pull the@ button.
Stopping the Press or pull the button for the a p-one-touch propriate window again. function
Electric windows -functions
r-111 First read and observe the introductory L-J,::.JJ information and safety warnings & on page 55.
One-touch opening and closing
One-touch opening and closing makes it possible to fully open and close the windows. The individual buttons do not have to be held down to do this.
For one-touch closing: pull the butlon for the ap-propriate window up briefly into the second posi-tion.
56 Before the journey
The windows can still be operated using lhe but-tons several minutes after the ignition has been switched off, provided that the driver door and front passenger door are not opened. If the vehicle key is removed from the ignition lock and lhe driver door Is opened, all electric windows can be opened or closed by operating and holding lhe correspond-ing window button in the driver door. After a few seconds, convenience opening/closing is started 57.
Stopping the one-touch function: press or pull the button for the appropriate window again.
Restoring one-touch opening and closing
One-touch opening and closing is deactivated if the vehicle battery has been disconnected or dis-charged while the windows were not fully closed. The function will have to be reset.
Page 57 of 486
• Close all windows and doors.
• Pull up the button for the window and hold it in this position for at least one second.
• Let go of the button then pull it up again and hold it in this position. One-touch opening and closing is now ready for operation.
The one-touch function can be restored for individ-ual windows or for several windows at the same time.
Convenience opening and closing
There are three different ways of opening and clos-ing all electric windows simultaneously when the ignition is switched off:
• Press and hold the locking or unlocking button in the remote control key.
• To interrupt this function, let go of the locking or unlocking button.
• OR: hold the vehicle key in the driver door lock cylinder in either the locking or the unlocking posi-tion until all windows are either opened or closed.
• To interrupt this function, turn the vehicle key in the opposite direction.
• OR: after switching the ignition off and opening the driver and front passenger doors, push or pull the@ button in the required direction for at least two seconds.
During convenience closing, first the windows and then the sliding/tilting roof will be closed.
A WARNING
Careless or unsupervised use of the electric windows can cause serious Injuries.
• The electric windows should only be opened or closed when you are sure that no-body is in their operating area.
• Never leave children or people requiring assistance alone In the vehicle when the ve-hicle is locked. The windows can no longer be opened In an emergency.
• Always take all vehicle keys with you ev-ery time you leave the vehicle. The windows can still be operated using the buttons sever-al minutes after the Ignition has been switch-ed off, provided that the driver door and front passenger door are not opened.
m One-touch opening and closing and the roii-L!J back function will not work if there is a fault in the electric windows. Go to a qualified workshop.
l"""l'l1 First read and observe the Introductory l-J,a,IJ Information and safety warnings & on page 55.
The roll-back function for the electric windows can reduce the risk of Injuries when the windows are closing :) &. If the one-touch closing function for a window does not work because it is stiff or is being obstructed, the window will automatically open again.
• Check to see why the window has not closed.
• Try to close the window again.
• If the window is again prevented from closing within approximately 10 seconds of the first at-tempt because it is stiff or obstructed, the automat-ic closing function is switched off for approximately 10 seconds.
• If the window is still obstructed, the window stops at this point. To close the window without the roll-back function, press the button again within 1 0 seconds :) &.
Closing the window without the roll-back function
• Try to close the window again within approxi-mately 10 seconds by holding the button. The roll-back function will be deactivated for a small section of the path of the closing window.
• If the closing procedure takes longer than ap-proximately 10 seconds, the roll-back function will be reactivated. The window will then stop again if it is stiff or meets another obstacle.
• Please go to a qualified workshop if the window still cannot be closed.
A WARNING
Closing the electric windows without the roll-back function could lead to severe Injuries.
• Always take care when closing electric windows. 11>
Opening and closing
Page 69 of 486
A WARNING (Continued)
• The steering wheel must always point to-wards the chest and not towards the face. This ensures that the driver front airbag pro-vides maximum protection in the event of an accident.
• While driving, always keep both hands on the outside of the steering wheel (at the 9 o'clock and 3 o'clock positions =>Fig. 47). This reduces the risk of injury if the driver front alrbag Is triggered.
Seat functions, front
a:n Introduction
This chapter contains information on the following subjects:
Seat heating . . . . . . . . . . . . . . . . . . . • • • . . . . . . 69
Memory seats . . . . . . . . . . . . . . . . . . . 70
Rotating front seats . . . . . . . . . . . . . . . . . . . . . . 71
Additional information and warnings:
• Adjusting the seat position =>page 61
• Seat bells =>page 79
• Airbag system =>page 87
• Child seats (accessories) 96
• Heating, ventilating, cooling 322
Seat heating
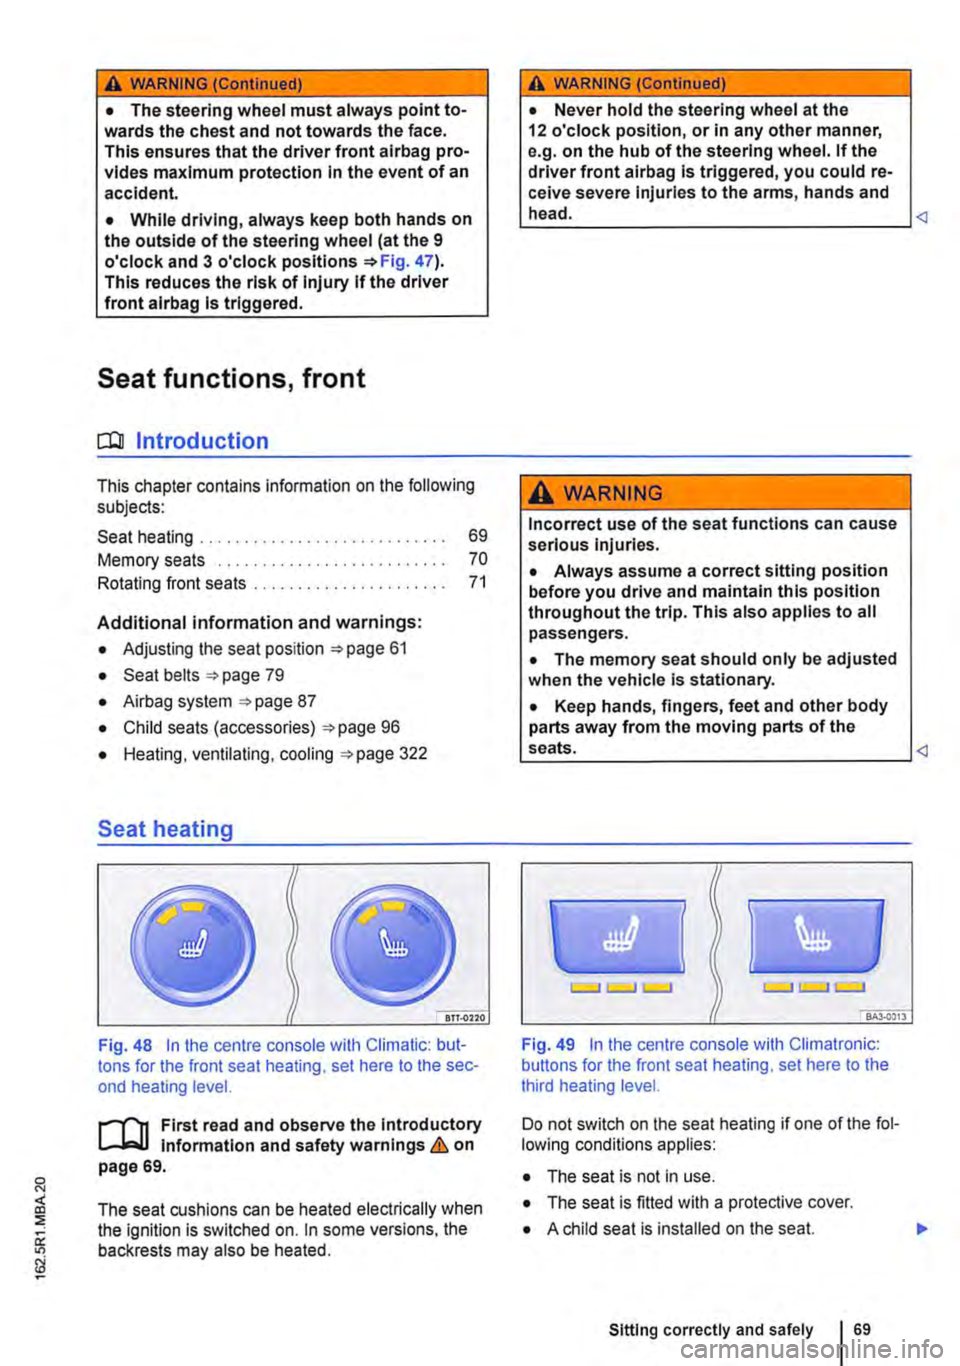
Fig. 48 In the centre console with Climatic: but-tons for the front seat heating, set here to the sec-ond heating level.
First read and observe the Introductory l-J,:.,U Information and safety warnings & on page 69.
The seat cushions can be heated electrically when the ignition is switched on. In some versions, the backrests may also be heated.
A WARNING (Continued)
• Never hold the steering wheel at the 12 o'clock position, or in any other manner, e.g. on the hub of the steering wheel. If the driver front airbag is triggered, you could re-ceive severe Injuries to the arms, hands and head.
A WARNING
Incorrect use of the seat functions can cause serious injuries.
• Always assume a correct sitting position before you drive and maintain this position throughout the trip. This also applies to all passengers.
• The memory seat should only be adjusted when the vehicle Is stationary.
• Keep hands, fingers, feet and other body parts away from the moving parts of the seats.
Fig. 49 In the centre console with Climatronic: buttons for the front seat heating, set here to the third heating level.
Do not switch on the seat heating if one of the fol-lowing conditions applies:
• The seat is not in use.
• The seat is fitted with a protective cover.
• A child seat is installed on the seat.
Sitting correctly and safely 69
Page 70 of 486
• The seat cushion is damp or wet.
• The interior or exterior temperature is above 2s•c (7rF).
Function
Switching on
Adjusting the heating output
Switching off
Action 49
Press the 0 or (9 button. The seat heating is switched on at the highest setting. All indicator lamps light up.
Press the 0 or (9 button repeat-edly until the required heat level is set.
Press the button 0 or (9 until the indicator lamps in the button go out 49.
A WARNING
Anyone experiencing reduced sensitivity to pain or temperature due to medication, para-lysis or chronic illness (e.g. diabetes) could sustain burns on the back, buttocks and legs when using the seat heating. These burns may take a long time to heal or may never heal fully. Please consult a doctor to deter-mine your own level of health.
Memory seats
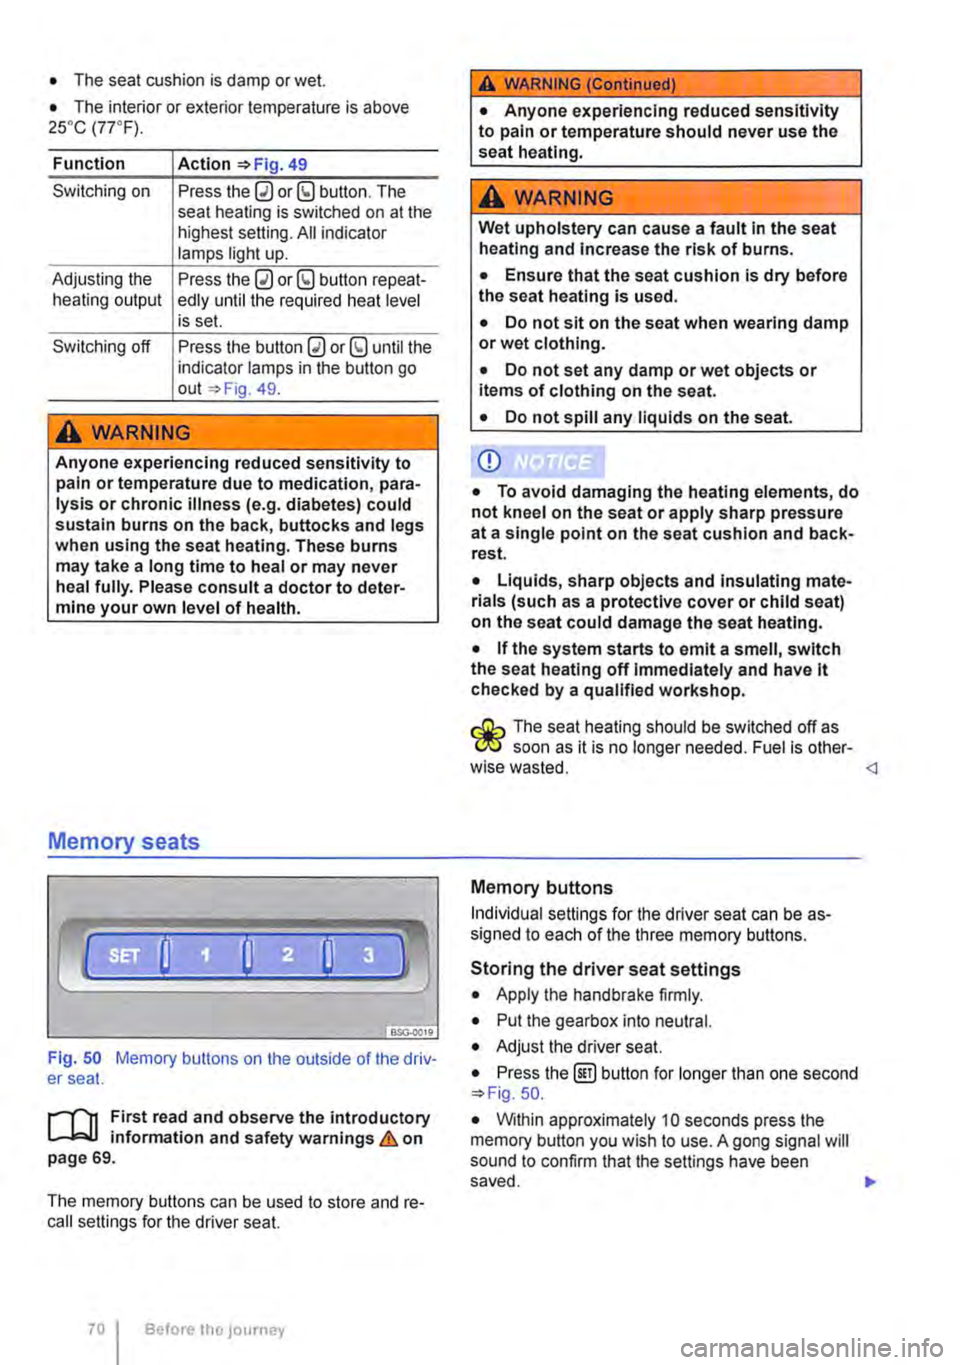
Fig. 50 Memory buttons on the outside of the driv-er seat.
r"''l1 First read and observe the introductory L-JcJ.I information and safety warnings & on page 69.
The memory buttons can be used to store and re-call settings for the driver seat.
Before the JOurney
A WARNING (Continued)
• Anyone experiencing reduced sensitivity to pain or temperature should never use the seat heating.
A wARNING
Wet upholstery can cause a fault In the seat heating and Increase the risk of burns.
• Ensure that the seat cushion is dry before the seat heating is used.
• Do not sit on the seat when wearing damp or wet clothing.
• Do not set any damp or wet objects or items of clothing on the seat.
• Do not spill any liquids on the seat.
Q)
• To avoid damaging the heating elements, do not kneel on the seat or apply sharp pressure at a single point on the seat cushion and back-rest.
• Liquids, sharp objects and Insulating mate-rials (such as a protective cover or child seat) on the seat could damage the seat heating.
• If the system starts to emit a smell, switch the seat heating off Immediately and have lt checked by a qualified workshop.
r:O:-, The seat heating should be switched off as C!JtJ soon as it is no longer needed. Fuel is other-wise wasted.
Individual settings for the driver seat can be as-signed to each of the three memory buttons.
Storing the driver seat settings
• Apply the handbrake firmly.
• Put the gearbox into neutral.
• Adjust the driver seat.
• Press the @] button for longer than one second 50.
• Within approximately 10 seconds press the memory button you wish to use. A gong signal will sound to confirm that the settings have been saved. .,..
Page 109 of 486

Turn the light switch to the required position 86:
When the Ignition Is switched off
0 The fog lights, dipped beam headlights and side lights are switched off.
,. The orientation lighting can be switched on.
) , The side lights are switched on.
Dipped beam headlights are switched off.
"'D While the vehicle key is in lhe ignition lock, the side lights will stay on.
Fog lights
The indicator lamps or 0$ in the light switch or Instrument cluster indicate that the fog lights are switched on.
• To switch the fog light on, pull the light switch out of the position "" or tD to the first stop.
• To switch the rear fog light 0$ on, pull the light switch out of position ,.,, or gD as far as it will go.
• To switch the fog lights off, press the light switch or move it to position 0.
Signal tones if lights are not switched off
If the key is removed from the ignition lock and the driver door is opened, a signal tone will sound in any of the following situations. This will remind you to switch off the lights as necessary.
Lights and vision -functions
1""1'11 First read and observe the introductory L-lo:.U Information and safety warnings & on page 106.
Parking light
When the parking lights (left and right turn signals) are switched on, the headlight on the correspond-ing side of the vehicle lights up along with the tail light and parts of the tail light cluster. The parking light only lights up when the Ignition is switched off and if the turn signal and main beam lever was in the central position before being operated.
Side lights
If the light switch is in position ;.o; both headlights with side lights light up, along with parts of the rear light cluster, the number plate lighting, the instru-ment cluster lighting and the buttons in the centre console and the dash panel.
If the charge level of the battery is too low, the side lights will switch off automatically &. This pre-vents the vehicle battery from being discharged
When the Ignition Is switched on
Lights switched off or daytime headlights are switched on.
The automatic headlight control and, if applica-ble, the daytime headlights are switched on.
The side lights are switched on.
The dipped beam headlights are switched on.
• If the parking light is switched on 107.
• If the light switch is in position '"'·
• If the light switch is in position iD or 0$ 112.
A WARNING
The side lights or daytime running lights are not bright enough to Illuminate the road ahead and to ensure that other road users are able to see you.
• Always switch the dipped beam head-lights on if it is dark, raining or visibility Is
completely and thus allows for still starting the en-gine 366, Automatic switch-off for electri-cal consumers.
Daytime running lights
There are separate lights in the headlights for the daytime running lights.
Only the separate lights light up when the daytime running lights are switched on &.
The daytime running lights are switched on when the ignition is switched on if the light switch is in position 0 or AUTO.
If the light switch is in position AUTO, a rain sensor will switch the dipped beam and the lighting in the instruments and switches on and off automatically.
The daytime running lights cannot be switched on or off manually. ,._
Lights and vision 1109
Page 169 of 486
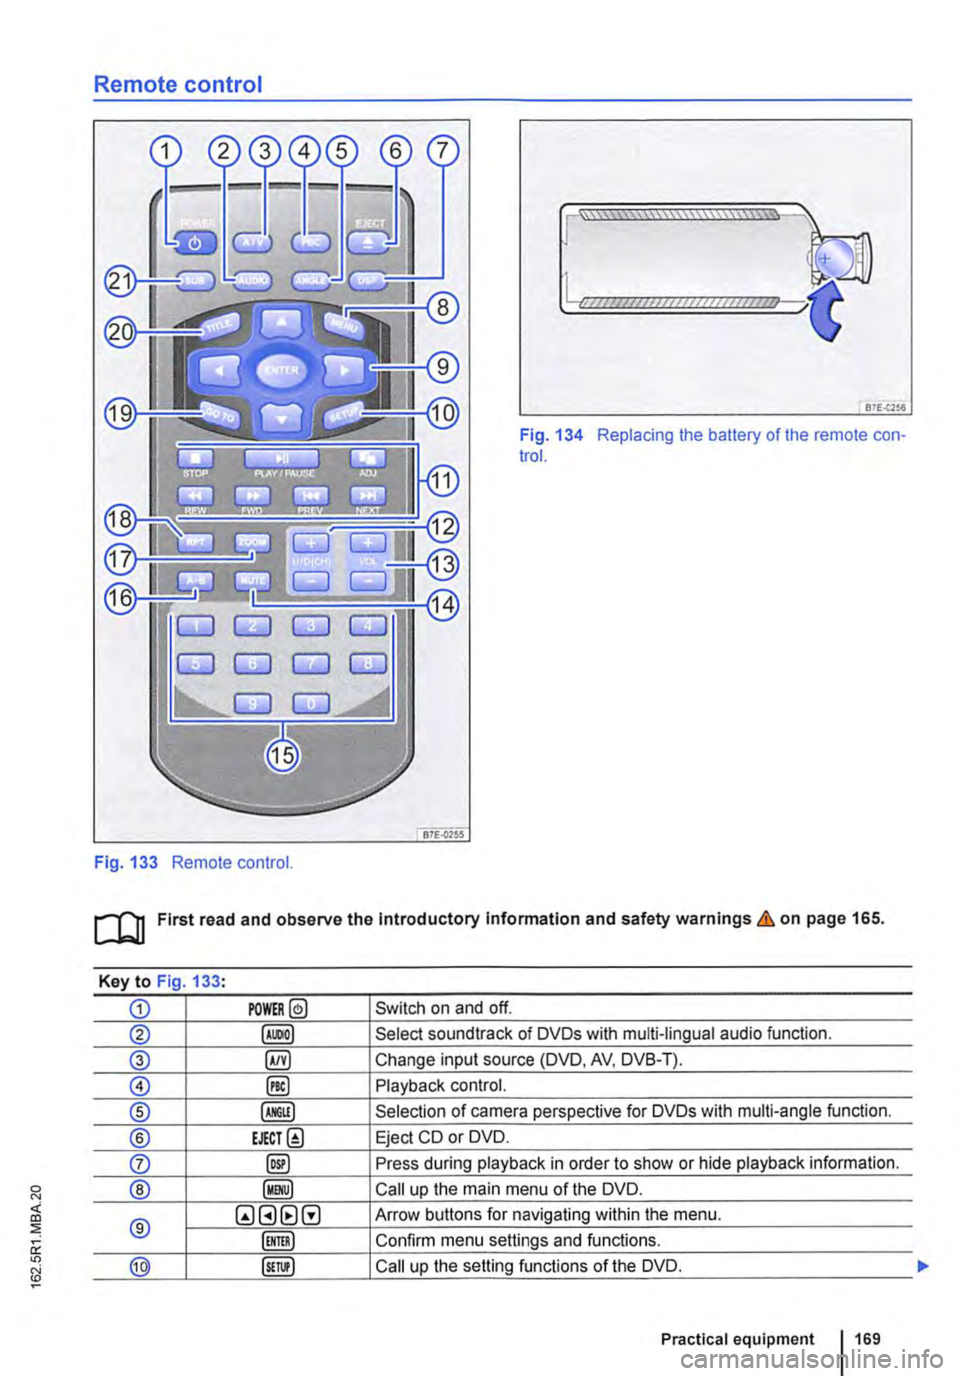
Remote control
Fig. 133 Remote control.
[::::::::::::::::::::::vm
81£.(256
Fig. 134 Replacing the battery of the remote con-trol.
[QJ First read and observe the Introductory Information and safety warnings & on page 165.
Key to Fig 133·
CD POWER@ Switch on and off.
@ Select soundtrack of DVDs with multi-lingual audio function.
® §) Change input source (DVD, AV, DVB-T).
0 @) Playback control.
® Selection of camera perspective for DVDs with multi-angle function.
® EJECT@ Eject CD or DVD.
0 @) Press during playback in order to show or hide playback information.
® Call up the main menu of the DVD.
® QGHtlG Arrow buttons for navigating within the menu.
Confirm menu settings and functions.
@ Call up the setting functions of the DVD.
Practical equipment 169
Page 170 of 486

Key to Fig 133·
8REW8FWD Fast forward or reverse during playback. Press the button repeatedly to increase forward or reverse speed. If the§) button is pressed be-forehand, the slow-motion function has been activated.
@ §)PREY 81£XT Change to previous or next title/chapter.
§) PLAY /PAUSE Press once to start or interrupt playback. Press twice during playback and then press the B or 8 button to jump from scene to scene.
@STOP Stop playback.
Call up settings menu for the screen.
© (!) U/D(CH) Q no function
@ (!)VO!.Q Increase or lower the volume.
®l Switch sound on and off.
@ (ij ... (i) Numerical buttons
® @ Repeat the section selected between the first and second time the button was pressed.
@ Zoom into the current image. Press the button repeatedly to increase the zoom factor and finally to switch the zoom function off.
@ @) Switch repeat function on and off.
@ Skip to a chapter or piece of music.
@ §D Call up the TITLE menu of the DVD.
@ @ Select subtitles of DVDs with a multi-lingual subtitle function.
Replacing the battery
If the remote control unit no longer reacts when you press a button. the battery is empty and must be replaced.
• Slide open the cover on the rear of the remote control unit.
• Using a suitable thin object, lever the battery out of the battery compartment.
• Insert a new battery in the direction of the arrow 134
• Close the cover.
Swallowing batteries with a diameter of 20 mm or other lithium batteries can result in severe or even fatal injuries within a very short period of time.
• Always keep the remote control unit, key ring with batteries, spare batteries, round cells and other batteries that are larger than 20 mm out of the reach of children.
Settings on the LCD screen
rl'11 First read and observe the introductory L-W.f information and safety warnings & on page 165.
170 I Before the journey
• Call for medical help immediately you sus-pect that someone has swallowed a battery.
CD
• The remote control can be damaged if the battery is not changed properly.
• Unsuitable batteries can damage the remote control. Replace discharged batteries only with new batteries of the same voltage rating, size and specification.
• Ensure that the battery Is fitted the right way round.
Dispose of discharged batteries in accord-W ance with regulations governing the protec-tion of the environment.
r::l If the 0 symbol is displayed when you press l!J a button, the button will not function when a CD or DVD is inserted in the slot.
Page 171 of 486

Calling up the main menu
• Press button on the remote control unit or the MENU button on the screen.
• Use the arr(w keyJ (8 G on the remote control unit or lvoL + ... ) VOL-.. on the screen to choose the desired setting.
unit or the PLAY>tl button on the screen to confirm your selection.
• Press the @m button on the remote control unit or the jMENUJ button on the screen to leave the main menu.
Changing image settings
In this menu, you can change the settings for con-trast, brightness, sharpness, colour and tint.
• Open the main menu.
• Use the arr(w keys) (8 G on the remote control unit or jvoL + ... ) VOL-.. on the screen to choose the desired picture setting.
• Use the arr(w keys) (8 G on the remote control unit or lvoL + ... ) voL-.. on the screen to choose the menu item whose settings are to be changed.
• Use the arr(w keys) (8 G on the remote control unit or lvOL + ... ) VOL-.. on the screen to make the desired setting.
unit or the PLAY•u button on the screen to save the setting.
Changing function settings
The following settings can be made in this menu:
Screen mode
Mirror mode
V-Fiip
Illumination
Adjust picture ratio (16:9 or 4:3)
Create a mirror image of the picture being shown.
Turn the picture being shown 180°.
Set the screen bright-ness
Settings on the DVD player
r--("'n First read and observe the introductory L.-J.:.I.I information and safety warnings & on page 165.
• Open the main menu.
• Use the arr(w keys) (8 G on the remote control unit or lvoL + ... ) VOL-.. on the screen to choose Function settings.
• Use the arr(w keyJ (8 G on the remote control unit or lvoL + ... ) VOL-.. on the screen to choose the menu item whose settings are to be changed.
• Use the arr(w keys) (8 G on the remote control unit or lvoL + ... ] VOL-.. on the screen to make the desired setting.
unit or the PLAY>tl button on the screen to save the setting.
Changing the language
The language can be changed in this menu: Ger-man and English are the available languages.
• Open the main menu.
• Use the arr(w keys) (8 G on the remote control unit or lvoL + ... ) voL-.. on the screen to choose the Language choice setting.
• Use the arr(w keys) (8 G on the remote control unit or lvoL + ... ) VOL-.. on the screen to select the desired language.
• Press the SET button on the remote control unit or the setting.
Calling up the main menu
• Press the !SETUP) button on the remote control unit.
• Use the arrow buttons (8 G to choose the de-sired setting. .,.
Practical equipment 1171