2012 VOLKSWAGEN TRANSPORTER display
[x] Cancel search: displayPage 347 of 486
A WARNING (Continued)
• If Ad Blue® gets Into the eyes or onto the skin, Immediately wash the area with lots of water for at least 15 minutes and consult a doctor.
• If Ad Blue® is swallowed, Immediately rinse the mouth out with lots of water for at least 15 minutes. Do not induce vomiting un-less Instructed to do so by a doctor. Seek medical assistance Immediately.
Warning and indicator lamps
CD
Ad Blue® can corrode surfaces such as painted vehicle parts, plastics, clothing and carpets. Remove any spiltAdBiue® as quickly as possi-ble with a damp cloth and plenty of cold water.
• If the Ad Blue® has already formed crystals, use warm water and a sponge to remove.
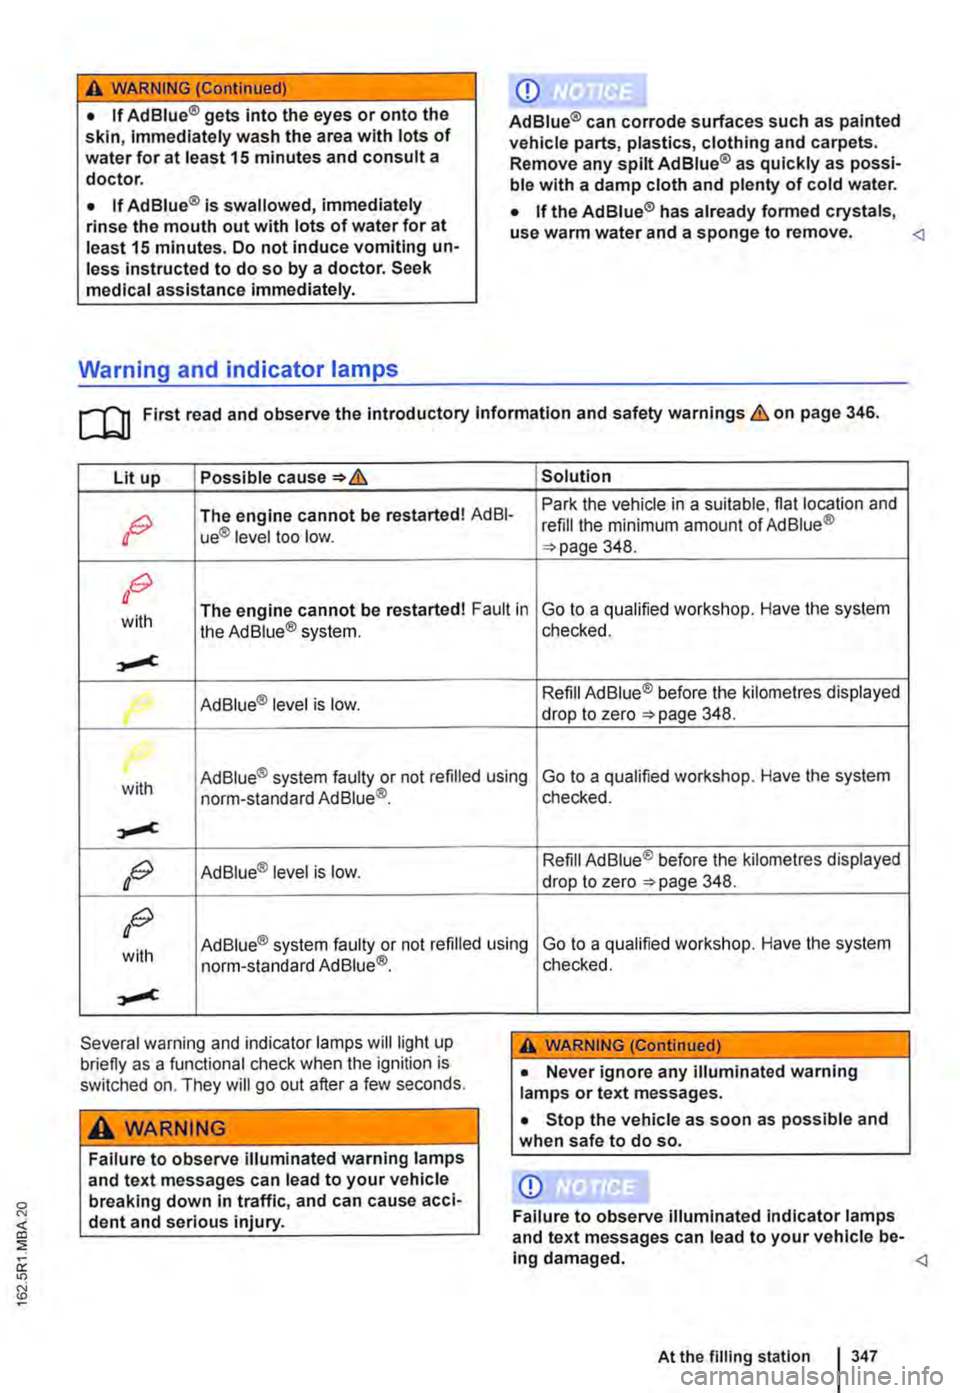
Lit up Possible Solution
OG The engine cannot be restarted! AdBI-Park the vehicle in a suitable. flat location and refill the minimum amount of Ad Blue® ue® level too low. 348.
OG
with The engine cannot be restarted! Fault in the Ad Blue® system. Go to a qualified workshop. Have the system checked.
,.,..,c
Ad Blue® level is low. Refill Ad Blue® before the kilometres displayed
r drop to zero 348.
with Ad Blue® system faulty or not refilled using norm-standard Ad Blue®_ Go to a qualified workshop. Have the system checked.
,.,..,c
OG Ad Blue® level is low. Refill Ad Blue® before the kilometres displayed drop to zero 348.
OG
with Ad Blue® system faulty or not refilled using Go to a qualified workshop. Have the system norm-standard Ad Blue®.
,.,..,c
Several warning and indicator lamps will light up briefly as a functional check when the ignition is switched on. They will go out after a few seconds.
A WARNING
Failure to observe illuminated warning lamps and text messages can lead to your vehicle breaking down in traffic, and can cause acci-dent and serious injury.
checked.
A WARNING (Continued)
• Never ignore any illuminated warning lamps or text messages.
• Stop the vehicle as soon as possible and when safe to do so.
CD
Failure to observe illuminated Indicator lamps and text messages can lead to your vehicle be-Ing damaged.
Page 348 of 486
![VOLKSWAGEN TRANSPORTER 2012 Owners Manual Refilling AdBiue®
Fig. 271 Behind the tank flap: filler cap of the Ad Blue tank unscrewed [A CD and attached in holder [[ ®. Fill the Ad Blue tank using a filler bottle [B@ or a filler nozzle C] @. VOLKSWAGEN TRANSPORTER 2012 Owners Manual Refilling AdBiue®
Fig. 271 Behind the tank flap: filler cap of the Ad Blue tank unscrewed [A CD and attached in holder [[ ®. Fill the Ad Blue tank using a filler bottle [B@ or a filler nozzle C] @.](/manual-img/18/55785/w960_55785-347.png)
Refilling AdBiue®
Fig. 271 Behind the tank flap: filler cap of the Ad Blue tank unscrewed [A CD and attached in holder [[ ®. Fill the Ad Blue tank using a filler bottle [B@ or a filler nozzle C] @.
,....-.('n First read and observe the Introductory 1.-J=,U Information and safety warnings & on page 346.
To refill with Ad Blue®, park the vehicle on a level surface and not on any kind of incline. The tank level gauge may not detect the refill quantity cor-rectly if the vehicle is not parked on a level surface.
Do not fill fuel and AdBiue® at the same lime.
If a message about the Ad Blue® level appears on the instrument cluster display, refill with at least 7 litres of Ad Blue®. A smaller amount of refill is insufficient. if no message about the AdBiue® level appears on the instrument cluster display, use any quantity to refill the tank to the maximum level.
Opening the tank filler neck
• Opening the tank flap.
• Unscrew the cap of the tank filler neck =>Fig. 271 anticlockwise.
• Fit the cap of the filler neck into the holder]) @.
Use only Ad Blue® that complies with the stand-ard ISO 22241-1.
Refilling using a refill bottle
• Please read the manufacturer's notes and infor-mation on the refill bottle.
• Observe the expiry date.
• Remove the screw top of the refill bottle.
• Place the neck of the refill bottle =>Fig. 271 [ID @ vertically onto the tank filler neck and turn it clockwise hand-tight.
• Push the refill bottle towards the filler neck, press and hold down.
348 While driving
• Wait until the contents of the refill bottle have entered the Ad Blue® tank. Do not crumple up or damage the refill bottle!
• Unscrew the refill bottle anticlockwise and lift it carefully up and out =>CD.
• When the Ad Blue® tank is full, Ad Blue® will no longer flow out of the bottle and into the tank.
Refilling using a filler bottle
• Please read the manufacturer's notes and infor-mation on the container.
• Observe the expiry date.
• Use the integrated spout.
• Refill at least 7 litres of AdBiue®. A smaller amount of refill is insufficient.
• Do overfill the tank. The Ad Blue® tank is com-pletely filled when Ad Blue® reaches the top level of tank filler neck.
Refilling using a filler nozzle
• The procedure for refilling with an Ad Blue® filler nozzle =>Fig. 271 @]@) is the same as for refilling the fuel tank with fuel =>CD.
• The Ad Blue® tank is full as soon as the (proper-ly operated) filler nozzle clicks off for the first time =>CD.
Closing the tank filler neck
• Screw the cap onto the tank filler neck =>Fig. 271 clockwise until it clicks into place.
• Close the tank flap.
Page 358 of 486
A WARNING (Continued)
• Always allow the engine to cool down completely to avoid burns.
• Avoid raising your arms when removing the oil drain plug with your fingers to help prevent oil from running down your arm.
• Use a suitable container when draining the used oil. it must be at least large enough to hold the entire quantity of engine oil re-quired for refilling.
• Never store engine oil in empty food con-tainers, bottles or any other non-original con-tainers as people finding these containers may not know that they contain engine oil.
Coolant
o:::n Introduction
This chapter contains information on the following subjects:
Warning lamp and coolant temperature display . . . . . . . . . . . . . . . . . . . . . . . . . 359
Coolant specification . . . . . 360 Checking the coolant level and refilling coolant . . . . . . . . . . . . . 361
Never carry out any work on the engine coolant system if you are not familiar with the requisite pro-cedures, or if you do not have access to the cor-rect tools, operating equipment and fluids &. The work should be carried out by a qualified work-shop if you are uncertain. Volkswagen Commercial Vehicles recommends using a Volkswagen Com-mercial Vehicles dealership for this purpose.
Serious injuries can be caused if work is carried out incorrectly.
Additional information and warnings:
• Towing a trailer 139
• Preparation for working in the engine compart-ment 350
• Accessories, modifications, repairs and renewal of parts =>page 394
358 I Cleaning and maintenance
A WARNING (Continued)
• Engine oil is toxic and must be stored out of the reach of children.
r:Q:.. Before changing the engine oil, first find out W where old oil can be disposed of properly near you.
Used oil must be disposed of in accordance W with regulations governing the protection of the environment. Never dispose of old oil in loca-tions such as gardens, woods, sewerage systems, on streets and roads, or in rivers and waterways.
Engine coolant is poisonous and can cause serious Injuries.
• Engine coolant should only be kept in sealed original containers In a safe place.
• Never store engine coolant In empty food containers, bottles or any other non-original containers as people finding these containers may then drink the engine coolant.
• The engine coolant must be stored out of the reach of children.
• Please note that the amount of correct coolant additive used must be sufficient for the lowest ambient temperature that you ex-pect the vehicle to be exposed to.
• Coolant can freeze at extremely cold out-side temperatures, causing the vehicle to break down. Vehicle occupants with Inade-quate winter clothing could then freeze to death as the heating will also no longer func-tion.
Coolant and coolant additives can pollute the W environment. Spilt service fluids must be col-lected then disposed of properly and in an environ-mentally responsible way.
Page 359 of 486
Warning lamp and coolant temperature display
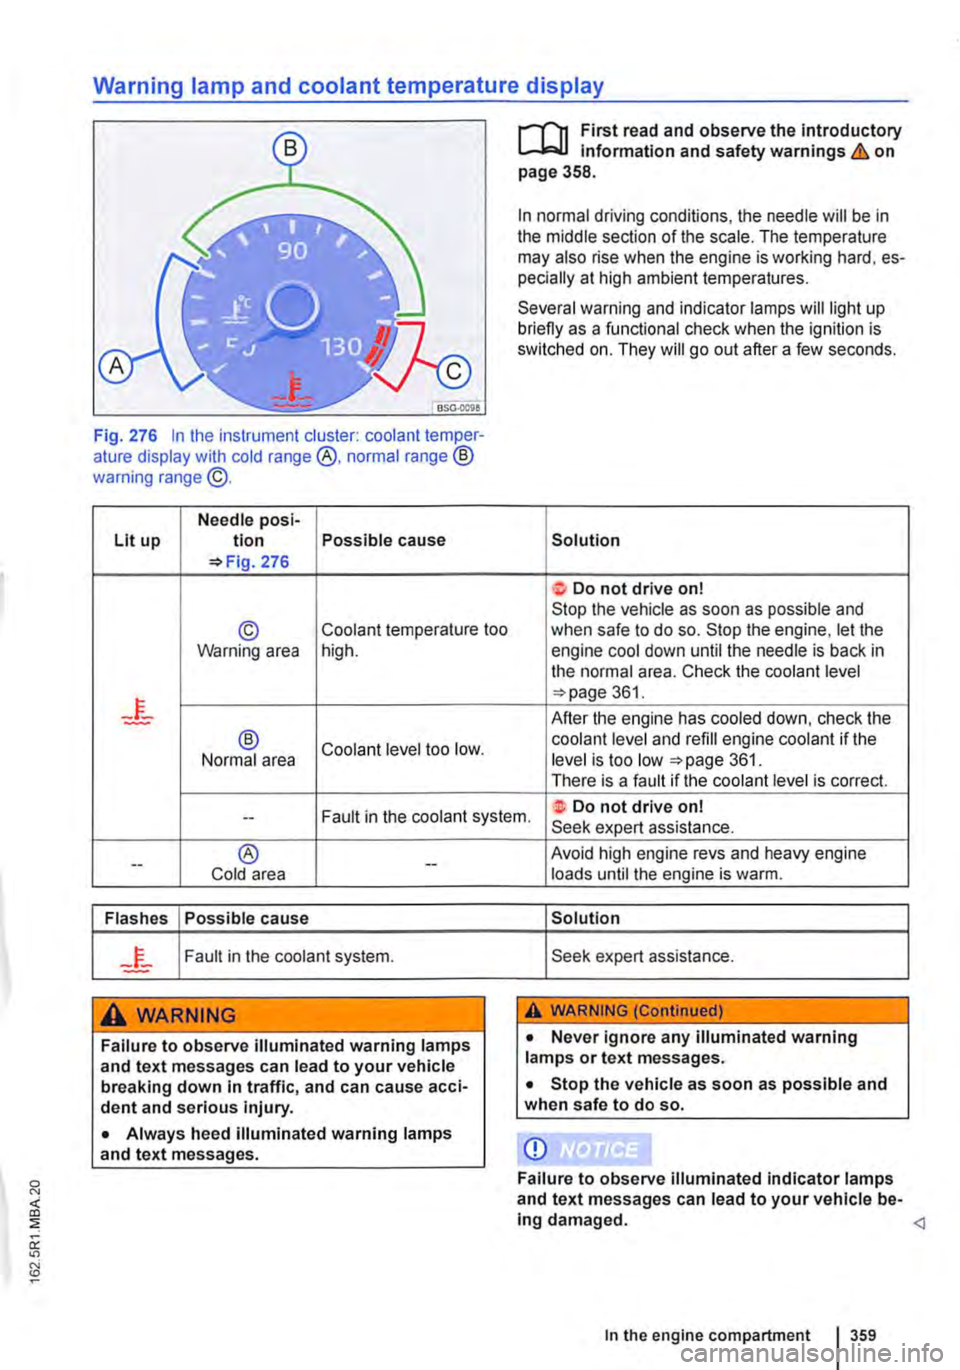
Fig. 276 In the instrument cluster: coolant temper-ature display with cold range @, normal range ® warning range @.
Needle posi-Lit up tion Possible cause =>Fig. 276
© Coolant temperature too Warning area high.
® Coolant level too low. Normal area
r-f"n First read and observe the introductory L,....J.:.lJ Information and safety warnings & on page 358.
In normal driving conditions, the needle will be in the middle section of the scale. The temperature may also rise when the engine is working hard, es-pecially at high ambient temperatures.
Several warning and indicator lamps will light up briefly as a functional check when the ignition is switched on. They will go out after a few seconds.
Solution
t Do not drive on! Stop the vehicle as soon as possible and when safe to do so. Stop the engine, let the engine cool down until the needle is back in the normal area. Check the coolant level =>page 361.
After the engine has cooled down, check the coolant level and refill engine coolant if the level is too low =>page 361. There is a fault if the coolant level is correct.
Fault in the coolant system. ·t Do not drive on! --Seek expert assistance.
--® Cold area --
Flashes Possible cause
Fault in the coolant system.
A WARNING
Failure to observe illuminated warning lamps and text messages can lead to your vehicle breaking down In traffic, and can cause acci-dent and serious injury.
• Always heed illuminated warning lamps and text messages.
Avoid high engine revs and heavy engine loads until the engine is warm.
Solution
Seek expert assistance.
A WARNING (Continued)
• Never ignore any illuminated warning lamps or text messages.
• Stop the vehicle as soon as possible and when safe to do so.
CD
Failure to observe illuminated indicator lamps and text messages can lead to your vehicle be-ing damaged.
Page 364 of 486
Warning lamp
ro First read and observe the Introductory Information and safety warnings & on page 362.
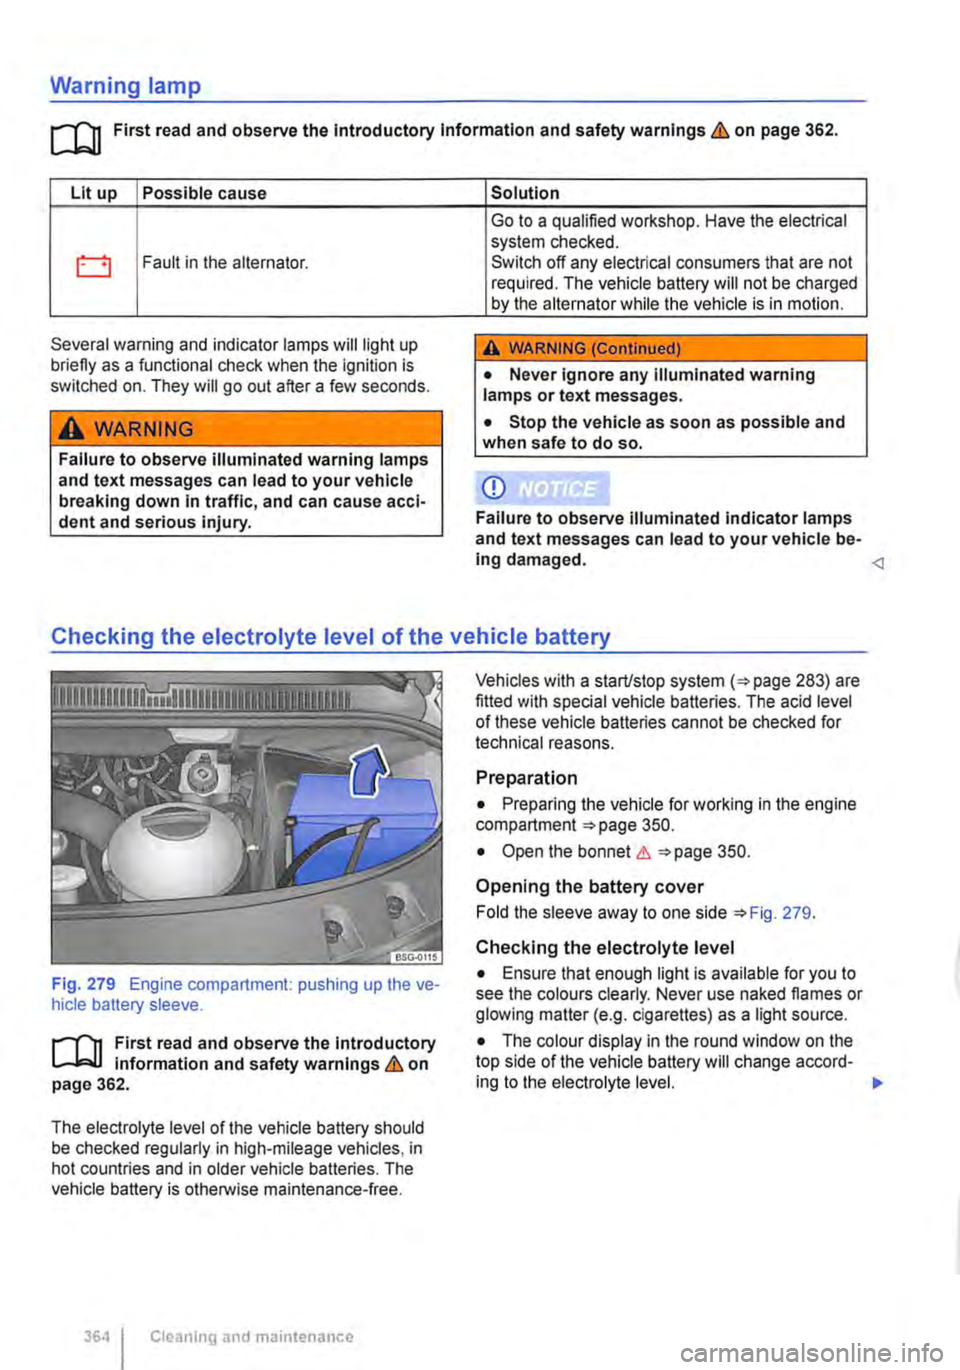
Lit up Possible cause
0 Fault in the alternator.
Several warning and indicator lamps will light up briefly as a functional check when the ignition is switched on. They will go out after a few seconds.
A WARNING
Failure to observe illuminated warning lamps and text messages can lead to your vehicle breaking down In traffic, and can cause acci-dent and serious injury.
Solution
Go to a qualified workshop. Have the electrical system checked. Switch off any electrical consumers that are not required. The vehicle battery will not be charged by the alternator while the vehicle is in motion.
A WARNING (Continued)
• Never ignore any illuminated warning lamps or text messages.
• Stop the vehicle as soon as possible and when safe to do so.
CD
Failure to observe illuminated indicator lamps and text messages can lead to your vehicle be-Ing damaged. <1
Checking the electrolyte level of the vehicle battery
Fig. 279 Engine compartment: pushing up the ve-hicle battery sleeve.
r-111 First read and observe the Introductory l-Jo=,.lJ Information and safety warnings & on page 362.
The electrolyte level of the vehicle battery should be checked regularly in high-mileage vehicles, in hot countries and in older vehicle batteries. The vehicle battery is otherwise maintenance-free.
364 I Cleaning and maintenance
Vehicles with a starUstop system (=>page 283) are fitted with special vehicle batteries. The acid level of these vehicle batteries cannot be checked for technical reasons.
Preparation
• Preparing the vehicle for working in the engine compartment =>page 350.
• Open the bonnet &::. =>page 350.
Opening the battery cover
Fold the sleeve away to one side =>Fig. 279.
Checking the electrolyte level
• Ensure that enough light is available for you to see the colours clearly. Never use naked flames or glowing matter (e.g. cigarettes) as a light source.
• The colour display in the round window on the top side of the vehicle battery will change accord-ing to the electrolyte level.
Page 365 of 486
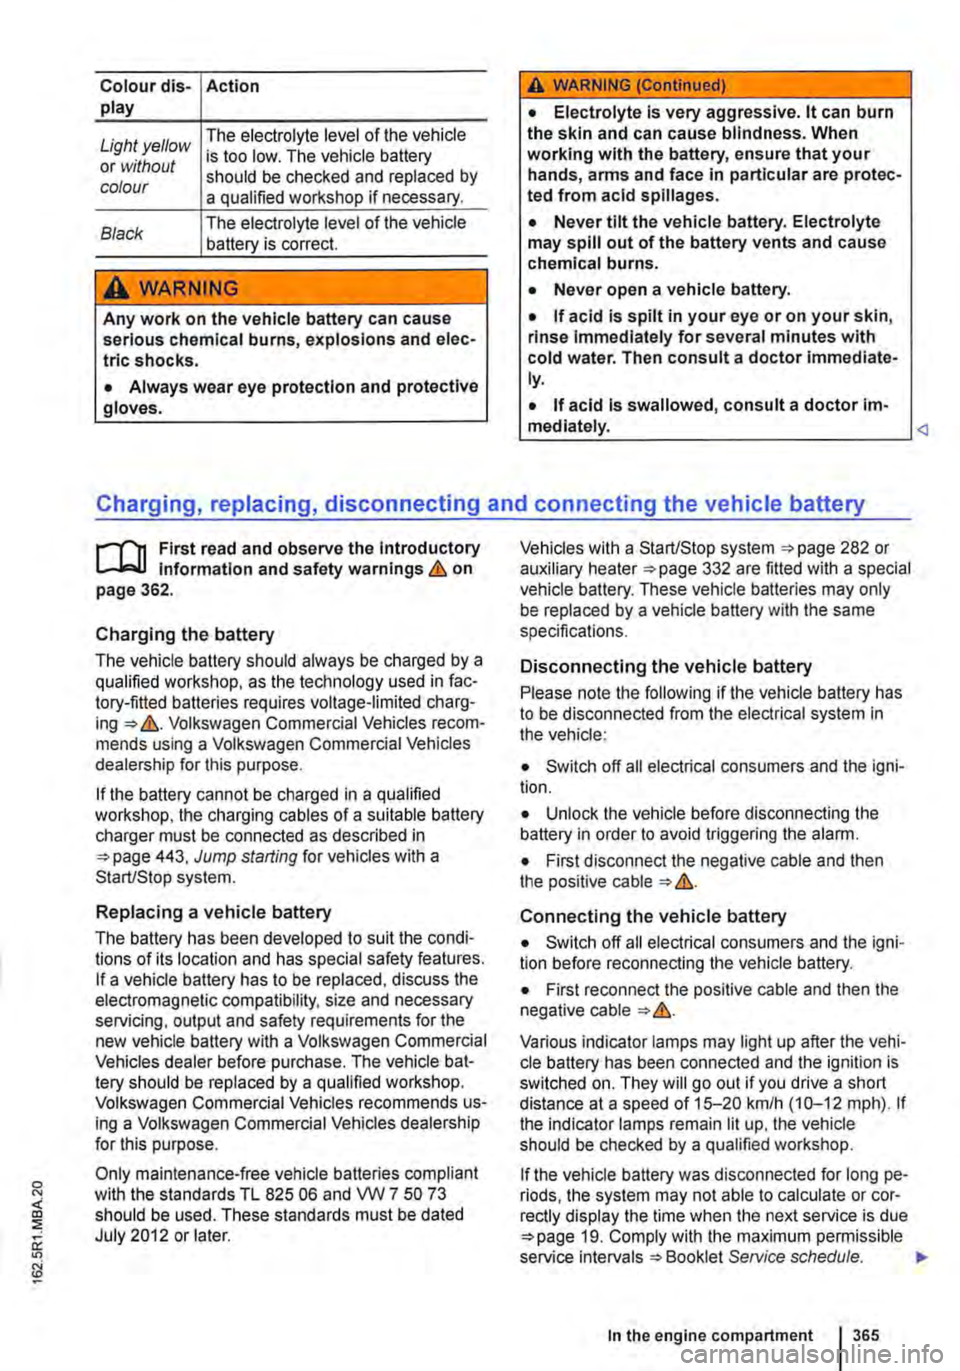
Colour dis-Action play
Light yellow The electrolyte level of the vehicle
or without is too low. The vehicle battery
colour should be checked and replaced by a qualified workshop if necessary.
Black The electrolyte level of the vehicle battery is correct.
A WARNING
Any work on the vehicle battery can cause serious chemical burns, explosions and elec-trlc shocks.
• Always wear eye protection and protective gloves.
A WARNING (Continued)
• Electrolyte is very aggressive. lt can burn the skin and can cause blindness. When working with the battery, ensure that your hands, arms and face in particular are protec-ted from acid spillages.
• Never tilt the vehicle battery. Electrolyte may spill out of the battery vents and cause chemical burns.
• Never open a vehicle battery.
• if acid is spilt in your eye or on your skin, rinse immediately for several minutes with cold water. Then consult a doctor immediate-ly.
• If acid is swallowed, consult a doctor im-mediately.
r-"f'n First read and observe the introductory L-Jo:.l.l information and safety warnings & on page 362.
Charging the battery
The vehicle battery should always be charged by a qualified workshop, as the technology used in fac-tory-fitted batteries requires voltage-limited charg-ing => &. Volkswagen Commercial Vehicles recom-mends using a Volkswagen Commercial Vehicles dealership for this purpose.
If the battery cannot be charged in a qualified workshop, the charging cables of a suitable battery charger must be connected as described in =>page 443, Jump starting for vehicles with a Start/Stop system.
Replacing a vehicle battery
The battery has been developed to suit the condi-tions of its location and has special safety features. If a vehicle battery has to be replaced, discuss the electromagnetic compatibility, size and necessary servicing, output and safety requirements for the new vehicle battery with a Volkswagen Commercial Vehicles dealer before purchase. The vehicle bat-tery should be replaced by a qualified workshop. Volkswagen Commercial Vehicles recommends us-ing a Volkswagen Commercial Vehicles dealership for this purpose.
Only maintenance-free vehicle batteries compliant with the standards TL 825 06 and VVV 7 50 73 should be used. These standards must be dated July 2012 or later.
Vehicles with a Start/Stop system =>page 282 or auxiliary heater =>page 332 are fitted with a special vehicle battery. These vehicle batteries may only be replaced by a vehicle battery with the same specifications.
Disconnecting the vehicle battery
Please note the following if the vehicle battery has to be disconnected from the electrical system in the vehicle:
• Switch off all electrical consumers and the igni-tion.
• Unlock the vehicle before disconnecting the battery in order to avoid triggering the alarm.
• First disconnect the negative cable and then the positive cable => &.
Connecting the vehicle battery
• Switch off all electrical consumers and the igni-tion before reconnecting the vehicle battery.
• First reconnect the positive cable and then the negative cable=>&.
Various indicator lamps may light up after the vehi-cle battery has been connected and the ignition is switched on. They will go out if you drive a short distance at a speed of 15-20 kmlh (10-12 mph). If the indicator lamps remain lit up, the vehicle should be checked by a qualified workshop.
if the vehicle battery was disconnected for long pe-riods, the system may not able to calculate or cor-rectly display the time when the next service is due =>page 19. Comply with the maximum permissible service intervals =>Booklet Service schedule. ""
In the engine compartment 365
Page 372 of 486
A WARNING (Continued)
• Check tyre pressures regularly, at least once a month, and before every long journey.
• All tyres must have the correct tyre pres-sure to suit the vehicle load.
• Never reduce excess pressure when the tyres are warm.
CD
• When attaching the tyre pressure gauge make sure that you do not position it at an an-gle to the valve shaft. This can damage the tyre valve.
Tread depth and wear indicators
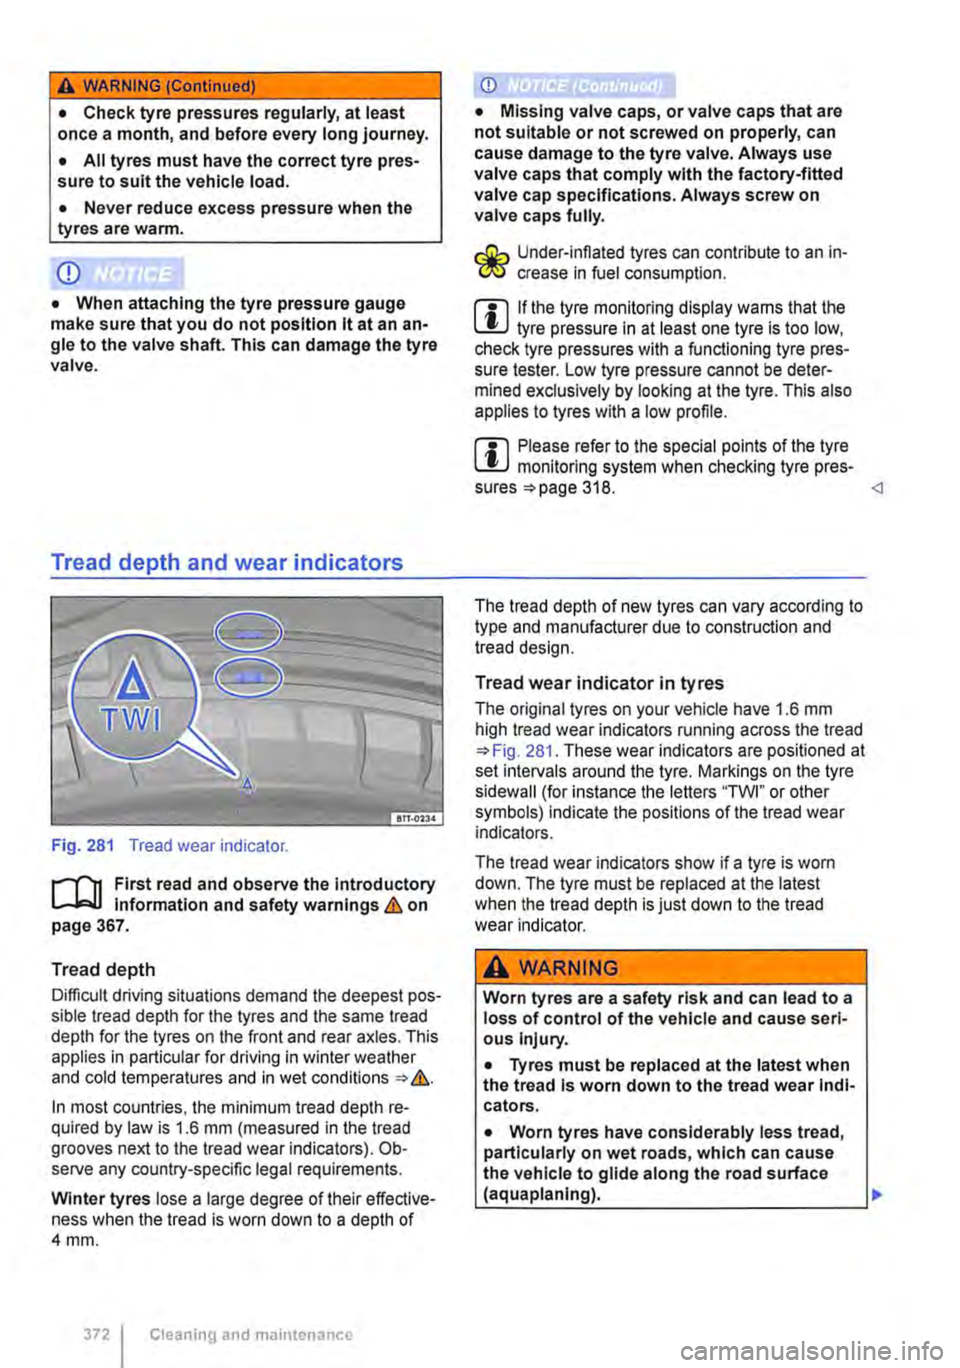
Fig. 281 Tread wear indicator.
r-fl1 First read and observe the Introductory L-.lo:::.l.l Information and safety warnings & on page 367.
Tread depth
Difficult driving situations demand the deepest pos-sible tread depth for the tyres and the same tread depth for the tyres on the front and rear axles. This applies in particular for driving in winter weather and cold temperatures and in wet conditions=>&.
In most countries, the minimum tread depth re-quired by law is 1.6 mm (measured in the tread grooves next to the tread wear indicators). Ob-serve any country-specific legal requirements.
Winter tyres lose a large degree of their effective-ness when the tread is worn down to a depth of 4mm.
3721 Cleaning and maintenance
CD
• Missing valve caps, or valve caps that are not suitable or not screwed on properly, can cause damage to the tyre valve. Always use valve caps that comply with the factory-fitted valve cap specifications. Always screw on valve caps fully.
Under-infiated tyres can contribute to an in-I!IS crease in fuel consumption.
m If the tyre monitoring display warns that the W tyre pressure in at least one tyre is too low, check tyre pressures with a functioning tyre pres-sure tester. Low tyre pressure cannot be deter-mined exclusively by looking at the tyre. This also applies to tyres with a low profile.
m Please refer to the special points of the tyre W monitoring system when checking tyre pres-sures =>page 318.
Tread wear indicator in tyres
The original tyres on your vehicle have 1.6 mm high tread wear indicators running across the tread =>Fig. 281. These wear indicators are positioned at set intervals around the tyre. Markings on the tyre sidewall (for instance the letters "TWI" or other symbols) indicate the positions of the tread wear indicators.
The tread wear indicators show if a tyre is worn down. The tyre must be replaced at the latest when the tread depth is just down to the tread wear indicator.
A WARNING
Worn tyres are a safety risk and can lead to a loss of control of the vehicle and cause seri-ous Injury.
• Tyres must be replaced at the latest when the tread Is worn down to the tread wear Indi-cators.
• Worn tyres have considerably less tread, particularly on wet roads, which can cause the vehicle to glide along the road surface (aquaplaning).
Page 378 of 486

z
w y
over 240 km/h (149 mph)
max. 270 kmlh (168 mph)
max. 300 kmlh (186 mph)
Winter tyres
r-f'n First read and observe the introductory L-J,::JJ information and safety warnings & on page 367.
In winter road conditions, winter tyres will consider-ably improve the car's handling. The design of summer tyres (width, rubber compound, tread pat-tern) gives less grip on ice and snow. Volkswagen Commercial Vehicles urgently recommends you use winter tyres or all-year tyres on all 4 wheels of the vehicle, particularly if winter conditions are ex-pected on the roads. Winter tyres will also improve the braking response of the vehicle and will help to reduce braking distances in winter weather. Volks-wagen Commercial Vehicles recommends that win-ter tyres be fitted to the vehicle at temperatures un-der+ 7•c (+45°F).
Winter tyres lose their effectiveness when the tread is worn down to a depth of 4 mm. Winter tyres also largely lose their effectiveness through ageing-regardless of the tread depth.
The following applies when using winter tyres:
• Observe any country-specific legal require-ments.
• Use winter tyres on all four wheels at the same time.
• Only use in winter road conditions.
• Only use the sizes of winter tyre that have been approved for the vehicle.
• Winter tyres must have the same type, size (rolling circumference) and the same tread pattern.
• Heed the maximum speed permitted by the speed index => &.
Speed limitation
Winter tyres have a speed limitation depending on the speed index =>page 375.
In some vehicle versions, a speed warning can be set in the menu MFD (multi function display) in the instrument cluster =>page 24.
378 I Cleaning and maintenance
Some tyre manufacturers use the code "ZR" for tyres with a highest permitted speed of over 240 km/h (149 mph).
If you use V-rated tyres the speed limits and re-quired tyre pressure will be determined by the en-gine size. You must ask a Volkswagen Commercial Vehicles dealership about the highest permitted speed and required tyre pressure.
Four-wheel drive (4MOTION)
Thanks to its four-wheel drive, the vehicle will have plenty of traction in winter conditions, even with the standard tyres. Nevertheless, Volkswagen Com-mercial Vehicles still recommends that winter tyres or all-year tyres should be fitted on all four wheels when winter road conditions are expected, mainly because this will give a better braking response.
Please refer to the appropriate information and notes when using snow chains =>page 379.
A WARNING
The Improved winter driving characteristics afforded by the winter tyres should not en-courage you to take any risks.
• Always adapt your speed and driving style to suit visibility, weather, road and traffic con-ditions.
• Never exceed the top speed and load per-mitted for the winter tyres that are fitted.
r:Q;-.. Summer tyres should be fitted in good time at the end of the winter. The vehicle handling is better if summer tyres are fitted at temperatures above +7•c (+45.F). They are quieter, do not wear so quickly and reduce fuel consumption.
m In vehicles with a tyre monitoring system, the l!.J systems have to "re-synchronise" after wheels are changed =>page 318.
m Volkswagen Commercial Vehicles dealer-l!.J ships can provide details on permissible win-