Page 149 of 516
Warning light
first read and note the introductory information and heed the on page 49.
Lights cause up
icon
appears Rear hatch open or
When the ignitio n is swi tc hed on,
the rear hatch is no t the red comes on in the instrum ent or the icon appears in the Premium
instrument
be
has been
key : button to and open the rear hatch .
first read and note the tory informa tion and heed the on page 49.
Before driving Proper
response
the
rear hatch is not it may
open when the
Stop and the rear
hatch .
it.
Fig. 28 rea r hatch from the outside .
Briefly press the button on the remote 27 to unlock the rear hatch .
Press and the
Page 150 of 516

N
with the Volkswagen emblem
Unlock the vehicle or rear hatch , or open a
door.
Using your thumb , press the top of the 28 and move the emblem
down . Grasp the bottom part of the emblem and
pull to lift the rear hatch .
or unsupervised unlocking or ing of the rear hatch can cause severe
a bicycle or luggage rack is installed on the rear hatch, it may be hard to see that the rear hatch is unlatched. An unlatched rear
hatch may open suddenly when the vehicle is moving.
Closing the rear hatch
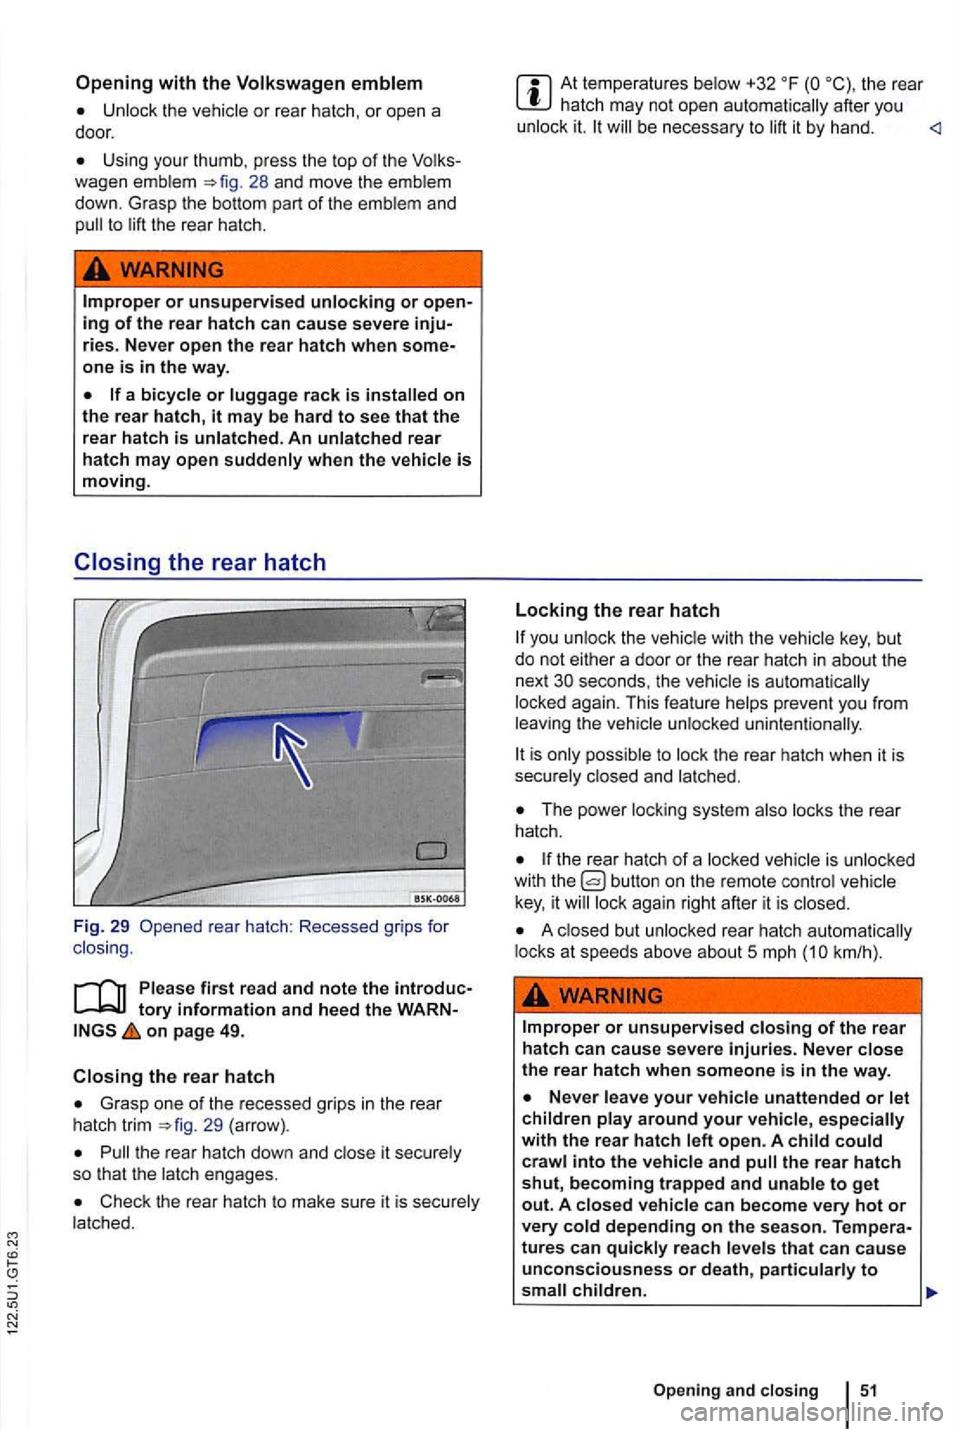
Fig. 29 rear hatch : Recessed grips for
clos ing .
on page 49.
the rear hatch
Grasp one of the recessed grips in the rear
hatch trim 29 (arrow).
Pull the rear hatch down and close it securely
so that the latch engages.
Check the rear hatch to make sure it is securely
la tched.
At temperatures below +32 the rear hatch may not open automatically after you
unlock it. will be necessary to lift it by hand.
Locking the rear hatch
you unlock the vehicle with the vehicle key, but
do not either a door or the rear hatch in about the
next
The power locking system also locks the rear
hatch.
the rear hatch of a locked vehicle is unlocked
with the
lock again right after it is closed.
A closed but unlocked rear hatch automatically
locks at speeds above about 5 mph
or unsupervised closing of the rear
hatch can cause severe injuries. Never close the rear hatch when someone is in the way .
Page 152 of 516
Power windows
Volkswagen
Power locking and closi ng system
.
the driver door: Switches for front and
rear powe r windows .
first read and note the introduc
on page 53.
Switches in the driver door
Key to fig.
For the windows in the front doors.
For the windows in the rear doors.
not open in case of an emergency .
the vehicle. You can use the power windows for several minutes after the ignition is switched off as as the driver or front passenger door has not b een opened.
dren are in the back seat to disable the rear power windows and keep them from being
opened and closed.
the switch again.
tomatic movem en
t:
The safety switch d e
activates the power windows in the rear doors. The indicator
mi
nutes after the ignit ion is sw itched off as
Page 155 of 516
Power
protection for the power sunroof
More information:
Volkswagen 24
locking and closi ng system
Emergency closing and opening
56
57
57
cess to the vehicle key. Unsupervised use of the remote control vehicle key makes it sible to lock the vehicle, start the engine, turn on the ignition and operate the sliding and tilting roof.
Remove leaves and other objects from the sunroof guiderails regularly either by hand or
using a vacuum cleaner.
the powe r sunroof malfunctions, pinch tection may not function properly . an
Opening and
the headliner : rotary switch for the
on page 56.
56 Before driving Turn
the
31 rotary switch to the desi red pos i
tio n to set the power sunroof in the following posi
tions :
® Closed .
@
Tilted.
You must switch on the ignition to operate the
Page 156 of 516

Power sunroof-convenience closing feature
on page 56.
Convenience closing
The conven ience closing feature lets you the power sunroof as fo llows:
Turn the vehicle key bit in the lock of the driver door to the closi ng position and hold it there The power sunroof is key in order to stop the process.
Convenience clos ing first closes the windows and
t hen the power sunroof.
Convenience from the out side leaves the rotary switch in
the l ast selected position. The switch must be new-
ly positioned when starting to drive again .
Pinch protection for the power sunroof
on page 56.
P inch protection
can help reduce the risk of If
the power sunroof clo sing meets resistance or
th ere is something in the way, the power sunroof opens again immedia te ly.
Check why the p ower sunroof did not close.
the power sunroof er sunroof close the next time without pinch protection .
31 ® and down th e rear part of the switch un til the power sunroof closes completely .
the power sunroof not close, please see an authorized Volkswagen dealer or an
Without pinc h protection, the power sunroof close with enoug h force t o cause serious personal injury.
Pinch protection is also active durin g ience
tection may not fu nction properly. thorized Volkswagen dealer or an authorized Volkswagen Service F acility for assis tance.
Op ening and closing 57
Page 157 of 516

Adjusting the seating position
Introduction
this section find inf ormation about:
Examp les
of improper seat ing pos itions . . . 59
Pr ope r seating position . . . . . . . . . . . . .
Manual contr ols on the driver and passe nger
seat . . . . . . . . . . . . . . . . . . . . . . . . . . . . . . . . . . . 61 Ele ctrica l co ntr ols o n the driver and front
passenger seats . . . . . . . . . . . . . . . . . . . . . . . . 62
Adj ustin g
the head restra ints . . . . . . . . . . . . . 63
R emoving and re in stalling head restraints . . . 64
Adj usting the stee
ring whee l position . . . . . . . 65
Cen te r armrest . . . . . . . . . . . . . . . . . . . . . . . . . . 66
Number of seats
Th e vehicle
has a t otal of 5 seat ing posit ions: 2 in front and 3 in the rea r. Eac h seating pos ition has a
safety belt.
More information:
funct ions 67
page 69
Ai r ba g syste m 82
safety and child restraints
WARNING
Improper seat ing pos itions increase the risk of severe or fatal injuries in a crash or other accidents,
times .
Never
Always secure children in the vehicle with a n approved and suitable restraint system appropriate for their age, weight, and height 82 .
Always keep your feet on the in front of the seat. Never rest them on the seat,
Always adjust seat , safety belts, and head straints properly before driving and make sure that
inches (25 em) betw een the front pa ssenger' s breastbone and the in strument panel.
ches (25 em) between your breastbone and the steering wheel.
Adjust the driver's seat so that you can push the pedals while keeping your knee(s) slightly bent. The
di stance to the instrument panel in the knee
a rea must be at least 4 inche s
these requirements cannot be met for physical reason s, contact an authorized
Volk swagen dealer or an auth orized gen Facility to see whether adaptive equipment is avai la bl e.
Always hold the steering wheel on the side of the steering wheel rim with your hands at the 9 o'clock and 3 o'clock positions to help reduce the risk of personal injury if the driver's airbag inflates .
Never hold the steering whee l a t the
12 o'clock position or with your hands at e r places inside the steering whee l rim or on the steering wheel hub. Holding the steering wheel the wrong way can cause serious rie s to the hand s, arm s, and head if the
Pointing the steer ing whe el t oward your face dec reases the of the driver's bag to h elp protect you in a
Never drive with backrest s reclined or ed back farthe r than necessary to drive
Page 159 of 516

first rea d and note the introductory information and hee d the WARNon page 58.
The following describes the proper seating posi
tions for the driver and front seat passenger .
special modifications to your
vehicle may be necessary .
to
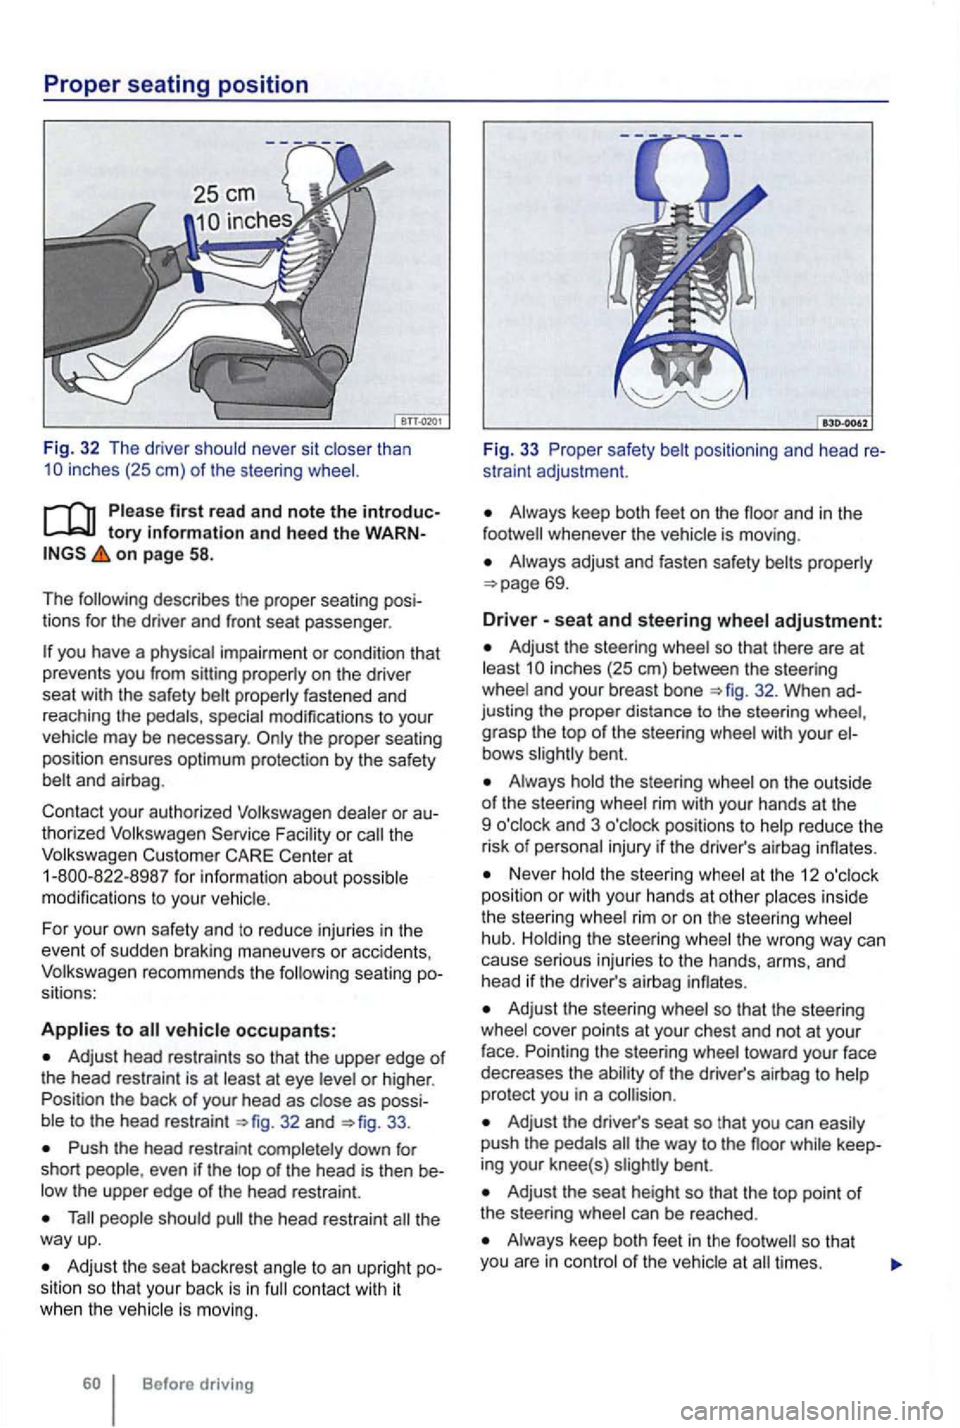
Adjust head restraints so that the upper edge of the head restraint is at least at eye
32 and 33.
Push the head restrai nt completely down for
short even if the top of the head is then be
people should the head restraint the way up.
Adjust the sea t backrest angle to an upright position so that your back is in contact with it when the veh icle is moving.
Before driving
Fig. 33 P roper safety
Always keep both feet on the whenever the vehicle is moving .
Always adjust and fasten safety belts properly
adjustment:
Adjust the steering whe el so that there are at least inches (25 em) between the steeri ng
wheel and your breast bone
grasp the top of the steering wheel with your bent.
Always hold the steering wheel on the outside of the steering wheel rim with your hands at the
9 o'clock and 3 o'clock positions to help reduce the
risk
of personal injury if the driver's airbag innates.
Never hold the steering wheel at the 12
and
head if th e driver's airbag innates.
Adjust the steering wheel so that the steering
wheel cover points at your chest and not at your
face. Pointing the steer ing wheel toward your face
dec reases the ability
of the driver's airbag to help
protec t you in a
Adjust the driver's seat so tha t you can easily push the pedals the way to the noor while keep
ing your knee(s) bent.
Adjust the seat height so that the top point o f
the steering wheel can be reached .
Always keep both feet in the times.
Page 162 of 516
Adjusting the head restraints
Fig. 37 Adjusting the head restraints .
on page 58.
th e ce nter head rest rai nt in th e center
pos ition.
There are notches in the head restraint gu ide rods
so that the head restraint can lock into place .
prope rly
tom of the adjus tment range.
Adjusting the height
37 o r 38 is
The head restraint must lock secu re ly in the
gap
may rema in betwee n th e head restra int and th e
ba ckrest when the head rest r
aint is t h e way
down .
Adjusting the head restraint for
go.
Dri v
ing without head restraints or with properly adjusted head restraints increases
the risk of serious injuri es in a collision.