2012 VOLKSWAGEN GOLF ESP
[x] Cancel search: ESPPage 72 of 516
Displaying the route list
A route list can be displayed during ro ut e
Press the Route button in the Info window, and
press the Rou te list bu tton in the pop-up window.
the map display function , ress the (Options ) function butt on and press Route tist function
button in th e pop-up window .
The route corresponding to the active route
guidance is calcula ted and displayed 68.
The route
d ispl ays street names or
route
sections which must be passed prior to the next
dest ination are displayed .
Tum the tuning knob 1 @to browse the
route list.
Press the tuning knob or th e (Deta ils) function
button to disp lay the distance, estimated drive
time , and where
Press butto n to close the
behind an entry in the route list
Mark the entry with an arrow by turning the
t uning knob and press to and sh ow the
partia l sect ions. The arro w ch ange to
Pr ess the entry wit h an arrow to hide the par-
tia l sectio ns.
Displayed route sections can be blocked
for the calculation or in com binat ion with
Displa ying the route list
Rotate the tuning knob 1 to tag the
route sectio n that is to be blo cked .
Press the (B lock ) function button .
Turn the tuning knob clockwise to tag the
When the route section is tagged up to the
r o ute to be blo cke d, touc h the to ) fun ction
bu tton .
the (B lock to ) function button appears to be
the sect ion of the route to be blocked
until the (Max) disappea rs and th e (Bloc k to ) tion button becomes active again. parts of a
route section if neede d 56.
315
a closu re has been confirmed , the route list be close d.
The ro ut e is reca lc ulated as long
as th e naviga tio n
system can determi ne a reasonabl e route to avoid
t he blocked section.
T
he f un ction button changes to in
the route list.
The blocked route sectio ns are then displayed
on the map in red . a detour is calcula ted , th e
b locked route section is displayed in gray .
Removing a block
Press the nus (except for
re ga rding exclusion starting with the vehic le location
Page 83 of 516
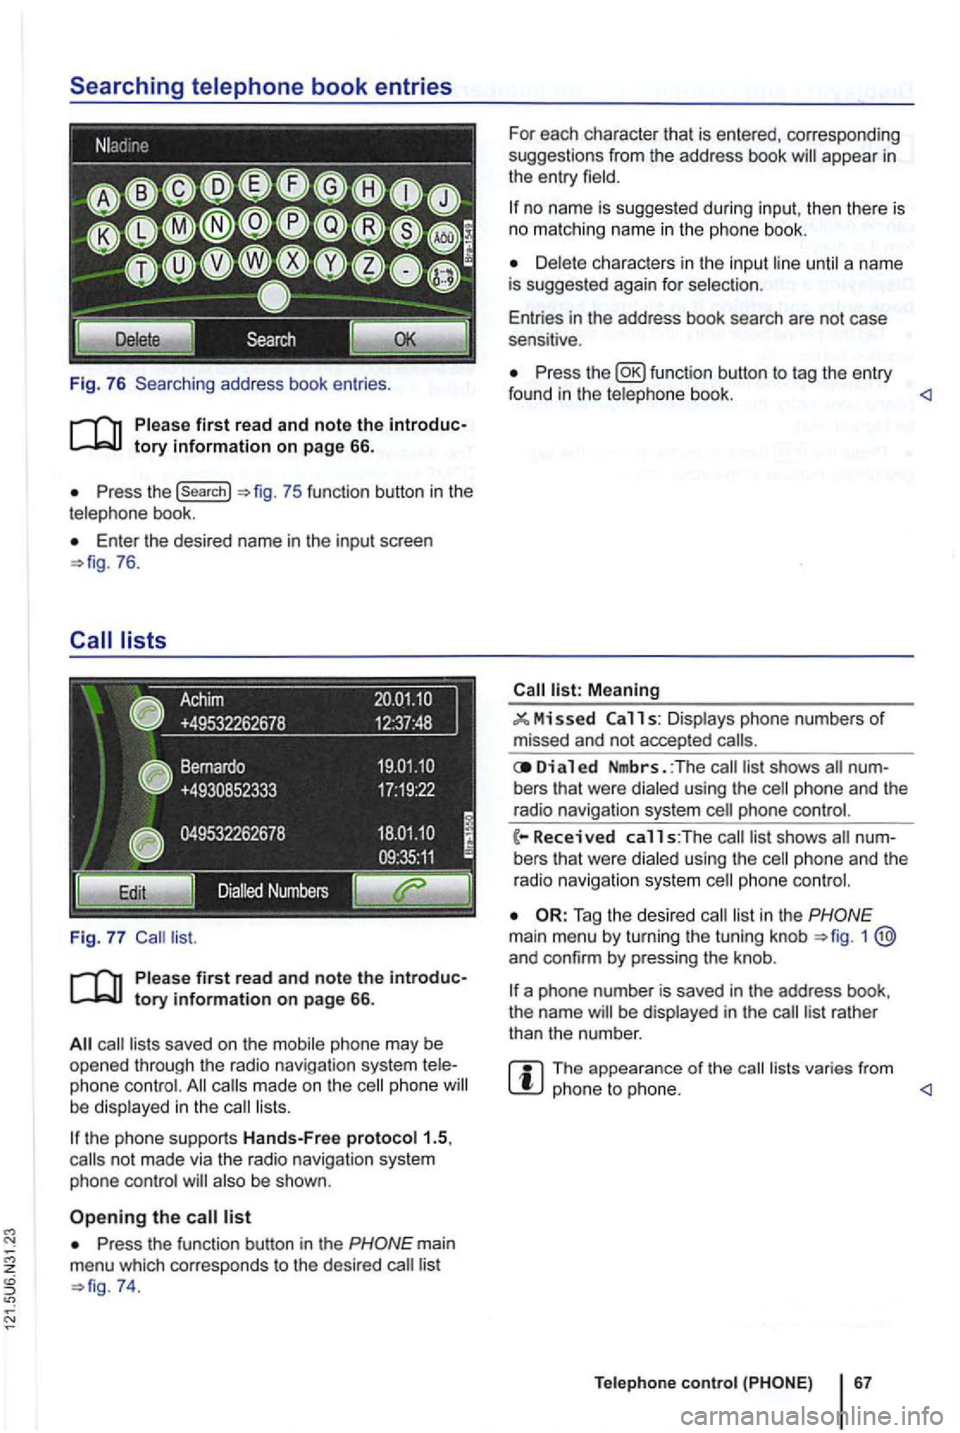
Fig. 76 Searching address book entries .
Press the (search}
Enter th e desired name in the input screen 76.
saved on the mobile phone may be opened through the radio navigation system phone made on the phone lists.
the phone supports Hands-Free proto col1.5,
also be shown .
Press the function button in the
74. For
each character that is entered, corresponding
suggestions from the address book
no name is suggested during input, then th ere is no matching name in the phone book.
until a name
is suggested again for selec tion .
Entries in the address book search are not case
sensitive .
Press the function button to tag the entry
found in the telephone book. <1
Meaning
11 s: Displays phone numbers of missed and not accepted
Di a 1 ed Nmbrs. :The bers that were dialed using the
phone and the
radio navigation system
list in the 1 and confirm by pressing the knob .
a phone number is saved in the address book,
the name be displayed in the
The appearance of the lists varies from phone to phone. <1
Teleph one c ontro l
Page 88 of 516
Settings (SETUP)
Sound,
this section
button
settings
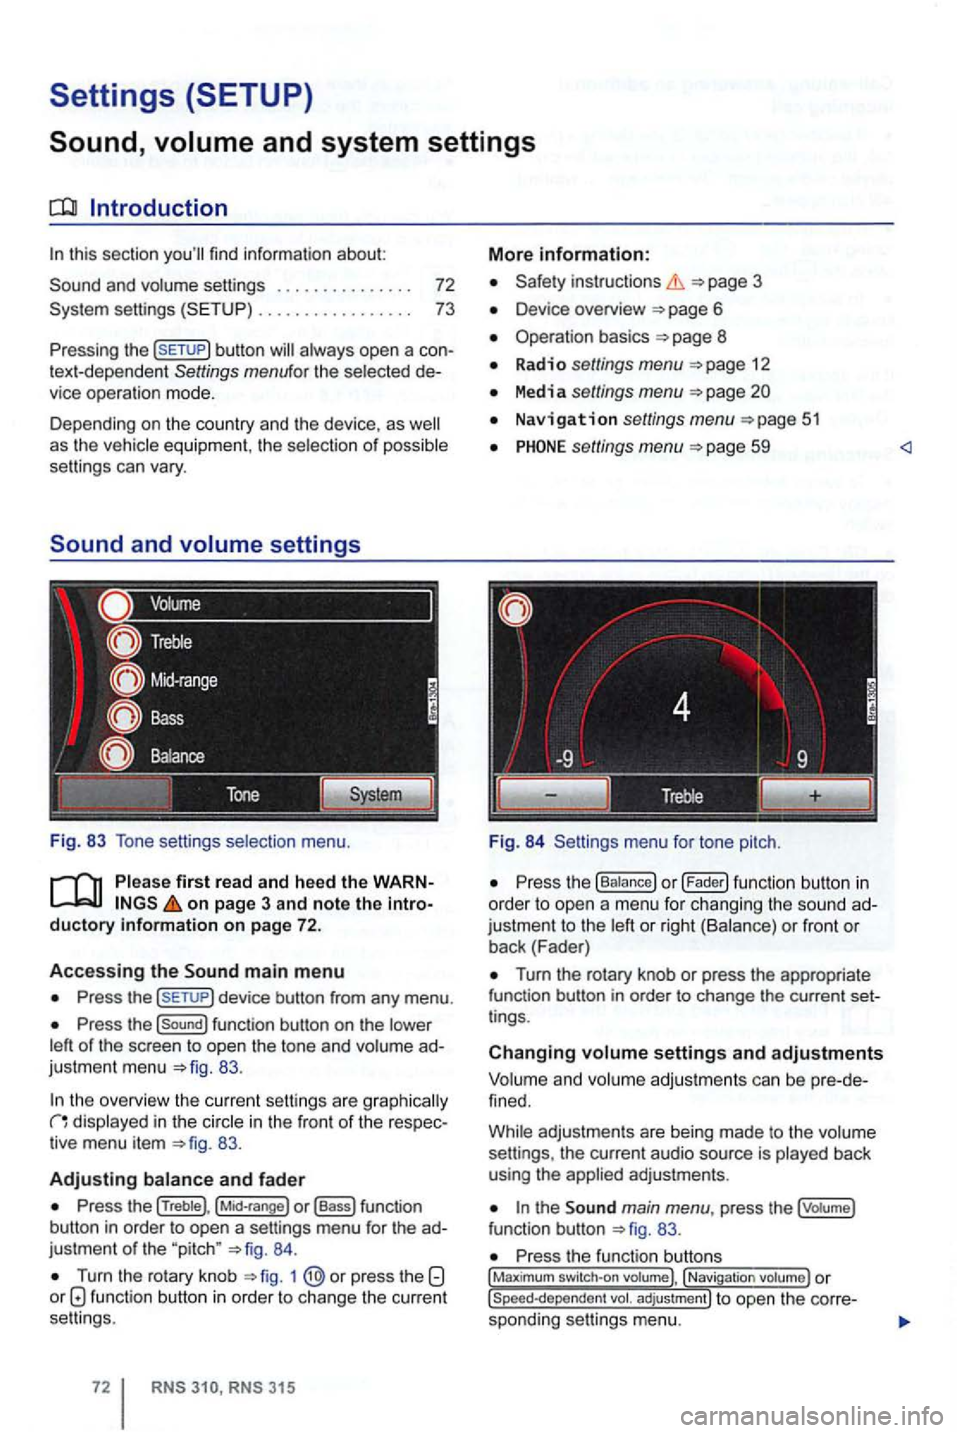
Fig. 83 Tone setti ngs selection menu.
on page 3 and note the introductory information on page 72.
Accessing the main m enu
Press the
Press the function button on the
83.
the overview the cu rrent se ttings are g raphica lly in the in the front of the respec
tiv e menu item 83.
Adjusting
Press the (Treble), o r (Bass) function
button in order to open a settings menu for the ad
justme nt
of the "pitch " 84.
Turn the rotary knob 1 function button in order to change the current
se ttings .
RNS RNS 31 5
More information:
Safety instructions 3
Device overview
Operation basics 8
Radio settings menu 12
Media settings menu
Navigation settings menu
settings menu 59
Fig. 84 Settings menu fo r tone pitch.
Turn the rotary knob or press the appropriate
function button in order to change the current set
t ings .
Changing settings and adjustments
Vo lum e and volume adjustm ents can be pre -de
f ined.
Whi le adjustmen ts are being made to the volume
settings , the current audio source is played back
using the
the main menu , press the (votume)
fun ction button 83.
Press the function , Navigati on
Page 119 of 516
Type of notification
or
deale r o r an autho rized
turn off automatically after a few sec
onds .
Priority 2 warning
message
or continuously levels may cause vehicle damage
and vehicle breakdown .
Check malfunc tion as soon as possib le. Con tact an authorized for assistance if necessary.
tex t
The odometer indicates the distance driven by the vehic le .
The
trip odometer (Trip) shows the distance driv
en since the time the trip odometer was reset.
The meters) .
Outside temperature
At out side temperatures (+4 (icy road warning)
appears in the display . The symbol the outside temperature rises
above +43 (+6
higher than the actual out
side temperature.
The measurement range is from
to
+122 (+so
Compass
Whe n the ignit ion and navigation system are
switched on, the current compass direction is indi
cated
in the instrument cluster display
position is shown both on the
side of the selector and in the instrument
cluster display. The respective gear may
as as in Tiptronic ® mode .
Alternative speed (mph or km/h)
The alternative speed display shows the current
Vehicle overview speedometer
shows mph, the alternative speed
display shows a
readout of the current veh i
signs are posted in units other than those shown
on the vehicle 's speedo meter .
For
vehicles with the Premi um instrument cluster
di splay. select th e A 1 t. s pe ed d sp me nu it em in the Settings menu 24.
For vehicles with the Basic instrument cluster dis
play :
Press the
Press the (o .o button once. or "km /h " be shown
This activates the alternative speed display . To deactivate , the same procedure .
and in strument cluste r text messages can cause the vehicle to break down in traffic and result in a sion and serious personal injury.
on emergency
Page 128 of 516
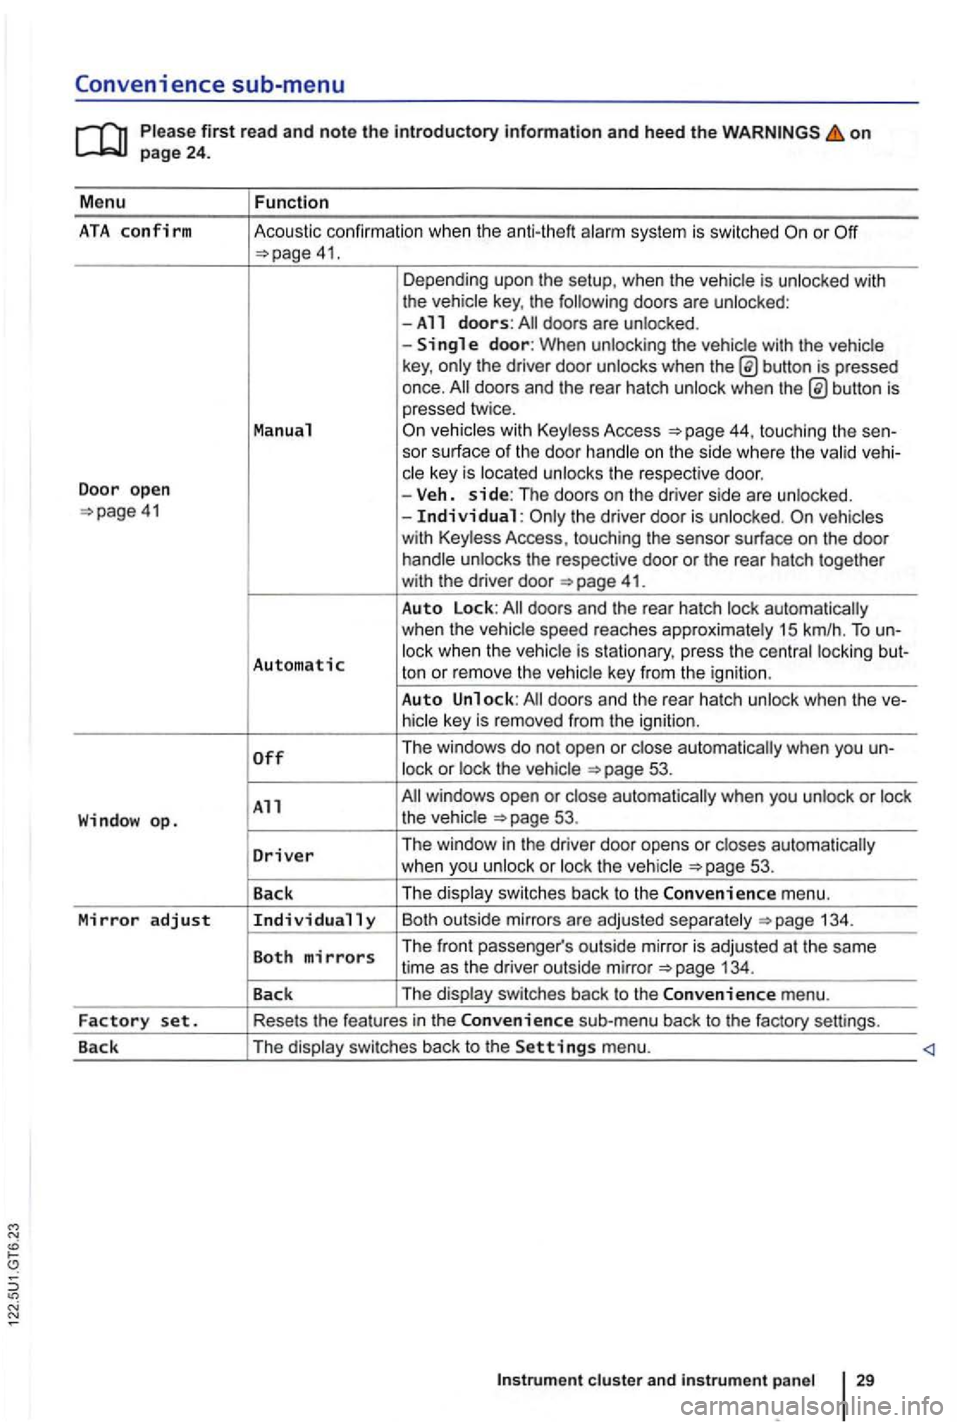
Convenience sub-menu
on
41. Depending upo n the setup, when the vehicle is unlocked with
the vehic le key , the following doors are unlocked :
-All doors: doors are un locked .
-
button is pressed
once.
44, touching the sen-
sor surface of the door handle on the s ide where the valid vehi-
c le key is located unlocks the respective doo r.
Door open -Veh. side: The doors on the dr iver side are unlo cked. the driver door is unloc ked.
41.
Auto Lock:
Automatic lock when the vehic le is s tationary, press the centra l locki ng but-
ton or rem ove the ve hic le key from the igni tion .
Auto Unlock:
53.
All 53.
D
river Th e window in the driver door opens or closes automatically
w hen you unlock or loc k th e ve hicle 53 .
Back The
displa y swi tc
hes back to the Convenience m enu.
Mirror adjust Individually Bo th outsi de mirrors a re ad juste d sepa ra te ly 134 .
Both mirrors The front passe nger's outs ide mirro r is adj usted at th e same
time as the driver out side mirror
Page 138 of 516
Replacing the remote control vehicle key battery
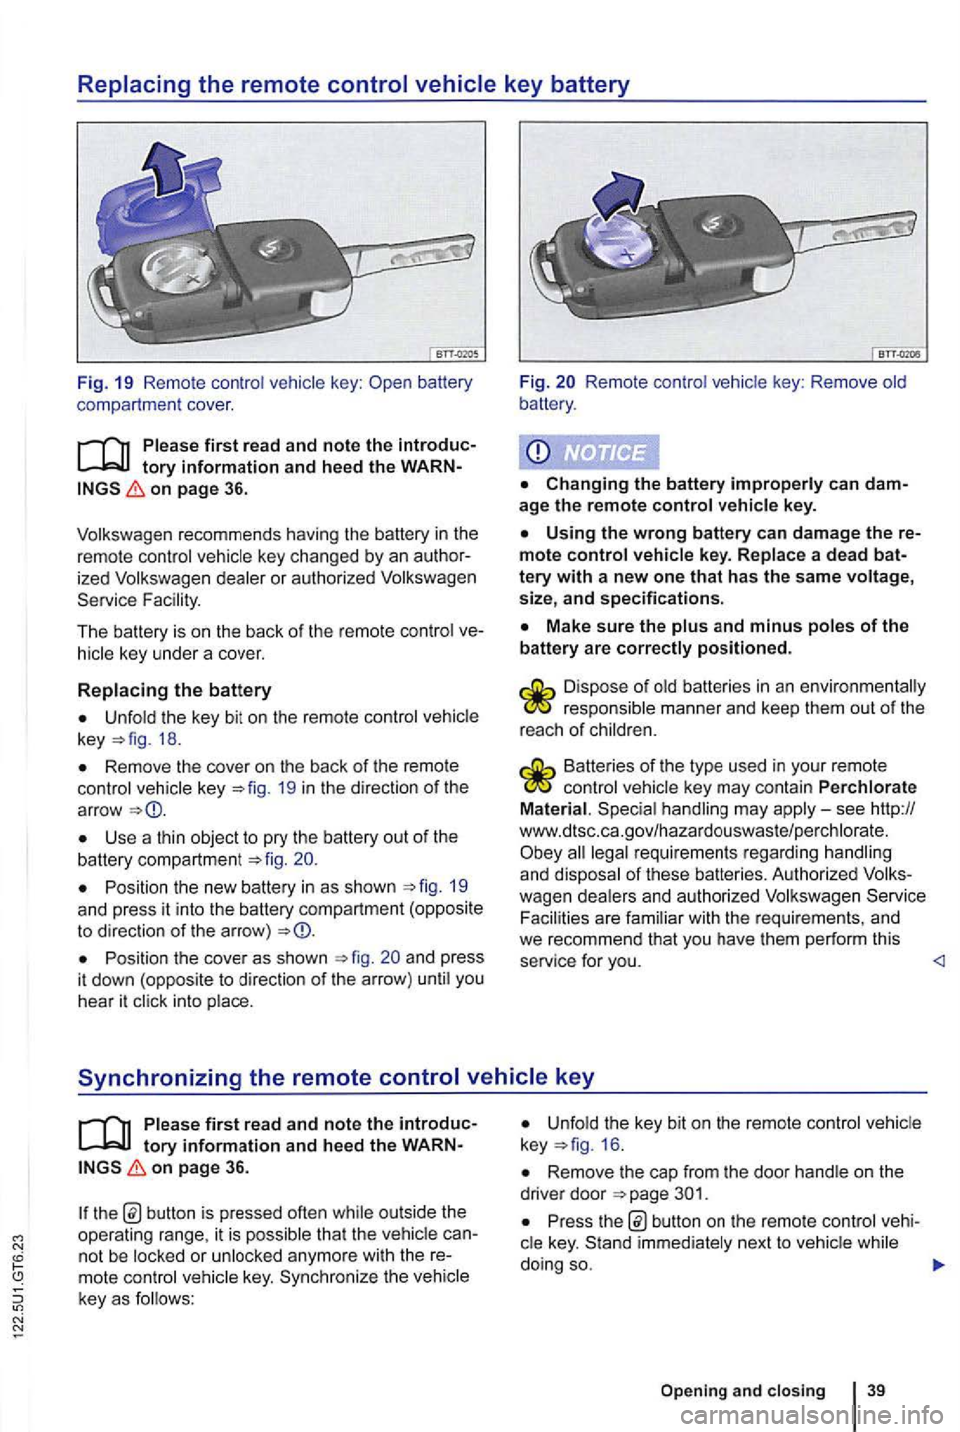
Fig. 19 Remo te contr ol key :
on page 36.
ized dealer or authori zed Service Fac ility.
The battery is on the back of the remo te control
Unfold the key bit on th e re mote control key 18.
Remove the cover on th e back of the remote control vehicle key 19 in th e d irection of th e
ar row
Use a thin object to pry the battery out of the battery compartment 20.
Position the new battery in as shown 19 and press it into the battery compartm ent (opposite to direction of the arro w)
Position the cove r as shown and press
i t dow n (oppos ite to direction of the arrow ) unti l you
hear it click into place.
Fig. Remote control vehic le key : Remove old
battery .
age the remote control vehicle key.
Using the wrong battery can damage the mote control vehicle key. Replace a dead
Make sure the plus and minus poles of the battery are correctly positioned .
responsible manner and keep them out of the
r eac h of ch ild ren.
Batteries of the type used in your re mote control veh icle key may contain Perchlorate
Material . Special handling may apply-see http://
www.dtsc .c a.go v/hazar douswaste/pe rchlo rate. all legal requirement s regardin g han dling and dispo sal of these batteries. Authorized Serv ice
Facili ties are fami lia r with the re quirements , and we recommend that you have them perform this
service for you.
tory information and hee d the on page 36.
th e b utton is pressed often while out side the
operating range, it is p ossib le tha t the vehicl e
key. Sy nchr oniz e the veh icle
key as f o llows:
Unfold the key bit on the remote control 16 .
Remove the cap from the door hand le on the
drive r door
Pr ess button on the remote cont rol
Opening and closing 39
Page 149 of 516
Warning light
first read and note the introductory information and heed the on page 49.
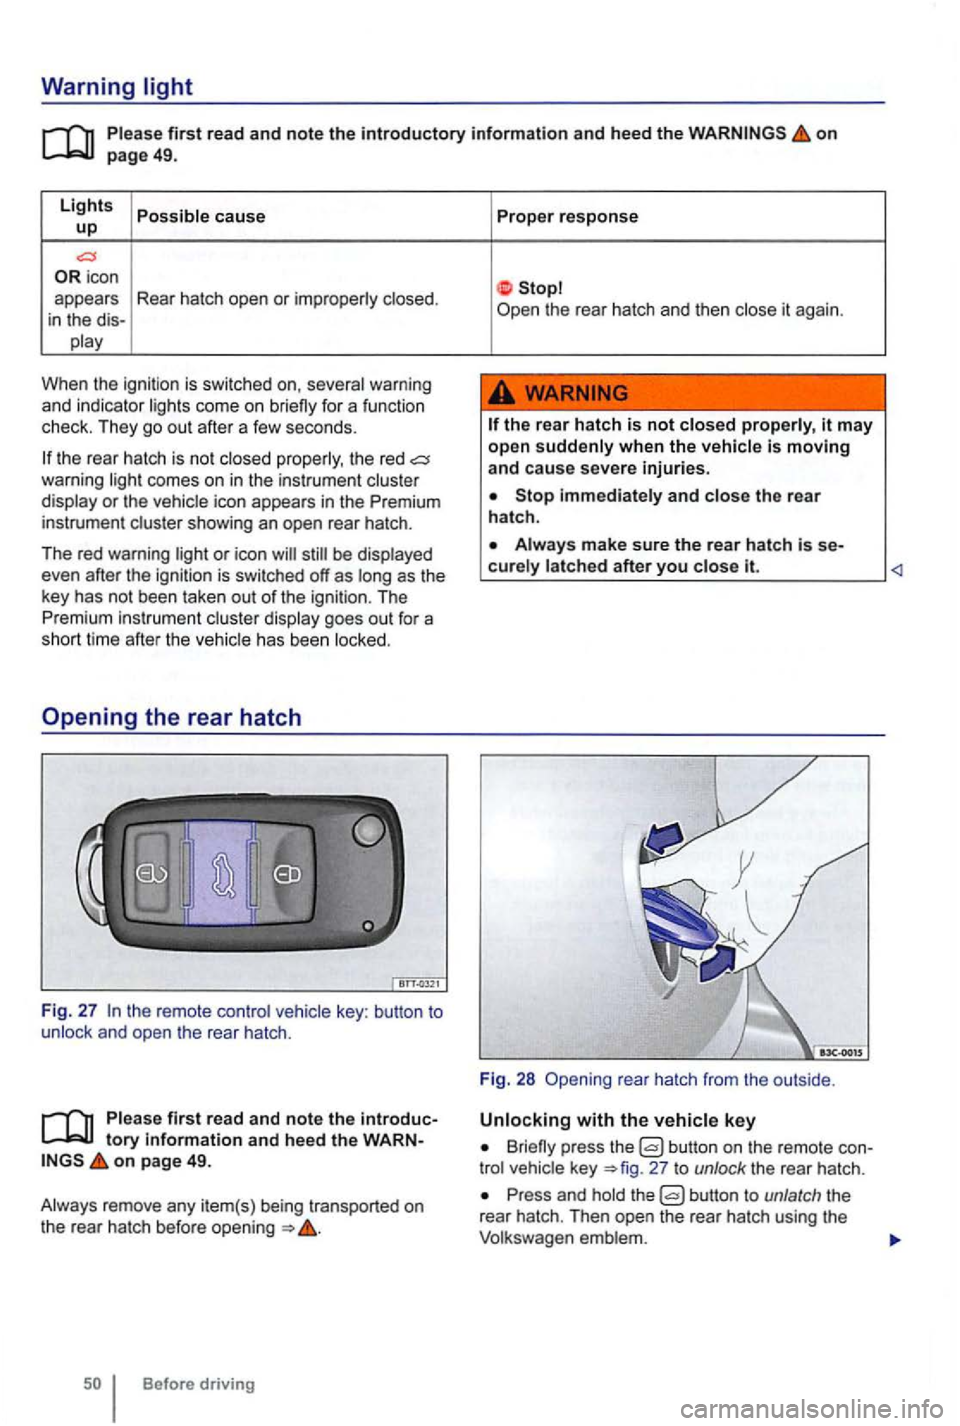
Lights cause up
icon
appears Rear hatch open or
When the ignitio n is swi tc hed on,
the rear hatch is no t the red comes on in the instrum ent or the icon appears in the Premium
instrument
be
has been
key : button to and open the rear hatch .
first read and note the tory informa tion and heed the on page 49.
Before driving Proper
response
the
rear hatch is not it may
open when the
Stop and the rear
hatch .
it.
Fig. 28 rea r hatch from the outside .
Briefly press the button on the remote 27 to unlock the rear hatch .
Press and the
Page 153 of 516
Power windows-features
on page 53.
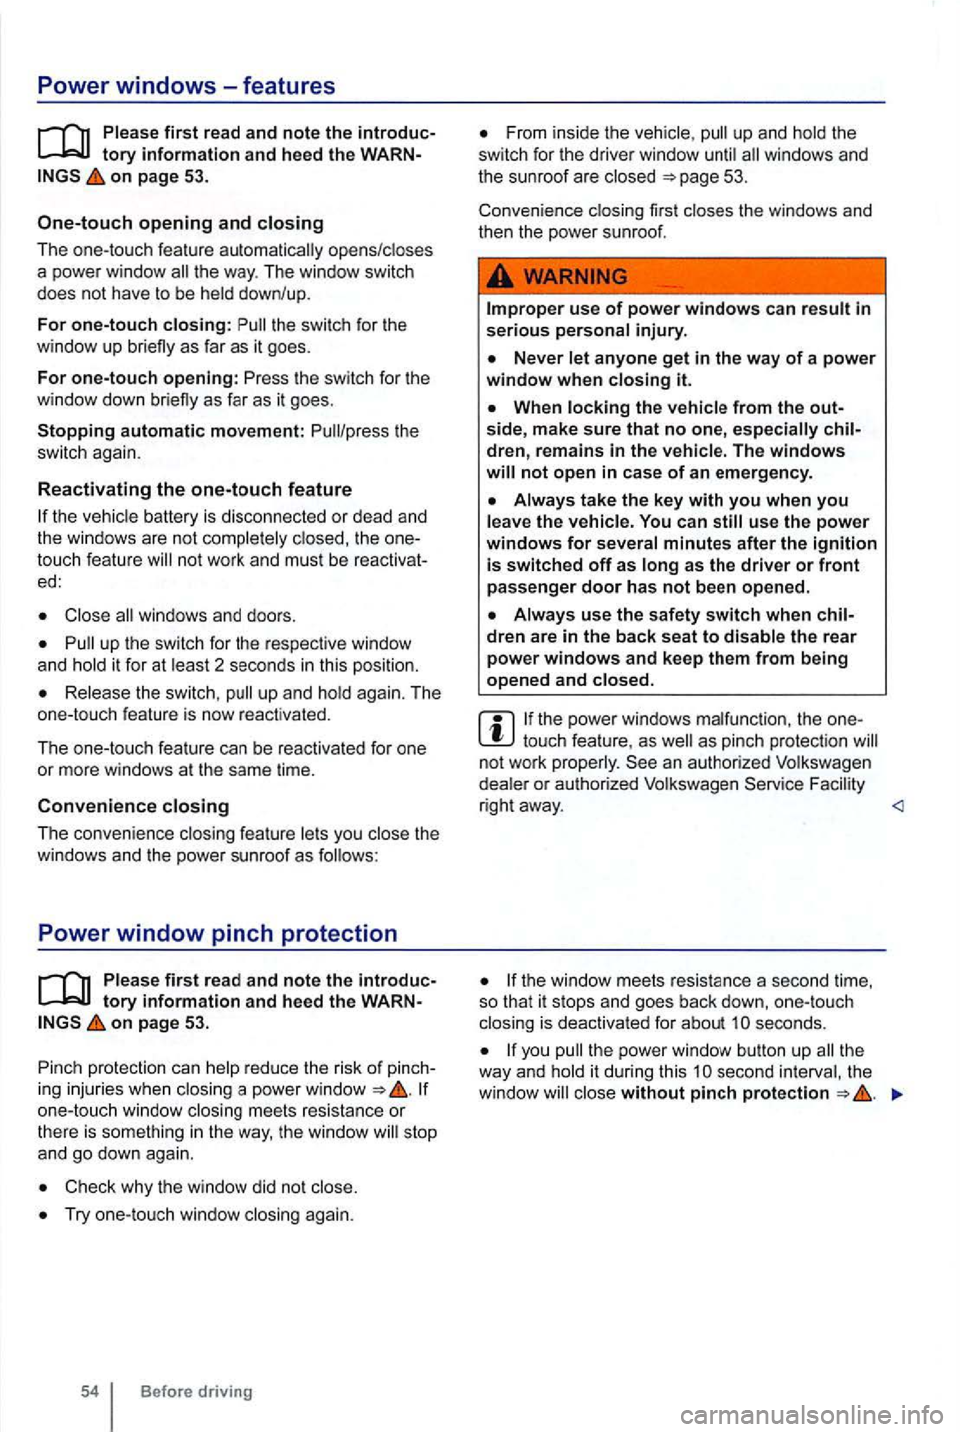
One-touch opening and closing
The one-touch feature automatically opens/closes
a power window
the switch for the
window up briefly as far as it goes.
For one-touch opening: Press lhe switch for the
window down brie fly as fa r as it goes.
touch feature
Close
up the switch for the respect ive window
and hold it for at least 2 seconds in this position.
Release the switch, up and hold again. The
one -touch feature is now reactivated .
T h e one-touch feature can be reactivated for one
or more windows at the same time.
Convenience closing
T he convenience closing feature lets you close the
windows and the power sunroof as follows:
Power window pinch protection
on page 53.
Pinch protection can help reduce the risk
of
one-touc h wi ndow closing meets res istan ce or
there is something in the way, the window stop
a nd go down again.
Check why the window did not close.
Try one -touch window closing again.
Before driving
up and hold the
switch for the drive r wi ndow until
Improper use of power windows can result in serious personal injury.
use the power windows for several minutes after the ignition is switched off as long as the driver or front passenger door has not been opened .
the power windows malfunction, the touch feature, as as pinch protection
the windo w meets resistance a second time,
so that it stops and goes back down, one-touch
closing is deactivated for about
seconds.
you the powe r w indow button up the
way and hold it duri ng this close without pinch protection