Page 65 of 330

DESTINATION SEARCH
65
INFORMATION
�If there is no match for the tele-
phone number inputted, a list of
identical numbers with different
area codes will be displayed.
� To set an address book entry as a
destination using the phone num-
ber, the number must already be
registered. (See page 113.)
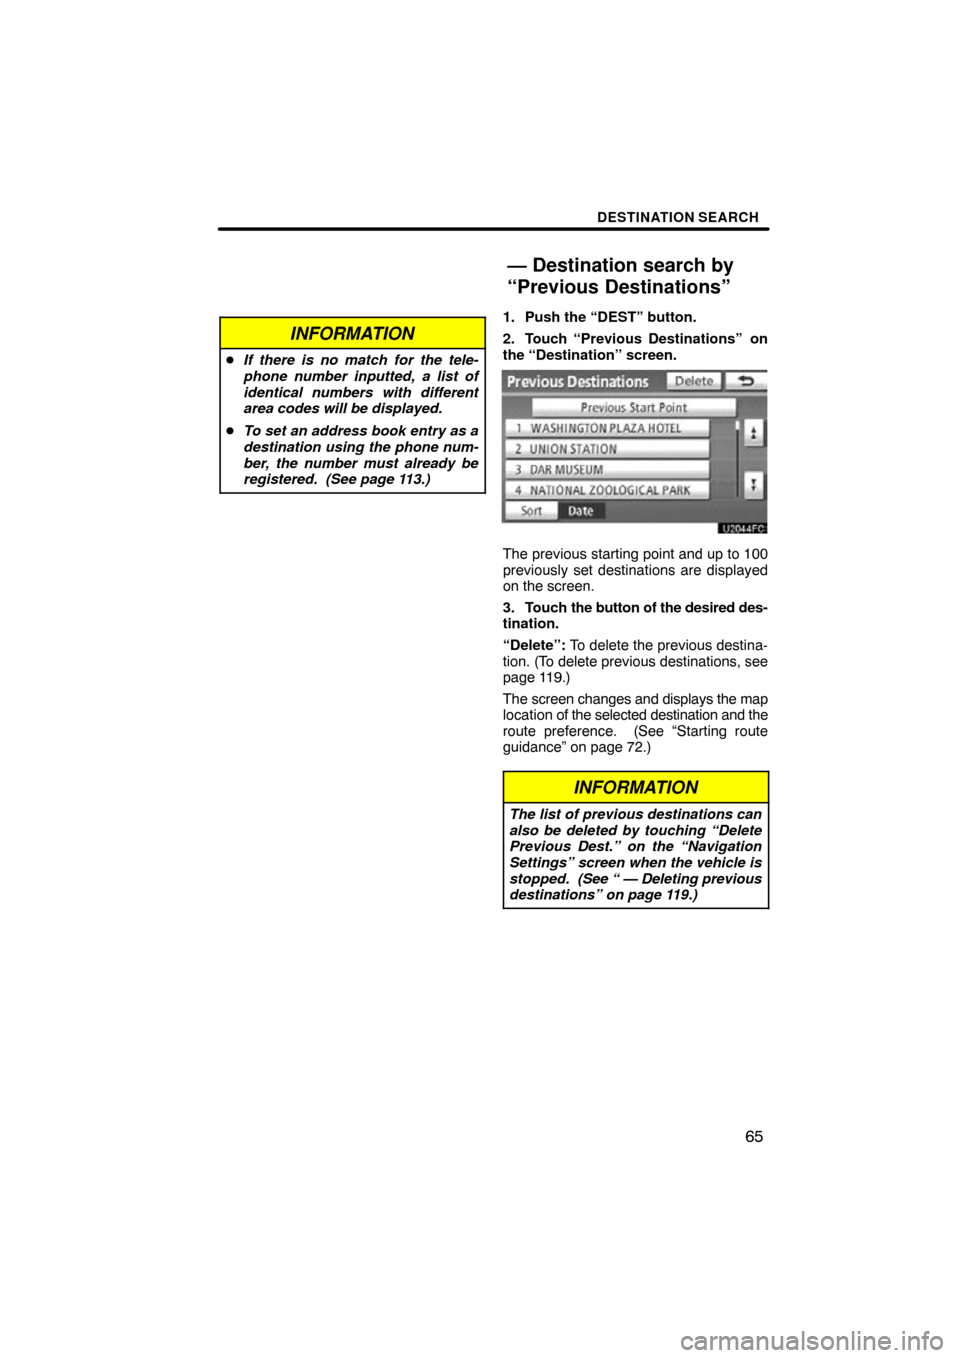
1. Push the “DEST” button.
2. Touch “Previous Destinations”
on
the “Destination” screen.
The previous starting point and up to 100
previously set destinations are displayed
on the screen.
3. Touch the button of the desired des-
tination.
“Delete”: To delete the previous destina-
tion. (To delete previous destinations, see
page 119.)
The screen changes and displays the map
location of the selected destination and the
route preference. (See “Starting route
guidance” on page 72.)
INFORMATION
The list of previous destinations can
also be deleted by touching “Delete
Previous Dest.” on the “Navigation
Settings” screen when the vehicle is
stopped. (See “ — Deleting previous
destinations” on page 119.)
— Destination search by
“Previous Destinations”
Page 72 of 330

DESTINATION SEARCH
72
The system searches for the guidance
route again, and displays the entire route.
INFORMATION
Set destinations can also be deleted
by touching “Route”. (See “ — Delet-
ing destinations” on page 85.)
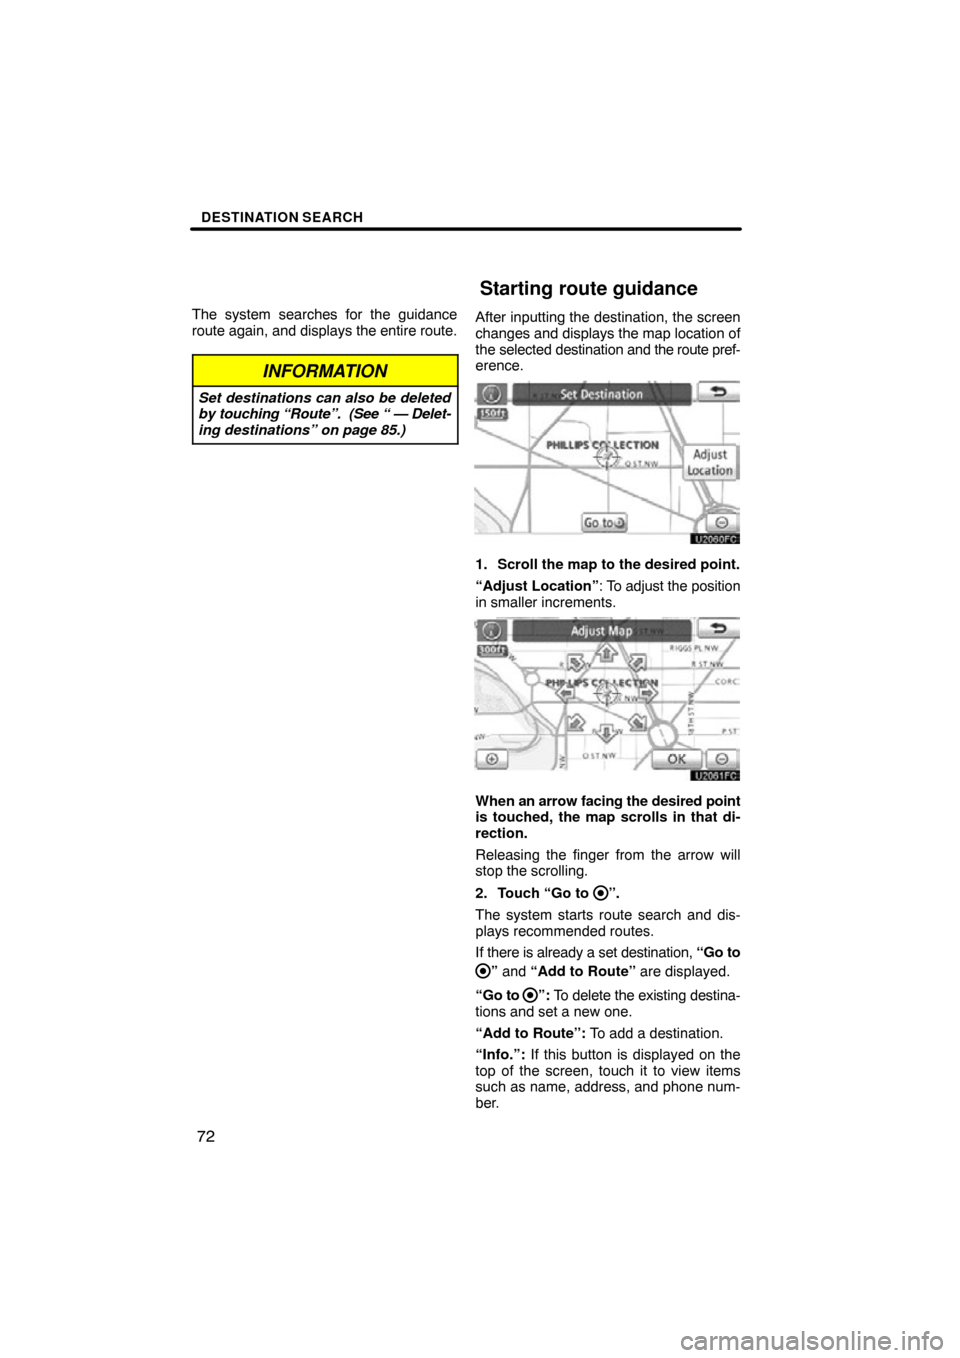
After inputting the destination, the screen
changes and displays the map location of
the selected destination and the route pref-
erence.
1. Scroll the map to the desired point.
“Adjust Location” : To adjust the position
in smaller increments.
When an arrow facing the desired point
is touched, the map scrolls in that di-
rection.
Releasing the finger from the arrow will
stop the scrolling.
2. Touch “Go to
”.
The system starts route search and dis-
plays recommended routes.
If there is already a set destination, “Go to
” and “Add to Route” are displayed.
“Go to
”: To delete the existing destina-
tions and set a new one.
“Add to Route”: To add a destination.
“Info.”: If this button is displayed on the
top of the screen, touch it to view items
such as name, address, and phone num-
ber.
Starting route guidance
Page 89 of 330
ROUTE GUIDANCE
89
:To indicate the next destination.
:To preview the route to the next
destination.
:To preview the route to the next
destination in fast −forward mode.
: To stop the preview.
: To review the route to the previous
destination or starting point.
: To review the route to the previous
destination or starting point in
fast−forward mode.
: To indicate the previous destina-
tion or starting point.
�To select route type
You can designate the route conditions of
the route to the destination.
1. Touch “Route”.
2. Touch “Preferences”.
3. Touch “Quick”, “Short” or “Alter-
nate” and touch “OK”.
— Route preference
Page 97 of 330
ROUTE GUIDANCE
97
�
To start recording the route trace
1. Touch “Show on Map”.
2. Touch “Route Trace”.
“Route Trace” indicator is highlighted.
�To stop recording the route trace
1. Touch “Show on Map”.
2. Touch “Route Trace”. The following
screen will be displayed.
Touching
“Yes” stops recording and the
route trace remains displayed on the
screen.
Touching “No” stops recording and the
route trace is erased.
Page 165 of 330

AUDIO/VIDEO SYSTEM
165
CAUTION
�Do not place anything on the
opened display, as such items may
be thrown about and possibly in-
jure people in the vehicle during
sudden braking or in an accident.
�To reduce the chance of injury in
case of an accident or sudden stop
while driving, keep the display
closed.
�Take care not to jam your hand
while the display is moving. Other-
wise, you could be injured.
NOTICE
�Do not obstruct the display while it
is moving. It could damage your
audio/video system.
�Do not insert one disc stacked on
top of another one or feed them in
continuously, to prevent discs
from getting stuck in the changer.
INFORMATION
Under extremely cold conditions, the
display may react slowly or operation
sound may become louder.
(b) Ejecting discs
�A single disc alone:
U032ADNS
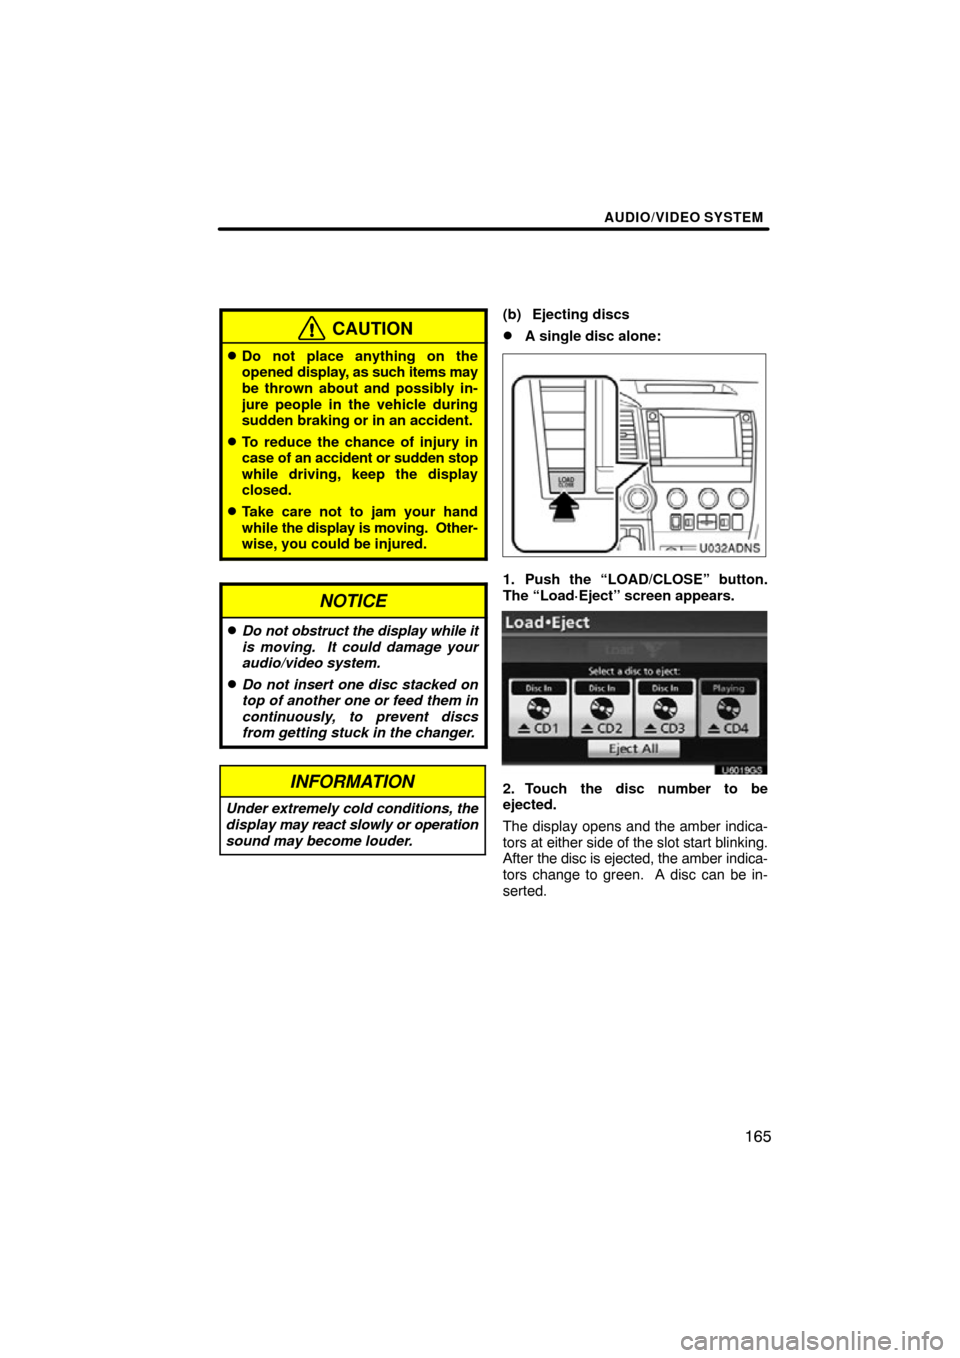
1. Push the “LOAD/CLOSE” button.
The “Load·Eject” screen appears.
U6019GS
2. Touch the disc number to be
ejected.
The display opens and the amber indica-
tors at either side of the slot start blinking.
After the disc is ejected, the amber indica-
tors change to green. A disc can be in-
serted.
Page 194 of 330

AUDIO/VIDEO SYSTEM
194
“RAND”: Use it for automatic and random
selection of the folder which you are cur-
rently listening to or of all the folders.
Playing the files in one folder in random
order —
Touch “RAND” briefly. “RAND” appears
on the screen. The system selects a file in
the folder you are currently listening to. To
cancel it, touch “RAND” once again.
Playing the files in all the folders in ran-
dom order —
Touch and hold “RAND” until the beep
sounds. “FLD.RAND” appears on the
screen. The system selects a file in the
folders of all the trays which are set and
plays it. To cancel it, touch “RAND” once
again.
When a file is skipped or the system is in-
operative, touch “RAND” to reset. (f) Operating a DVD video disc
NOTE:
The playback condition of some
DVD video discs may be determined by
a DVD video software producer. This
DVD player plays a disc as the software
producer intended. So some functions
may not work properly. Be sure to read
the instruction manual for the DVD
video disc separately provided. For the
detailed information about DVD video
discs, see “(i) DVD player and DVD
video disc information” on page 209.
Precautions on DVD video disc
When recording with a DVD video or video
CD, audio tracks may not record in some
cases while the menu is displayed. As au-
dio will not play in this case, verify that the
video tracks are playing and then activate
playback.
When playback of a disc is completed:
�If an audio CD or MP3 disc is playing,
the first track or file starts.
�If a DVD video or video CD is playing,
playback will stop or the menu screen
will be displayed.
The title/chapter number and playback
time display may not appear while playing
back certain DVD video discs.
Page 196 of 330
AUDIO/VIDEO SYSTEM
196
U6084GS
PLAYING A DVD DISC
Push the “AUDIO” button and touch the
“DVD” tab to display this screen.
To play DVD movie, when a DVD video
disc is inserted, the DVD will start automat-
ically within the first few seconds after the
parking brake is disengaged.
Touch “Settings” on “DVD” screen and
touch “Wide” on “Settings” screen. The
screen mode can be changed.
If you touch “Full Screen” when the ve-
hicle is completely stopped and the park-
ing brake is applied, the video screen re-
turns.
U6051GS
DVD SETTINGS
If you touch “Settings” on “DVD” screen,
“Settings” screen appears.
Page 198 of 330

AUDIO/VIDEO SYSTEM
198
DESCRIPTION OF DVD CONTROLS
“Menu” and “Top Menu”: If you touch
any of the above controls, the menu
screen for DVD video appears. (For the
operation, see the manual that come with
the DVD video disc provided separately.)
: The menu control key appears on the
screen. (See page 198.)
: Touching this will pause the video
screen.
: Touching this will fast reverse dur-
ing playback.
: Touching this will stop the video
screen.
: Touching this will resume normal
play during pause.
: Touching this will fast forward dur-
ing playback and forward frame by frame
during pause.
U6052GS
U6053GS
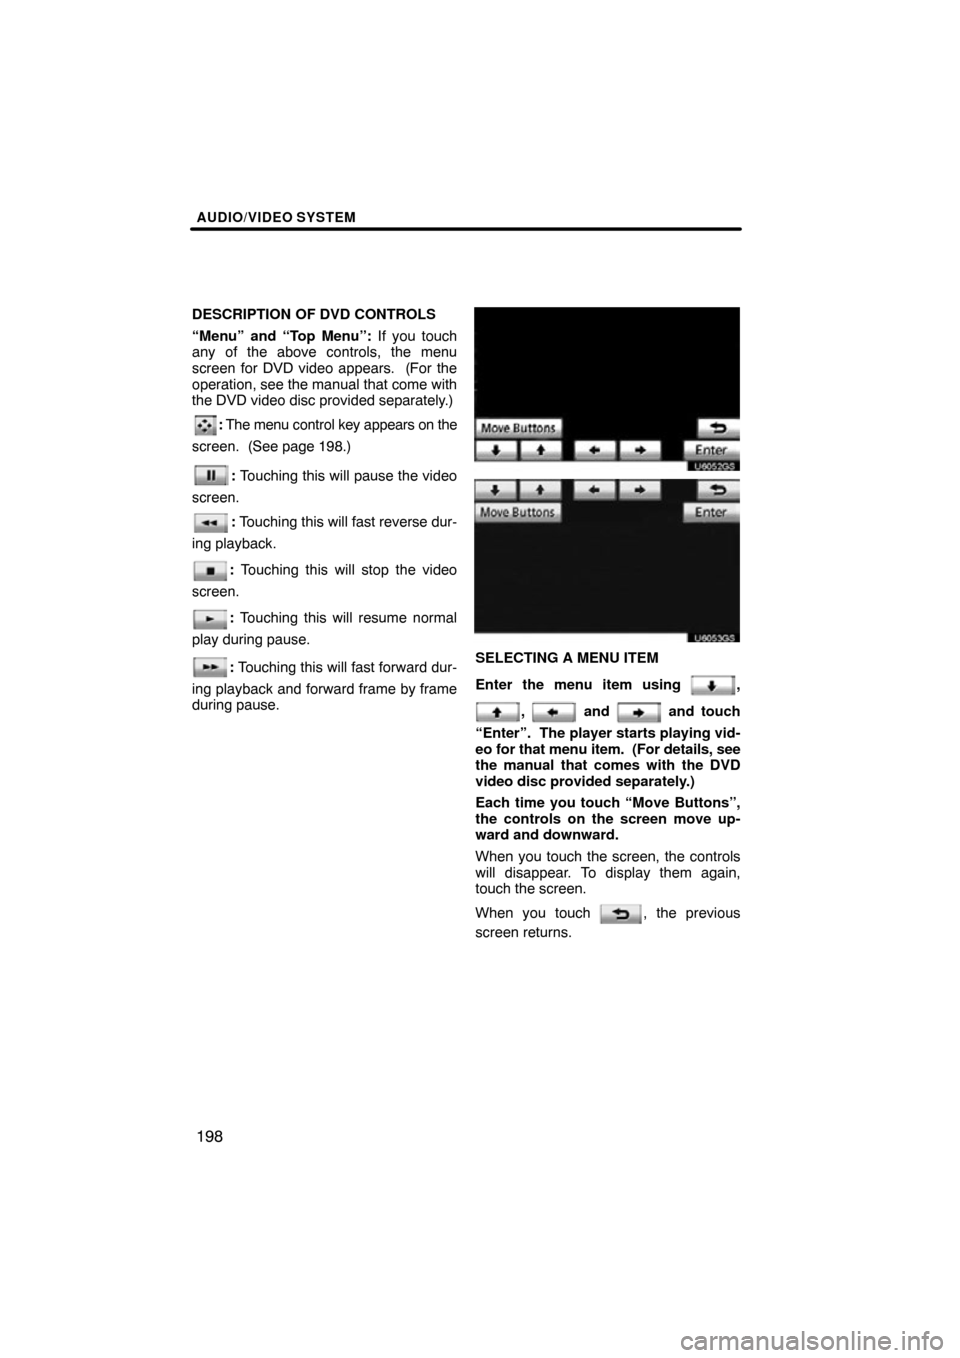
SELECTING A MENU ITEM
Enter the menu item using
,
, and and touch
“Enter”. The player starts playing vid-
eo for that menu item. (For details, see
the manual that comes with the DVD
video disc provided separately.)
Each time you touch “Move Buttons”,
the controls on the screen move up-
ward and downward.
When you touch the screen, the controls
will disappear. To display them again,
touch the screen.
When you touch
, the previous
screen returns.