Page 17 of 750

15Pictorial index
UK_AURIS/AURIS_HV_EE (OM12E33E)Windshield wipers . . . . . . . . . . . . . . . . . . . . . . . . . . . . . . . . . P. 312
Precautions against winter season . . . . . . . . . . . . . . . . . . . . . P. 368
Precautions against car wash . . . . . . . . . . . . . . . . . . . . . . . . . P. 476
Fuel filler door . . . . . . . . . . . . . . . . . . . . . . . . . . . . . . . . . . . . P. 318
Refueling method . . . . . . . . . . . . . . . . . . . . . . . . . . . . . . . . . . P. 318
Fuel type/fuel tank capacity . . . . . . . . . . . . . . . . . . . . . . . . . . . P. 703
Tires . . . . . . . . . . . . . . . . . . . . . . . . . . . . . . . . . . . . . . . . . . . . P. 519
Tire size/inflation pressure . . . . . . . . . . . . . . . . . . . . . . . . . . . . P. 714
Winter tires/tire chain . . . . . . . . . . . . . . . . . . . . . . . . . . . . . . . . P. 368
Checking/rotation. . . . . . . . . . . . . . . . . . . . . . . . . . . . . . . . . . . P. 519
Coping with flat tires . . . . . . . . . . . . . . . . . . . . . . . . . . . . . . . . P. 626
Hood . . . . . . . . . . . . . . . . . . . . . . . . . . . . . . . . . . . . . . . . . . . . P. 488
Opening . . . . . . . . . . . . . . . . . . . . . . . . . . . . . . . . . . . . . . . . . . P. 488
Engine oil . . . . . . . . . . . . . . . . . . . . . . . . . . . . . . . . . . . . . . . . . P. 705
Coping with overheat . . . . . . . . . . . . . . . . . . . . . . . . . . . . . . . . P. 685
Headlights . . . . . . . . . . . . . . . . . . . . . . . . . . . . . . . . . . . . . . . P. 300
Front position lights/daytime running lights . . . . . . . . . . . P. 300
Front fog lights
*1/rear fog light . . . . . . . . . . . . . . . . . . . . . . P. 310
Turn signal lights . . . . . . . . . . . . . . . . . . . . . . . . . . . . . . . . . . P. 297
Stop/tail lights . . . . . . . . . . . . . . . . . . . . . . . . . . . . . . . . . . . . P. 300
Hill-start assist control
*1 . . . . . . . . . . . . . . . . . . . . . . . . . . . . . P. 362
License plate lights . . . . . . . . . . . . . . . . . . . . . . . . . . . . . . . . P. 300
Back-up light
Shifting the shift lever to R. . . . . . . . . . . . . . . . P. 276, 281, 286, 289
Rear view monitor system camera
*1, 3
4
5
6
7
Light bulbs of the exterior lights for driving
(Replacing method: P. 555, Watts: P. 716)
*1: If equipped
*2: Vehicles with a multi-information display
*3: Refer to ““touch screen” Owner’s manual”.
8
9
10
11
12
13
14
15
Page 557 of 750
5556-3. Do-it-yourself maintenance
UK_AURIS/AURIS_HV_EE (OM12E33E)
6
Maintenance and care
Check the wattage of the light bulb to be replaced. (P. 716)
Front
Vehicles with halogen headlights
Light bulbs
You may replace the following bulbs by yourself. The difficulty
level of replacement varies depending on the bulb. As there is a
danger that components may be damaged, we recommend that
replacement is carried out by any authorized Toyota dealer or
repairer, or another duly qualified and equipped professional.
Preparing for light bulb replacement
Bulb locations
Headlights
Side turn signal lights
Front turn signal lights
Front fog lights (if equipped)1
2
3
4
Page 560 of 750
5586-3. Do-it-yourself maintenance
UK_AURIS/AURIS_HV_EE (OM12E33E)
Headlights (vehicles with halogen headlights)
Remove the securing clip.
Pull out the washer fluid filler
opening after turning it.
(When replacing right side
bulb only.)
Remove the cover.
Turn the bulb base counter-
clockwise and remove it.
Unplug the connector while
pressing the lock release.
Replacing light bulbs
1
2
3
4
Page 561 of 750
5596-3. Do-it-yourself maintenance
UK_AURIS/AURIS_HV_EE (OM12E33E)
6
Maintenance and care
Replace the light bulb, and
install the bulb base.
Align the 3 tabs on the light bulb
with the mounting and insert.
Turn and secure the bulb
base.
Shake the bulb base gently to
check that it is not loose, turn
the headlights on once and visu-
ally confirm that no light is leak-
ing through the mounting.
Install the cover.
Make sure the protruding part (A
in the illustration) is pointing
upwards and firmly push in the
cover’s perimeter.
Install the washer fluid filler
opening by inserting and
turning it. Install the securing
clip. (When replacing right
side bulb only.)
5
6
A7
8
Page 570 of 750

5686-3. Do-it-yourself maintenance
UK_AURIS/AURIS_HV_EE (OM12E33E)
Replacing the following bulbs
If any of the lights listed below has burnt out, have it replaced by
any authorized Toyota dealer or repairer, or another duly qualified
and equipped professional.
Headlights (vehicles with discharge headlights)
Front position lights/daytime running lights
High mounted stoplight
Stop/tail lights (hybrid model)
Discharge headlights (vehicles with discharge headlights)
If voltage to the discharge bulbs is insufficient, the bulbs may not come on, or
may go out temporarily. The discharge bulbs will come on when normal
power is restored.
LED light bulbs
The high mounted stoplight, front position lights/daytime running lights and
stop/tail lights (hybrid model) consist of a number of LEDs. If any of the LEDs
burn out, take your vehicle to any authorized Toyota dealer or repairer, or
another duly qualified and equipped professional to have the light replaced.
Condensation build-up on the inside of the lens
Contact any authorized Toyota dealer or repairer, or another duly qualified
and equipped professional for more information in the following situations.
Temporary condensation build-up on the inside of the headlight lens does not
indicate a malfunction.
Large drops of water have built up on the inside of the lens.
Water has built up inside the headlight.
When replacing light bulbs
P. 554
Page 571 of 750

5696-3. Do-it-yourself maintenance
UK_AURIS/AURIS_HV_EE (OM12E33E)
6
Maintenance and care
CAUTION
Replacing light bulbs
Turn off the lights. Do not attempt to replace the bulb immediately after
turning off the lights.
The bulbs become very hot and may cause burns.
Do not touch the glass portion of the light bulb with bare hands. Hold the
bulb by the plastic or metal portion.
If the bulb is scratched or dropped, it may blow out or crack.
Fully install light bulbs and any parts used to secure them. Failure to do so
may result in heat damage, fire, or water entering the headlight unit. This
may damage the headlights or cause condensation to build up on the lens.
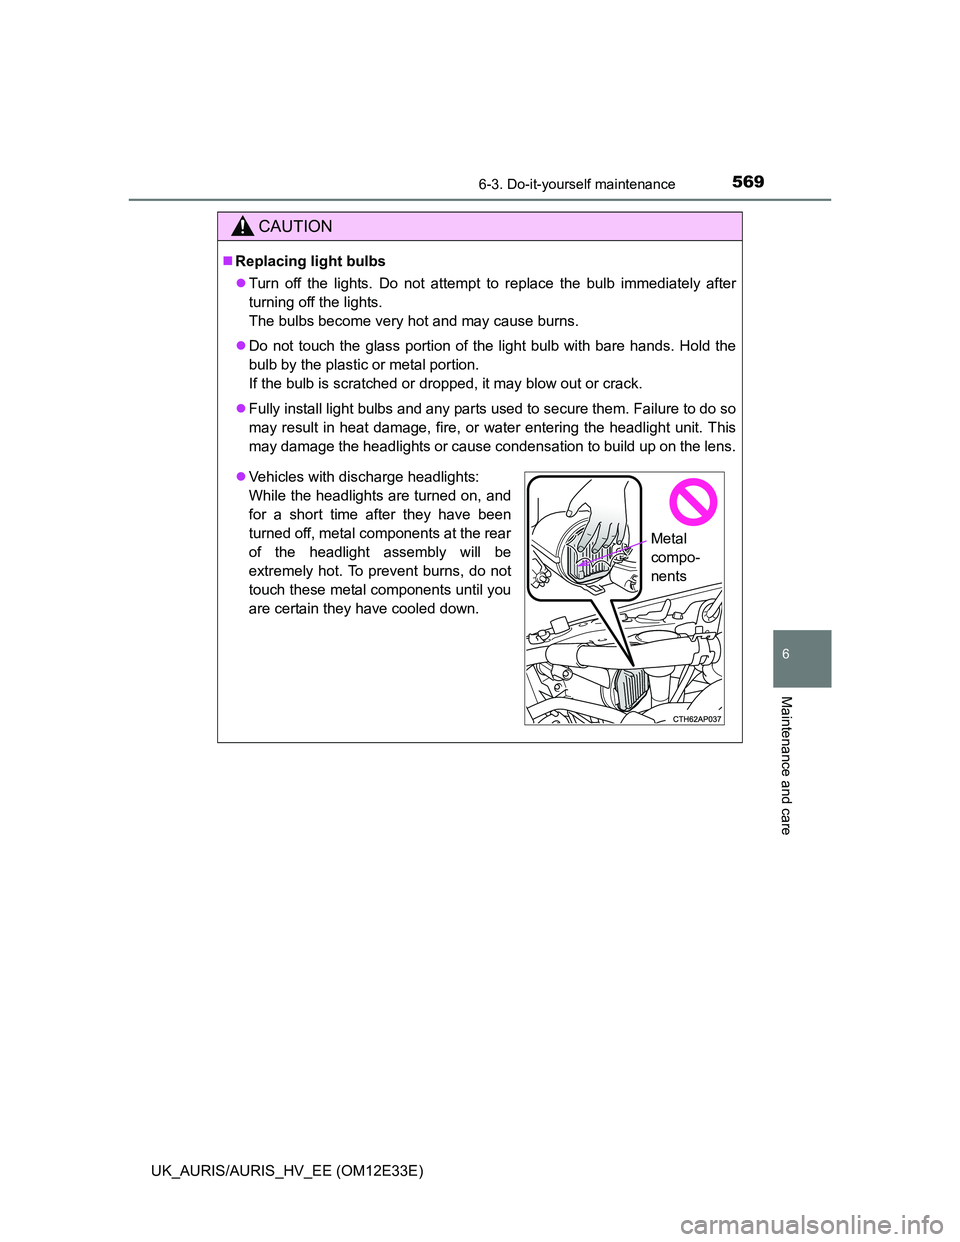
Vehicles with discharge headlights:
While the headlights are turned on, and
for a short time after they have been
turned off, metal components at the rear
of the headlight assembly will be
extremely hot. To prevent burns, do not
touch these metal components until you
are certain they have cooled down.
Metal
compo-
nents
Page 572 of 750
5706-3. Do-it-yourself maintenance
UK_AURIS/AURIS_HV_EE (OM12E33E)
CAUTION
Discharge headlights (vehicles with discharge headlights)
Contact any authorized Toyota dealer or repairer, or another duly qualified
and equipped professional, before replacing the discharge headlights
(including light bulbs).
Do not touch the discharge headlight’s high voltage socket when the head-
lights are turned on.
An extremely high voltage of 30000 V will be discharged and could result
in death or serious injury by electric shock.
Do not attempt to take apart or repair the headlight bulbs, connectors,
power supply circuits, or related components.
Doing so could result in electric shock and death or serious injury.
To prevent damage or fire
Make sure bulbs are fully seated and locked.
Page 718 of 750
7168-1. Specifications
UK_AURIS/AURIS_HV_EE (OM12E33E)
Light bulbs
Light BulbsWTy p e
Exterior
Headlights
Discharge bulbs
Halogen bulbs
35
55A
B
Front fog lights*119C
Front turn signal lights21D
Side turn signal lights5E
Rear fog light21F
Rear turn signal lights16F
Stop/tail lights*221/5G
Back-up lights16F
Licence plate lights5F
Interior
Vanity lights*15H
Front interior lights/personal lights8F
Rear interior lights*18H
Rear personal lights*18F
Luggage compartment light5H
A: D4S discharge bulbs
C: H16 halogen bulbs
E: Wedge base bulbs (amber)
G: Single end bulbs (clear)
*1: If equipped
*2: Except hybrid modelB: HIR2 halogen bulbs
D: Single end bulbs (amber)
F: Wedge base bulbs (clear)
H: Double end bulbs