2012 SUBARU TRIBECA lock
[x] Cancel search: lockPage 122 of 420
mode.
To exit valet mode, change the setting of
your vehicle’s alarm system for activation
mode. Refer to “Activating and deactivat-
ing the alarm system ”F 2-16.
& Passive arming
When passive arming mode has been
programmed by the dealer, arming of the
system is automatically accomplished
without using the remote transmitter. Note
that in this mode, DOORS MUST BE
MANUALLY LOCKED. ! To enter the passive mode
If you wish to program the passive arming
mode, have it done by your SUBARU
dealer. ! Arming the system
CAUTION
In passive mode, the system will
automatically activate the alarm but
WILL NOT automatically lock the
doors. In order to lock the doors
you must either lock them as in-
dicated in step 4 below or with the
key once they have been closed.
Failure to lock the doors manually
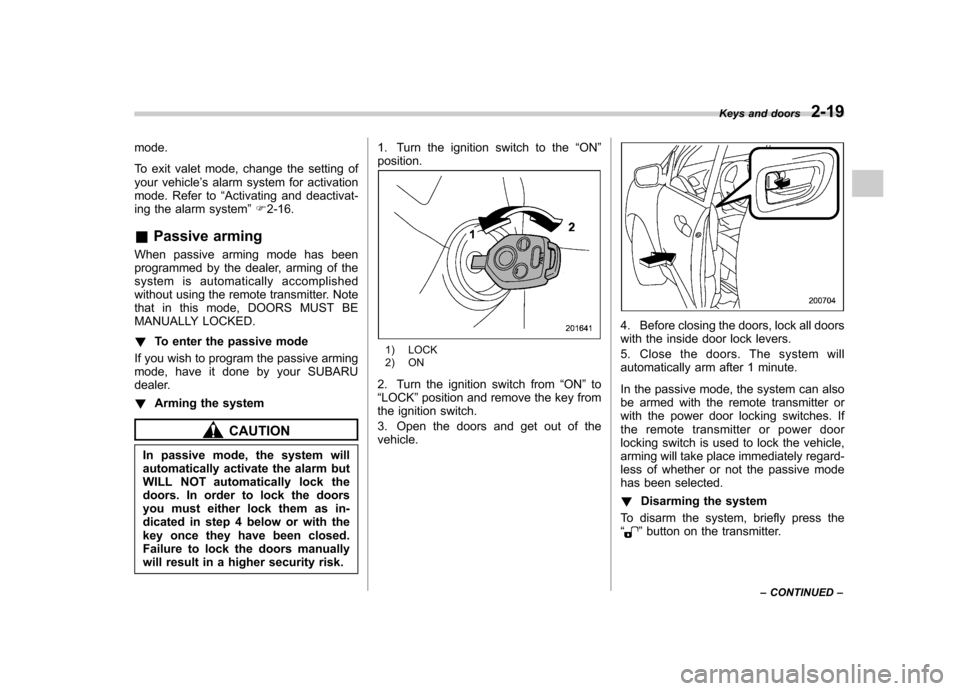
will result in a higher security risk. 1. Turn the ignition switch to the
“ON ”
position.
1) LOCK
2) ON
2. Turn the ignition switch from “ON ”to
“ LOCK ”position and remove the key from
the ignition switch.
3. Open the doors and get out of the vehicle.
4. Before closing the doors, lock all doors
with the inside door lock levers.
5. Close the doors. The system will
automatically arm after 1 minute.
In the passive mode, the system can also
be armed with the remote transmitter or
with the power door locking switches. If
the remote transmitter or power door
locking switch is used to lock the vehicle,
arming will take place immediately regard-
less of whether or not the passive mode
has been selected. ! Disarming the system
To disarm the system, briefly press the “
” button on the transmitter. Keys and doors
2-19
– CONTINUED –
Page 124 of 420
Child safety locks
WARNING
Always use the child safety lock
whenever a child rides in the rear.
Serious injury could result if a child
accidentally opened the door and
fell out.
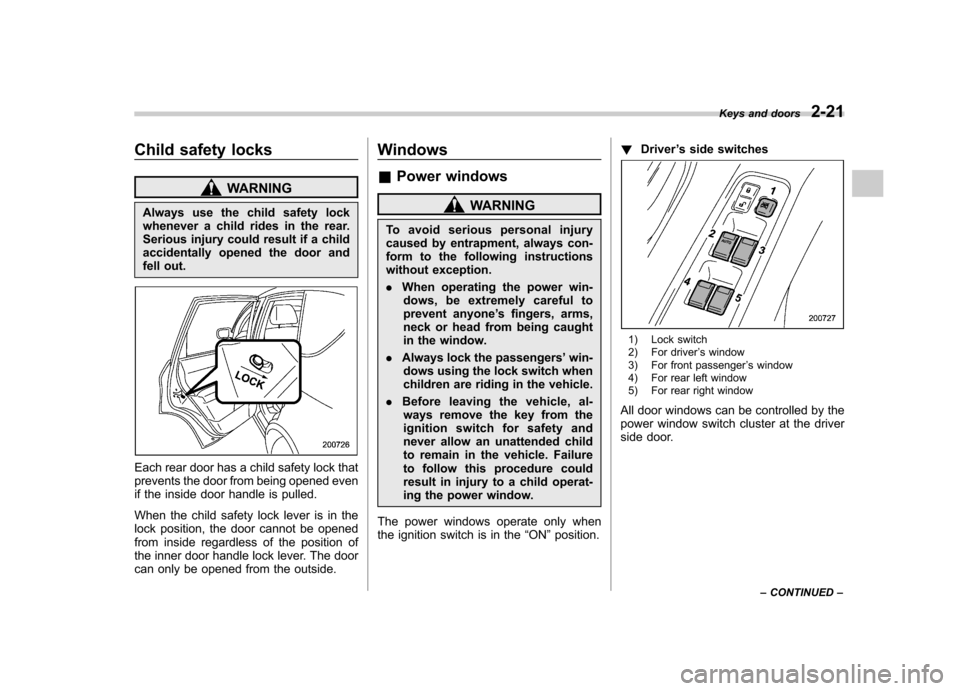
Each rear door has a child safety lock that
prevents the door from being opened even
if the inside door handle is pulled.
When the child safety lock lever is in the
lock position, the door cannot be opened
from inside regardless of the position of
the inner door handle lock lever. The door
can only be opened from the outside. Windows &
Power windows
WARNING
To avoid serious personal injury
caused by entrapment, always con-
form to the following instructions
without exception. . When operating the power win-
dows, be extremely careful to
prevent anyone ’s fingers, arms,
neck or head from being caught
in the window.
. Always lock the passengers ’win-
dows using the lock switch when
children are riding in the vehicle.
. Before leaving the vehicle, al-
ways remove the key from the
ignition switch for safety and
never allow an unattended child
to remain in the vehicle. Failure
to follow this procedure could
result in injury to a child operat-
ing the power window.
The power windows operate only when
the ignition switch is in the “ON ”position. !
Driver ’s side switches
1) Lock switch
2) For driver ’s window
3) For front passenger ’s window
4) For rear left window
5) For rear right window
All door windows can be controlled by the
power window switch cluster at the driver
side door. Keys and doors
2-21
– CONTINUED –
Page 126 of 420

!Locking the passengers ’windows
Push the lock switch. When the lock
switch is in the “LOCK ”position, the
passengers ’windows cannot be opened
or closed.
Press the switch again to cancel the passengers ’window locking.
NOTE
When the lock switch is pushed to the “ LOCK ”position, the indicator lights in
the passenger ’s window switches (in-
cluded in the power window switch
cluster on the driver ’s door) all turn off. !
Passengers ’side switchesFront passenger ’s window switch
1) Open
2) Close
Rear passengers ’window switches
1) Open
2) Close
To open:
Push the switch down and hold it until the
window reaches the desired position.
To close:
Pull the switch up and hold it until the
window reaches the desired position.
When the lock switch on the power
window switch cluster, located on thedriver ’s side door, is in the “LOCK ”
position, the passengers ’windows cannot
be operated with the passengers ’
switches. Keys and doors
2-23
Page 127 of 420
2-24Keys and doors
Rear gate
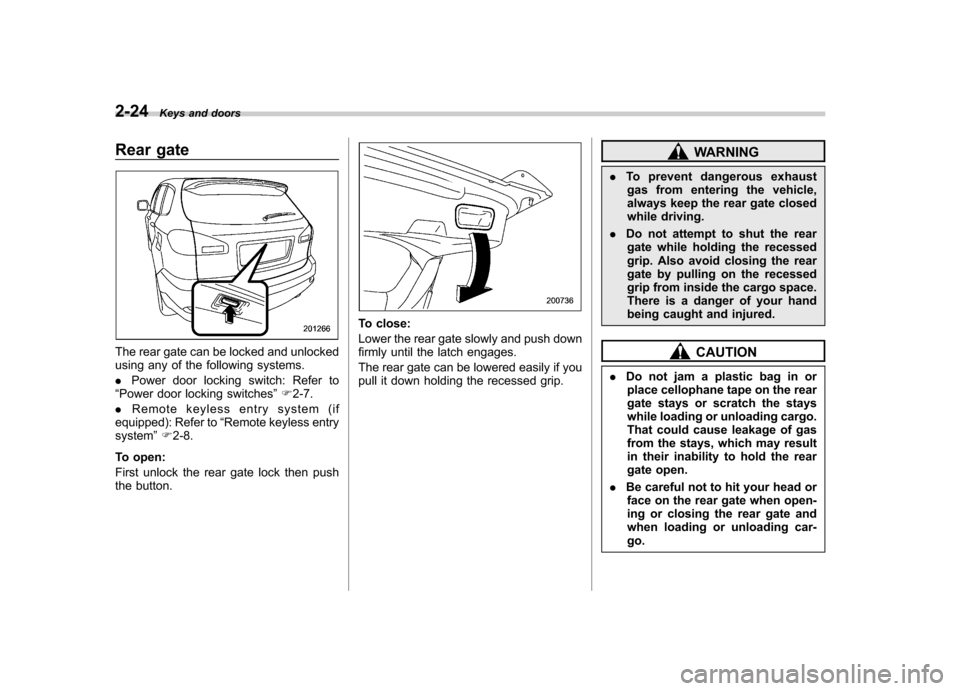
The rear gate can be locked and unlocked
using any of the following systems. .Power door locking switch: Refer to
“ Power door locking switches ”F 2-7.
. Remote keyless entry system (if
equipped): Refer to “Remote keyless entry
system ”F 2-8.
To open:
First unlock the rear gate lock then push
the button.
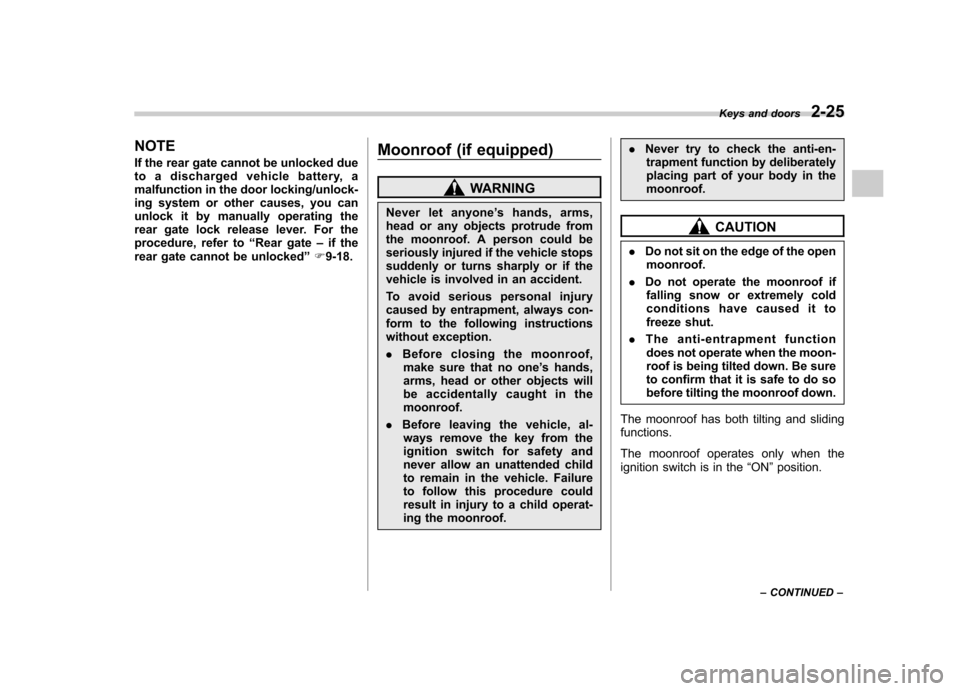
To close:
Lower the rear gate slowly and push down
firmly until the latch engages.
The rear gate can be lowered easily if you
pull it down holding the recessed grip.
WARNING
. To prevent dangerous exhaust
gas from entering the vehicle,
always keep the rear gate closed
while driving.
. Do not attempt to shut the rear
gate while holding the recessed
grip. Also avoid closing the rear
gate by pulling on the recessed
grip from inside the cargo space.
There is a danger of your hand
being caught and injured.
CAUTION
. Do not jam a plastic bag in or
place cellophane tape on the rear
gate stays or scratch the stays
while loading or unloading cargo.
That could cause leakage of gas
from the stays, which may result
in their inability to hold the rear
gate open.
. Be careful not to hit your head or
face on the rear gate when open-
ing or closing the rear gate and
when loading or unloading car-go.
Page 128 of 420
NOTE
If the rear gate cannot be unlocked due
to a discharged vehicle battery, a
malfunction in the door locking/unlock-
ing system or other causes, you can
unlock it by manually operating the
rear gate lock release lever. For the
procedure, refer to“Rear gate –if the
rear gate cannot be unlocked ”F 9-18. Moonroof (if equipped)
WARNING
Never let anyone ’s hands, arms,
head or any objects protrude from
the moonroof. A person could be
seriously injured if the vehicle stops
suddenly or turns sharply or if the
vehicle is involved in an accident.
To avoid serious personal injury
caused by entrapment, always con-
form to the following instructions
without exception. . Before closing the moonroof,
make sure that no one ’s hands,
arms, head or other objects will
be accidentally caught in themoonroof.
. Before leaving the vehicle, al-
ways remove the key from the
ignition switch for safety and
never allow an unattended child
to remain in the vehicle. Failure
to follow this procedure could
result in injury to a child operat-
ing the moonroof. .
Never try to check the anti-en-
trapment function by deliberately
placing part of your body in themoonroof.
CAUTION
. Do not sit on the edge of the open
moonroof.
. Do not operate the moonroof if
falling snow or extremely cold
conditions have caused it to
freeze shut.
. The anti-entrapment function
does not operate when the moon-
roof is being tilted down. Be sure
to confirm that it is safe to do so
before tilting the moonroof down.
The moonroof has both tilting and slidingfunctions.
The moonroof operates only when the
ignition switch is in the “ON ”position.
Keys and doors
2-25
– CONTINUED –
Page 132 of 420

Ignition switch..................................................... 3-3
LOCK .................................................................. 3-3
Acc..................................................................... 3-4
ON...................................................................... 3-4
START ................................................................ 3-4
Key reminder chime ............................................ 3-4
Ignition switch light ............................................. 3-4
Hazard warning flasher ....................................... 3-5
Meters and gauges. ............................................. 3-5
Combination meter illumination ........................... 3-5
Canceling the function for meter needle/gauge movement and combination meter sequential
illumination upon turning on the ignition switch ............................................................... 3-5
Speedometer ....................................................... 3-6
Odometer ............................................................ 3-6
Double trip meter ................................................ 3-7
Tachometer ......................................................... 3-7
Fuel gauge .......................................................... 3-8
Temperature gauge ............................................. 3-8
Warning and indicator lights .............................. 3-9
Seatbelt warning light and chime ........................ 3-10
SRS airbag system warning light ........................ 3-11
Front passenger ’s frontal airbag ON and OFF
indicators ......................................................... 3-12
CHECK ENGINE warning light/Malfunction indicator light ................................................... 3-12
Charge warning light .......................................... 3-13
Oil pressure warning light .................................. 3-13
AT OIL TEMP warning light ................................. 3-13 Rear differential oil temperature warning
light ................................................................ 3-13
Low tire pressure warning light .......................... 3-14
ABS warning light .............................................. 3-15
Brake system warning light ................................ 3-16
Low fuel warning light ....................................... 3-17
Door open warning light .................................... 3-17
Windshield washer fluid warning light ................ 3-17
All-Wheel Drive warning light ... .......................... 3-18
Vehicle Dynamics Control warning light (U.S.- spec models and Canada-spec. models)/Vehicle
Dynamics Control operation indicator light (allmodels) ........................................................... 3-18
Traction Control system OFF indicator light (U.S.-spec models and Canada-spec.models) ........................................................... 3-19
Vehicle Dynamics Control warning light (Latin America-spec. models)/Traction Control OFF
indicator light (Latin America-spec. models) ..... 3-19
Security indicator light ....................................... 3-21
SPORT mode indicator light ............................... 3-21
Select lever/Gear position indicator .................... 3-21
Turn signal indicator lights ................................. 3-21
High beam indicator light ................................... 3-22
Cruise control indicator light .............................. 3-22
Cruise control set indicator light ........................ 3-22
Headlight indicator light ..................................... 3-22
Front fog light indicator light .............................. 3-22
Clock .................................................................. 3-22
Outside temperature indicator .......................... 3-23
Low outside temperature warning ...................... 3-24
Instruments and controls
3
Page 134 of 420
Ignition switch
WARNING
. Never turn the ignition switch to
“ LOCK ”while the vehicle is
being driven or towed because
that will lock the steering wheel,
preventing steering control. And
when the engine is turned off, it
takes a much greater effort than
usual to steer.
. Before leaving the vehicle, al-
ways remove the key from the
ignition switch for safety and
never allow an unattended child
to remain in the vehicle. Failure
to follow this procedure could
result in injury to a child or
others. Children could operate
the power windows, the moon-
roof or other controls or even
make the vehicle move.
CAUTION
Do not attach a large key holder or
key case to either key. If it banged
against your knees or hands while
you were driving, it could turn the
ignition switch from the “ON ”posi- tion to the
“Acc ”or “LOCK ”posi-
tion, thereby stopping the engine.
Also, if the key is attached to a
keyholder or to a large bunch of
other keys, centrifugal force may act
on it as the vehicle moves, resulting
in unwanted turning of the ignitionswitch.
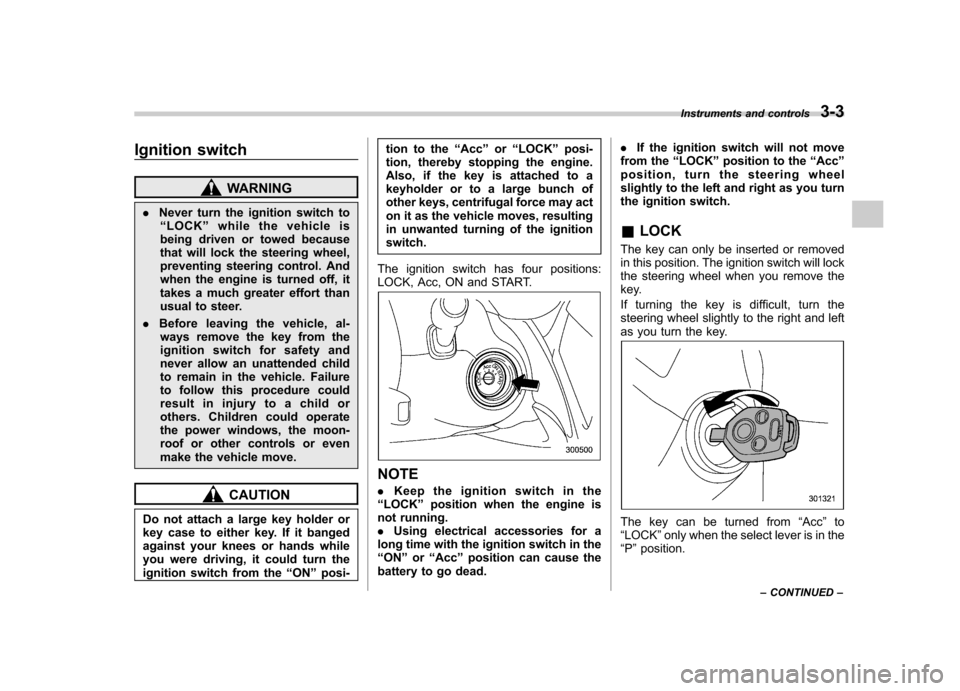
The ignition switch has four positions:
LOCK, Acc, ON and START.
NOTE . Keep the ignition switch in the
“ LOCK ”position when the engine is
not running. . Using electrical accessories for a
long time with the ignition switch in the“ ON ”or “Acc ”position can cause the
battery to go dead. .
If the ignition switch will not move
from the “LOCK ”position to the “Acc ”
position, turn the steering wheel
slightly to the left and right as you turn
the ignition switch. & LOCK
The key can only be inserted or removed
in this position. The ignition switch will lock
the steering wheel when you remove the
key.
If turning the key is difficult, turn the
steering wheel slightly to the right and left
as you turn the key.
The key can be turned from “Acc ”to
“ LOCK ”only when the select lever is in the
“ P ”position. Instruments and controls
3-3
– CONTINUED –
Page 135 of 420
3-4Instruments and controls
&Acc
In this position the electrical accessories
(radio, accessory power outlet, etc.) can
be used. & ON
This is the normal operating position after
the engine is started. & START
CAUTION
Do not turn the ignition switch to the “ START ”position while the engine
is running.
The engine is started in this position. The
starter cranks the engine to start it. When
the key is released (after the engine has
started), the key automatically returns tothe “ON ”position.
If your registered key fails to start the
engine, pull out the key once (the security
indicator light will blink), and then insert
the key in the ignition switch and turn it tothe “START ”position and again try to start
the engine. NOTE
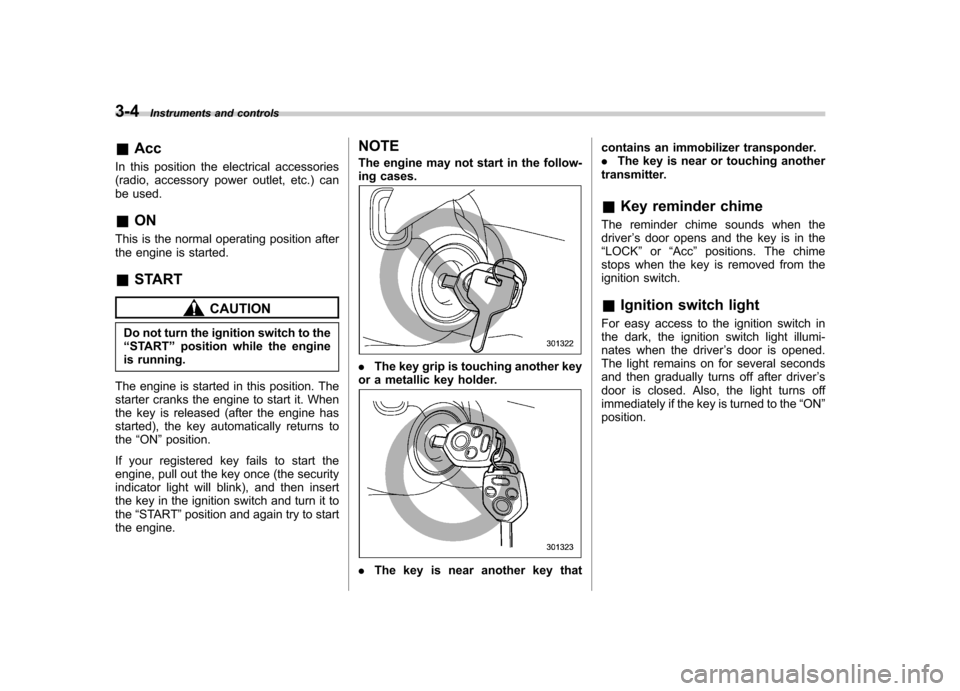
The engine may not start in the follow-
ing cases.
.
The key grip is touching another key
or a metallic key holder.
. The key is near another key that contains an immobilizer transponder. .
The key is near or touching another
transmitter. & Key reminder chime
The reminder chime sounds when the driver ’s door opens and the key is in the
“ LOCK ”or “Acc ”positions. The chime
stops when the key is removed from the
ignition switch.
& Ignition switch light
For easy access to the ignition switch in
the dark, the ignition switch light illumi-
nates when the driver ’s door is opened.
The light remains on for several seconds
and then gradually turns off after driver ’s
door is closed. Also, the light turns off
immediately if the key is turned to the “ON ”
position.