2012 SUBARU TRIBECA maintenance
[x] Cancel search: maintenancePage 196 of 420
NOTE
While you are holding down either side
of the“TUNE TRACK ”button, the
tuning frequency will not stop chan-
ging even if the frequency of a recei-
vable station is reached. ! Seek tuning
If you press the “
”or “”side of the
“ SEEK FLDR ”button (7), the radio will
automatically search for a receivable
station and stop at the first one it finds.
This function may not be available, how-
ever, when radio signals are weak. In such
a situation, perform manual tuning to
select the desired station. ! Automatic tuning (SCAN)
Press the “SCAN ”button (8) to change the
radio to the SCAN mode. In this mode, the
radio scans through the radio band until a
station is found. The radio will stop at the
station for 5 seconds while displaying the
frequency, after which scanning will con-
tinue until the entire band has been
scanned from the low end to the high
end. Press the “SCAN ”button again to
cancel the SCAN mode and to stop on any
displayed frequency.
Press the “
”or “”side of the “SEEK
FLDR ”button (7) again to cancel the scan
mode and to stop on any displayed frequency.
When the
“SCAN ”button is pressed for
automatic tuning, stations are scanned in
the direction of low frequencies to high
frequencies only.
Automatic tuning may not function prop-
erly if the station reception is weakened by
distance from the station or proximity to
tall buildings and hills. ! Selecting preset stations
Presetting a station with a preset button
(10) allows you to select that station in a
single operation. Up to six, AM, FM1 and
FM2 stations each may be preset. ! How to preset stations
1. Press the “FM AM ”button (2) to select
FM1, FM2, or AM reception.
2. Press the “SCAN ”button (8) or tune
the radio manually until the desired station
frequency is displayed.
3. Press and hold one of the preset
buttons (10) to store the frequency. If the
button is pressed briefly, the preceding
selection will remain in memory. NOTE . If the connection between the radio
and battery is broken for any reason
such as vehicle maintenance or radio
removal, all stations stored in the preset buttons are cleared. If this
occurs, it is necessary to reset the
preset buttons..
If a cell phone is placed near the
radio, it may cause the radio to emit
noise when it receives calls. This noise
does not indicate a radio malfunction. ! Satellite radio mode (if equipped)
To receive satellite radio, it is necessary to
install the SUBARU genuine satellite
receiver (optional part) and to enter into
a contract with a satellite radio network
service such as “Sirius XM
TMsatellite
radio ”(for U.S.A. only) or “Sirius satellite
radio ”(for Canada only). For details,
please contact your SUBARU dealer. ! Sirius satellite radio (for Canada only)
Sirius satellite radio is a recent innovation
that allows the listener to experience
digital sound quality and to have a greater
variety of channels.
Use of satellite radio (Sirius) requires a
tuner, antenna and a service contract. For
details, please contact your SUBARU
dealer or visit Sirius Satellite Radio at
www.sirius.ca or call 1-888-539-7474 for
more information. Sirius, the Sirius dog
logo, channel names and logos are trade-
marks of SIRIUS Satellite Radio Inc. Audio
5-7
– CONTINUED –
Page 198 of 420
button is pressed briefly, the preceding
selection will remain in memory. NOTE
If the connection between the radio and
battery is broken for any reason such
as vehicle maintenance or radio re-
moval, all channels stored in the preset
buttons are cleared. If this occurs, it is
necessary to reset the preset buttons. !Display selection
Press the “AUDIO ”button (5) while receiv-
ing satellite radio to change the display as follows.
! Rear seat entertainment
If your vehicle is equipped with a Rear
Seat Entertainment System, you can
enjoy audio outputs from the system
through the vehicle ’s speakers by press-
ing the “RSE AUX ”button (3). Press the
button again to return to the audio setsound.
NOTE
If your vehicle is equipped with a Rear
Seat Entertainment System, refer to the Owner
’s Manual supplement for the
Rear Seat Entertainment System for
further details. Audio
5-9
– CONTINUED –
Page 207 of 420
5-18Audio
NOTE
While you are holding down either side
of the TUNE/TRACK button, the tuning
frequency will not stop changing even
if the frequency of a receivable station
is reached. ! Seek tuning (SEEK)
If you press the “
”or “”side of the
“ SEEK FLDR ”button (7), the radio will
automatically search for a receivable
station and stop at the first one it finds.
This function may not be available, how-
ever, when radio signals are weak. In such
a situation, perform manual tuning to
select the desired station. ! Scan tuning (SCAN)
Press the “SCAN ”button (8) to change the
radio to the SCAN mode. In this mode, the
radio scans through the radio band until a
station is found. The radio will stop at the
station for 5 seconds while displaying the
frequency, after which scanning will con-
tinue until the entire band has been
scanned from the low end to the high
end. Press the “SCAN ”button again to
cancel the SCAN mode and to stop on any
displayed frequency.
Press the “
”or “”side of the “SEEK
FLDR ”button (7) again to cancel the scan
mode and to stop on any displayed frequency.
When the
“SCAN ”button is pressed for
automatic tuning, stations are scanned in
the direction of low frequencies to high
frequencies only.
Automatic tuning may not function prop-
erly if the station reception is weakened by
distance from the station or proximity to
tall buildings and hills. ! Selecting preset stations
Presetting a station with a preset button
allows you to select that station in a single
operation. Up to six AM, FM1 and FM2
stations each may be preset. ! How to preset stations
1. Press the “FM AM ”button (2) to select
FM1, FM2 or AM reception.
2. Press the “SCAN ”button (8) or tune
the radio manually until the desired station
frequency is displayed.
3. Press and hold one of the preset
buttons to store the frequency. If the
button is pressed briefly, the preceding
selection will remain in memory. NOTE . If the connection between the radio
and battery is broken for any reason
such as vehicle maintenance or radio
removal, all stations stored in the preset buttons are cleared. If this
occurs, it is necessary to reset the
preset buttons..
If a cell phone is placed near the
radio, it may cause the radio to emit
noise when it receives calls. This noise
does not indicate a radio malfunction. ! Satellite radio mode (if equipped)
To receive satellite radio, it is necessary to
install the SUBARU genuine satellite
receiver (optional part) and to enter into
a contract with a satellite radio network
service such as “Sirius XM
TMsatellite
radio ”(for U.S.A. only) or “Sirius satellite
radio ”(for Canada only). For details,
please contact your SUBARU dealer. ! Sirius satellite radio (for Canada only)
Refer to “Sirius satellite radio (for Canada
only) ”F 5-7.
! Sirius XM
TMSatellite Radio Activa-
tion (for U.S.A. only)
Refer to “Sirius XM
TMSatellite Radio
Activation (for U.S.A. only) ”F 5-8.
! Satellite radio reception
Refer to “Satellite radio reception ”F 5-8.
! Displaying satellite radio ID of tuner
When you activate satellite radio, you
Page 208 of 420
should have your satellite radio tuner ID
ready because each tuner is identified by
its unique satellite radio tuner ID.
The satellite radio ID will be needed when
you activate satellite radio and receive
satellite radio customer support.
The satellite radio ID can be found on the
audio display by tuning the channel to“0 ”.
Turn the “TUNE/TRACK ”button (4) to
select the satellite radio channel. ! Band selection button
Push the “SAT ”button (1) when the radio
is off to turn on the radio.
Push the “SAT ”button when the radio is
on to select SAT1, SAT2 or SAT3 recep- tion. ! Channel selection
Press “
”of the “TUNE TRACK ”button
(4) to select the next channel and press “
” of the button to select the previous
channel.
Keep pressing “
”of the button to
change to the next channel continuously
and keep pressing “
”of the button to
change to the previous channel continu-
ously. ! Category selection
Press “
”or “”of the “SEEK FLDR ”
button (7) to display the current category. Press
“
”again to select the next
category, and press “”again to select
the previous category. ! Channel scan
Press the “SCAN ”button (8) to change the
radio to the SCAN mode. In this mode, the
radio scans through the channels until a
station is found. The radio will stop at the
station for 5 seconds while displaying the
channel number, after which scanning will
continue until the entire channel has been
scanned from the low end to the high end.
Also during the category selection, chan-
nel scan can be performed in that cate-
gory.
Press the “SCAN ”button again to cancel
the SCAN mode and to stop on any
displayed channel. ! Selecting preset channels
Presetting a channel with a preset button
(10) allows you to select that channel in a
single operation. Up to six, SAT1, SAT2
and SAT3 channels each may be preset. ! How to preset channels
1. Press the “SAT ”button (1) to select
SAT1, SAT2 and SAT3 reception.
2. Press the “SCAN ”button (8) or the
“ TUNE TRACK ”button (4) to select the
channel. 3. Press and hold one of the preset
buttons (10) to store the channel. If the
button is pressed briefly, the preceding
selection will remain in memory. NOTE
If the connection between the radio and
battery is broken for any reason such
as vehicle maintenance or radio re-
moval, all channels stored in the preset
buttons are cleared. If this occurs, it is
necessary to reset the preset buttons. !
Display selection
Press the “AUDIO ”button (5) while receiv-
ing satellite radio to change the display as follows.
! Rear seat entertainment
If your vehicle is equipped with a Rear
Seat Entertainment System, you can
enjoy audio outputs from the system
through the vehicle ’s speakers by press-
ing the “RSE AUX ”button (3). Press the
button again to return to the audio setsound. Audio
5-19
– CONTINUED –
Page 246 of 420
Fuel...................................................................... 7-2
Fuel requirements ............................................... 7-2
Fuel filler lid and cap ........................................... 7-3
State emission testing (U.S. only) ...................... 7-5
Preparing to drive ............................................... 7-7
Starting the engine .............................................. 7-7
Stopping the engine ............................................ 7-8
Remote engine start system (dealer option) ..... 7-8
Starting your vehicle ........................................... 7-9
Remote start safety features ................................ 7-9
Entering the vehicle while it is running via remote start .................................................................. 7-9
Entering the vehicle following remote engine start shutdown .......................................................... 7-9
Pre-heating or pre-cooling the interior of the vehicle ............................................................. 7-10
Service mode ..................................................... 7-10
Remote engine start transmitter programming and programmable feature option ..................... 7-10
System maintenance .......................................... 7-11
Automatic transmission ..................................... 7-12
Select lever ........................................................ 7-13
Shift lock function .............................................. 7-14
Selection of manual mode .................................. 7-16
Driving tips ........................................................ 7-17
SPORT mode ..................................................... 7-18 Power steering
................................................... 7-18
Braking ............................................................... 7-19
Braking tips ....................................................... 7-19
Brake system .................................................... 7-19
Disc brake pad wear warning indicators ............. 7-20
ABS (Anti-lock Brake System) .......................... 7-20
ABS system self-check ...................................... 7-21
ABS warning light .............................................. 7-21
Electronic Brake Force Distribution (EBD) system ............................................................. 7-22
Steps to take if EBD system malfunctions ..... ..... 7-22
Vehicle Dynamics Control system .................... 7-23
Vehicle Dynamics Control system monitor..... ..... 7-25
Traction Control system OFF switch ................... 7-25
Tire pressure monitoring system (TPMS) ........ 7-27
Parking your vehicle ......................................... 7-28
Parking brake .................................................... 7-28
Parking tips ....................................................... 7-29
Cruise control .................................................... 7-29
To set cruise control .......................................... 7-30
To temporarily cancel the cruise control ............. 7-30
To turn off the cruise control .............................. 7-31
To change the cruising speed .. .......................... 7-31
Cruise control indicator light .............................. 7-32
Cruise control set indicator light ........................ 7-32
Starting and operating
7
Page 250 of 420
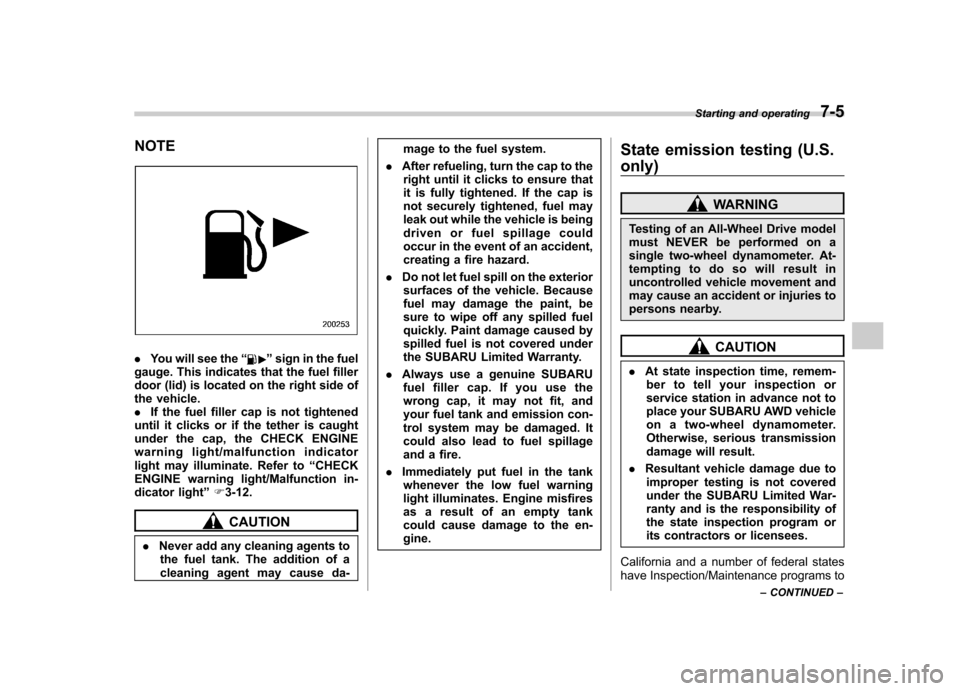
NOTE
.You will see the “”sign in the fuel
gauge. This indicates that the fuel filler
door (lid) is located on the right side of
the vehicle.. If the fuel filler cap is not tightened
until it clicks or if the tether is caught
under the cap, the CHECK ENGINE
warning light/malfunction indicator
light may illuminate. Refer to “CHECK
ENGINE warning light/Malfunction in-
dicator light ”F 3-12.
CAUTION
. Never add any cleaning agents to
the fuel tank. The addition of a
cleaning agent may cause da- mage to the fuel system.
. After refueling, turn the cap to the
right until it clicks to ensure that
it is fully tightened. If the cap is
not securely tightened, fuel may
leak out while the vehicle is being
driven or fuel spillage could
occur in the event of an accident,
creating a fire hazard.
. Do not let fuel spill on the exterior
surfaces of the vehicle. Because
fuel may damage the paint, be
sure to wipe off any spilled fuel
quickly. Paint damage caused by
spilled fuel is not covered under
the SUBARU Limited Warranty.
. Always use a genuine SUBARU
fuel filler cap. If you use the
wrong cap, it may not fit, and
your fuel tank and emission con-
trol system may be damaged. It
could also lead to fuel spillage
and a fire.
. Immediately put fuel in the tank
whenever the low fuel warning
light illuminates. Engine misfires
as a result of an empty tank
could cause damage to the en-gine. State emission testing (U.S. only)
WARNING
Testing of an All-Wheel Drive model
must NEVER be performed on a
single two-wheel dynamometer. At-
tempting to do so will result in
uncontrolled vehicle movement and
may cause an accident or injuries to
persons nearby.
CAUTION
. At state inspection time, remem-
ber to tell your inspection or
service station in advance not to
place your SUBARU AWD vehicle
on a two-wheel dynamometer.
Otherwise, serious transmission
damage will result.
. Resultant vehicle damage due to
improper testing is not covered
under the SUBARU Limited War-
ranty and is the responsibility of
the state inspection program or
its contractors or licensees.
California and a number of federal states
have Inspection/Maintenance programs to Starting and operating
7-5
– CONTINUED –
Page 256 of 420
sing the brake pedal repeatedly will toggle
the feature ON or OFF each time.
7. To exit the remote transmitter and
feature programming mode, turn the igni-
tion switch to the“LOCK ”position, remove
the key from the ignition switch and test
operation of the remote transmitter(s) and
horn confirmation feature. & System maintenance
! Changing the batteries
CAUTION
. Do not let dust, oil or water get on
or in the remote engine start
transmitter when replacing the
battery.
. Be careful not to damage the
printed circuit board in the re-
mote engine start transmitter
when replacing the battery.
. Be careful not to allow children to
touch the battery and any re-
moved parts; children could
swallow them.
. There is a danger of explosion if
an incorrect replacement battery
is used. Replace only with the
same or equivalent type of bat-
tery. .
Batteries should not be exposed
to excessive heat such as sun-
shine, fire or the like.
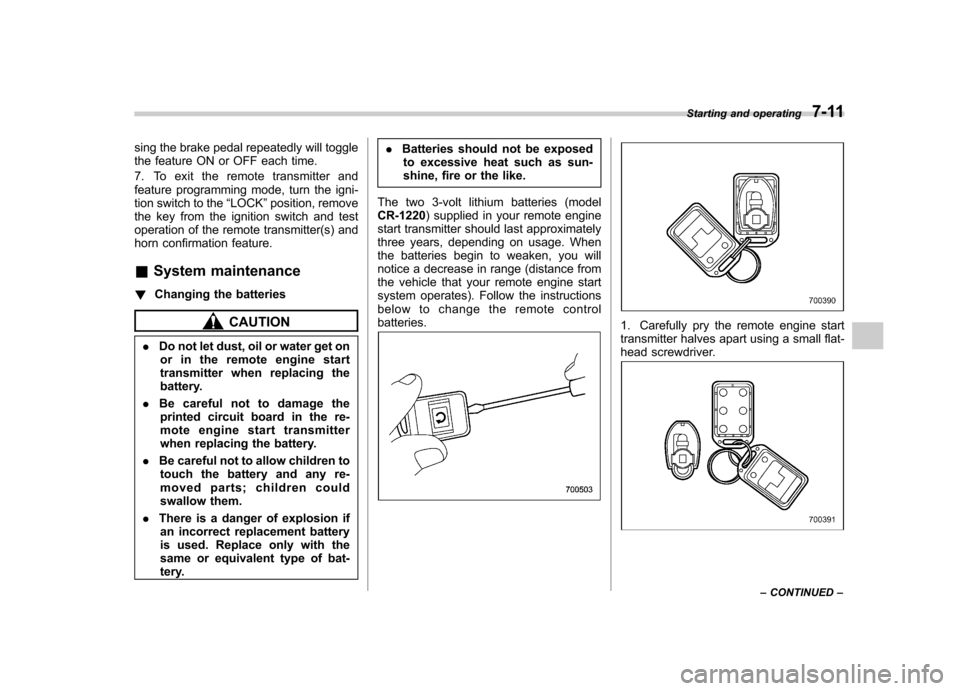
The two 3-volt lithium batteries (modelCR-1220 ) supplied in your remote engine
start transmitter should last approximately
three years, depending on usage. When
the batteries begin to weaken, you will
notice a decrease in range (distance from
the vehicle that your remote engine start
system operates). Follow the instructions
below to change the remote controlbatteries.1. Carefully pry the remote engine start
transmitter halves apart using a small flat-
head screwdriver.
Starting and operating 7-11
– CONTINUED –
Page 278 of 420
New vehicle break-in driving–the first
1,000 miles (1,600 km) ..................................... 8-2
Fuel economy hints ............................................ 8-2
Engine exhaust gas (carbon monoxide) ............ 8-2
Catalytic converter .............................................. 8-3
Periodic inspections ........................................... 8-4
Driving in foreign countries ............................... 8-4
Driving tips for AWD models .............................. 8-4
On-road and off-road driving .............................. 8-6
Winter driving ...................................................... 8-8
Operation during cold weather ............................. 8-8
Driving on snowy and icy roads .......................... 8-9
Corrosion protection .......................................... 8-10
Snow tires ......................................................... 8-10
Tire chains ......................................................... 8-11
Rocking the vehicle ............................................ 8-11 Loading your vehicle
......................................... 8-12
Vehicle capacity weight ...................................... 8-12
GVWR and GAWR (Gross Vehicle Weight Rating and Gross Axle Weight Rating) ........................ 8-13
Roof rails and crossbar (if equipped) .................. 8-14
Roof molding and crossbar (if equipped) ............ 8-17
Trailer hitch (if equipped) .................................. 8-18
Connecting a trailer ........................................... 8-19
When you do not tow a trailer .. .......................... 8-20
Trailer towing ..................................................... 8-21
Warranties and maintenance .............................. 8-21
Maximum load limits .......................................... 8-21
Trailer hitches .................................................... 8-24
Connecting a trailer ........................................... 8-25
Trailer towing tips .............................................. 8-26Driving tips
8