2012 SUBARU OUTBACK lights
[x] Cancel search: lightsPage 285 of 474

7-8Starting and operating
NOTE
Engine oil, engine coolant, brake fluid,
washer fluid and other fluid levels
should be checked daily, weekly or at
fuel stops. Starting the engine
CAUTION
Do not operate the starter motor
continuously for more than 10 sec-
onds. If the engine fails to start after
operating the starter for 5 to 10
seconds, wait for 10 seconds or
more before trying again.
& MT models
1. Apply the parking brake.
2. Turn off unnecessary lights and ac- cessories.
3. Depress the clutch pedal to the floor
and shift the shift lever into neutral. Hold
the clutch pedal to the floor while starting
the engine. The starter motor will only
operate when the clutch pedal is de-
pressed fully to the floor.
4. Turn the ignition switch to the “ON ”
position and check the operation of the
warning and indicator lights. Refer to“ Warning and indicator lights ”F 3-9.
5. Turn the ignition switch to the “START ”
position without depressing the accelera-
tor pedal. Release the key immediately
after the engine has started.
If the engine does not start, perform the following procedure.
(1) Turn the ignition switch to the “LOCK ”position and wait for at least
10 seconds. After checking that the
parking brake is applied, turn the
ignition switch to the “START ”position
while depressing the accelerator pedal
slightly (approximately a quarter of the
full stroke). Release the accelerator
pedal as soon as the engine starts.
(2) If this fails to start the engine, turn
the ignition switch back to the “LOCK ”
position and wait for at least 10
seconds. Then fully depress the accel-
erator pedal and turn the ignition
switch to the “START ”position. If the
engine starts, quickly release the
accelerator pedal.
(3) If this does not start the engine,
turn the ignition switch again to the“ LOCK ”position. After waiting for 10
seconds or longer, turn the ignition
switch to the “START ”position without
depressing the accelerator pedal.
(4) If the engine still refuses to start,
contact your nearest SUBARU dealer
for assistance.
Page 286 of 474

6. Confirm that all warning and indicator
lights have turned off after the engine has
started. The fuel injection system auto-
matically lowers the idle speed as the
engine warms up.
NOTE (2.5 L non-turbo models)
To protect the engine while the shift
lever is in the neutral position, the
engine is controlled so that the engine
speed may not become too high even if
the accelerator pedal is depressedhard. &AT and CVT models
CAUTION
If you restart the engine while the
vehicle is moving, shift the select
lever into the “N ” position. Do not
attempt to place the select lever of a
moving vehicle into the “P ” posi-
tion.
1. Apply the parking brake.
2. Turn off unnecessary lights and ac- cessories.
3. Shift the select lever to the “P ” or “N ”
position (preferably “P ” position). The
starter will only operate when the select
lever is at the “P ”or “N ”position. 4. Turn the ignition switch to the
“ON ”
position and check the operation of the
warning and indicator lights. Refer to“ Warning and indicator lights ”F 3-9.
5. Turn the ignition switch to the “START ”
position without depressing the accelera-
tor pedal. Release the key immediately
after the engine has started.
If the engine does not start, perform the
following procedure.
(1) Turn the ignition switch to the“LOCK ”position and wait for at least
10 seconds. After checking that the
parking brake is applied, turn the
ignition switch to the “START ”position
while depressing the accelerator pedal
slightly (approximately a quarter of the
full stroke). Release the accelerator
pedal as soon as the engine starts.
(2) If this fails to start the engine, turn
the ignition switch back to the “LOCK ”
position and wait for at least 10
seconds. Then fully depress the accel-
erator pedal and turn the ignition
switch to the “START ”position. If the
engine starts, quickly release the
accelerator pedal.
(3) If this fails to start the engine, turn
the ignition switch again to the “LOCK ”
position. After waiting for 10 seconds
or longer, turn the ignition switch to the“ START ”position without depressing the accelerator pedal.
(4) If the engine still refuses to start,
contact your nearest SUBARU dealer
for assistance.
6. Confirm that all warning and indicator
lights have turned off after the engine has
started. The fuel injection system auto-
matically lowers the idle speed as the
engine warms up.
While the engine is warming up, make
sure that the select lever is at the “P ” or
“ N ”position and that the parking brake is
applied.
NOTE (2.5 L non-turbo and 3.6 L models)
To protect the engine while the select
lever is in the “P ” or “N ” position, the
engine is controlled so that the engine
speed may not become too high even if
the accelerator pedal is depressedhard. Starting and operating
7-9
Page 287 of 474

7-10Starting and operating
Stopping the engine
WARNING
Do not stop the engine when the
vehicle is moving. This will cause
loss of power to the power steering
and the brake booster, making steer-
ing and braking more difficult. It
could also result in accidental acti-
vation of the “LOCK ”position on the
ignition switch, causing the steering
wheel to lock.
The ignition switch should be turned off
only when the vehicle is stopped and the
engine is idling. Remote engine start system
(dealer option)
WARNING
. Do not remote start a vehicle in
an enclosed environment (e.g.
closed garage). Prolonged opera-
tion of a motor vehicle in an
enclosed environment can cause
a harmful build-up of Carbon
Monoxide. Carbon Monoxide is
harmful to your health. Exposure
to high levels of Carbon Monox-
ide can cause headaches, dizzi-
ness or in extreme cases uncon-
sciousness and/or death.
. Before performing any servicing
of the vehicle, temporarily place
the remote engine start system in
service mode to prevent the
system from unexpectedly start-
ing the engine.
& Starting your vehicle
NOTE
All vehicle doors, the engine hood and
trunk / rear gate must be closed prior to
activating the remote engine start sys-
tem. Any open entry point will prevent
starting or cause the system to shutdown.
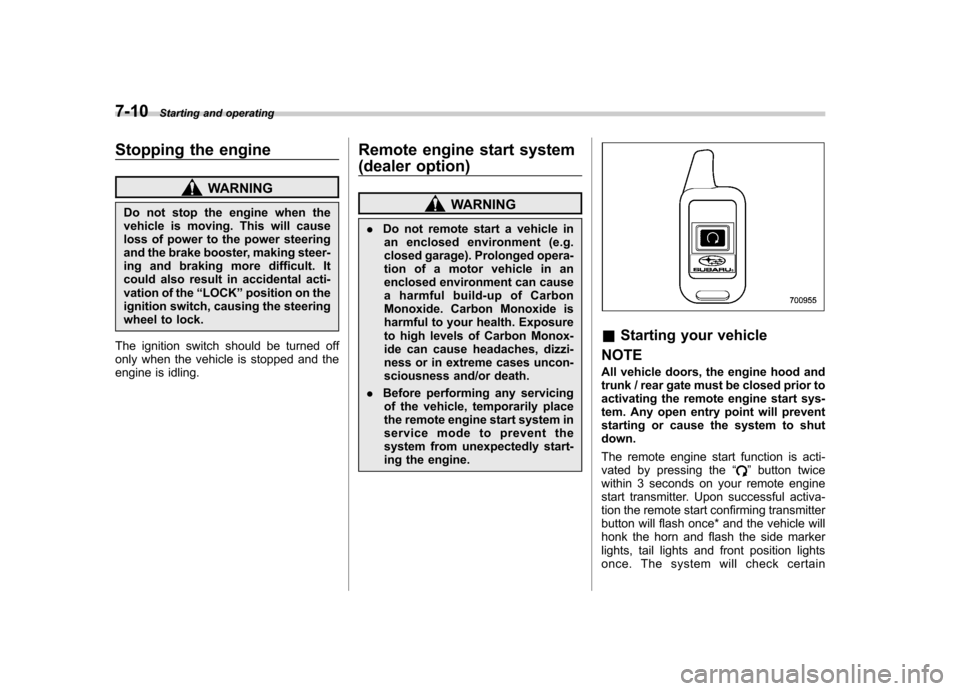
The remote engine start function is acti-
vated by pressing the “
”button twice
within 3 seconds on your remote engine
start transmitter. Upon successful activa-
tion the remote start confirming transmitter
button will flash once* and the vehicle will
honk the horn and flash the side marker
lights, tail lights and front position lights
once. The system will check certain
Page 288 of 474

preconditions before starting, and if all
safety parameters are correct, the engine
will start within 5 seconds. Upon success-
ful engine start, the remote start confirma-
tion transmitter button will flash twice
every 5 seconds* and the vehicle will
honk the horn and flash the side marker
lights, tail lights and the front position
lights once, then the lights will illuminate
and remain illuminated, indicating that the
engine is running. While the vehicle is
operating via the remote engine start
function, the power window features will
be disabled. Also, the system has a timer
and will shut down after 15 minutes if you
do not operate the vehicle. Press and hold the“
”button for 2 seconds to turn the
engine off. The remote start confirmation
transmitter button will flash three times*
indicating that the engine has shut down.
If the starter cranks but does not start or
starts and stalls, the remote engine start
system will power off and then attempt to
start the engine an additional three times
unless the remote engine start system
determines that a vehicle malfunction is
preventing the system from starting. If the
engine does not start after additional
attempts, the remote engine start system
will abort and return to a non-activatestate.
*: Provided that the remote engine start transmitter is within the operating range of
the system. &
Remote start safety features
For safety and security reasons, the
system will fail to start and honk the horn
twice or shut down the engine during
remote start operation if any of the
following occur: . Any of the doors or the trunk / rear gate
are open / opened (*the vehicle ’s horn will
honk six times and the side marker lights,
tail lights and the front position lights will
flash six times indicating that a vehicle
door or trunk / rear gate was open when
the remote engine start system wasactivated). . The brake pedal is depressed
. The key was already in the ignition
switch. The engine hood is opened
. The remote start system “Service
mode ”is engaged
. The vehicle ’s engine idle speed has
reached a level over 3,500 RPM. The alarm is triggered by opening a
door or the rear gate.. The select lever is not in the “P ”
position (AT and CVT models)
In addition to the items above, if the vehicle
’s engine management system
determines there is a safety risk due to a
vehicle related problem, the vehicle will
shut down and the vehicle ’s horn will honk
three times.
NOTE . If the alarm system is armed at the
time of remote engine start activation
(the security indicator light on the
combination meter is flashing), the
alarm system will remain armed
throughout the remote start run cycle.. If the alarm system is disarmed at
the time of remote engine start activa-
tion (the security indicator light on the
combination meter is not flashing), the
alarm system will remain disarmed
throughout the remote start run cycle. & Entering the vehicle while it
is running via remote start
1. Unlock the vehicle doors using the
remote keyless entry system. If the vehi-cle ’s doors are unlocked manually using
the key, the vehicle ’s alarm system will
trigger (if the alarm system is armed prior
to activating the remote engine start
system) and the engine will turn off.
Inserting the key into the ignition switch
and turning it to the “ON ”position or
pressing the unlock button “
”on the
Starting and operating
7-11
– CONTINUED –
Page 290 of 474

&Entering the vehicle follow-
ing remote engine start shut- down
An alarm trigger may occur if the vehicle is
opened by the remote keyless entry
transmitter within a few seconds immedi-
ately following remote engine start shut-down. & Pre-heating or pre-cooling
the interior of the vehicle
Models with automatic climate control system:
After the system starts the engine, the
automatic climate control system will
activate the “FULL AUTO ”mode and heat
or cool the interior to the predetermined
median (room) temperature. No pre-
setting of controls is necessary.
Models without automatic climate con-
trol system:
Before exiting the vehicle, set the tem-
perature controls to the desired setting
and operation. After the system starts the
engine, the heater or air conditioning will
activate and heat or cool the interior to
your setting. &
Service mode
In service mode, the remote engine start
function is temporarily disabled to prevent
the system from unexpectedly starting the
engine while being serviced.
To engage or disengage service mode:
1. Enter the vehicle and close all vehicle
doors and the trunk/rear gate.
2. Verify that the select lever is in the “P ”
position (AT and CVT models)
3. Depress and hold the brake pedal
4. Turn the ignition switch to the “ON ”
position
5. Press and release the remote engine
start transmitter “
”button three times.
The system will honk the vehicle ’s horn
each time the button is pressed.
6. The system will pause for 1 second
then honk the vehicle ’s horn three times to
indicate that the service mode has been
engaged or honk one time to indicate that
the service mode has been disengaged.
NOTE
When taking your vehicle in for service,
it is recommended that you inform the
service personnel that your vehicle is
equipped with a remote engine startsystem. &
Remote transmitter program
New transmitters can be programmed to
the remote engine start system in the
event that a transmitter is lost, stolen,
damaged or additional transmitters are
desired (the system will accept up to eight
transmitters). New remote engine start
transmitters can be programmed accord-
ing to the following procedure.
1. Open the driver ’s door (the driver ’s
door must remain opened throughout the
entire process).
2. Depress and hold the brake pedal.
3. Turn the ignition switch to “ON ”then
“ LOCK ”, back to “ON ”then “LOCK ”, then
back to “ON ”again and leave the ignition
“ ON ”throughout the programming pro-
cess.
4. The system will flash the side marker
lights, tail lights and front position lights
and honk the horn three times, indicating
that the system has entered the transmit-
ter learn mode.
5. Press and release the “
”button on
the transmitter that you want to program.
6. The system will flash the side marker
lights, tail lights and front position lights
and honk the horn one time, indicating that
the system has learned the transmitter.
Upon successful programming, the re-
mote start confirmation transmitter button Starting and operating
7-13
– CONTINUED –
Page 303 of 474

7-26Starting and operating
warning light illuminate simultaneously,
take the following steps.
1. Stop the vehicle in the nearest safe,
flat place.
2. Shut down the engine, then restart it.
3. Release the parking brake. If both
warning lights turn off, the EBD system
may be malfunctioning.
Drive carefully to the nearest SUBARU
dealer and have the system inspected.
4. If both warning lights illuminate again
and remain illuminated after the engine
has been restarted, shut down the engine
again, apply the parking brake, and check
the brake fluid level. Refer to “Brake fluid ”
F 11-25.
5. If the brake fluid level is not below the“ MIN ”mark, the EBD system may be
malfunctioning. Drive carefully to the
nearest SUBARU dealer and have the
system inspected.
6. If the brake fluid level is below the “ MIN ”mark, DO NOT drive the vehicle.
Instead, have the vehicle towed to the
nearest SUBARU dealer for repair.
WARNING
. Driving with the brake system
warning light on is dangerous.
This indicates your brake system may not be working properly. If
the light remains on, have the
brakes inspected by a SUBARU
dealer immediately.
. If at all in doubt about whether
the brakes are operating prop-
erly, do not drive the vehicle.
Have your vehicle towed to the
nearest SUBARU dealer for re-
pair. Vehicle Dynamics Control system
WARNING
Always use the utmost care in driving –overconfidence because
you are driving with a Vehicle Dy-
namics Control system equipped
vehicle could easily lead to a ser-
ious accident.
CAUTION
. Even if your vehicle is equipped
with Vehicle Dynamics Control
system, winter tires should be
used when driving on snow-cov-
ered or icy roads; in addition,
vehicle speed should be reduced
considerably. Simply having a
Vehicle Dynamics Control sys-
tem does not guarantee that the
vehicle will be able to avoid
accidents in any situation.
. Activation of the Vehicle Dy-
namics Control system is an
indication that the road being
travelled on has a slippery sur-
face; since having Vehicle Dy-
namics Control is no guarantee
Page 334 of 474

Hitch harness connector
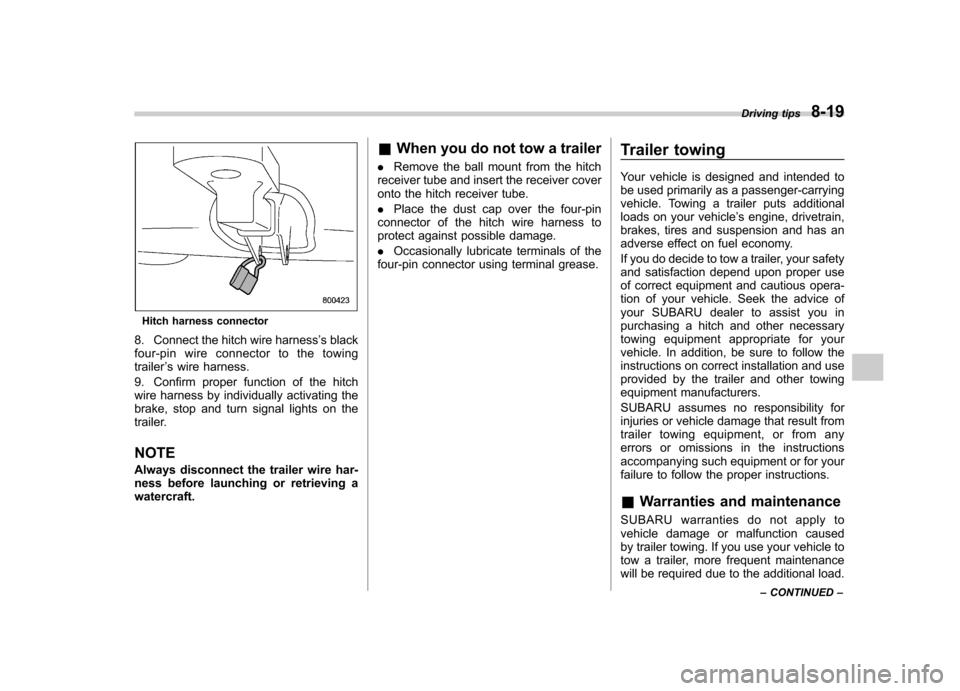
8. Connect the hitch wire harness ’s black
four-pin wire connector to the towing trailer ’s wire harness.
9. Confirm proper function of the hitch
wire harness by individually activating the
brake, stop and turn signal lights on the
trailer. NOTE
Always disconnect the trailer wire har-
ness before launching or retrieving awatercraft. &
When you do not tow a trailer
. Remove the ball mount from the hitch
receiver tube and insert the receiver cover
onto the hitch receiver tube. . Place the dust cap over the four-pin
connector of the hitch wire harness to
protect against possible damage. . Occasionally lubricate terminals of the
four-pin connector using terminal grease. Trailer towing
Your vehicle is designed and intended to
be used primarily as a passenger-carrying
vehicle. Towing a trailer puts additional
loads on your vehicle
’s engine, drivetrain,
brakes, tires and suspension and has an
adverse effect on fuel economy.
If you do decide to tow a trailer, your safety
and satisfaction depend upon proper use
of correct equipment and cautious opera-
tion of your vehicle. Seek the advice of
your SUBARU dealer to assist you in
purchasing a hitch and other necessary
towing equipment appropriate for your
vehicle. In addition, be sure to follow the
instructions on correct installation and use
provided by the trailer and other towing
equipment manufacturers.
SUBARU assumes no responsibility for
injuries or vehicle damage that result from
trailer towing equipment, or from any
errors or omissions in the instructions
accompanying such equipment or for your
failure to follow the proper instructions.
& Warranties and maintenance
SUBARU warranties do not apply to
vehicle damage or malfunction caused
by trailer towing. If you use your vehicle to
tow a trailer, more frequent maintenance
will be required due to the additional load. Driving tips
8-19
– CONTINUED –
Page 340 of 474

!Side mirrors
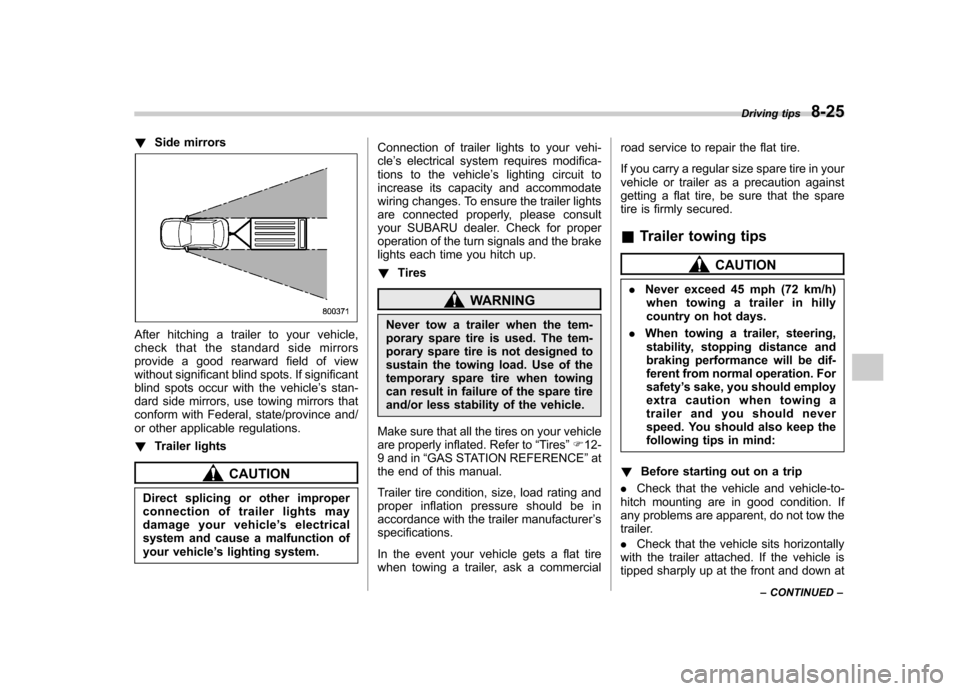
After hitching a trailer to your vehicle,
check that the standard side mirrors
provide a good rearward field of view
without significant blind spots. If significant
blind spots occur with the vehicle ’s stan-
dard side mirrors, use towing mirrors that
conform with Federal, state/province and/
or other applicable regulations. ! Trailer lights
CAUTION
Direct splicing or other improper
connection of trailer lights may
damage your vehicle ’s electrical
system and cause a malfunction of
your vehicle ’s lighting system. Connection of trailer lights to your vehi-cle
’s electrical system requires modifica-
tions to the vehicle ’s lighting circuit to
increase its capacity and accommodate
wiring changes. To ensure the trailer lights
are connected properly, please consult
your SUBARU dealer. Check for proper
operation of the turn signals and the brake
lights each time you hitch up. ! Tires
WARNING
Never tow a trailer when the tem-
porary spare tire is used. The tem-
porary spare tire is not designed to
sustain the towing load. Use of the
temporary spare tire when towing
can result in failure of the spare tire
and/or less stability of the vehicle.
Make sure that all the tires on your vehicle
are properly inflated. Refer to “Tires ”F 12-
9 and in “GAS STATION REFERENCE ”at
the end of this manual.
Trailer tire condition, size, load rating and
proper inflation pressure should be in
accordance with the trailer manufacturer ’s
specifications.
In the event your vehicle gets a flat tire
when towing a trailer, ask a commercial road service to repair the flat tire.
If you carry a regular size spare tire in your
vehicle or trailer as a precaution against
getting a flat tire, be sure that the spare
tire is firmly secured.
& Trailer towing tips
CAUTION
. Never exceed 45 mph (72 km/h)
when towing a trailer in hilly
country on hot days.
. When towing a trailer, steering,
stability, stopping distance and
braking performance will be dif-
ferent from normal operation. Forsafety ’s sake, you should employ
extra caution when towing a
trailer and you should never
speed. You should also keep the
following tips in mind:
! Before starting out on a trip
. Check that the vehicle and vehicle-to-
hitch mounting are in good condition. If
any problems are apparent, do not tow the
trailer. . Check that the vehicle sits horizontally
with the trailer attached. If the vehicle is
tipped sharply up at the front and down at Driving tips
8-25
– CONTINUED –