2012 SUBARU OUTBACK keyless
[x] Cancel search: keylessPage 104 of 474

NOTE
Make sure no one else is operating
their remote keyless entry system with-
in range of your vehicle when program-
ming transmitters. If someone else
were to operate their remote transmit-
ter while you are programming your
transmitters, it is possible that their
transmitter code will be programmed
into your system, allowing them un-
authorized access to your vehicle.Alarm system
The alarm system helps to protect your
vehicle and valuables from theft. The horn
sounds and the turn signal lights flash if
someone attempts to break into yourvehicle.
The system can be armed and disarmed
with the remote transmitter.
The system does not operate when the
key is inserted into the ignition switch.
Your vehicle
’s alarm system has been set
for activation at the time of shipment from
the factory. You can set the system for
deactivation yourself or have it done by
your SUBARU dealer. & System alarm operation
The alarm system will give the following
alarms when triggered: . The vehicle ’s horn will sound and the
turn signal lights will flash for 30 seconds.. If any door (or the rear gate/trunk lid)
remains open after the 30-second period,
the horn will continue to sound for a
maximum of 3 minutes. If the door (or
the rear gate/trunk lid) is closed while the
horn is sounding, the horn will stop
sounding with a delay of up to 30 seconds. The alarm is triggered by: .
Opening a door, the rear gate or trunk
lid. Physical impact to the vehicle, such as
forced entry (only models with shock
sensors (dealer option)) NOTE
The alarm system can be set to trigger
illumination of map lights and dome
light. The map lights and dome light
notification is deactivated as the fac-
tory setting. Refer to “Function set-
tings ”F20. A SUBARU dealer can
activate the system. Contact your
SUBARU dealer for details. & Activating and deactivating
the alarm system
To change the setting of your vehicle ’s
alarm system for activation or deactiva-
tion, do the following.
1. Disarm the alarm system. Refer to “ Disarming the system ”F 2-17.
2. Sit in the driver ’s seat and shut all
doors (and the rear gate (Outback)).
3. Turn the ignition switch to the “ON ”
position.
4. Hold down the REAR (UNLOCK) side
of the driver ’s power door locking switch,
open the driver ’s door within the following Keys and doors
2-15
– CONTINUED –
Page 112 of 474
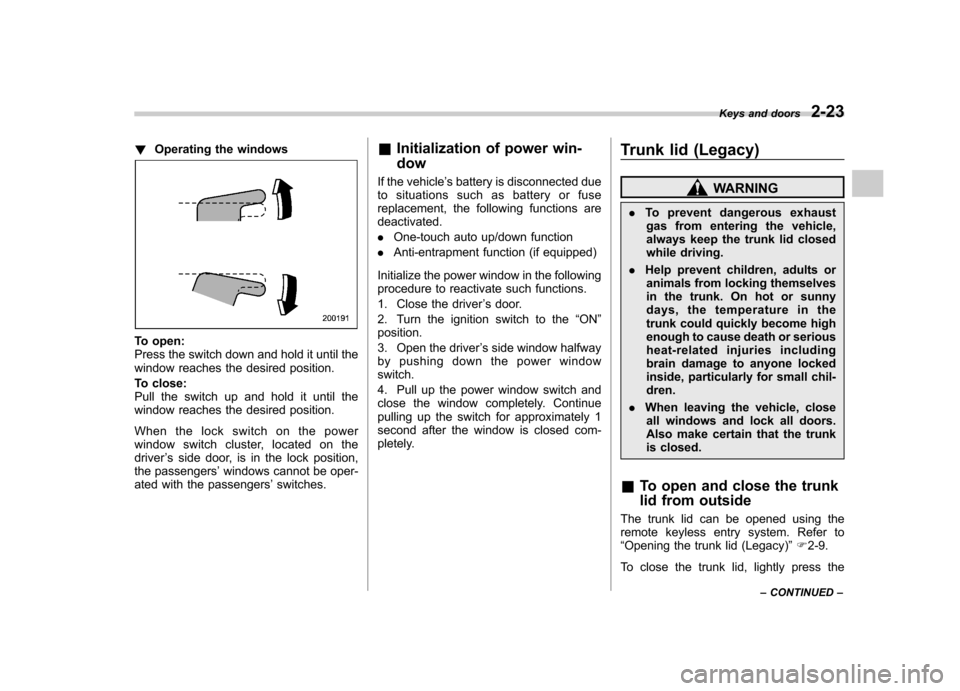
!Operating the windows
To open:
Press the switch down and hold it until the
window reaches the desired position.
To close:
Pull the switch up and hold it until the
window reaches the desired position.
When the lock switch on the power
window switch cluster, located on thedriver ’s side door, is in the lock position,
the passengers ’windows cannot be oper-
ated with the passengers ’switches. &
Initialization of power win- dow
If the vehicle ’s battery is disconnected due
to situations such as battery or fuse
replacement, the following functions aredeactivated. . One-touch auto up/down function
. Anti-entrapment function (if equipped)
Initialize the power window in the following
procedure to reactivate such functions.
1. Close the driver ’s door.
2. Turn the ignition switch to the “ON ”
position.
3. Open the driver ’s side window halfway
by pushing down the power window switch.
4. Pull up the power window switch and
close the window completely. Continue
pulling up the switch for approximately 1
second after the window is closed com-
pletely. Trunk lid (Legacy)
WARNING
. To prevent dangerous exhaust
gas from entering the vehicle,
always keep the trunk lid closed
while driving.
. Help prevent children, adults or
animals from locking themselves
in the trunk. On hot or sunny
days, the temperature in the
trunk could quickly become high
enough to cause death or serious
heat-related injuries including
brain damage to anyone locked
inside, particularly for small chil-dren.
. When leaving the vehicle, close
all windows and lock all doors.
Also make certain that the trunk
is closed.
& To open and close the trunk
lid from outside
The trunk lid can be opened using the
remote keyless entry system. Refer to“ Opening the trunk lid (Legacy) ”F 2-9.
To close the trunk lid, lightly press the Keys and doors
2-23
– CONTINUED –
Page 113 of 474
2-24Keys and doors
trunk lid down until the latch engages. NOTE . Do not leave your valuables in the
trunk when you leave your vehicle. . Even when the trunk lid cannot be
opened using the remote keyless entry
system, you can open the trunk lid by
using the key. Refer to “Trunk lid
(Legacy) –if the trunk lid cannot be
opened ”F 9-19.
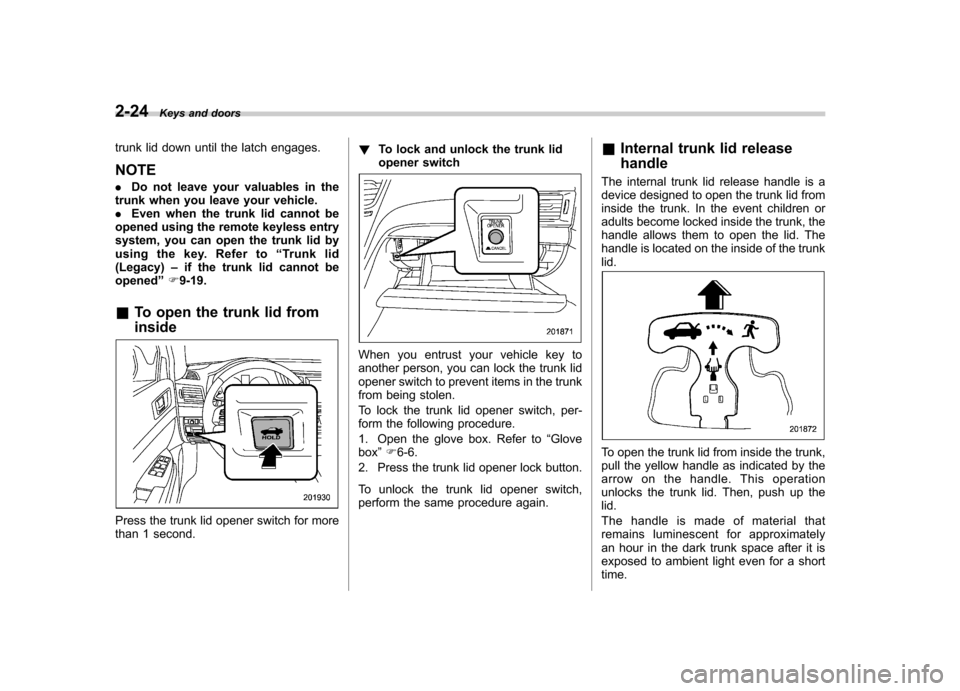
& To open the trunk lid from inside
Press the trunk lid opener switch for more
than 1 second. !
To lock and unlock the trunk lid
opener switch
When you entrust your vehicle key to
another person, you can lock the trunk lid
opener switch to prevent items in the trunk
from being stolen.
To lock the trunk lid opener switch, per-
form the following procedure.
1. Open the glove box. Refer to “Glove
box ”F 6-6.
2. Press the trunk lid opener lock button.
To unlock the trunk lid opener switch,
perform the same procedure again. &
Internal trunk lid release handle
The internal trunk lid release handle is a
device designed to open the trunk lid from
inside the trunk. In the event children or
adults become locked inside the trunk, the
handle allows them to open the lid. The
handle is located on the inside of the trunklid.
To open the trunk lid from inside the trunk,
pull the yellow handle as indicated by the
arrow on the handle. This operation
unlocks the trunk lid. Then, push up thelid.
The handle is made of material that
remains luminescent for approximately
an hour in the dark trunk space after it is
exposed to ambient light even for a shorttime.
Page 115 of 474
2-26Keys and doors
If the latch is not released, contact your
SUBARU dealer.
In that case, use the key to release the
latch, then close the trunk lid.
Also, if the movement of the release
handle feels restric ted or not entirely
smooth during operation, or the handle
and/or handle base is cracked, contact
your SUBARU dealer. Rear gate (Outback)
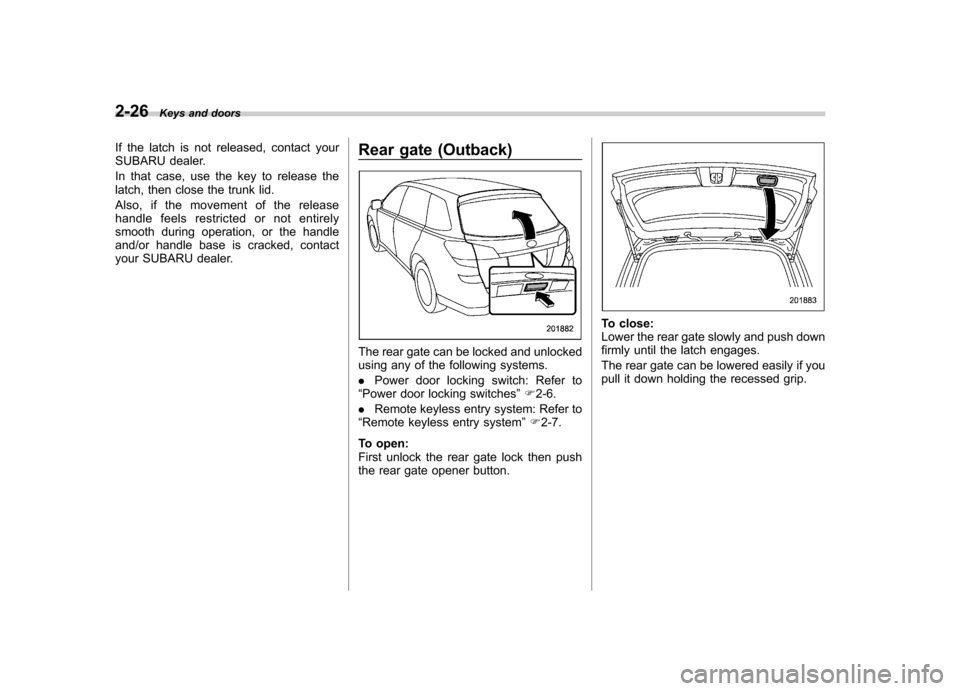
The rear gate can be locked and unlocked
using any of the following systems. .
Power door locking switch: Refer to
“ Power door locking switches ”F 2-6.
. Remote keyless entry system: Refer to
“ Remote keyless entry system ”F 2-7.
To open:
First unlock the rear gate lock then push
the rear gate opener button.
To close:
Lower the rear gate slowly and push down
firmly until the latch engages.
The rear gate can be lowered easily if you
pull it down holding the recessed grip.
Page 123 of 474
3-4Instruments and controls
&Acc
In this position the electrical accessories
(radio, accessory power outlet, etc.) can
be used. & ON
This is the normal operating position after
the engine is started. & START
CAUTION
Do not turn the ignition switch to the “ START ”position while the engine
is running.
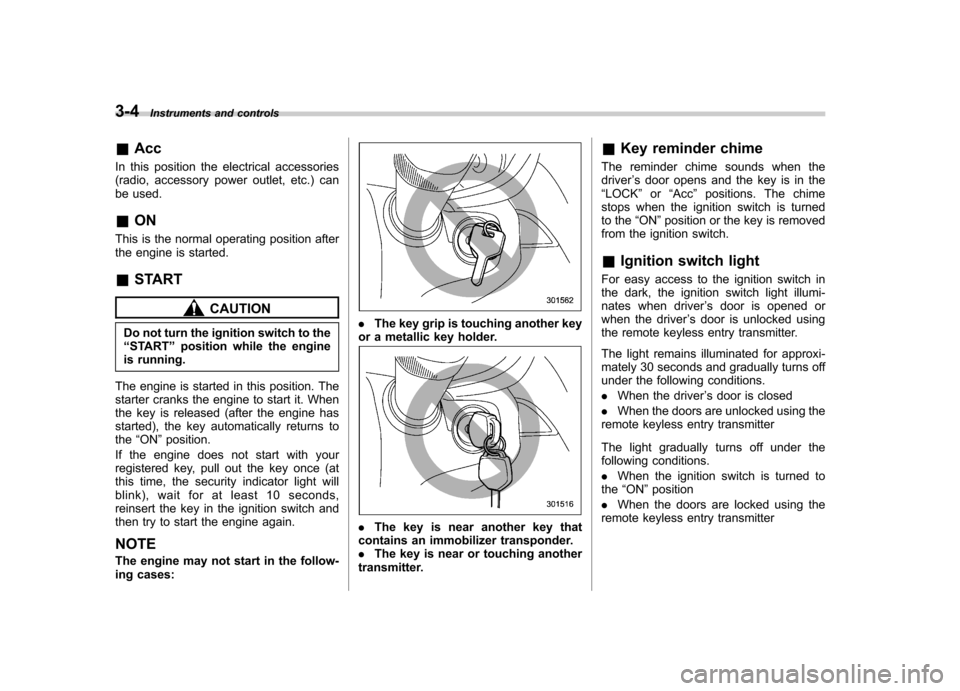
The engine is started in this position. The
starter cranks the engine to start it. When
the key is released (after the engine has
started), the key automatically returns tothe “ON ”position.
If the engine does not start with your
registered key, pull out the key once (at
this time, the security indicator light will
blink), wait for at least 10 seconds,
reinsert the key in the ignition switch and
then try to start the engine again.
NOTE
The engine may not start in the follow-
ing cases:
. The key grip is touching another key
or a metallic key holder.
. The key is near another key that
contains an immobilizer transponder. . The key is near or touching another
transmitter. &
Key reminder chime
The reminder chime sounds when thedriver ’s door opens and the key is in the
“ LOCK ”or “Acc ”positions. The chime
stops when the ignition switch is turned
to the “ON ”position or the key is removed
from the ignition switch.
& Ignition switch light
For easy access to the ignition switch in
the dark, the ignition switch light illumi-
nates when driver ’s door is opened or
when the driver ’s door is unlocked using
the remote keyless entry transmitter.
The light remains illuminated for approxi-
mately 30 seconds and gradually turns off
under the following conditions. . When the driver ’s door is closed
. When the doors are unlocked using the
remote keyless entry transmitter
The light gradually turns off under the
following conditions. . When the ignition switch is turned to
the “ON ”position
. When the doors are locked using the
remote keyless entry transmitter
Page 255 of 474
6-2Interior equipment
Interior light
When leaving your vehicle, make sure the
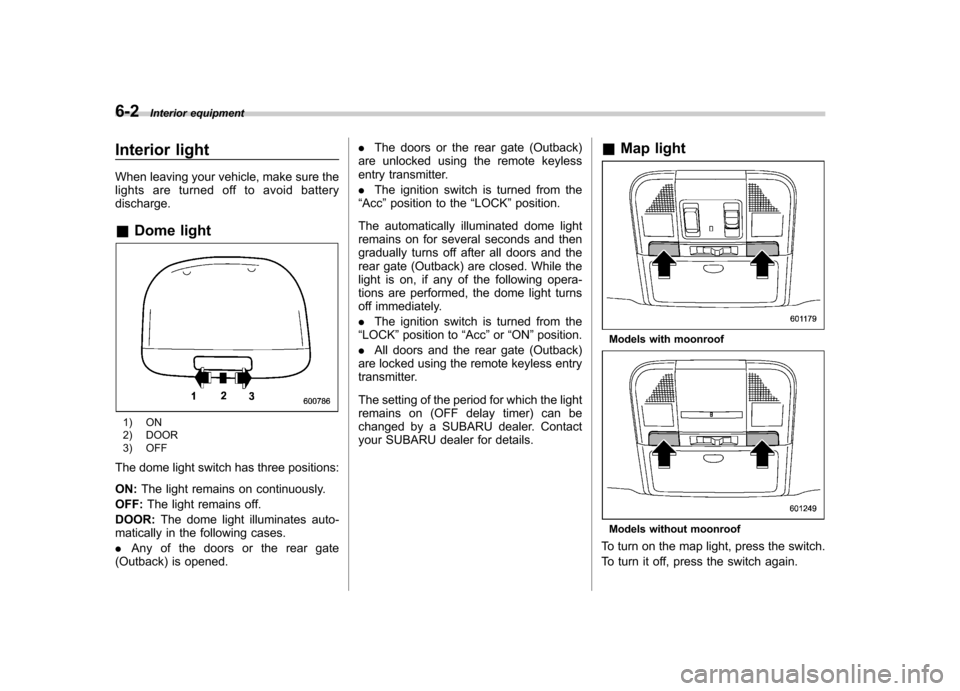
lights are turned off to avoid batterydischarge. &Dome light
1) ON
2) DOOR
3) OFF
The dome light switch has three positions: ON: The light remains on continuously.
OFF: The light remains off.
DOOR: The dome light illuminates auto-
matically in the following cases. . Any of the doors or the rear gate
(Outback) is opened. .
The doors or the rear gate (Outback)
are unlocked using the remote keyless
entry transmitter. . The ignition switch is turned from the
“ Acc ”position to the “LOCK ”position.
The automatically illuminated dome light
remains on for several seconds and then
gradually turns off after all doors and the
rear gate (Outback) are closed. While the
light is on, if any of the following opera-
tions are performed, the dome light turns
off immediately. . The ignition switch is turned from the
“ LOCK ”position to “Acc ”or “ON ”position.
. All doors and the rear gate (Outback)
are locked using the remote keyless entry
transmitter.
The setting of the period for which the light
remains on (OFF delay timer) can be
changed by a SUBARU dealer. Contact
your SUBARU dealer for details. &
Map light
Models with moonroof
Models without moonroof
To turn on the map light, press the switch.
To turn it off, press the switch again.
Page 256 of 474
When leaving the vehicle, make sure the
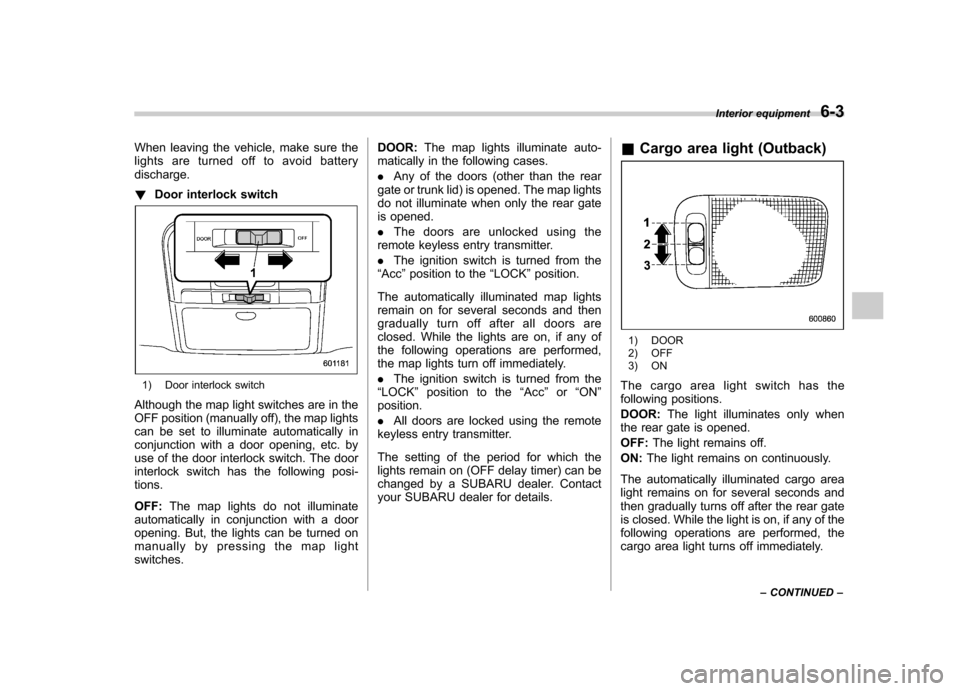
lights are turned off to avoid batterydischarge. !Door interlock switch
1) Door interlock switch
Although the map light switches are in the
OFF position (manually off), the map lights
can be set to illuminate automatically in
conjunction with a door opening, etc. by
use of the door interlock switch. The door
interlock switch has the following posi-tions. OFF: The map lights do not illuminate
automatically in conjunction with a door
opening. But, the lights can be turned on
manually by pressing the map lightswitches. DOOR:
The map lights illuminate auto-
matically in the following cases. . Any of the doors (other than the rear
gate or trunk lid) is opened. The map lights
do not illuminate when only the rear gate
is opened. . The doors are unlocked using the
remote keyless entry transmitter.. The ignition switch is turned from the
“ Acc ”position to the “LOCK ”position.
The automatically illuminated map lights
remain on for several seconds and then
gradually turn off after all doors are
closed. While the lights are on, if any of
the following operations are performed,
the map lights turn off immediately. . The ignition switch is turned from the
“ LOCK ”position to the “Acc ”or “ON ”
position. . All doors are locked using the remote
keyless entry transmitter.
The setting of the period for which the
lights remain on (OFF delay timer) can be
changed by a SUBARU dealer. Contact
your SUBARU dealer for details. &
Cargo area light (Outback)
1) DOOR
2) OFF
3) ON
The cargo area light switch has the
following positions. DOOR: The light illuminates only when
the rear gate is opened.OFF: The light remains off.
ON: The light remains on continuously.
The automatically illuminated cargo area
light remains on for several seconds and
then gradually turns off after the rear gate
is closed. While the light is on, if any of the
following operations are performed, the
cargo area light turns off immediately. Interior equipment
6-3
– CONTINUED –
Page 257 of 474
6-4Interior equipment
.The ignition switch is turned from the
“ LOCK ”position to the “Acc ”or “ON ”
position. . The rear gate is locked using the
remote keyless entry transmitter.
The setting of the period for which the
lights remain on (OFF delay timer) can be
changed by a SUBARU dealer. Contact
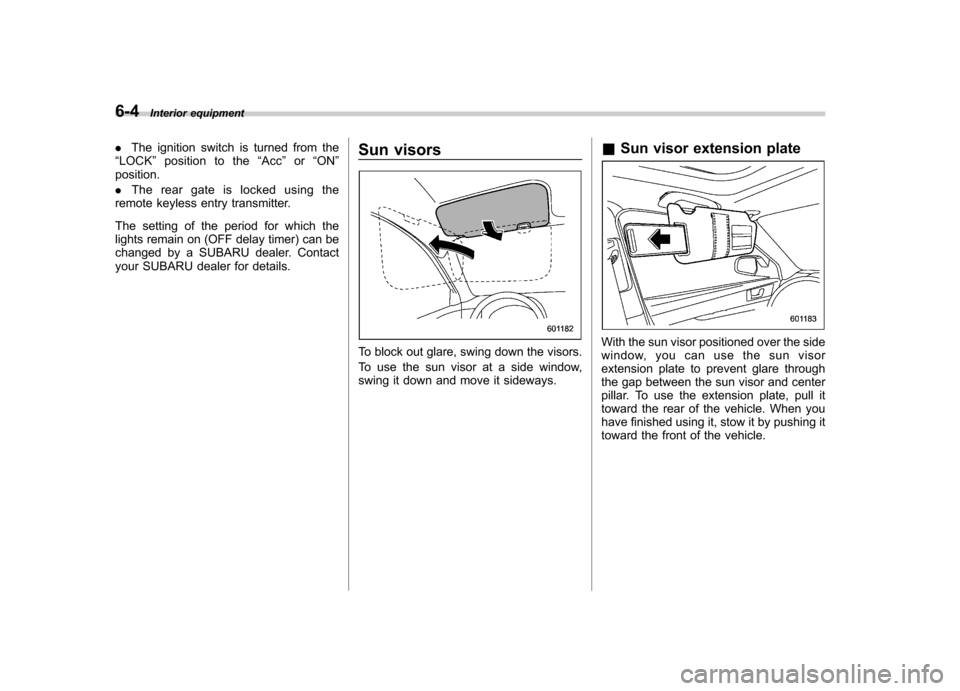
your SUBARU dealer for details. Sun visors
To block out glare, swing down the visors.
To use the sun visor at a side window,
swing it down and move it sideways.&
Sun visor extension plateWith the sun visor positioned over the side
window, you can use the sun visor
extension plate to prevent glare through
the gap between the sun visor and center
pillar. To use the extension plate, pull it
toward the rear of the vehicle. When you
have finished using it, stow it by pushing it
toward the front of the vehicle.