2012 SUBARU OUTBACK light
[x] Cancel search: lightPage 169 of 474

3-50Instruments and controls
begins to flash slowly (after approximately
20 seconds), position the hand-held trans-
mitter of the device between 1 to 3 inches
(25 to 76 mm) away from the HomeLink
®button you wish to program.
3. Press and hold the hand-held trans-
mitter button. The HomeLink
®indicator
light will flash, first slowly and then rapidly.
4. When the indicator light begins to flash
rapidly, release both buttons.
The programming for the previous device
is now erased and the new device can be
operated by pressing the HomeLink
®button. ! Erasing HomeLink
®button memory
NOTE . Performing this procedure erases
the memory of all the preprogrammed
buttons simultaneously. The memory
of individual buttons cannot be erased.. It is recommended that upon the
sale of the vehicle, the memory of all
programmed HomeLink
®buttons be
erased for security purposes.
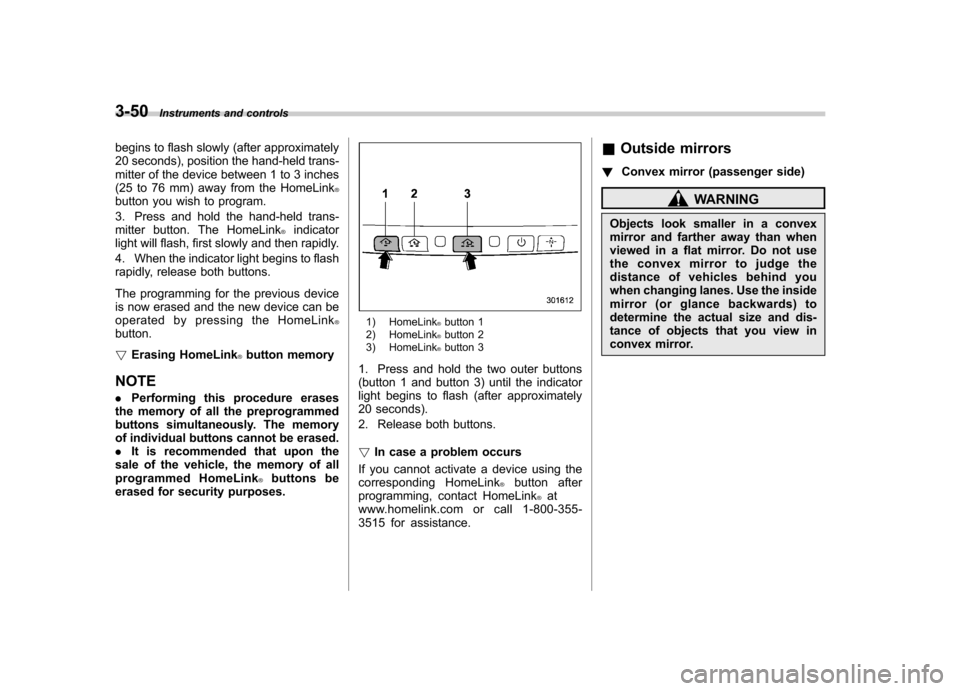
1) HomeLink®button 1
2) HomeLink®button 2
3) HomeLink®button 3
1. Press and hold the two outer buttons
(button 1 and button 3) until the indicator
light begins to flash (after approximately
20 seconds).
2. Release both buttons. ! In case a problem occurs
If you cannot activate a device using the
corresponding HomeLink
®button after
programming, contact HomeLink®at
www.homelink.com or call 1-800-355-
3515 for assistance. &
Outside mirrors
! Convex mirror (passenger side)
WARNING
Objects look smaller in a convex
mirror and farther away than when
viewed in a flat mirror. Do not use
the convex mirror to judge the
distance of vehicles behind you
when changing lanes. Use the inside
mirror (or glance backwards) to
determine the actual size and dis-
tance of objects that you view in
convex mirror.
Page 172 of 474

Ventilator control................................................. 4-2
Center ventilators ................................................ 4-2
Side ventilators ................................................... 4-2
Climate control panel .......................................... 4-3
Type A ................................................................ 4-3
Type B ................................................................ 4-4
Automatic climate control system (type B) ....... 4-5
Temperature sensors ........................................... 4-5
Manual climate control ....................................... 4-6
Airflow mode selection ........................................ 4-6
Temperature control ............................................ 4-7
Fan speed control ............................................... 4-7
Air conditioner control ........................................ 4-7
Air inlet selection ................................................ 4-7
Defrosting ............................................................ 4-8 Operating tips for heater and air
conditioner ........................................................ 4-8
Cleaning ventilator grille ...................................... 4-8
Efficient cooling after parking in direct sunlight ............................................................. 4-8
Lubrication oil circulation in the refrigerant circuit ................................................................ 4-9
Checking air conditioning system before summer season .............................................................. 4-9
Cooling and dehumidifying in high humidity and low temperature weather condition ..................... 4-9
Air conditioner compressor shut-off when engine is heavily loaded ................................................ 4-9
Refrigerant for your climate control system ... ....... 4-9
Air filtration system ............................................. 4-9
Replacing an air filter ......................................... 4-10Climate control
4
Page 176 of 474

Automatic climate control
system (type B) NOTE .Operate the automatic climate con-
trol system when the engine is running. . The blower fan rotates at a low
speed when the engine coolant tem-
perature is low.. For efficient defogging or dehumidi-
fying in cold weather, press the “A/C ”
button.
When the automatic climate control mode
is selected, the following items are auto-
matically controlled. . Outlet air temperature
. Fan speed
. Airflow distribution
. Air inlet control
. Air conditioner compressor operation
To activate this mode, perform the follow-
ing procedure.
1. Set the preferred temperature using
the temperature control button.
2. Press the “AUTO ”button. The FULL
AUTO mode is selected and the “FULL
AUTO ”indicator light on the display
illuminates. NOTE .
When the “DUAL ”button is pressed,
separate temperature settings for the driver ’s side and passenger ’s side can
be enabled (DUAL mode). To cancel the
DUAL mode, press the “DUAL ”button
again. The temperature setting for thepassenger ’s side becomes the same as
the setting for the driver ’s side.
. If you operate any of the buttons on
the control panel other than the “OFF ”
button, rear window defogger button
and temperature control buttons during
FULL AUTO mode operation, the“ FULL ”indicator light on the control
panel will turn off and the “AUTO ”
indicator light will remain illuminated.
You can then manually control the
system as desired. To change the
system back to the FULL AUTO mode,
press the “AUTO ”button.
3. To turn off the climate control system,
press the “OFF ”button. &
Temperature sensors
1) Solar sensor
2) Interior air temperature sensor
The automatic climate control system
employs several sensors. These sensors
are delicate. If they are treated incorrectly Climate control
4-5
– CONTINUED –
Page 178 of 474

both side windows to prevent fogging.)
(Heat-def): Windshield defroster outlets,
foot outlets and both side outlets of the
instrument panel
(Defrost): Windshield defroster outlets and
both side outlets of the instrument panel&
Temperature control
! Type A
Turn the temperature control dial over a
range from the blue side (cool) to red side
(warm) to regulate the temperature of
airflow from the air outlets. ! Type B
To increase the temperature setting, press the “
”side of the temperature control
button. To decrease the temperature
setting, press the “
”side of the tempera-
ture control button.
Each temperature setting is shown on the
display. When “LO ”is shown, the system
provides maximum cooling performance.When “HI ”is shown, the system provides
maximum heating performance.
NOTE
When the “DUAL ”button is pressed,
separate temperature settings for the driver ’s side and passenger ’s side can
be enabled (DUAL mode). To cancel the
DUAL mode, press the “DUAL ”button
again. The temperature setting for thepassenger ’s side becomes the same as
the setting for the driver ’s side.
& Fan speed control
The fan operates only when the ignition switch is in the
“ON ”position. Select the
preferred fan speed by turning the fan
speed control dial (type A), or by pressing
the fan speed control buttons (type B).
& Air conditioner control
The air conditioner operates only when
the engine is running.
Press the air conditioner button while the
fan is in operation to turn on the air
conditioner. When the air conditioner is
on, the indicator light on the air conditioner
button (type A)/ “A/C ”indicator light (type
B) illuminates.
To turn off the air conditioner, press the
button again. The indicator light will turnoff. NOTE
For efficient defogging or dehumidify-
ing in cold weather, turn on the air
conditioner. & Air inlet selection
Select the air inlet by pressing the air inlet
selection button.
ON position (recirculation) : Interior air is
recirculated inside the vehicle. Press the
air inlet selection button to the ON position
for fast cooling with the air conditioner or
when driving on a dusty road. When the Climate control
4-7
– CONTINUED –
Page 179 of 474

4-8Climate control
ON position is selected, the indicator light
on the air inlet selection button illuminates.
OFF position (outside air) : Outside air is
drawn into the passenger compartment.
Press the air inlet selection button to the
OFF position when the interior has cooled
to a comfortable temperature and the road
is no longer dusty. The indicator light will
turn off.
WARNING
Continued operation in the ON posi-
tion may fog up the windows. Switch
to the OFF position as soon as the
outside dusty condition clears. Defrosting
Select the desired
“
”mode or “”mode
to defrost or dehumidify the windshield
and front door windows by performing the
following procedures.
For type A: Press the airflow control button
and select the “
”mode or “”mode.
For type B: Press the airflow mode
selection button to select the “
”mode
or press the defroster button to select the “
” mode.
NOTE
When the “
”mode or “”mode is
selected, the air conditioner compres-
sor automatically operates to more
quickly defog the windshield. At the
same time, the air inlet selection is
automatically set to the outside air
mode. For details, refer to “Airflow
mode selection ”F 4-6. Operating tips for heater and
air conditioner &
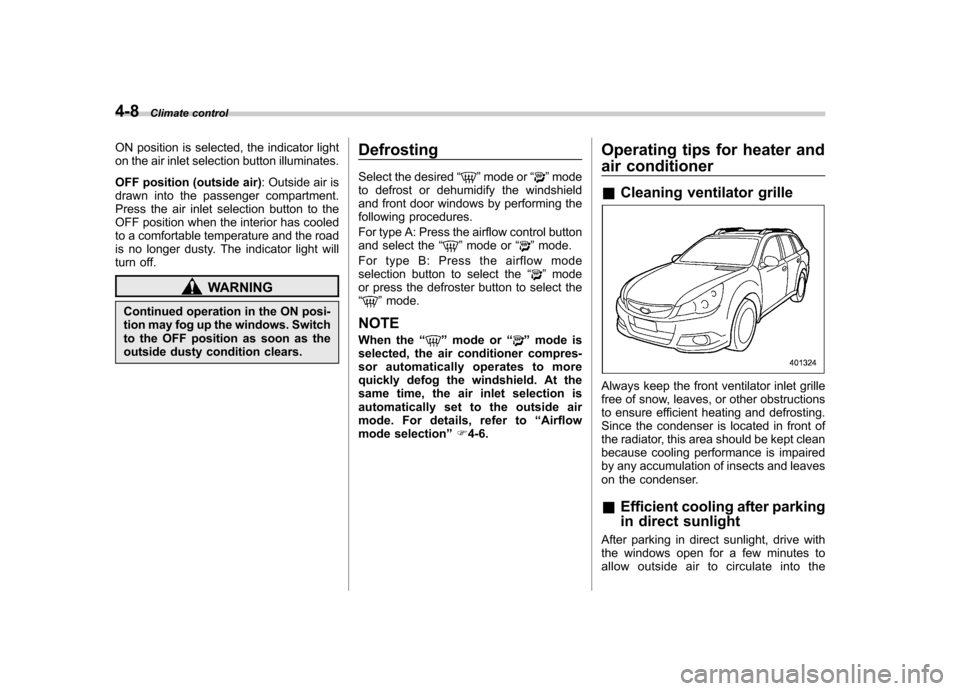
Cleaning ventilator grille
Always keep the front ventilator inlet grille
free of snow, leaves, or other obstructions
to ensure efficient heating and defrosting.
Since the condenser is located in front of
the radiator, this area should be kept clean
because cooling performance is impaired
by any accumulation of insects and leaves
on the condenser. &Efficient cooling after parking
in direct sunlight
After parking in direct sunlight, drive with
the windows open for a few minutes to
allow outside air to circulate into the
Page 198 of 474

mode after approximately 10 seconds. &HD Radio
®Technology (Digi-
tal AM and FM Radio) (type C audio)
! HD Radio Technology Information
! What is HD Radio
®Technology and
how does it work?
HD Radio
TMTechnology is the digital
evolution of analog AM/FM radio. Your
radio product has a special receiver which
allows it to receive digital broadcasts
(where available) in addition to the analog
broadcasts it already receives. Digital
broadcasts have better sound quality than
analog broadcasts as digital broadcasts
provide free, crystal clear audio with no static or distortion. For more information,
and a guide to available radio stations and
programming, please visit www.hdradio.com. !
Using HD Radio
®Technology
As a consumer works through the analog
radio stations, (where applicable) the radio
receiver will automatically tune from an
analog signal to a digital signal within five
seconds. An orange
logo indicator will
be seen on the screen when in digital. NOTE The
logo will first appear in a gray
color indicating the station is indeed
(an analog and) a digital station. Once
the digital signal is acquired, the logo
will be a bright orange color. ! Benefits of HD Radio
®Technology
1.
Information: The song title, artist name
and music genre will appear on the screen
when available by the radio station. 2.
Multicast: On the FM radio frequency
most digital stations have “multiple ”or
supplemental programs on one FM sta-
tion. When the consumer pushes the
multicast button, they will move between
the multiple unique program content. 3.
Clear Reception: Unlike analog radio
signals, digital signals do not pass along static, hiss or pops. !
HD Radio
®Technology Trouble-
shooting
1.
Station blending: When acquiring a
radio station, as usual, the radio will play
content in analog. If the radio verifies the
broadcast is an HD Radio Technology
station, it will then shift or blend smoothly
to a digital signal within five seconds.
Depending on the station quality, the
consumer may hear a slight sound change
when the station switches from the analog
to digital signal. 2.
Reception area: Topography of the
earth can affect radio signals. For exam-
ple, when a vehicle is behind a hill or large
building from the radio tower location
analog reception will be poor and it is
highly likely that HD Radio reception will
not occur. When a consumer is on the
multicast or supplemental programming
(HD2/HD3/HD4) and the reception is
weak or lost, this will result in a “mute ”
condition. On the main or HD1 program, a
weak or lost digital signal will result in the
playing of an analog signal until a digital
signal is available. 3.
Station issues: In order to provide the
best experience, a contact form has been
developed to report any radio station
issues found while listening to a broad- Audio
5-15
– CONTINUED –
Page 215 of 474

5-32Audio
.You cannot use a DualDisc in the CD
player. If you insert a DualDisc into the
player, the disc may not come out again,
possibly causing the player to malfunction. . In cold and/or rainy weather, dew can
form inside the CD player, preventing
normal operation. If this happens, eject
the CD and wait for the player to dry out. . Skipping may occur when the CD
player is subjected to severe vibration
(for example, when the vehicle is driven
on a rough surface). . To remove a disc from the case, press
the center of the case and hold both
edges of the disc. If the disc surface is
touched directly, contamination could
cause poor tone quality. Do not touch the
disc surface. . Use a clean disc whenever possible. If there are deposits, wipe the disc surface
from the center outward with a dry, soft
cloth. Be sure not to use a rough cloth,
thinner, benzine, alcohol, etc. .
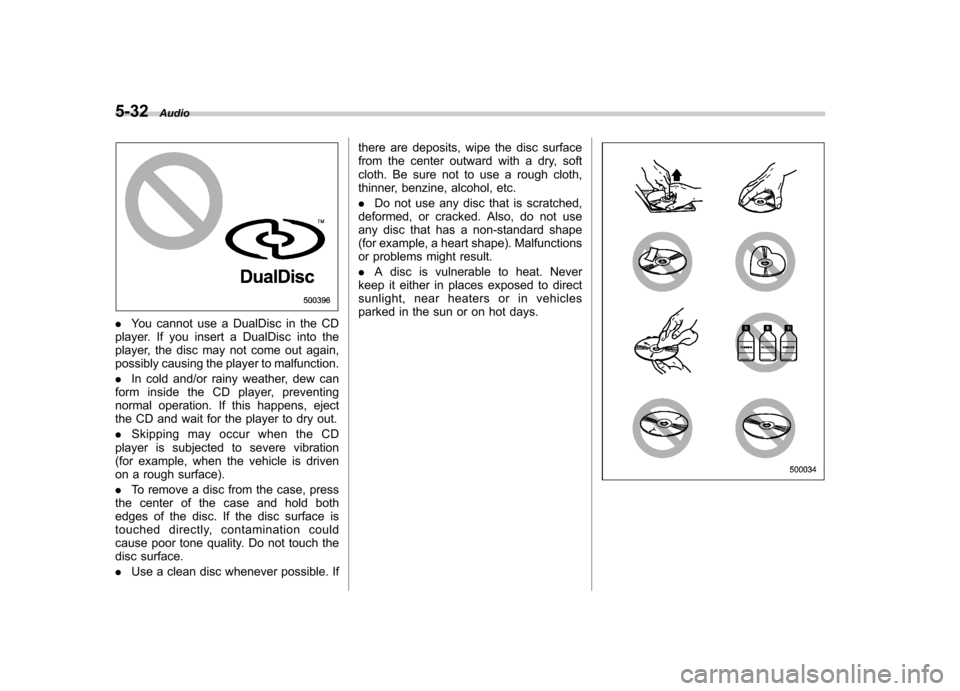
Do not use any disc that is scratched,
deformed, or cracked. Also, do not use
any disc that has a non-standard shape
(for example, a heart shape). Malfunctions
or problems might result. . A disc is vulnerable to heat. Never
keep it either in places exposed to direct
sunlight, near heaters or in vehicles
parked in the sun or on hot days.
Page 254 of 474

Interior light......................................................... 6-2
Dome light .......................................................... 6-2
Map light ............................................................. 6-2
Cargo area light (Outback) ................................... 6-3
Sun visors ........................................................... 6-4
Sun visor extension plate .................................... 6-4
Vanity mirror with light ........................................ 6-5
Storage compartment ......................................... 6-5
Glove box ........................................................... 6-6
Center console box ............................................. 6-6
Overhead console ............................................... 6-8
Pocket (if equipped) ............................................ 6-8
Cup holder ........................................................... 6-8
Front passenger ’s cup holder .............................. 6-9
Rear passenger ’s cup holder ............................... 6-9
Bottle holders ...................................................... 6-9
Accessory power outlets ................................... 6-10 Ashtray (if equipped)
......................................... 6-12
Coat hook ........................................................... 6-13
Shopping bag hook ........................................... 6-13
Legacy .............................................................. 6-13
Outback ............................................................ 6-14
Floor mat ............................................................ 6-14
Cargo area cover (Outback –if equipped) ....... 6-15
Using the cover ................................................. 6-15
To remove the cover housing ... .......................... 6-16
Stowage of the cargo area cover ........................ 6-16
To install the cover housing ............................... 6-17
Convenient tie-down hooks (Outback) ............. 6-17
Under-floor storage compartment .................... 6-18
Rear view camera (if equipped) ........................ 6-19
How to use the rear view camera ....................... 6-20
Viewing range on the screen .............................. 6-21
Help line ............................................................ 6-22 Interior equipment
6