Page 221 of 416
5-40Audio
First menu Second menu Third menu Details Page
SETUP SECURITY SET PIN Setting a PIN code 5-46
PHBK LOCK* Locking the phonebook 5-46
PHBK UNLOCK* Unlocking the phonebook 5-46
GO BACK
PHONE SETUP PAIR PHONE Registering a new cell phone 5-38
SELECT PHONE Selecting a cell phone to be used 5-47
CHANGE NAME Changing the registered name of the cell phone 5-47
LIST PHONES Showing the list of the registered cell phones 5-47
SET PASSKEY Changing the pass key 5-48
DELETE Deleting the registered cell phone 5-48
GO BACK
SYSTEM SETUP GUIDANCE VOL Setting the volume of the voice guidance 5-48
INITIALIZE Initialization 5-48
SEL LANGUAGE Selecting the language (using the Hands-free system) 5-48
GO BACK
GO BACK —
*: If a PIN code is not registered, the menu described in the chart is not available.
Page 223 of 416

5-42Audio
38 security sécurité
39 pair phone jumeler le télé- phone
40 change name modifier le nom
41 select phone sélectionner le tél- éphone
42 list phones lister les télé-phones
43 set pass key configurer le
passe-partout
44 add entry ajouter l ’entrée
45 delete entry supprimer l ’entrée
46 delete speed dial supprimer compo-
sition abrégée
47 by voice vocalement
48 by phone par téléphone
49 call history historique d ’appels
50 set speed dial configurer compo-
sition abrégée
51 incoming entrant
52 outgoing sortant
53 list names lister les noms
54 set PIN configurer NIP
55 phone book lock verrouiller le regis- tre!
Updating phonebook data
! Registering by voice
1. Select the “BY VOICE ”menu.
2. Press the talk switch
.
3. Say the phone number to be regis- tered.
4. Select the “CONFIRM ”menu.
5. Perform either of the following proce- dures. –Select the “RECORD NAME ”menu
by operating the “TUNE/TRACK/CH ”
dial. – Press the talk switch
.
6. Say the name (voice tag) to be registered.
7. Select the “CONFIRM ”menu.
– Then “STORED ”is displayed and
the mode changes to the registering
speed dial mode. Refer to “Registering
speed dial ”F 5-43.
! Registering by phone
1. Select the “BY PHONE ”menu.
2. Select the “CONFIRM ”menu.
– Then “TRANSFER ”is displayed.
3. Transfer the data from the cell phone.
For details about transferring the data,
refer to the instruction manual of the cellphone. 4. Perform either of the following proce-dures.
–Select the “RECORD NAME ”menu
by operating the “TUNE/TRACK/CH ”
dial. – Press the talk switch
.
5. Say the name (voice tag) to be registered.
6. Select the “CONFIRM ”menu.
– Then “STORED ”is displayed and
the mode changes to the registering
speed dial mode. Refer to “Registering
speed dial ”F 5-43.
! Registering by inputting manually
1. Select the “MANUAL INPUT ”menu by
operating the “TUNE/TRACK/CH ”dial.
2. Input the phone number to be regis-tered.
3. Perform either of the following proce- dures. –Select the “RECORD NAME ”menu
by operating the “TUNE/TRACK/CH ”
dial. – Press the talk switch
.
4. Say the name (voice tag) to be registered.
5. Select the “CONFIRM ”menu.
– Then “STORED ”is displayed and
the mode changes to the registering
speed dial mode. Refer to “Registering
Page 227 of 416

5-46Audio
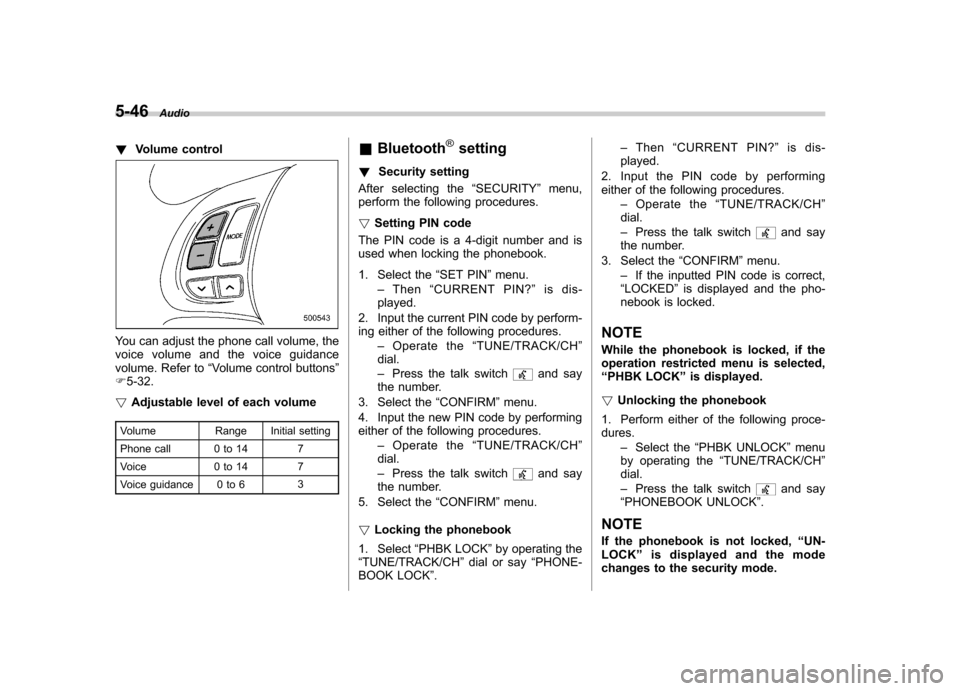
!Volume control
You can adjust the phone call volume, the
voice volume and the voice guidance
volume. Refer to “Volume control buttons ”
F 5-32.
! Adjustable level of each volume
Volume Range Initial setting
Phone call 0 to 14 7
Voice 0 to 14 7
Voice guidance 0 to 6 3&
Bluetooth
®setting
! Security setting
After selecting the “SECURITY ”menu,
perform the following procedures. ! Setting PIN code
The PIN code is a 4-digit number and is
used when locking the phonebook.
1. Select the “SET PIN ”menu.
– Then “CURRENT PIN? ”is dis-
played.
2. Input the current PIN code by perform-
ing either of the following procedures. –Operate the “TUNE/TRACK/CH ”
dial. – Press the talk switch
and say
the number.
3. Select the “CONFIRM ”menu.
4. Input the new PIN code by performing
either of the following procedures. –Operate the “TUNE/TRACK/CH ”
dial. – Press the talk switch
and say
the number.
5. Select the “CONFIRM ”menu.
! Locking the phonebook
1. Select “PHBK LOCK ”by operating the
“ TUNE/TRACK/CH ”dial or say “PHONE-
BOOK LOCK ”. –
Then “CURRENT PIN? ”is dis-
played.
2. Input the PIN code by performing
either of the following procedures. –Operate the “TUNE/TRACK/CH ”
dial. – Press the talk switch
and say
the number.
3. Select the “CONFIRM ”menu.
– If the inputted PIN code is correct,
“ LOCKED ”is displayed and the pho-
nebook is locked.
NOTE
While the phonebook is locked, if the
operation restricted menu is selected,“ PHBK LOCK ”is displayed.
! Unlocking the phonebook
1. Perform either of the following proce-dures. –Select the “PHBK UNLOCK ”menu
by operating the “TUNE/TRACK/CH ”
dial. – Press the talk switch
and say
“ PHONEBOOK UNLOCK ”.
NOTE
If the phonebook is not locked, “UN-
LOCK ”is displayed and the mode
changes to the security mode.
Page 235 of 416
6-6Interior equipment
! Except STI
A dual cup holder is built into the center
console, beside the parking brake lever. !STI
The dual cup holder is built into the center console near the parking brake lever.
To access the cup holder, pull the lid
toward the rear.
The divider in the cup holder can be pulled
out and inserted in a different position
(further toward the front or rear) to enablecups of different sizes to be held.
NOTE
With the divider taken out, the cup
holder can be used as a storage box.
Page 239 of 416

6-10Interior equipment
Ashtray (if equipped)
CAUTION
. Do not use ashtrays as waste
receptacles or leave a lighted
cigarette in an ashtray. This
could cause a fire.
. Always extinguish matches and
cigarettes before putting them
into the ashtray, and then close
the ashtray securely. If you keep
the ashtray open, the fire of the
cigarette may spread to another
cigarette butt and start a fire.
. Do not put flammable material in
the ashtray.
. Do not leave a lot of cigarette
butts in the ashtray.
NOTE
Particles of ash and tobacco will accu-
mulate around the hinges of the ash-tray ’s inner lid. Clean them off using a
toothbrush or a similar narrow-endedimplement.
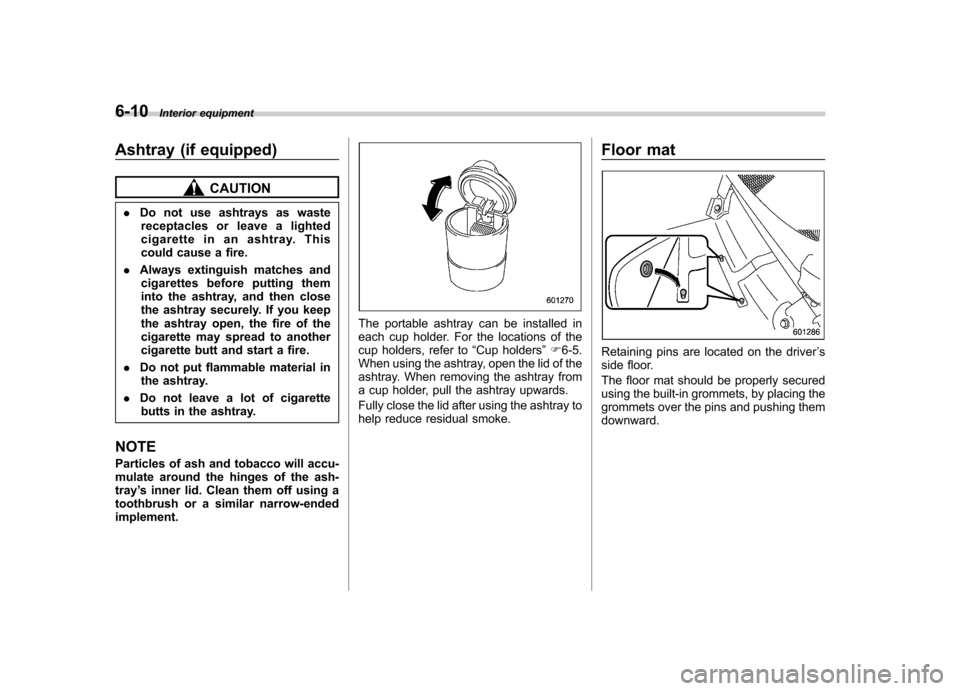
The portable ashtray can be installed in
each cup holder. For the locations of the
cup holders, refer to “Cup holders ”F 6-5.
When using the ashtray, open the lid of the
ashtray. When removing the ashtray from
a cup holder, pull the ashtray upwards.
Fully close the lid after using the ashtray to
help reduce residual smoke. Floor mat
Retaining pins are located on the driver
’s
side floor.
The floor mat should be properly secured
using the built-in grommets, by placing the
grommets over the pins and pushing themdownward.
Page 240 of 416
CAUTION
If the floor mat slips forward and
interferes with the movement of the
pedals during driving, it could cause
an accident. Observe the following
precautions to prevent the floor mat
from slipping forward. . Be sure to use a genuine
SUBARU floor mat designed with
grommets in the correct loca-tions.
. Make sure that the driver ’s floor
mat is placed back in its proper
location and is correctly secured
on its retaining pins. .
Do not use more than one floor
mat. Shopping bag hook (5-door)
CAUTION
Do not hang items on the shopping
bag hook that weigh 6 lbs (3 kg) ormore.
A shopping bag hook is attached to each
side of the cargo area. Interior equipment
6-11
Page 242 of 416
&To install the cover housing
1. Shorten the bar.
2. Insert the projections located on the
both ends of the sleeve into the recesses
of the retainers. Cargo tie-down hooks (5-door)The cargo area is equipped with four tie-
down hooks so that cargo can be secured
with a cargo net or ropes.
When using the tie-down hooks, turn them
down out of the storing recesses. When
not in use, put the hooks up into the
storing recesses.
CAUTION
The cargo tie-down hooks are de-
signed only for securing light cargo.
Never try to secure cargo that
exceeds the capacity of the hooks.
The maximum load capacity is 44
lbs (20 kg) per hook. Interior equipment
6-13
Page 249 of 416

7-6Starting and operating
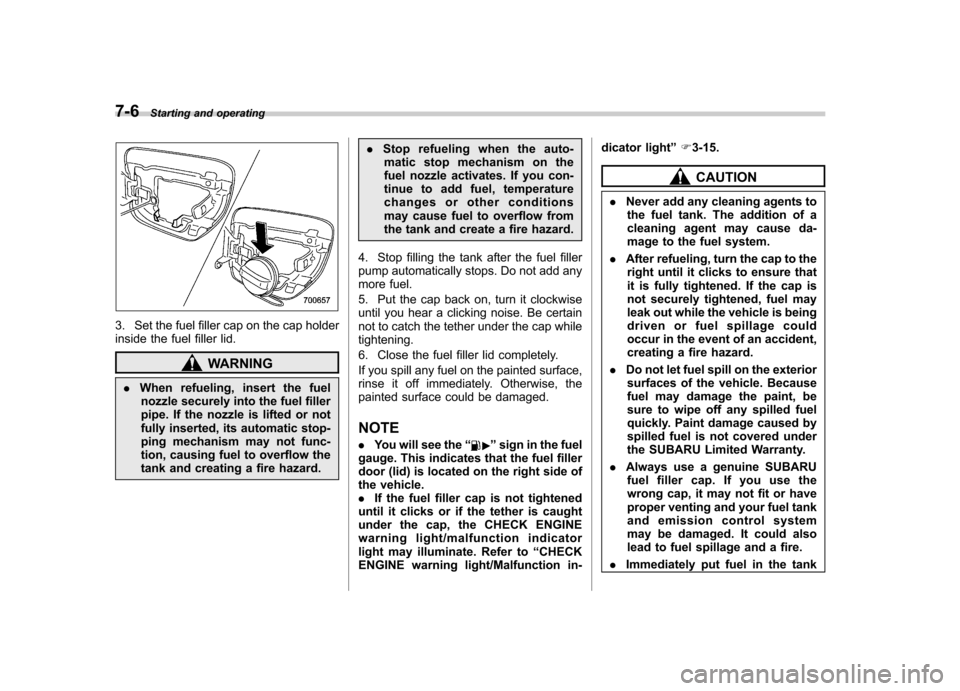
3. Set the fuel filler cap on the cap holder
inside the fuel filler lid.
WARNING
. When refueling, insert the fuel
nozzle securely into the fuel filler
pipe. If the nozzle is lifted or not
fully inserted, its automatic stop-
ping mechanism may not func-
tion, causing fuel to overflow the
tank and creating a fire hazard. .
Stop refueling when the auto-
matic stop mechanism on the
fuel nozzle activates. If you con-
tinue to add fuel, temperature
changes or other conditions
may cause fuel to overflow from
the tank and create a fire hazard.
4. Stop filling the tank after the fuel filler
pump automatically stops. Do not add any
more fuel.
5. Put the cap back on, turn it clockwise
until you hear a clicking noise. Be certain
not to catch the tether under the cap whiletightening.
6. Close the fuel filler lid completely.
If you spill any fuel on the painted surface,
rinse it off immediately. Otherwise, the
painted surface could be damaged. NOTE . You will see the “
”sign in the fuel
gauge. This indicates that the fuel filler
door (lid) is located on the right side of
the vehicle.. If the fuel filler cap is not tightened
until it clicks or if the tether is caught
under the cap, the CHECK ENGINE
warning light/malfunction indicator
light may illuminate. Refer to “CHECK
ENGINE warning light/Malfunction in- dicator light
”F 3-15.
CAUTION
. Never add any cleaning agents to
the fuel tank. The addition of a
cleaning agent may cause da-
mage to the fuel system.
. After refueling, turn the cap to the
right until it clicks to ensure that
it is fully tightened. If the cap is
not securely tightened, fuel may
leak out while the vehicle is being
driven or fuel spillage could
occur in the event of an accident,
creating a fire hazard.
. Do not let fuel spill on the exterior
surfaces of the vehicle. Because
fuel may damage the paint, be
sure to wipe off any spilled fuel
quickly. Paint damage caused by
spilled fuel is not covered under
the SUBARU Limited Warranty.
. Always use a genuine SUBARU
fuel filler cap. If you use the
wrong cap, it may not fit or have
proper venting and your fuel tank
and emission control system
may be damaged. It could also
lead to fuel spillage and a fire.
. Immediately put fuel in the tank