2012 SUBARU IMPREZA WRX differential
[x] Cancel search: differentialPage 261 of 416
7-18Starting and operating
Driver ’s Control Center Dif-
ferential (DCCD) (STI)
WARNING
Always use the utmost care when
driving. Being overconfident be-
cause you are driving a vehicle with
a driver ’s control center differential
could easily lead to a serious acci-dent.
CAUTION
All the indicator lights will flash in
the event that the driver ’s control
center differential has a malfunc-
tion. Have the vehicle inspected by
your SUBARU dealer.
The driver ’s control center differential
allows you to freely change the degree
of limitation of the differential action
(limited slip differential (LSD) torque) of
your vehicle ’s center differential.
By using the center differential control
switch, you can set an initial LSD torque to
match the road surface conditions, driving
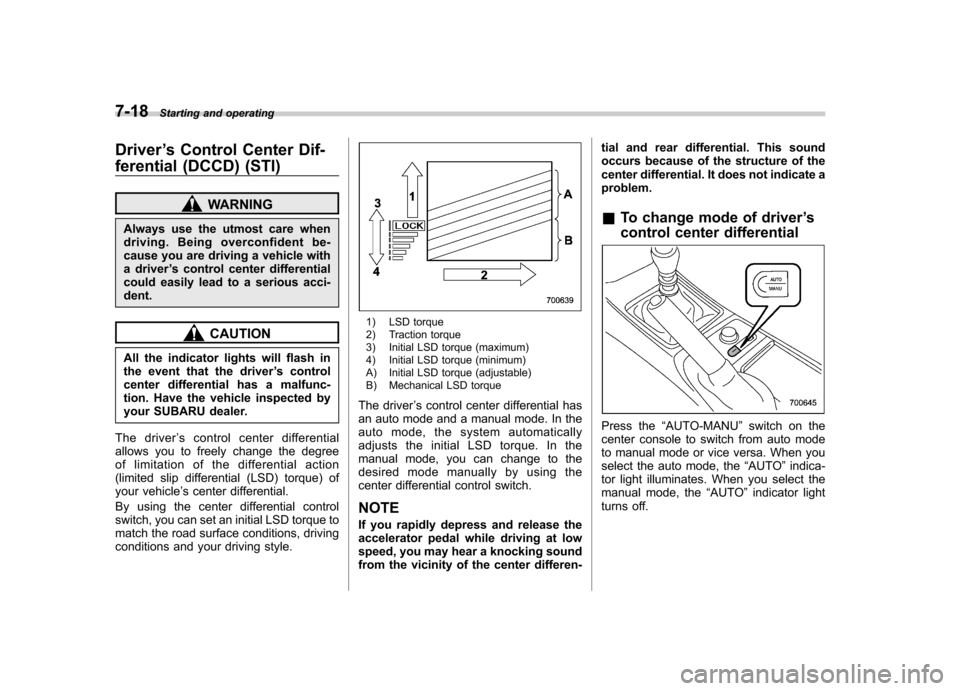
conditions and your driving style.1) LSD torque
2) Traction torque
3) Initial LSD torque (maximum)
4) Initial LSD torque (minimum)
A) Initial LSD torque (adjustable)
B) Mechanical LSD torque
The driver ’s control center differential has
an auto mode and a manual mode. In the
auto mode, the system automatically
adjusts the initial LSD torque. In the
manual mode, you can change to the
desired mode manually by using the
center differential control switch.
NOTE
If you rapidly depress and release the
accelerator pedal while driving at low
speed, you may hear a knocking sound
from the vicinity of the center differen- tial and rear differential. This sound
occurs because of the structure of the
center differential. It does not indicate aproblem. &
To change mode of driver ’s
control center differential
Press the “AUTO-MANU ”switch on the
center console to switch from auto mode
to manual mode or vice versa. When you
select the auto mode, the “AUTO ”indica-
tor light illuminates. When you select the
manual mode, the “AUTO ”indicator light
turns off.
Page 262 of 416
&Auto mode
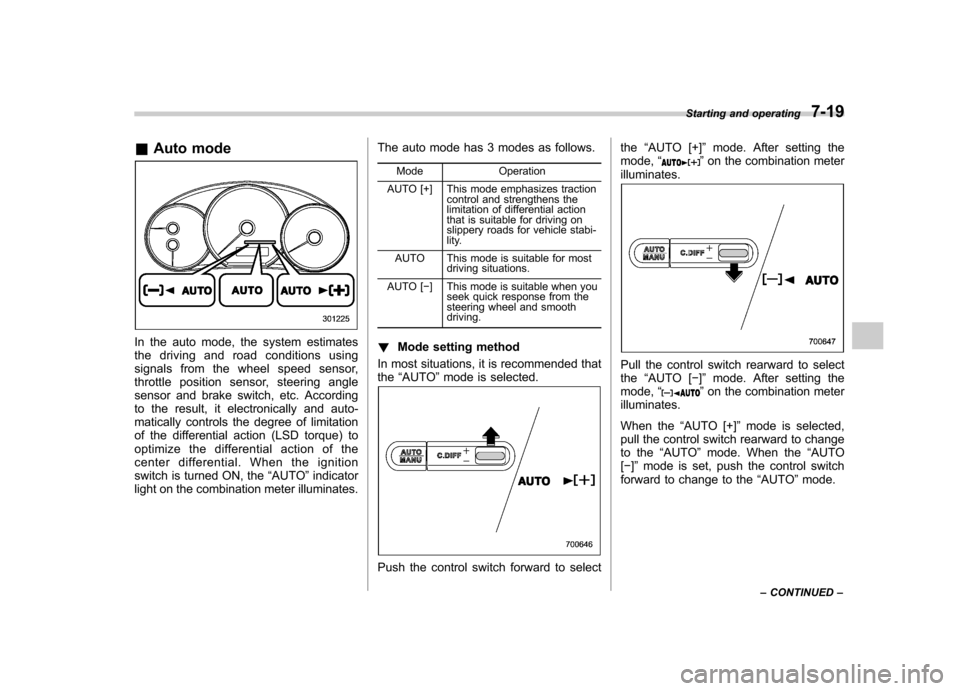
In the auto mode, the system estimates
the driving and road conditions using
signals from the wheel speed sensor,
throttle position sensor, steering angle
sensor and brake switch, etc. According
to the result, it electronically and auto-
matically controls the degree of limitation
of the differential action (LSD torque) to
optimize the differential action of the
center differential. When the ignition
switch is turned ON, the “AUTO ”indicator
light on the combination meter illuminates. The auto mode has 3 modes as follows.
Mode Operation
AUTO [+] This mode emphasizes traction control and strengthens the
limitation of differential action
that is suitable for driving on
slippery roads for vehicle stabi-
lity.
AUTO This mode is suitable for most driving situations.
AUTO [ �] This mode is suitable when you
seek quick response from the
steering wheel and smooth driving.
! Mode setting method
In most situations, it is recommended that the “AUTO ”mode is selected.
Push the control switch forward to select the
“AUTO [+] ”mode. After setting the
mode, “
”on the combination meter
illuminates.
Pull the control switch rearward to select the “AUTO [ �]” mode. After setting the
mode, “
”on the combination meter
illuminates.
When the “AUTO [+] ”mode is selected,
pull the control switch rearward to change
to the “AUTO ”mode. When the “AUTO
[ � ]” mode is set, push the control switch
forward to change to the “AUTO ”mode.
Starting and operating
7-19
– CONTINUED –
Page 263 of 416
7-20Starting and operating
& Manual mode
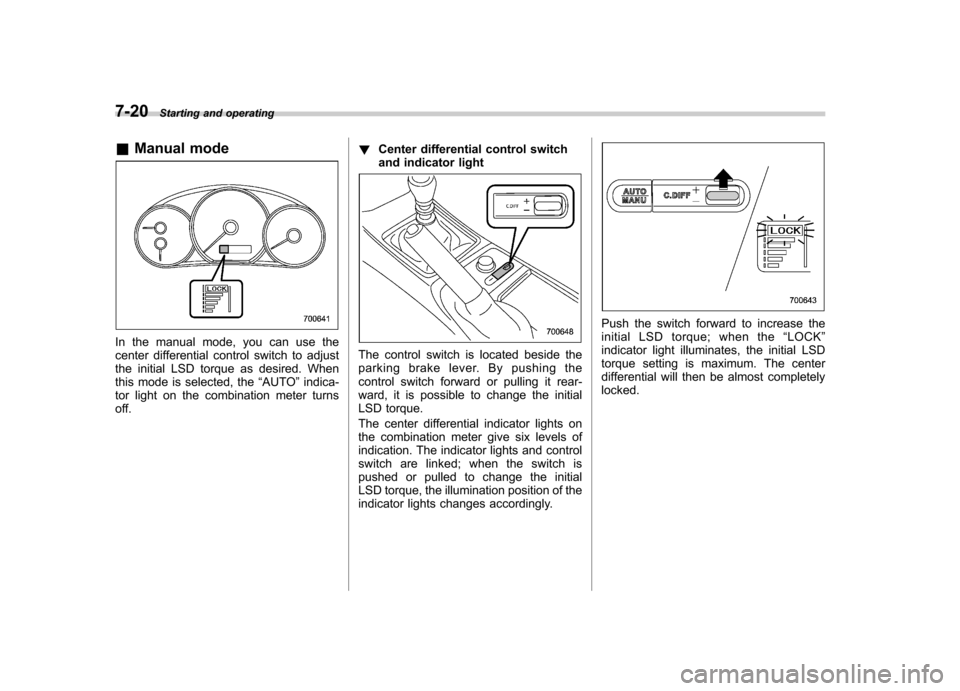
In the manual mode, you can use the
center differential control switch to adjust
the initial LSD torque as desired. When
this mode is selected, the “AUTO ”indica-
tor light on the combination meter turns
off. !
Center differential control switch
and indicator lightThe control switch is located beside the
parking brake lever. By pushing the
control switch forward or pulling it rear-
ward, it is possible to change the initial
LSD torque.
The center differential indicator lights on
the combination meter give six levels of
indication. The indicator lights and control
switch are linked; when the switch is
pushed or pulled to change the initial
LSD torque, the illumination position of the
indicator lights changes accordingly.
Push the switch forward to increase the
initial LSD torque; when the “LOCK ”
indicator light illuminates, the initial LSD
torque setting is maximum. The center
differential will then be almost completelylocked.
Page 264 of 416
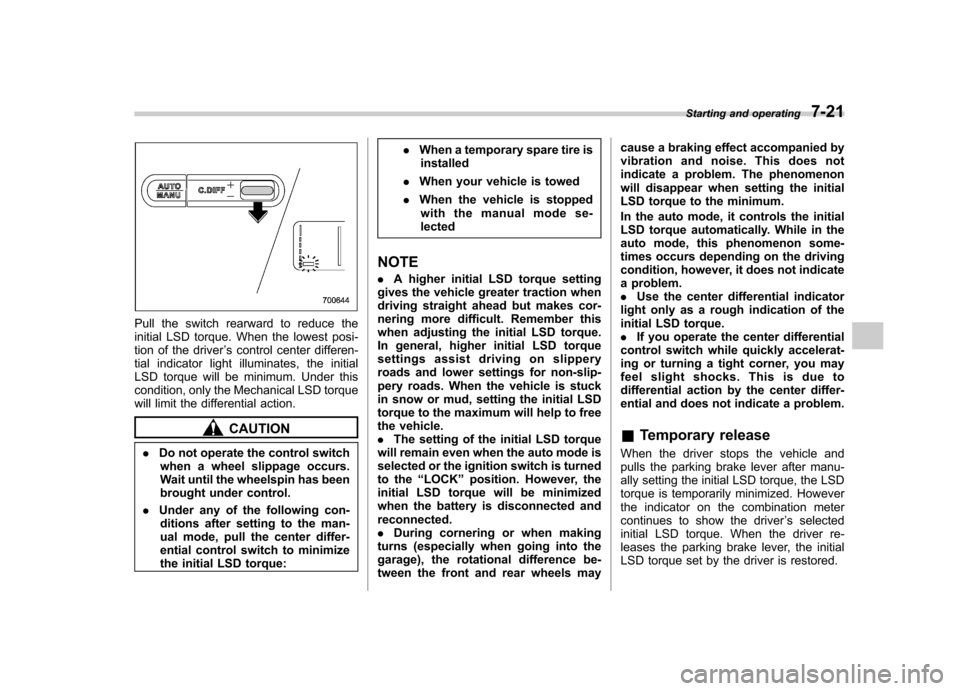
Pull the switch rearward to reduce the
initial LSD torque. When the lowest posi-
tion of the driver’s control center differen-
tial indicator light illuminates, the initial
LSD torque will be minimum. Under this
condition, only the Mechanical LSD torque
will limit the differential action.
CAUTION
. Do not operate the control switch
when a wheel slippage occurs.
Wait until the wheelspin has been
brought under control.
. Under any of the following con-
ditions after setting to the man-
ual mode, pull the center differ-
ential control switch to minimize
the initial LSD torque: .
When a temporary spare tire is
installed
. When your vehicle is towed
. When the vehicle is stopped
with the manual mode se-lected
NOTE . A higher initial LSD torque setting
gives the vehicle greater traction when
driving straight ahead but makes cor-
nering more difficult. Remember this
when adjusting the initial LSD torque.
In general, higher initial LSD torque
settings assist driving on slippery
roads and lower settings for non-slip-
pery roads. When the vehicle is stuck
in snow or mud, setting the initial LSD
torque to the maximum will help to free
the vehicle.. The setting of the initial LSD torque
will remain even when the auto mode is
selected or the ignition switch is turned
to the “LOCK ”position. However, the
initial LSD torque will be minimized
when the battery is disconnected andreconnected.. During cornering or when making
turns (especially when going into the
garage), the rotational difference be-
tween the front and rear wheels may cause a braking effect accompanied by
vibration and noise. This does not
indicate a problem. The phenomenon
will disappear when setting the initial
LSD torque to the minimum.
In the auto mode, it controls the initial
LSD torque automatically. While in the
auto mode, this phenomenon some-
times occurs depending on the driving
condition, however, it does not indicate
a problem..
Use the center differential indicator
light only as a rough indication of the
initial LSD torque.. If you operate the center differential
control switch while quickly accelerat-
ing or turning a tight corner, you may
feel slight shocks. This is due to
differential action by the center differ-
ential and does not indicate a problem. & Temporary release
When the driver stops the vehicle and
pulls the parking brake lever after manu-
ally setting the initial LSD torque, the LSD
torque is temporarily minimized. However
the indicator on the combination meter
continues to show the driver ’s selected
initial LSD torque. When the driver re-
leases the parking brake lever, the initial
LSD torque set by the driver is restored. Starting and operating
7-21
Page 267 of 416
7-24Starting and operating
Limited slip differential (LSD) (STI)
The LSD provides optimum distribution of
power according to the difference in
revolutions between the right and left
wheels that may be caused by certain
driving conditions, thereby improving driv-
ing stability on snow-covered, muddy or
other slippery roads or when high speeddriving.
CAUTION
. Never start the engine while a tire
on one side is jacked up, as the
vehicle may move.
. If one tire is spinning in mud,
avoid continued spinning at high
speed as this could adversely
affect the LSD.
. If you use a temporary spare tire
to replace a flat tire, be sure to
use the original temporary spare
tire stored in the vehicle. Using
other sizes will adversely affect
the LSD. Power steering
The power steering system operates only
when the engine is running.
If you lose power steering assist because
the engine stops or the system fails to
function, you can steer but it will take
much more effort.
CAUTION
Do not hold the steering wheel at the
fully locked position left or right for
more than 5 seconds. This may
damage the power steering pump.
NOTE
Right after the engine has been started
and before it has warmed up, you may
hear a noise coming from areas adja-
cent to the power steering pump which
is located at the right-front area of the
engine compartment. This noise is
normal. It does not indicate power
steering system trouble. Braking &
Braking tips
WARNING
Never rest your foot on the brake
pedal while driving. This can cause
dangerous overheating of the
brakes and needless wear on the
brake pads and linings.
! When the brakes get wet
When driving in rain or after washing the
vehicle, the brakes may get wet. As a
result, brake stopping distance will be
longer. To dry the brakes, drive the vehicle
at a safe speed while lightly depressing
the brake pedal to heat up the brakes. ! Use of engine braking
Remember to make use of engine braking
in addition to foot braking. When descend-
ing a grade, if only the foot brake is used,
the brakes may start working improperly
because of brake fluid overheating,
caused by overheated brake pads. To
help prevent this, shift into a lower gear to
get stronger engine braking. ! Braking when a tire is punctured
Do not depress the brake pedal suddenly
when a tire is punctured. This could cause
Page 309 of 416
9-12In case of emergency
Engine overheating
WARNING
Never attempt to remove the radia-
tor cap until the engine has been
shut off and has fully cooled down.
When the engine is hot, the coolant
is under pressure. Removing the
cap while the engine is still hot
could release a spray of boiling hot
coolant, which could burn you very
seriously.
If the engine overheats, safely pull off the
road and stop the vehicle in a safe place. & If steam is coming from the
engine compartment
Turn off the engine and get everyone
away from the vehicle until it cools down. & If no steam is coming from
the engine compartment
NOTE
For details about how to check the
coolant level or how to add coolant,
refer to “Engine coolant ”F 11-12.
1. Keep the engine running at idlingspeed. 2. Open the hood to ventilate the engine
compartment. Refer to
“Engine hood ”
F 11-5.
Confirm that the cooling fan is turning. If
the fan is not turning, immediately turn off
the engine and contact your authorized
dealer for repair.
3. After the engine coolant temperature
has dropped, turn off the engine.
If temperature gauge stays in the over-
heated zone, turn off the engine. Refer to“ Temperature gauge ”F 3-10.
4. After the engine has fully cooled down,
check the coolant level in the reservetank.
If the coolant level is below the “LOW ”
mark, add coolant up to the “FULL ”mark.
5. If there is no coolant in the reserve
tank, add coolant to the reserve tank.
Then remove the radiator cap and fill the
radiator with coolant.
If you remove the radiator cap from a hot
radiator, first wrap a thick cloth around the
radiator cap, then turn the cap counter-
clockwise slowly without pressing down
until it stops. Release the pressure from
the radiator. After the pressure has been
fully released, remove the cap by pressing
down and turning it. Towing
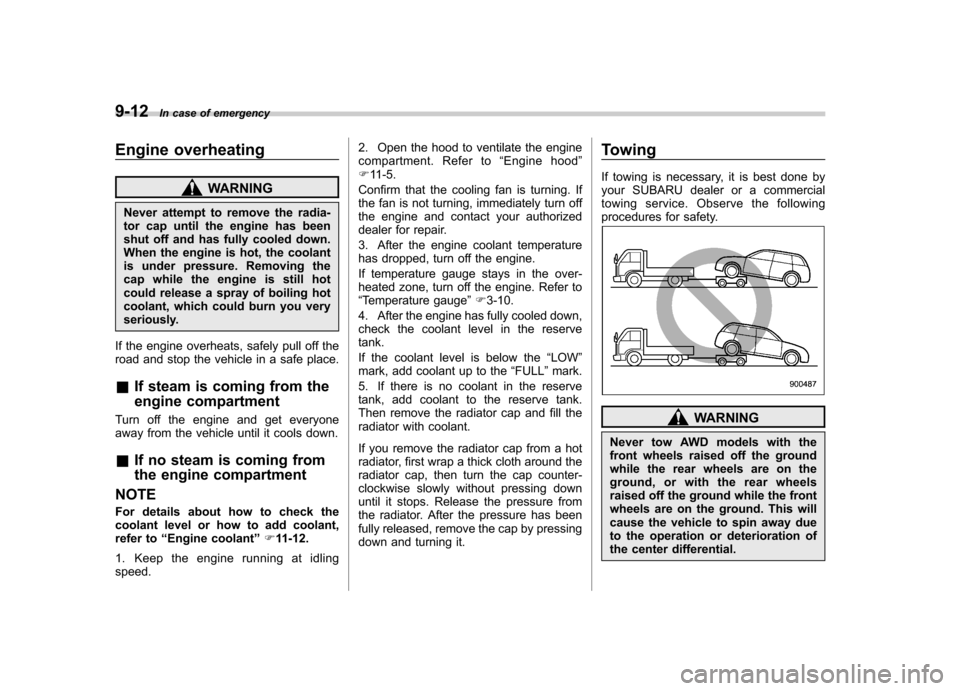
If towing is necessary, it is best done by
your SUBARU dealer or a commercial
towing service. Observe the following
procedures for safety.
WARNING
Never tow AWD models with the
front wheels raised off the ground
while the rear wheels are on the
ground, or with the rear wheels
raised off the ground while the front
wheels are on the ground. This will
cause the vehicle to spin away due
to the operation or deterioration of
the center differential.
Page 322 of 416

Maintenance schedule....................................... 11-3
Maintenance precautions ................................... 11-3
Before checking or servicing in the engine compartment .................................................... 11-4
When checking or servicing in the engine compartment .................................................... 11-4
When checking or servicing in the engine compartment while the engine is running .......... 11-5
Engine hood ....................................................... 11-5
Engine compartment overview .......................... 11-6
Turbo models except STI .................................... 11-6
STI..................................................................... 11-7
Engine oil ............................................................ 11-8
Checking the oil level ......................................... 11-8
Changing the oil and oil filter .............................. 11-9
Recommended grade and viscosity .................. 11-10
Synthetic oil ..................................................... 11-10
Cooling system ................................................ 11-11
Cooling fan, hose and connections ................... 11-11
Engine coolant ................................................. 11-12
Air cleaner element .......................................... 11-13
Replacing the air cleaner element ..................... 11-13
Spark plugs ...................................................... 11-14
Recommended spark plugs .............................. 11-14
Drive belts ........................................................ 11-15
Manual transmission oil .................................. 11-15
Checking the oil level ....................................... 11-15
Recommended grade and viscosity .................. 11-16
Rear differential gear oil .................................. 11-16
Recommended grade and viscosity .................. 11-16Power steering fluid
........................................ 11-17
Checking the fluid level .................................... 11-17
Recommended fluid ......................................... 11-17
Brake fluid ........................................................ 11-18
Checking the fluid level .................................... 11-18
Recommended brake fluid ............................... 11-18
Clutch fluid ....................................................... 11-19
Checking the fluid level .................................... 11-19
Recommended clutch fluid ............................... 11-19
Brake booster .................................................. 11-20
Brake pedal ...................................................... 11-20
Checking the brake pedal free play .................. 11-20
Checking the brake pedal reserve distance....... 11-21
Clutch pedal ..................................................... 11-21
Checking the clutch function ............................ 11-21
Checking the clutch pedal free play .................. 11-21
Hill start assist system .................................... 11-22
Replacement of brake pad and lining ............ 11-22
Breaking-in of new brake pads and linings ....... 11-22
Parking brake stroke ....................................... 11-23
Tires and wheels .............................................. 11-23
Types of tires ................................................... 11-23
Tire pressure monitoring system (TPMS) (if equipped) ...................................................... 11-24
Tire inspection ................................................. 11-25
Tire pressures and wear .................................. 11-25
Wheel balance ................................................. 11-27
Wear indicators ............................................... 11-28
Tire rotation direction mark .............................. 11-28
Tire rotation ..................................................... 11-29
Maintenance and service
11
Page 337 of 416
11-16Maintenance and service
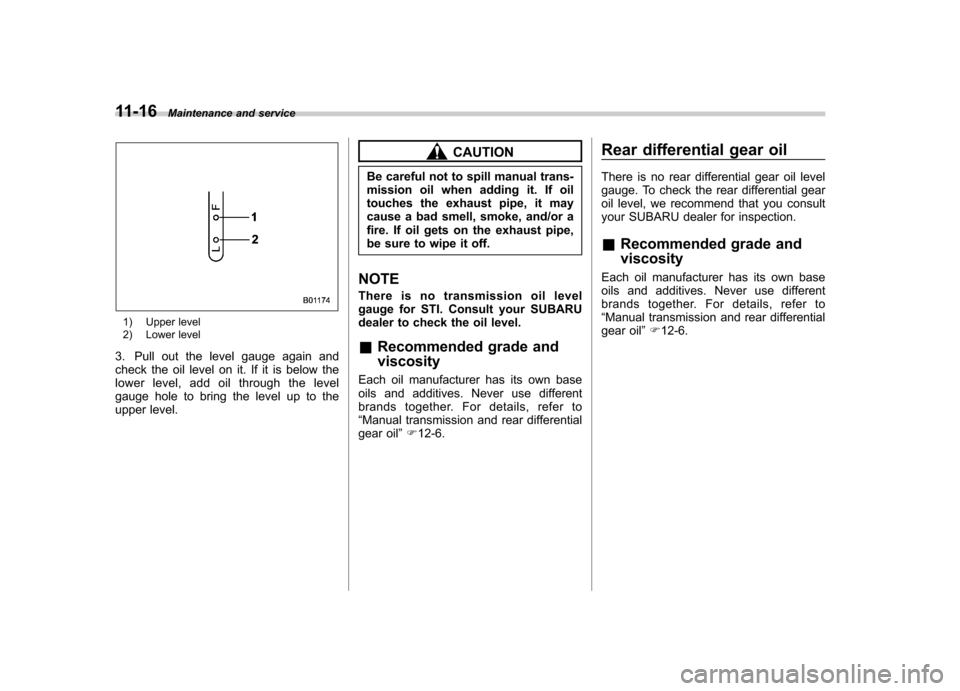
1) Upper level
2) Lower level
3. Pull out the level gauge again and
check the oil level on it. If it is below the
lower level, add oil through the level
gauge hole to bring the level up to the
upper level.
CAUTION
Be careful not to spill manual trans-
mission oil when adding it. If oil
touches the exhaust pipe, it may
cause a bad smell, smoke, and/or a
fire. If oil gets on the exhaust pipe,
be sure to wipe it off.
NOTE
There is no transmission oil level
gauge for STI. Consult your SUBARU
dealer to check the oil level. & Recommended grade and viscosity
Each oil manufacturer has its own base
oils and additives. Never use different
brands together. For details, refer to“ Manual transmission and rear differential
gear oil ”F 12-6. Rear differential gear oil
There is no rear differential gear oil level
gauge. To check the rear differential gear
oil level, we recommend that you consult
your SUBARU dealer for inspection. &
Recommended grade and viscosity
Each oil manufacturer has its own base
oils and additives. Never use different
brands together. For details, refer to“ Manual transmission and rear differential
gear oil ”F 12-6.