2012 SKODA CITIGO ABS
[x] Cancel search: ABSPage 63 of 157

Uphill start assist
The uphill start assist makes it easier to start off on steep hills. The system holds
the brake pressure produced by the activation of the brake pedal for approx.
2 seconds after the brake pedal is released. The driver can therefore move his
foot from the brake pedal to the accelerator pedal and start off on the slope,
without having to actuate the handbrake. The brake pressure drops gradually the
more you operate the accelerator pedal. If the vehicle does not start off within 2
seconds, it starts to roll back.
The uphill start assist is active as of a 5
% slope, if the driver door is closed. It is
always active on slopes when in forward or reverse start off. When driving down-
hill, it is inactive. ÐAntilock brake system (ABS)
First read and observe the introductory information and safety warn-
ings on page 58.
ABS prevents the wheels locking when braking. Thus helping the driver to main-
tain control of the vehicle.
The intervention of the ABS is noticeable from the pulsating movements of the
brake pedal which is accompanied by noises.
Do not reduce the pressure on the brake pedal during the intervention of the
ABS. The ABS deactivates if the brake pedal is released. Never interrupt the appli-
cation of the brakes during the intervention of the ABS! ÐTraction control (TC)
First read and observe the introductory information and safety warn-
ings on page 58.
If the wheels are slipping, the TCS adapts the engine speed to the conditions of
the road surface. The TCS makes it much easier to start off, accelerate and climb
steep hills even if the conditions of the road surface are unfavourable.
During an intervention of the system, the warning light flashes in the instru-
ment cluster.
If there is a fault in the TCS, the warning light then lights up in the instrument
cluster » page 17 . Ð
ä
ä Electronic differential lock (EDL)
First read and observe the introductory information and safety warn-
ings on page 58.
If one of the wheels starts to spin, the EDL system brakes the spinning wheel and
transfers the driving force to the other wheels. This ensures the stability of the
vehicle and a quick journey.
The EDL switches off automatically if unusually severe stresses exist in order to
avoid excessive heat generation in the disc brake on the wheel which is being
braked. The vehicle can continue to be driven and has the same characteristics as
a vehicle not fitted with EDL. The EDL switches on again automatically as soon as
the brake has cooled down. Ð Shifting (manual gearbox)
Fig. 65
Shift pattern of the 5-speed
manual gearbox
Always depress the clutch pedal fully when changing gear, to prevent excessive
wear of the clutch.
The gearshift indicator must be observed when changing gear » page 10.
Only engage reverse gear when the vehicle is stationary. Depress the clutch pedal
and hold it fully depressed. Wait a moment before reverse gear is engaged to
avoid any shift noises.
The reversing lights will come on once reverse gear is engaged, provided the igni-
tion is on. WARNING
Never engage reverse gear when driving – risk of accident! £
ä
61
Starting-off and Driving
Page 80 of 157
Seat belts
Seat belts
ä
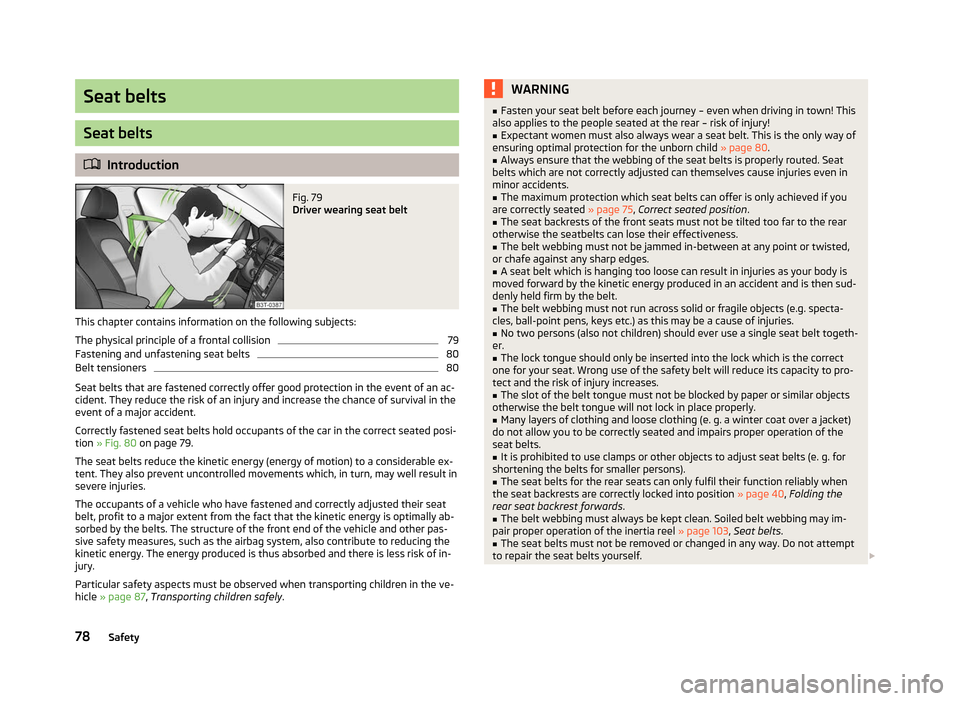
Introduction Fig. 79
Driver wearing seat belt
This chapter contains information on the following subjects:
The physical principle of a frontal collision 79
Fastening and unfastening seat belts 80
Belt tensioners 80
Seat belts that are fastened correctly offer good protection in the event of an ac-
cident. They reduce the risk of an injury and increase the chance of survival in the
event of a major accident.
Correctly fastened seat belts hold occupants of the car in the correct seated posi-
tion » Fig. 80 on page 79.
The seat belts reduce the kinetic energy (energy of motion) to a considerable ex-
tent. They also prevent uncontrolled movements which, in turn, may well result in
severe injuries.
The occupants of a vehicle who have fastened and correctly adjusted their seat
belt, profit to a major extent from the fact that the kinetic energy is optimally ab-
sorbed by the belts. The structure of the front end of the vehicle and other pas-
sive safety measures, such as the airbag system, also contribute to reducing the
kinetic energy. The energy produced is thus absorbed and there is less risk of in-
jury.
Particular safety aspects must be observed when transporting children in the ve-
hicle » page 87, Transporting children safely . WARNING
■ Fasten your seat belt before each journey – even when driving in town! This
also applies to the people seated at the rear – risk of injury!
■ Expectant women must also always wear a seat belt. This is the only way of
ensuring optimal protection for the unborn child » page 80.
■ Always ensure that the webbing of the seat belts is properly routed. Seat
belts which are not correctly adjusted can themselves cause injuries even in
minor accidents. ■ The maximum protection which seat belts can offer is only achieved if you
are correctly seated » page 75, Correct seated position .
■ The seat backrests of the front seats must not be tilted too far to the rear
otherwise the seatbelts can lose their effectiveness.
■ The belt webbing must not be jammed in-between at any point or twisted,
or chafe against any sharp edges.
■ A seat belt which is hanging too loose can result in injuries as your body is
moved forward by the kinetic energy produced in an accident and is then sud-
denly held firm by the belt.
■ The belt webbing must not run across solid or fragile objects (e.g. specta-
cles, ball-point pens, keys etc.) as this may be a cause of injuries.
■ No two persons (also not children) should ever use a single seat belt togeth-
er.
■ The lock tongue should only be inserted into the lock which is the correct
one for your seat. Wrong use of the safety belt will reduce its capacity to pro-
tect and the risk of injury increases.
■ The slot of the belt tongue must not be blocked by paper or similar objects
otherwise the belt tongue will not lock in place properly.
■ Many layers of clothing and loose clothing (e. g. a winter coat over a jacket)
do not allow you to be correctly seated and impairs proper operation of the
seat belts. ■ It is prohibited to use clamps or other objects to adjust seat belts (e. g. for
shortening the belts for smaller persons).
■ The seat belts for the rear seats can only fulfil their function reliably when
the seat backrests are correctly locked into position » page 40, Folding the
rear seat backrest forwards. ■ The belt webbing must always be kept clean. Soiled belt webbing may im-
pair proper operation of the inertia reel » page 103, Seat belts.
■ The seat belts must not be removed or changed in any way. Do not attempt
to repair the seat belts yourself. £
78 Safety
Page 81 of 157
WARNING (Continued)
■ Check the condition of all the seat belts on a regular basis. If any damage to
the seat belts, seat belt connections, inertia reel or the lock is detected, the
relevant seat belt must be replaced by a specialist garage.
■ Damaged seat belts which have been subjected to stress in an accident and
were therefore stretched, must be replaced – this is best done by a specialist
garage. The anchorage points of the belts must also be inspected. The an-
chorage points for the belts should also be checked. Note
The national legal requirements must be observed when using seat belts. ÐThe physical principle of a frontal collision
Fig. 80
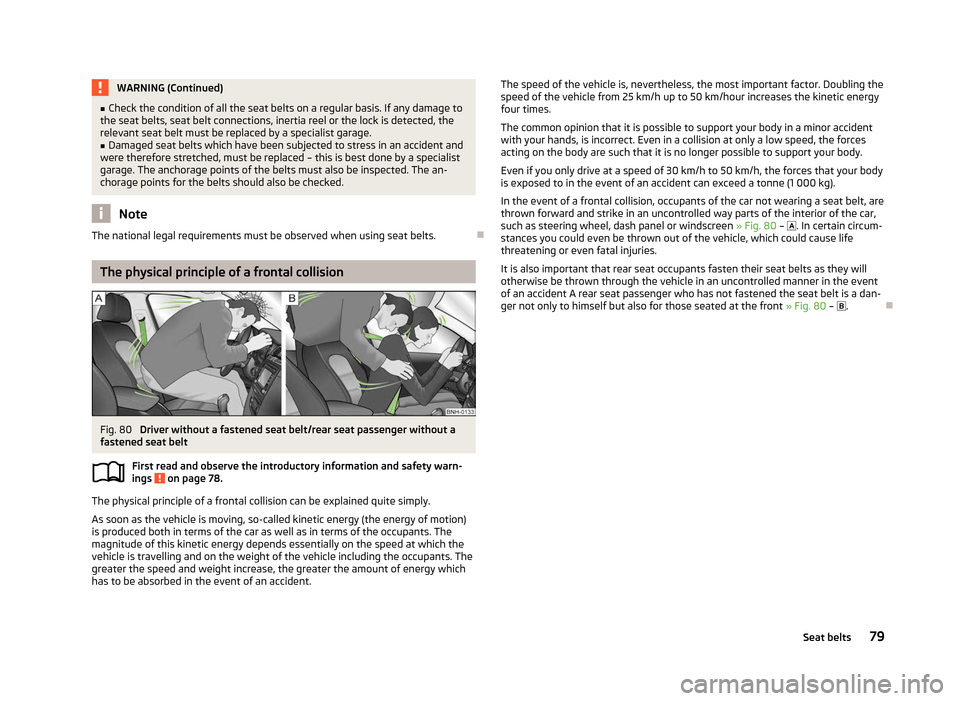
Driver without a fastened seat belt/rear seat passenger without a
fastened seat belt
First read and observe the introductory information and safety warn-
ings on page 78.
The physical principle of a frontal collision can be explained quite simply.
As soon as the vehicle is moving, so-called kinetic energy (the energy of motion)
is produced both in terms of the car as well as in terms of the occupants. The
magnitude of this kinetic energy depends essentially on the speed at which the
vehicle is travelling and on the weight of the vehicle including the occupants. The
greater the speed and weight increase, the greater the amount of energy which
has to be absorbed in the event of an accident. ä The speed of the vehicle is, nevertheless, the most important factor. Doubling the
speed of the vehicle from 25 km/h up to 50 km/hour increases the kinetic energy
four times.
The common opinion that it is possible to support your body in a minor accident
with your hands, is incorrect. Even in a collision at only a low speed, the forces
acting on the body are such that it is no longer possible to support your body.
Even if you only drive at a speed of 30 km/h to 50 km/h, the forces that your body
is exposed to in the event of an accident can exceed a tonne (1 000 kg).
In the event of a frontal collision, occupants of the car not wearing a seat belt, are
thrown forward and strike in an uncontrolled way parts of the interior of the car,
such as steering wheel, dash panel or windscreen » Fig. 80 – . In certain circum-
stances you could even be thrown out of the vehicle, which could cause life
threatening or even fatal injuries.
It is also important that rear seat occupants fasten their seat belts as they will
otherwise be thrown through the vehicle in an uncontrolled manner in the event
of an accident A rear seat passenger who has not fastened the seat belt is a dan-
ger not only to himself but also for those seated at the front » Fig. 80 – . Ð
79
Seat belts
Page 104 of 157
Clean upholstery cover materials and cloth trims on doors, luggage compartment
cover, etc. using specific cleaning agents, e.g., dry foam. Use a soft sponge, brush,
or commercially available microfibre cloth. Use a cloth and a specific cleaning
agent to clean the roof trim.
Some clothing materials, such as dark denim, do, in part, not have sufficient col-
our fastness. This can cause damage or clearly visible discolouration to seat cov-
ers (fabric or leather) even when used correctly. This particularly applies to light
seat covers (fabric or leather). This is not a defect in the seat cover, but poor col-
our fastness of the clothing textiles. ÐFabric covers on electrically heated seats
First read and observe the introductory information and safety warn-
ings on page 97.
Do not clean the seat covers
using moisture as this can damage the seat heating
system.
Use a specific cleaning agent such as dry foam or similar to clean the covers. ÐNatural leather
First read and observe the introductory information and safety warn-
ings on page 97.
Depending on the amount of wear-and-tear, the leather should be cleaned on a
regular basis.
Normal cleaning
Clean soiled areas of the leather with slightly moistened cotton or woollen cloth.
Severe soiling
Ensure that the leather is not soaked through at any point and that no water gets
into the stitching of the seams.
Dry off the leather with a soft, dry cloth.
Removing stains
Remove fresh water-based stains (e.g., coffee, tea, juices, blood) with an absorb-
ent cloth or household cleaning paper. A specific cleaning agent is required for
dried-on stains.
ä
ä
Remove fresh
grease-based stains (e.g. butter, mayonnaise, chocolate, etc.) with
an absorbent cloth, household cleaning paper, or use a suitable cleaner if the
stain has not yet penetrated into the surface.
Use a grease solvent for grease stains which have dried in.
Remove specific stains (e.g. ball-point pens, marker pen, nail varnish, dispersion
paint, shoe polish, etc.) with a special stain remover suitable for leather.
Leather care
Treat the leather roughly every six months with a suitable leather care product.
Apply only a small amount of the cleaning and care product.
Dry off the leather with a soft, dry cloth. CAUTION
■ Avoid leaving the vehicle for lengthy periods in bright sunlight to avoid the
leather from bleaching. If the vehicle is parked in the open for lengthy periods,
protect the leather from direct sunlight by covering it.
■ Sharp-edged objects on items of clothing such as zip fasteners, rivets, sharp-
edged belts, jewellery and pendants may leave permanent scratches or signs of
rubbing on the surface.
■ The use of a mechanical steering wheel lock may damage the leather surface of
the steering wheel. Note
■ Use a care cream with light blocker and impregnation effect on a regular basis
and each time after cleaning. The cream nourishes the leather, allows it to
breathe and keeps it supple and also provides moisture. It also creates surface
protection. ■ Clean the leather every 2 to 3 months, remove any fresh stains as they occur.
■ Also look after the leather dye. Refresh any areas with a special coloured leath-
er cream as required.
■ The leather is a natural material with specific properties. During the use of the
vehicle, minor optical changes can occur on the leather parts of the covers (e. g
wrinkles or creases as a result of the stress of the covers). Ð
102 General Maintenance
Page 116 of 157
There may be an indication of a leak in the brake system, however, if the fluid lev-
el drops significantly within a short time or if it drops below the
“MIN” marking. If
the brake fluid level is too low, this is indicated by the warning light lighting up
in the instrument cluster » page 15, Brake system .WARNING
If the fluid level has dropped below the MIN marking, do not continue your
journey – risk of accident! Seek help from a
ŠKODA specialist garage.ÐChanging the brake fluid
First read and observe the introductory information and safety warn-
ings on page 108.
Brake fluid absorbs moisture. Over time it therefore absorbs moisture from the
environment. Excessive water in the brake fluid may be the cause of corrosion in
the brake system. The water content also lowers the boiling point of the brake
fluid.
The brake fluid must comply with the following standards or specifications:
› VW 50114;
› FMVSS 116 DOT4. WARNING
Using old brake fluid can result in severe stress on the brakes because of the
formation of vapour bubbles in the brake system. This greatly impairs the
braking efficiency and thus also the safety of your vehicle. CAUTION
Brake fluid damages the paintwork of the vehicle. Ð
ä Windscreen washer system
Fig. 103
Engine compartment: Wind-
screen washer fluid reservoir
First read and observe the introductory information and safety warn-
ings on page 108.
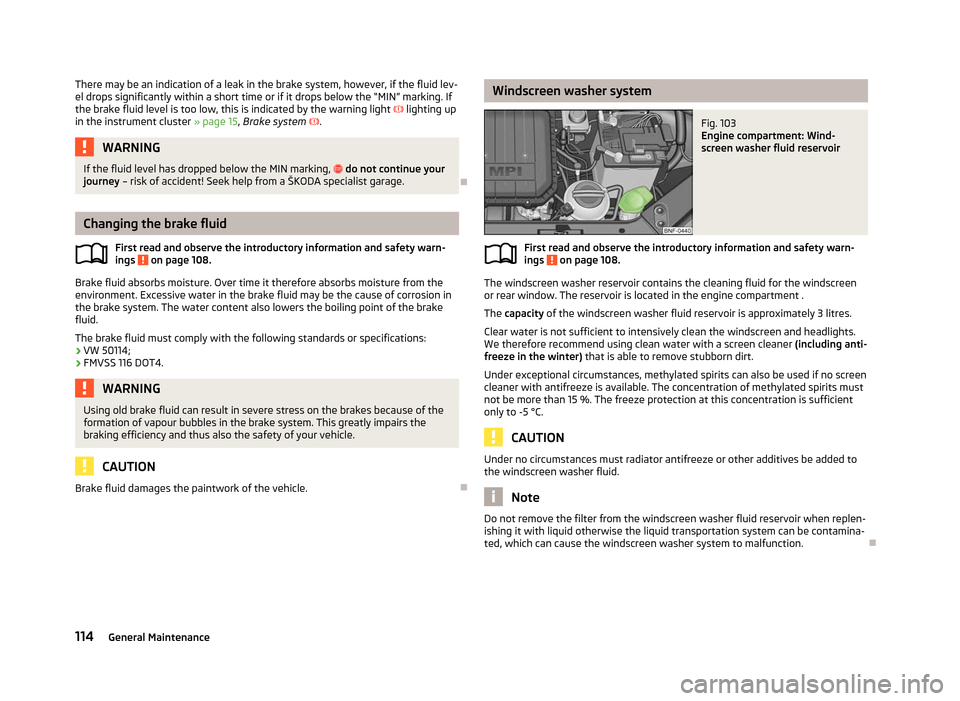
The windscreen washer reservoir contains the cleaning fluid for the windscreen
or rear window. The reservoir is located in the engine compartment .
The capacity
of the windscreen washer fluid reservoir is approximately 3
litres.
Clear water is not sufficient to intensively clean the windscreen and headlights.
We therefore recommend using clean water with a screen cleaner (including anti-
freeze in the winter) that is able to remove stubborn dirt.
Under exceptional circumstances, methylated spirits can also be used if no screen
cleaner with antifreeze is available. The concentration of methylated spirits must
not be more than 15 %. The freeze protection at this concentration is sufficient
only to -5 °C. CAUTION
Under no circumstances must radiator antifreeze or other additives be added to
the windscreen washer fluid. Note
Do not remove the filter from the windscreen washer fluid reservoir when replen-
ishing it with liquid otherwise the liquid transportation system can be contamina-
ted, which can cause the windscreen washer system to malfunction. Ð
ä
114 General Maintenance
Page 123 of 157
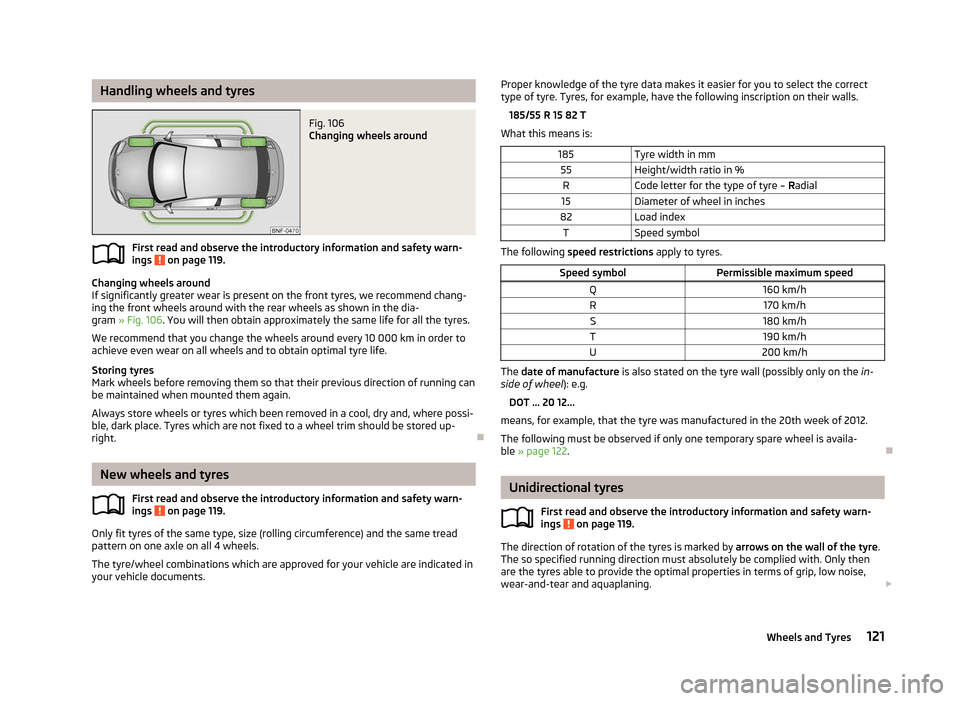
Handling wheels and tyres
Fig. 106
Changing wheels around
First read and observe the introductory information and safety warn-
ings on page 119.
Changing wheels around
If significantly greater wear is present on the front tyres, we recommend chang-
ing the front wheels around with the rear wheels as shown in the dia-
gram » Fig. 106. You will then obtain approximately the same life for all the tyres.
We recommend that you change the wheels around every 10
000 km in order to
achieve even wear on all wheels and to obtain optimal tyre life.
Storing tyres
Mark wheels before removing them so that their previous direction of running can
be maintained when mounted them again.
Always store wheels or tyres which been removed in a cool, dry and, where possi-
ble, dark place. Tyres which are not fixed to a wheel trim should be stored up-
right. ÐNew wheels and tyres
First read and observe the introductory information and safety warn-
ings on page 119.
Only fit tyres of the same type, size (rolling circumference) and the same tread
pattern on one axle on all 4
wheels.
The tyre/wheel combinations which are approved for your vehicle are indicated in
your vehicle documents.
ä
ä Proper knowledge of the tyre data makes it easier for you to select the correct
type of tyre. Tyres, for example, have the following inscription on their walls.
185/55
R 15 82 T
What this means is:
185 Tyre width in mm
55 Height/width ratio in %
R Code letter for the type of tyre – Radial
15 Diameter of wheel in inches
82 Load index
T Speed symbol The following speed restrictions apply to tyres.
Speed symbol Permissible maximum speed
Q 160 km/h
R 170 km/h
S 180 km/h
T 190 km/h
U 200 km/h The date of manufacture
is also stated on the tyre wall (possibly only on the in-
side of wheel ): e.g.
DOT ... 20
12...
means, for example, that the tyre was manufactured in the 20th week of 2012.
The following must be observed if only one temporary spare wheel is availa-
ble » page 122. Ð Unidirectional tyres
First read and observe the introductory information and safety warn-
ings on page 119.
The direction of rotation of the tyres is marked by arrows on the wall of the tyre
.
The so specified running direction must absolutely be complied with. Only then
are the tyres able to provide the optimal properties in terms of grip, low noise,
wear-and-tear and aquaplaning. £
ä
121
Wheels and Tyres
Page 141 of 157

›
Press the locking mechanism 1
and carefully open the cover in the direction of
the arrow.
› After the fuse has been replaced, fold the cover upwards in the opposite direc-
tion of the arrow so that it audibly latches.
Fuse assignment on the underside of the dash panel No. Power consumer
1 Telephone, radiator fan, instrument cluster, engine control unit
2 Diagnostic connection, AC compressor
3 Clutch pedal switch, brake pedal switch
4 Daytime running lights 5 Switch wiring harness
6 Headlamp beam adjustment, exterior mirror adjustment
7-8 Automated transmission 9 Airbag
10 Park Assist 11 Low beam
12 Rear fog light
13 Low beam
14 Rear window wiper 15 Light switch
16 Steering force assistance 17 Windscreen washer
18 Reverse light switch 19 Injection valves, coolant pump
20 ABS/ESP, switch wiring harness 21 Switch illumination, number plate light
22 Daytime running lights
23 Light switch
24-26 Switch wiring harness 27 Interior light
28 Diagnostic connector 29 Central control unit
30 Exterior mirror heater 31 Cooler fan, regulator valve, lambda probe No. Power consumer
32 Turn signal, brake light
33 Main beam
34 Instrument cluster, main beam 35 Not assigned
36 Cigarette lighter, 12-volt power socket 37 Air blower for heating and air conditioning
38 Radio 39 Panoramic sliding roof, horn
40 Engine control unit 41 Central locking system
42 Ignition module
43 Seat heaters
44 Fuel pump 45 Light switch
46 Rear window heater 47 Power windows - right
48 Horn 49 Windscreen wipers50 Fog lights 51 Power windows - left Ð
139
Fuses and light bulbs
Page 142 of 157

Fuses in the engine compartment
Fig. 120
Engine compartment: Distribution board cover/fuses
First read and observe the introductory information and safety warn-
ings on page 138.
The fuses are located underneath a cover next to the vehicle battery
» Fig. 120.
› Press together the interlocks of the cover A
simultaneously and press the cov-
er upwards in the direction of the arrow.
› After the fuse has been replaced, place the cover on the fuse box and fold up-
wards in the opposite direction of the arrow so that it audibly latches.
Fuse assignment in engine compartment No. Power consumer
S1 ABS/ESP
S2 Radiator fan
S3 Battery management, control unit for radiator fan
S4 ABS/ESP S5 Central control unit
S6 Ignition lock, starter Ð
ä Fuses in the dash panel
Fig. 121
On the driver's side of the dash panel: Fuse box cover/Schematic di-
agram of the fuse box
First read and observe the introductory information and safety warn-
ings on page 138.
The fuses are located on the left-hand side of the dashboard behind a cover on
vehicles with the
START STOP system.
› Insert a suitably flat object, e.g. a screwdriver, into the slot in the region of the
arrow » Fig. 121, carefully prise out the cover and remove.
› After the fuse has been replaced, place the cover on the fuse box and press it
until it audibly latches.
Fuse assignment in the dash panel No. Power consumer
1 ABS/ESP
2 Instrument cluster
3 Radio, diagnosis
4 DC-DC voltage converter, starter relay 5 Not assigned
6 Air blower for air conditioning/heating 7 Control unit for the AC system
8 Not assigned 9 Right light
10 Left light £ ä
140 Do-it-yourself