Page 74 of 289

73
Driver information system
Driver information system Information system
Introduction
With the ignition switched on, it is possible to read the different functions of
the display by scrolling through the menus.
In vehicles with multifunction steering wheel, the multifunction display can
only be operated with the multifunction steering wheel buttons.
The number of menus displayed on the instrument panel will vary according
to the vehicle electronics and equipment.
A specialised workshop will be able to programme or modify additional
functions, according to the vehicle equipment. SEAT recommends visiting a
SEAT Official Service.
Some menu options can only be read when the vehicle is at a standstill.
As long as a priority 1 warning is displayed, it will not be possible to read
the menus. Some warning messages can be confirmed and made to disap-
pear with the windscreen wiper lever button or the multifunction steering
wheel button.
Additional information and warnings:
● Easy Connect system ⇒ page 79
● Driver assistance systems ⇒ page 164
● Radio or navigation system ⇒ Booklet Radio or ⇒ Booklet Navigation
system
WARNING
Any distraction may lead to an accident, with the risk of injury.
● Do not read the instrument panel display menus when driving.
Overview of the menu structure
Driving data ⇒ page 75
■ Vehicle status
■ MFD from departure
■ MFD from refuelling
■ MFD total calculation
Assist systems ⇒ table on page 75
■ Activate/deactivate Lane Assist
■ Reverse (optional)
Navigation ⇒ Booklet Navigation system Audio ⇒ Booklet Radio or ⇒ Booklet Navigation systemTelephone ⇒ Booklet Bluetooth systemVehicle ⇒ table on page 75
Safety FirstOperating instructionsPractical TipsTechnical specifications
Page 76 of 289

75
Driver information system
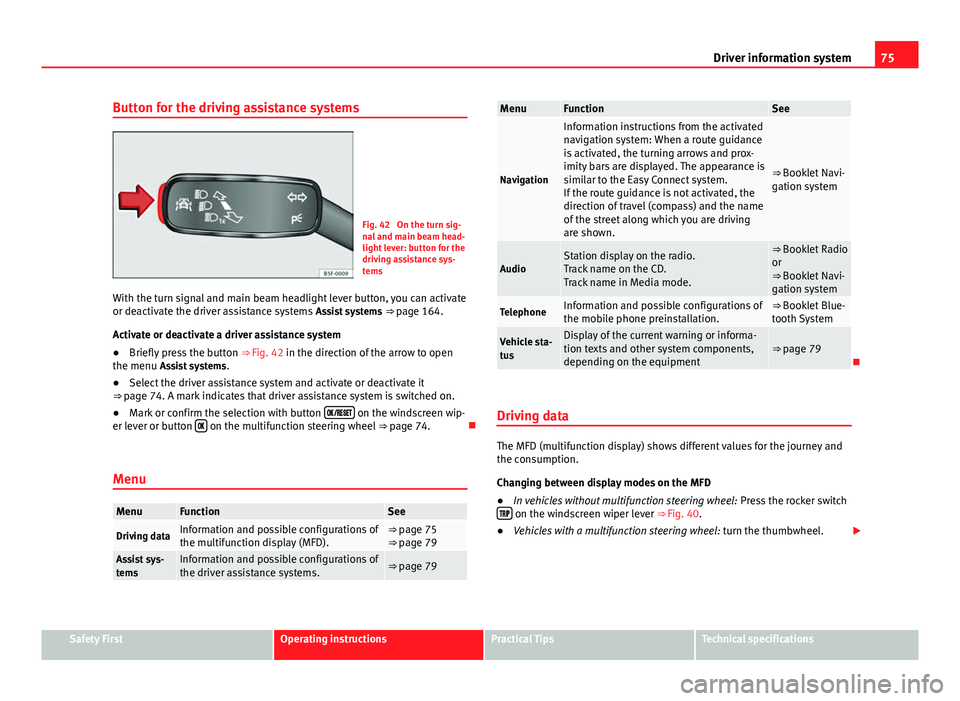
Button for the driving assistance systems
Fig. 42 On the turn sig-
nal and main beam head-
light lever: button for the
driving assistance sys-
tems
With the turn signal and main beam headlight lever button, you can activate
or deactivate the driver assistance systems Assist systems ⇒ page 164.
Activate or deactivate a driver assistance system
● Briefly press the button ⇒ Fig. 42 in the direction of the arrow to open
the menu Assist systems .
● Select the driver assistance system and activate or deactivate it
⇒ page 74. A mark indicates that driver assistance system is switched on.
● Mark or confirm the selection with button
on the windscreen wip-
er lever or button on the multifunction steering wheel
⇒ page 74.
Menu
MenuFunctionSee
Driving dataInformation and possible configurations of
the multifunction display (MFD).⇒ page 75
⇒ page 79
Assist sys-
temsInformation and possible configurations of
the driver assistance systems.⇒ page 79
MenuFunctionSee
Navigation
Information instructions from the activated
navigation system: When a route guidance
is activated, the turning arrows and prox-
imity bars are displayed. The appearance is
similar to the Easy Connect system.
If the route guidance is not activated, the
direction of travel (compass) and the name
of the street along which you are driving
are shown.
⇒ Booklet Navi-
gation system
AudioStation display on the radio.
Track name on the CD.
Track name in Media mode.⇒ Booklet Radio
or
⇒ Booklet Navi-
gation system
TelephoneInformation and possible configurations of
the mobile phone preinstallation.⇒ Booklet Blue-
tooth System
Vehicle sta-
tusDisplay of the current warning or informa-
tion texts and other system components,
depending on the equipment⇒ page 79
Driving data
The MFD (multifunction display) shows different values for the journey and
the consumption.
Changing between display modes on the MFD
● In vehicles without multifunction steering wheel: Press the rocker switch
on the windscreen wiper lever ⇒ Fig. 40.
● Vehicles with a multifunction steering wheel: turn the thumbwheel.
Safety FirstOperating instructionsPractical TipsTechnical specifications
Page 182 of 289

181
Driver assistance systems
● Switch the ignition on.
● Press button
.
● Press the Setup function button.
● Press the Parking and Manoeuvring function button.
● Select the parking aid (ParkPilot) from the list.
● Automatic activation.
When the function button check box is activated , the function is on.
Adjusting the display and audible warnings
The settings for the display and audible warnings are con-
trolled via the Easy Connect*.
Requirements: the parking aid must be switched on.
– Select: button CAR
> control button Car* Systems > Driver assis-
tant > Parking aid ⇒ page 81.
Automatic activation 1)
on – activates the Automatic activation option ⇒ page 180
off – deactivates the Automatic activation option ⇒ page 180.
Front volume
Volume in the front and rear area.
Front sound settings
Frequency (tone) of the sound in the front area. Rear volume
Volume in the rear area
Rear sound settings
Frequency (tone) of the sound in the rear area.
Adjust volume
With the parking aid switched on, the active audio/video source volume will
be reduced to the intensity of the selected setting.
You will hear a short test tone from the corresponding speaker each time
you make a new setting.
Error messages
When the parking aid is activated or when switching it on, if a continuous
warning can be heard over several seconds (additionally, in the case of Plus
parking aid the LED of the button flashes), there is a fault in the system.
If the fault does not disappear before switching off the ignition, the next
time the parking aid is switched on by engaging reverse gear the fault will
only be indicated with the flashing LED on the button.
Plus parking aid*
If there is a fault in a sensor, the symbol is displayed on the Easy Con-
nect display in front of/behind the vehicle. If a rear sensor is faulty, only the
obstacles in the areas A
and B are displayed ⇒ Fig. 103. If a front sensor
is faulty, only the obstacles in the areas C and D are displayed.
Have the fault corrected by a specialised workshop without delay.
1)
available only with certain equipment - Radio Standard
Safety FirstOperating instructionsPractical TipsTechnical specifications