2012 Seat Leon 5D steering wheel
[x] Cancel search: steering wheelPage 45 of 289

44Airbag system
Deactivating airbags
Deactivating airbags
The deactivation of airbags corresponds only to certain cases, i.e. if:
● a child seat is required in the front passenger seat with the child facing
in the opposite direction to the direction of travel (in some countries, due to
divergent legal requirements, facing in the direction of travel) ⇒ page 49;
● despite the driver seat being in the correct position, a minimum dis-
tance of 25 cm cannot be maintained between the centre of the steering
wheel and the driver's torso.
● installation of special devices is required in the steering wheel area due
to a physical disability.
● if you have special seats installed (e.g. an orthopaedic seat without side
airbag).
The front passenger front airbag can be disabled using the switch
⇒ page 45.
We recommend that you contact an authorised SEAT dealer for the disabling
of other airbags.
Airbag system control
The airbag system availability is controlled electronically, regardless of
whether an airbag is disabled.
If an airbag was disabled using a diagnostics system:
● the airbag system warning lamp lights up after switching on the igni-
tion for about 4 seconds, and then flashes for about 12 seconds If the airbag has been disabled with the airbag switch on the side of the
dash panel:
●
the airbag control lamp will light up for about 4 seconds after the ig-
nition is switched on.
● The airbag is disabled, signalled with the warning lamp which
lights up with the word placed in the centre part of the
dash panel ⇒ Fig. 26.
Note
● Respect the current legislation in your country regarding the deactiva-
tion of airbags
● At your authorised SEAT dealer you can find information on which vehi-
cle airbags can be deactivated.
Page 60 of 289

59
Controls and displays
Operating instructions Controls and displays
Overview
Door handle
Central locking switch . . . . . . . . . . . . . . . . . . . . . . . . . . . . . . . . . . . . . 93
Electric control to adjust exterior mirrors . . . . . . . . . . . . . . . . . . . .122
Air outlets . . . . . . . . . . . . . . . . . . . . . . . . . . . . . . . . . . . . . . . . . . . . . . . . 140
Control lever for:
– Turn signals and main beam headlights . . . . . . . . . . . . . . . . .107
– Lane Assist . . . . . . . . . . . . . . . . . . . . . . . . . . . . . . . . . . . . . . . . . . . . . 168
– Main beam assist . . . . . . . . . . . . . . . . . . . . . . . . . . . . . . . . . . . . . . . 111
– Cruise control system (CCS) . . . . . . . . . . . . . . . . . . . . . . . . . . . . . 164
Depending on equipment fitted:
– Lever for cruise control . . . . . . . . . . . . . . . . . . . . . . . . . . . . . . . . . . 164
Steering wheel with horn and
– Driver airbag . . . . . . . . . . . . . . . . . . . . . . . . . . . . . . . . . . . . . . . . . . . 35
– On-board computer controls . . . . . . . . . . . . . . . . . . . . . . . . . . . . 73
– Controls for radio, telephone, navigation and speech dia-
logue system ⇒ Booklet Radio
– Paddle levers for tiptronic gearshift (automatic gearbox) . .159
Instrument panel . . . . . . . . . . . . . . . . . . . . . . . . . . . . . . . . . . . . . . . . . . 61
Control lever for:
– Windscreen wipers and washer . . . . . . . . . . . . . . . . . . . . . . . . . . 116
– Wipe and wash system . . . . . . . . . . . . . . . . . . . . . . . . . . . . . . . . . 116
– On-board computer . . . . . . . . . . . . . . . . . . . . . . . . . . . . . . . . . . . . . 73
12345
6
7
89
Depending on equipment fitted: Radio or display for Easy
Connect (navigation, radio, TV/video)
. . . . . . . . . . . . . . . . . . . . . .79
Depending on the equipment, buttons for:
– SEAT driving modes . . . . . . . . . . . . . . . . . . . . . . . . . . . . . . . . . . . . . 171
– Start-Stop system . . . . . . . . . . . . . . . . . . . . . . . . . . . . . . . . . . . . . . . 149
– Park assist system . . . . . . . . . . . . . . . . . . . . . . . . . . . . . . . . . . . . . . 178
– Hazard warning lights . . . . . . . . . . . . . . . . . . . . . . . . . . . . . . . . . . 110
– Airbag off display . . . . . . . . . . . . . . . . . . . . . . . . . . . . . . . . . . . . . . . 45
Glove compartment with CD changer. . . . . . . . . . . . . . . . . . . . . . .130
Depending on the equipment:
– Multimedia interface* ⇒ Booklet Radio
– Tyre pressure switch . . . . . . . . . . . . . . . . . . . . . . . . . . . . . . . . . . . . 177
Front passenger airbag switch . . . . . . . . . . . . . . . . . . . . . . . . . . . . . 45
Front passenger airbag . . . . . . . . . . . . . . . . . . . . . . . . . . . . . . . . . . . . 35
Passenger seat heating control . . . . . . . . . . . . . . . . . . . . . . . . . . . . 126
Storage compartment
Depending on gearbox fitted, gear lever or selector lever for:
– manual gearbox . . . . . . . . . . . . . . . . . . . . . . . . . . . . . . . . . . . . . . . . 152
– automatic gearbox . . . . . . . . . . . . . . . . . . . . . . . . . . . . . . . . . . . . . . 154
Depending on the equipment, controls for:
– Heating and ventilation system or manual air conditioner .138, 137
– Automatic air conditioner . . . . . . . . . . . . . . . . . . . . . . . . . . . . . . . 135
Parking brake . . . . . . . . . . . . . . . . . . . . . . . . . . . . . . . . . . . . . . . . . . . . . 147
Driver seat heating control . . . . . . . . . . . . . . . . . . . . . . . . . . . . . . . . . 126
10
11
1213
1415161718
19
2021
Safety FirstOperating instructionsPractical TipsTechnical specifications
Page 67 of 289

66Instruments and warning/control lamps
Reading a service notification
With the ignition switched on, the engine off and the vehicle at a standstill,
the current service notification can be read:
Press and hold the button ⇒ Fig. 36 4
for more than 5 seconds to consult
the service message.
When the service date has past , a minus sign is displayed in front of the
number of kilometres or days. In vehicles with text messages the following
is displayed: Service --- km (miles) or --- days ago .
The time can also be set via the
key and Setup function button in the
Easy Connect system ⇒ page 79.
The service interval display is reset
If the service was not carried out by a SEAT dealership, the display can be
reset as follows:
● To reset the service interval display, turn the ignition off and press and
hold the button ⇒ Fig. 36 4
.
● Switch the ignition back on.
● Release the button 4
and press the button 4 again for the next 20
seconds.
Note
● The service message disappears after a few seconds, when the engine is
started or when OK/RESET
is pressed on the windscreen wiper lever, or OKon the multifunction steering wheel.
●
In vehicles with the LongLife system in which the battery has been dis-
connected for a long period of time, it is not possible to calculate the date
of the next service. Therefore the service interval display may not be correct.
In this case, please check the maximum permitted service intervals ⇒ Book-
let Maintenance Programme. Rev counter
The rev counter indicates the number of engine revolutions
per minute.
Together with the gear-change indicator, the rev counter offers you the pos-
sibility of using the engine of your vehicle at a suitable speed.
The start of the red zone on the dial indicates the maximum engine speed
which may be used briefly when the engine is warm and after it has been
run in properly. Before reaching this range, you should change to a higher
gear for vehicles with a manual gearbox or for automatic gearboxes put the
selector lever in “D” or take your foot off the accelerator pedal.
We recommend that you avoid high revs and that you follow the recommen-
dations on the gear-change indicator. Consult the additional information in
⇒ page 68, Gear-change indicator.
CAUTION
Never allow the rev counter needle 1 ⇒ Fig. 36 to go into the red zone on
the scale for more than a very brief period, otherwise, there is a risk of en-
gine damage.
For the sake of the environment
Changing up a gear early will help you to save fuel and minimise engine
noise.
Page 74 of 289
73
Driver information system
Driver information system Information system
Introduction
With the ignition switched on, it is possible to read the different functions of
the display by scrolling through the menus.
In vehicles with multifunction steering wheel, the multifunction display can
only be operated with the multifunction steering wheel buttons.
The number of menus displayed on the instrument panel will vary according
to the vehicle electronics and equipment.
A specialised workshop will be able to programme or modify additional
functions, according to the vehicle equipment. SEAT recommends visiting a
SEAT Official Service.
Some menu options can only be read when the vehicle is at a standstill.
As long as a priority 1 warning is displayed, it will not be possible to read
the menus. Some warning messages can be confirmed and made to disap-
pear with the windscreen wiper lever button or the multifunction steering
wheel button.
Additional information and warnings:
● Easy Connect system ⇒ page 79
● Driver assistance systems ⇒ page 164
● Radio or navigation system ⇒ Booklet Radio or ⇒ Booklet Navigation
system
WARNING
Any distraction may lead to an accident, with the risk of injury.
● Do not read the instrument panel display menus when driving.
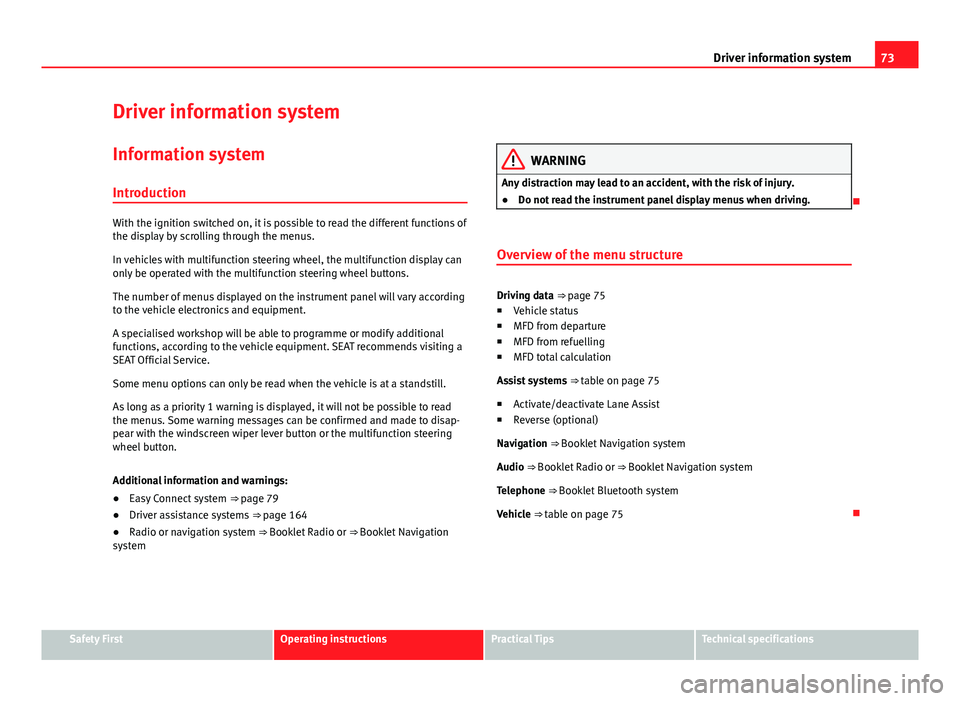
Overview of the menu structure
Driving data ⇒ page 75
■ Vehicle status
■ MFD from departure
■ MFD from refuelling
■ MFD total calculation
Assist systems ⇒ table on page 75
■ Activate/deactivate Lane Assist
■ Reverse (optional)
Navigation ⇒ Booklet Navigation system Audio ⇒ Booklet Radio or ⇒ Booklet Navigation systemTelephone ⇒ Booklet Bluetooth systemVehicle ⇒ table on page 75
Safety FirstOperating instructionsPractical TipsTechnical specifications
Page 75 of 289
74Driver information system
Operating the instrument panel menus
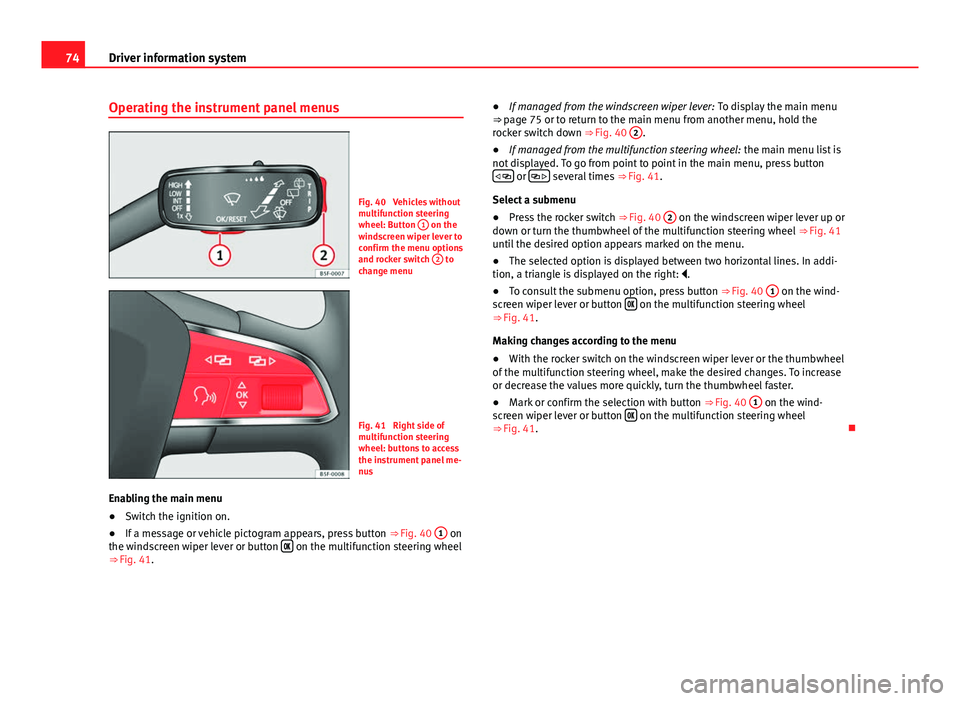
Fig. 40 Vehicles without
multifunction steering
wheel: Button 1
on the
windscreen wiper lever to
confirm the menu options
and rocker switch 2
to
change menu
Fig. 41 Right side of
multifunction steering
wheel: buttons to access
the instrument panel me-
nus
Enabling the main menu
● Switch the ignition on.
● If a message or vehicle pictogram appears, press button ⇒ Fig. 40 1
on
the windscreen wiper lever or button on the multifunction steering wheel
⇒ Fig. 41. ●
If managed from the windscreen wiper lever: To display the main menu
⇒ page 75 or to return to the main menu from another menu, hold the
rocker switch down ⇒ Fig. 40 2
.
● If managed from the multifunction steering wheel: the main menu list is
not displayed. To go from point to point in the main menu, press button
or several times
⇒ Fig. 41.
Select a submenu
● Press the rocker switch ⇒ Fig. 40 2
on the windscreen wiper lever up or
down or turn the thumbwheel of the multifunction steering wheel ⇒ Fig. 41
until the desired option appears marked on the menu.
● The selected option is displayed between two horizontal lines. In addi-
tion, a triangle is displayed on the right: .
● To consult the submenu option, press button ⇒ Fig. 40 1
on the wind-
screen wiper lever or button on the multifunction steering wheel
⇒ Fig. 41.
Making changes according to the menu
● With the rocker switch on the windscreen wiper lever or the thumbwheel
of the multifunction steering wheel, make the desired changes. To increase
or decrease the values more quickly, turn the thumbwheel faster.
● Mark or confirm the selection with button ⇒ Fig. 40 1
on the wind-
screen wiper lever or button on the multifunction steering wheel
⇒ Fig. 41.
Page 76 of 289
75
Driver information system
Button for the driving assistance systems
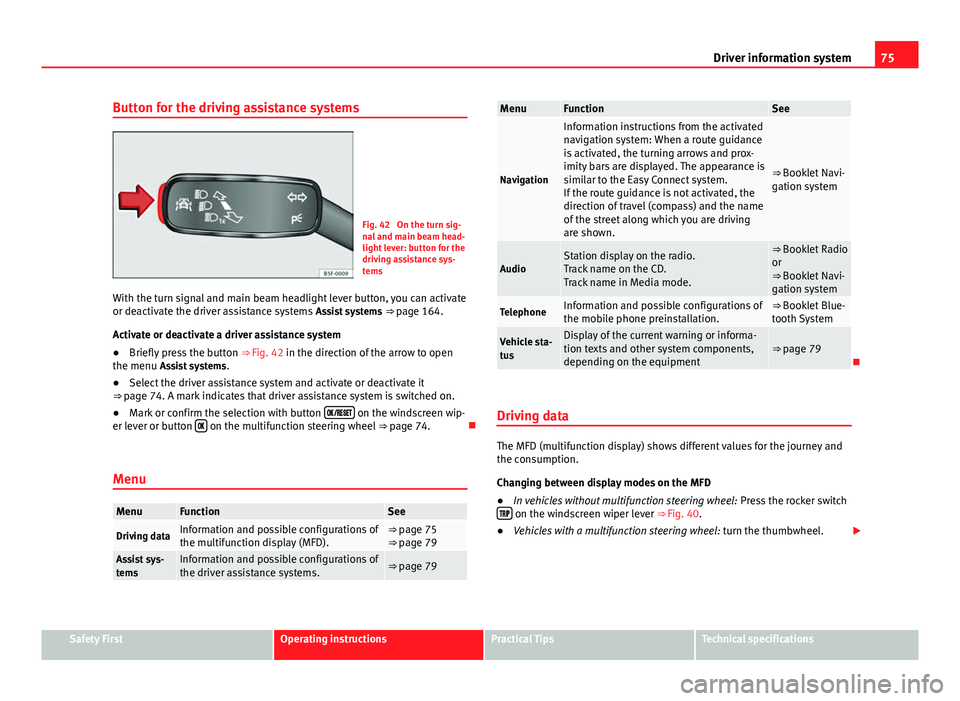
Fig. 42 On the turn sig-
nal and main beam head-
light lever: button for the
driving assistance sys-
tems
With the turn signal and main beam headlight lever button, you can activate
or deactivate the driver assistance systems Assist systems ⇒ page 164.
Activate or deactivate a driver assistance system
● Briefly press the button ⇒ Fig. 42 in the direction of the arrow to open
the menu Assist systems .
● Select the driver assistance system and activate or deactivate it
⇒ page 74. A mark indicates that driver assistance system is switched on.
● Mark or confirm the selection with button
on the windscreen wip-
er lever or button on the multifunction steering wheel
⇒ page 74.
Menu
MenuFunctionSee
Driving dataInformation and possible configurations of
the multifunction display (MFD).⇒ page 75
⇒ page 79
Assist sys-
temsInformation and possible configurations of
the driver assistance systems.⇒ page 79
MenuFunctionSee
Navigation
Information instructions from the activated
navigation system: When a route guidance
is activated, the turning arrows and prox-
imity bars are displayed. The appearance is
similar to the Easy Connect system.
If the route guidance is not activated, the
direction of travel (compass) and the name
of the street along which you are driving
are shown.
⇒ Booklet Navi-
gation system
AudioStation display on the radio.
Track name on the CD.
Track name in Media mode.⇒ Booklet Radio
or
⇒ Booklet Navi-
gation system
TelephoneInformation and possible configurations of
the mobile phone preinstallation.⇒ Booklet Blue-
tooth System
Vehicle sta-
tusDisplay of the current warning or informa-
tion texts and other system components,
depending on the equipment⇒ page 79
Driving data
The MFD (multifunction display) shows different values for the journey and
the consumption.
Changing between display modes on the MFD
● In vehicles without multifunction steering wheel: Press the rocker switch
on the windscreen wiper lever ⇒ Fig. 40.
● Vehicles with a multifunction steering wheel: turn the thumbwheel.
Safety FirstOperating instructionsPractical TipsTechnical specifications
Page 77 of 289
76Driver information system
Multifunction display memory
The multifunction display is equipped with three memories that work auto-
matically: MFD from departure, MFD from refuelling, MFD total calculation.
On the screen display, you can read which memory is currently displayed.
To change between memories with the ignition on and the memory shown,
press the button
on the windscreen wiper lever or you can also
change between memories using the button on the multifunction steer-
ing wheel.
MenuFunction
MFD from de-
parture
Display and storage of the values for the journey and the
consumption from when the ignition is switched on to
when it is switched off.
If the journey is continued in less than 2 hours after the ig-
nition is switched off, the new data is added to the data al-
ready stored in the memory. The memory will automatically
be deleted if the journey is interrupted for more than two
hours.
MFD from re-
fuellingDisplay and storage of the values for the journey and the
consumption. By refuelling, the memory will be erased au-
tomatically.
MFD total cal-
culation
The memory records the values for a specific number of
partial trips, up to a total of 19 hours and 59 minutes or 99
hours and 59 minutes, or 1999.9 km (or miles) or 9999 km
(or miles), depending on the model of instrument panel.
On reaching either of these limits a)
, the memory is auto-
matically erased and starts to count from 0 again.
a) It varies according to the type of instrument panel fitted.
Erasing a memory manually
● Select the memory that you wish to erase.
● Press and hold the button
on the windscreen wiper lever or the
button on the multifunction steering wheel for about 2 seconds. Personalising the displays
In the Easy Connect system you can adjust which of the possible displays of
the MFD can be shown on the instrument panel display with the button
and the function button Setup ⇒ page 79.
DisplaysMenuFunction
Current fuel con-
sumptionThe current fuel consumption display operates through-
out the journey, in litres/100 km; and with the engine
running and the vehicle stopped, in litres/hour.
Average fuel con-
sumption
After turning on the ignition, average fuel consumption
in litres/100 km will be shown after travelling approxi-
mately 100 metres. Otherwise horizontal lines are dis-
played. The value shown is updated approximately ev-
ery 5 seconds.
Operating range
Approximate distance in km that can still be travelled
with the fuel remaining in the tank, assuming the same
style of driving is maintained. This is calculated using
the current fuel consumption.
Journey durationThis indicates the hours (h) and minutes (min) since
the ignition was switched on.
Distance coveredDistance covered in km (m) after switching on the igni-
tion.
Average speed
The average speed will be shown after a distance of ap-
proximately 100 metres has been travelled. Otherwise
horizontal lines are displayed. The value shown is up-
dated approximately every 5 seconds.
Digital display of
speedCurrent speed displayed in digital format.
Speed warning at
--- km/h or Speed
warning at --- mphIf the stored speed is exceeded (between 30 - 250 km/
h, or 1 - 155 mph), an audible warning is given togeth-
er with a visual warning.
Page 78 of 289
77
Driver information system
DisplaysMenuFunctionOil temperatureUpdated engine oil temperature digital displayCoolant tempera-
ture gaugeDigital display of the current temperature of the liquid
coolant.
Storing a speed for the speed warning
● Select the display Speed warning at --- km/h (--- mph)
● Press the button
on the windscreen wiper lever or the button on the multifunction steering wheel to store the current speed and activate
the warning.
●
If necessary, adjust the desired speed within 5 seconds using the rocker
switch
on the windscreen wiper lever or by turning the thumbwheel on
the multifunction steering wheel. Next, press the button or again
or wait several seconds. The speed is stored and the warning activated.
● To deactivate it press the button
or the button . The stored
speed is deleted.
Assist systems submenu
Assist systems
menuFunction
Lane Assist*Switching the Lane Assist system on or off ⇒ page 170.Tiredness detec-
tion*Switching the tiredness detection on or off (pause recom-
mendation) ⇒ page 173.
Personal convenience settings
When two people use a vehicle, SEAT recommends that each person always
uses their own remote control key. When the ignition is switched off, or the vehicle is locked, the convenience settings are stored and allocated to the
vehicle key
⇒ page 73.
The values of the personalised convenience settings are allocated to the ve-
hicle key in the Easy Connect system via the button
and the function
button Setup ⇒ page 79:
Vehicle settings menu
■ Time
■ Language
■ Units
Convenience settings menu ■ Door unlock (individual opening, Auto Lock)
■ Convenience handling of windows
■ Rear vision mirror adjustment
Light settings menu
■ Coming home and leaving home
■ Footwell light
■ Convenience turn signals
The stored settings are automatically activated, at the latest when the igni-
tion is switched on.
Engine oil temperature display
Vehicles without multifunction steering wheel
– To display the temperature of the engine oil, press the rocker
switch ⇒ Fig. 40 2
until the main menu appears. Enter into
Journey data . With the button 2 move to the oil temperature
gauge.
Safety FirstOperating instructionsPractical TipsTechnical specifications