2012 Seat Ibiza ST sport mode
[x] Cancel search: sport modePage 156 of 282

154Driving
Automatic gearbox*
Gearbox programmes
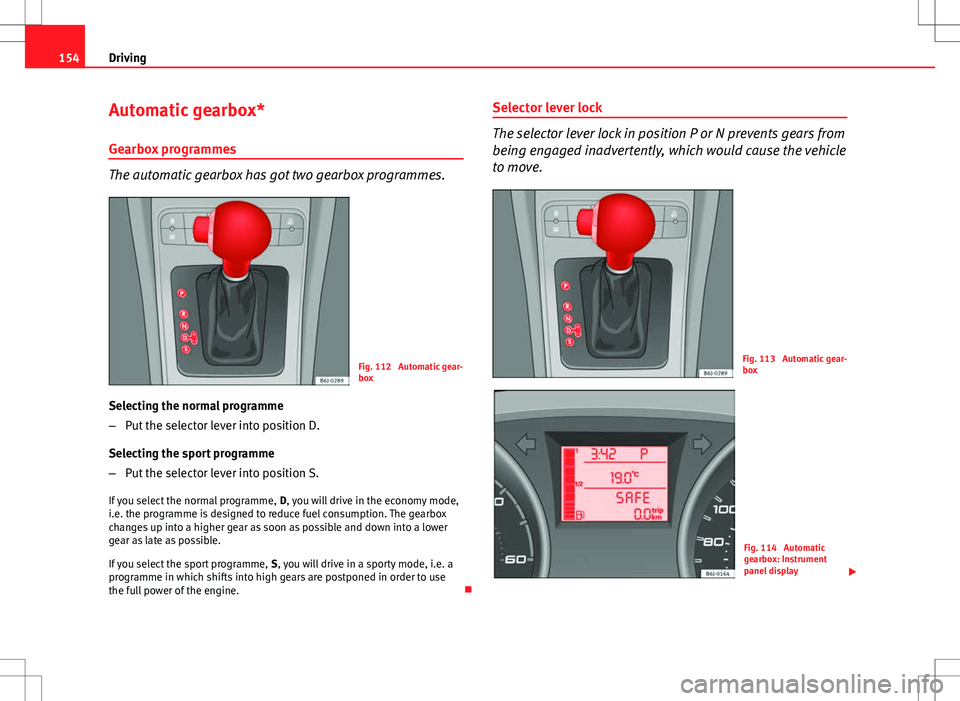
The automatic gearbox has got two gearbox programmes.
Fig. 112 Automatic gear-
box
Selecting the normal programme
– Put the selector lever into position D.
Selecting the sport programme
– Put the selector lever into position S.
If you select the normal programme, D, you will drive in the economy mode,
i.e. the programme is designed to reduce fuel consumption. The gearbox
changes up into a higher gear as soon as possible and down into a lower
gear as late as possible.
If you select the sport programme, S, you will drive in a sporty mode, i.e. a
programme in which shifts into high gears are postponed in order to use
the full power of the engine. Selector lever lock
The selector lever lock in position P or N prevents gears from
being engaged inadvertently, which would cause the vehicle
to move.
Fig. 113 Automatic gear-
box
Fig. 114 Automatic
gearbox: Instrument
panel display
Page 160 of 282

158Driving
Changing gear in tiptronic mode
–Press the selector lever from position D to the right into the tip-
tronic selector gate.
– Lightly press the selector lever forward + to change up into high
gears.
– Lightly press the selector lever backwards - to change down into
low gears.
Changing gear with the steering wheel paddle levers*
– Press the right paddle lever +
towards the steering wheel to
change up. ⇒ Fig. 117.
– Press the left paddle lever –
towards the steering wheel to
change down. ⇒ Fig. 117.
Using the paddle levers on the steering wheel, you can access manual driv-
ing mode regardless of the pre-selected driving mode.
General information about driving in tiptronic mode
When accelerating, the automatic gearbox / DSG automatic gearbox goes
into a higher gear a little before the engine reaches its maximum permitted
revolutions.
If a lower gear is selected, the automatic gearbox / DSG automatic gearbox
will only change down when the engine cannot go over its maximum permit-
ted revolutions.
If tiptronic is selected whilst the vehicle is in motion and the automatic
gearbox / DSG automatic gearbox is in third gear and selector lever position
D, tiptronic mode will then also be in third gear. Changing gears in the normal or sport programme using the steering wheel
paddle levers
If the paddle levers
⇒ Fig. 117 are used in the normal or sport programme,
the system switches temporarily to tiptronic mode. To exit “tiptronic” mode
again, press the right paddle lever +
towards the steering wheel for approx-
imately one second. You will also leave tiptronic mode if the paddle levers
are not moved for a certain time.
Note
● The gear paddle levers on the steering wheel can be operated with the
selector lever in any position and with the vehicle in motion.
Selector lever positions
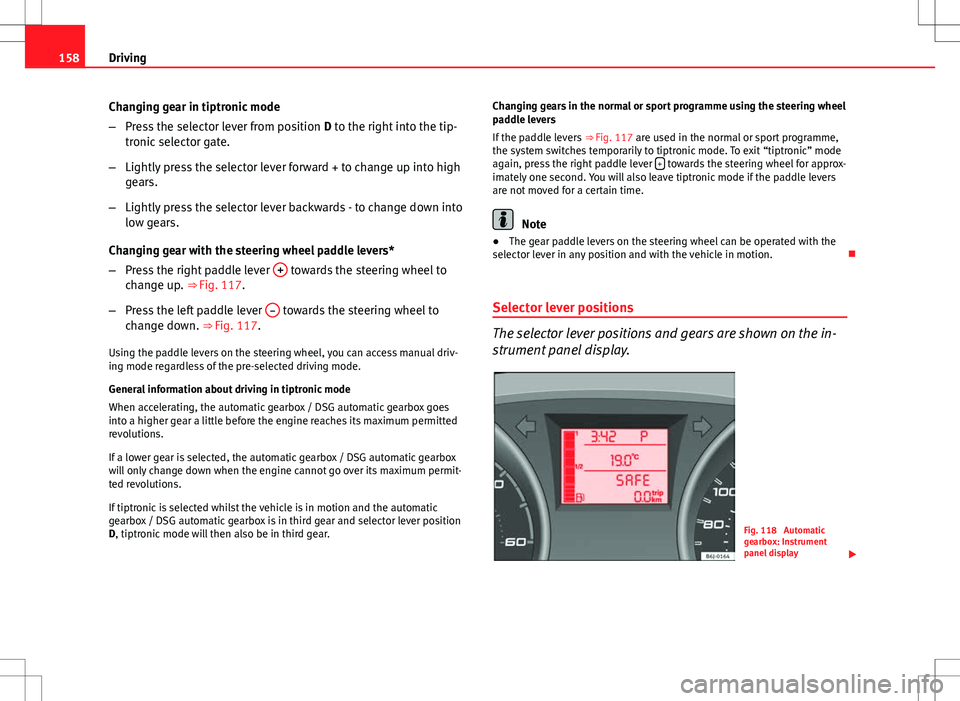
The selector lever positions and gears are shown on the in-
strument panel display.
Fig. 118 Automatic
gearbox: Instrument
panel display
Page 161 of 282

159
Driving
Selector lever positions
The selected gear is displayed on the side of the selector lever and on the
instrument panel display. The currently selected gear for the automatic
gearbox will also be shown on the display.
Tiptronic gear indicator
If the automatic gearbox is shifted manually, the selected gears are shown
on the screen.
P - parking lock
When the selector lever is in this position, the driven wheels are locked me-
chanically.
Position P on the lever must only be selected if the vehicle is stationary.
To move selector lever from position P, the locking button on the selector
lever handle must be pressed and the brake pedal depressed at the same
time while the ignition is switched on.
To put the selector lever in position P, simply press the lock button down
and, if necessary, depress the brake pedal down.
R - Reverse gear
The reverse gear is engaged in this position.
Reverse gear must be engaged only when the vehicle is stationary and the
engine is idling.
To move the selector lever to position R, press the lock button down and, at
the same time, press the brake pedal down, with the ignition switched on.
With the selector lever in position R and the ignition switched on the follow-
ing occurs:
● Reverse lights light up.
● The air conditioner automatically changes the air recirculation mode. ●
The wiper starts if the windscreen washer is on.
● The parking distance warning system switches on.*
N - Neutral (idling)
If this position is selected, the gearbox is in neutral. Power is not transmit-
ted to the wheels and the engine does not have a braking function.
Never use the N position to drive down a hill. The engine does not function
as a brake and the brakes are subjected to excessive stain.
You could damage the automatic gearbox if you drive down hills with the
gearbox lever in position N and the engine switched off.
D - Drive (forward)
In this position the gearbox automatically changes to a lower or higher gear,
according to the engine's requirements, the driving style and speed. The
braking effect of the engine when driving downhill is very limited when the
selector is in this position. The instrument panel display shows the selected
gear as well as the selector lever in position D.
If position N has been selected and you wish to select D, you must press the
foot brake if the vehicle is stationary, or travelling at under 5 km/h (3 mph).
S - Standard driving position (Sport programme)
When the selector lever is in position S, it will automatically change up into
a higher gear later, and change down into a low gear, if compared with posi-
tion D. This way, it is possible to take full advantage of the engine reserve
power, depending on the engine demand, driving style and speed. The
braking effect of the engine when driving downhill is very limited. On the
instrument panel display the selected gear is shown as well as the selector
lever to position S.
To select gear range S, press the lock button on the selector lever.
Safety FirstOperating InstructionsPractical TipsTechnical Specifications
Page 181 of 282

179
Driving and the environment
If the trailer has a 7-pin plug you will need to use an adapter cable. This is
available in any Technical Service.
Trailer weight/drawbar load
Never exceed the authorised trailer weight. If you do not load the trailer up
to the maximum permitted trailer weight, you can then climb correspond-
ingly steeper slopes.
The maximum trailer weights listed are only applicable for altitudes up to
1000 m above sea level. With increasing altitude the engine power and
therefore the vehicle climbing ability are impaired because of the reduced
air density. The maximum trailer weight has to be reduced accordingly. The
weight of the vehicle and trailer combination must be reduced by 10% for
every further 1000 m (or part thereof). The gross combination weight is the
actual weight of the laden vehicle plus the actual weight of the laden trailer.
When possible, operate the trailer with the maximum permitted drawbar
load on the ball joint of the towing bracket, but do not exceed the specified
limit.
The figures for trailer weights and drawbar loads that are given on the data
plate of the towing bracket are for certification purposes only. The correct
figures for your specific model, which may be lower than these figures for
the towing bracket, are given in the vehicle documentation or in ⇒ chap-
ter Technical Data.
Distributing the load
Distribute loads in the trailer so that heavy objects are as near to the axle as
possible. Loads carried in the trailer must be secured to prevent them mov-
ing.
Tyre pressure
Set tyre pressure to the maximum permissible pressure shown on the stick-
er on the inside of the fuel tank flap. Set the tyre pressure of the trailer tyres
in accordance with the trailer manufacturer's recommendations. Exterior mirrors
Check whether you can see enough of the road behind the trailer with the
standard rear vision mirrors. If this is not the case, you should have addi-
tional exterior mirrors fitted. Both exterior mirrors should be mounted on
hinged extension brackets. Adjust the mirrors to give sufficient vision to the
rear.
WARNING
Never transport people in a trailer. This could result in fatal accidents.
Note
● Towing a trailer places additional demands on the vehicle. We recom-
mend additional services between the normal inspection intervals if the ve-
hicle is used frequently for towing a trailer.
● Find out whether special regulations apply to towing a trailer in your
country.
Ball coupling of towing bracket*
The ball coupling is provided with instructions on fitting and removing the
ball coupling of the towing bracket.
WARNING
The towing bracket ball coupling must be stored securely in the luggage
compartment to prevent them being flung through the vehicle and caus-
ing injury.
Note
● By law, the ball coupling must be removed if a trailer is not being towed
if it obscures the number plate.
Safety FirstOperating InstructionsPractical TipsTechnical Specifications
Page 259 of 282

257
Description of specifications
Information on fuel consumption
Fuel consumption
The consumption and emission details shown on the vehicle
data sticker differ from one vehicle to another. The vehicle fuel consumption and CO 2 emissions can be consulted on the
vehicle data sticker in the spare wheel well, inside the luggage compart-
ment and on the rear cover of the Maintenance Programme.
The fuel consumption and CO 2 emission values refer to the weight category
assigned to your vehicle according to the engine and gearbox combination,
as well as the specific equipment fitted, and is only used to compare be-
tween the different models.
The fuel consumption and CO 2 emissions do not depend only on the per-
formance of the vehicle, they can also differ from the established values de-
pending on other factors such as driving style, road conditions, traffic con-
ditions, environmental conditions, load and number of passengers.
Calculation of fuel consumption
The consumption values have been calculated based on measurements per-
formed or supervised by certified CE laboratories according to the latest ver-
sion of directives 715/2007/EC and 80/1268/CEE (for more information
consult the European Union Publications Office at EUR-Lex: © European Un-
ion, http://eur-lex.europa.eu/en/index.htm) and are valid for the kerb
weight indicated for the vehicle.
Note
In practice, and considering all the factors mentioned here, consumption
values can differ from those calculated in the current European regulations. Weights
Kerb weight refers to the basic model with a fuel tank filled to 90% capacity
and without optional extras. The figure quoted includes 75 kg to allow for
the weight of the driver.
For special versions and optional equipment fittings or for the addition of
accessories, the weight of the vehicle will increase
⇒
.
WARNING
● Please note that the centre of gravity may shift when transporting
heavy objects; this may affect vehicle handling and lead to an accident.
Always adjust your speed and driving style to suit road conditions and re-
quirements.
● Never exceed the gross axle weight rating or the gross vehicle weight
rating. If the allowed axle load or the allowed total weight is exceeded,
the driving characteristics of the vehicle may change, leading to acci-
dents, injuries and damage to the vehicle.
Towing a trailer Trailer weights
Trailer weight
The trailer weights and drawbar loads approved are selected in intensive tri-
als according to precisely defined criteria. The approved trailer weights are
valid for vehicles in the EU for maximum speeds of 80 km/h (50 mph) (in
certain circumstances up to 100 km/h (60 mph)). The figures may be differ-
ent in other countries. All data in the official vehicle documentation takes
precedence over these data at all times ⇒
.
Safety FirstOperating InstructionsPractical TipsTechnical Specifications